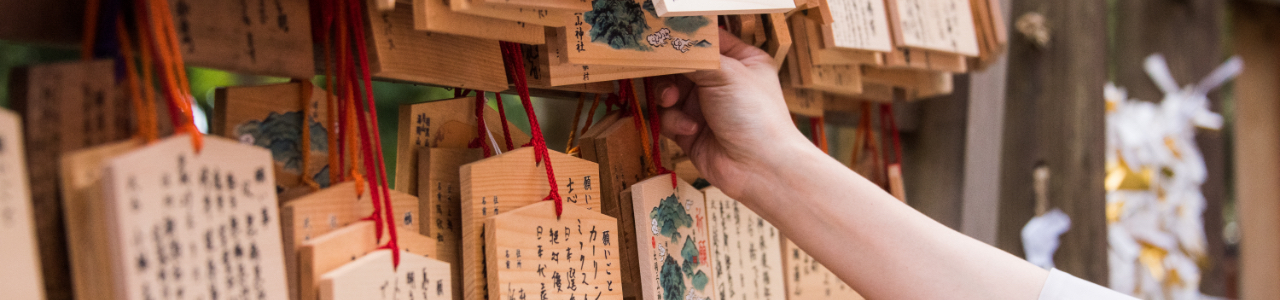
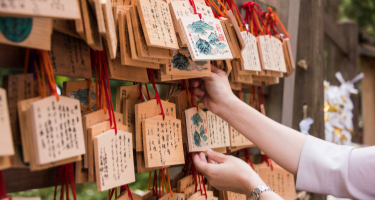
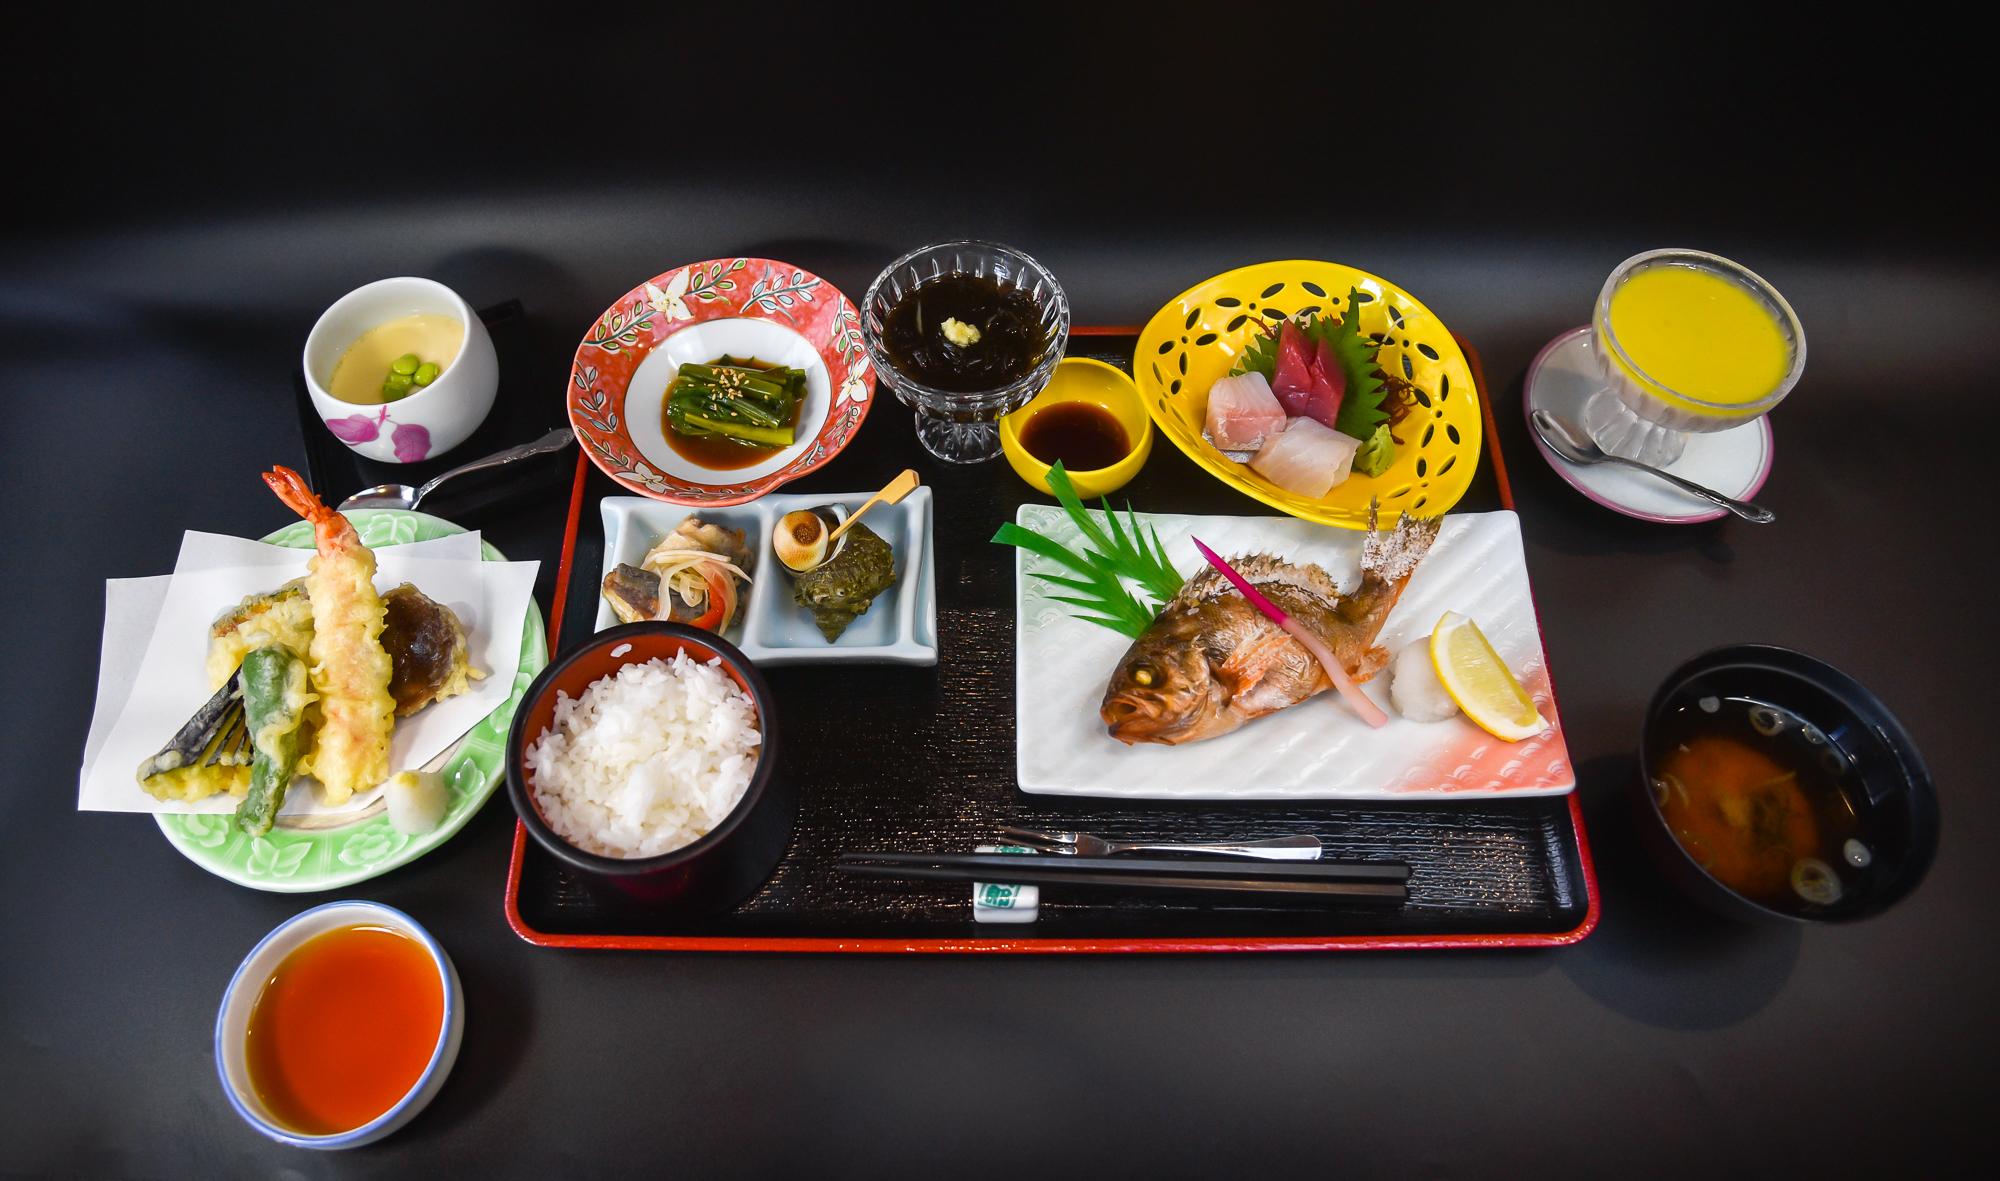
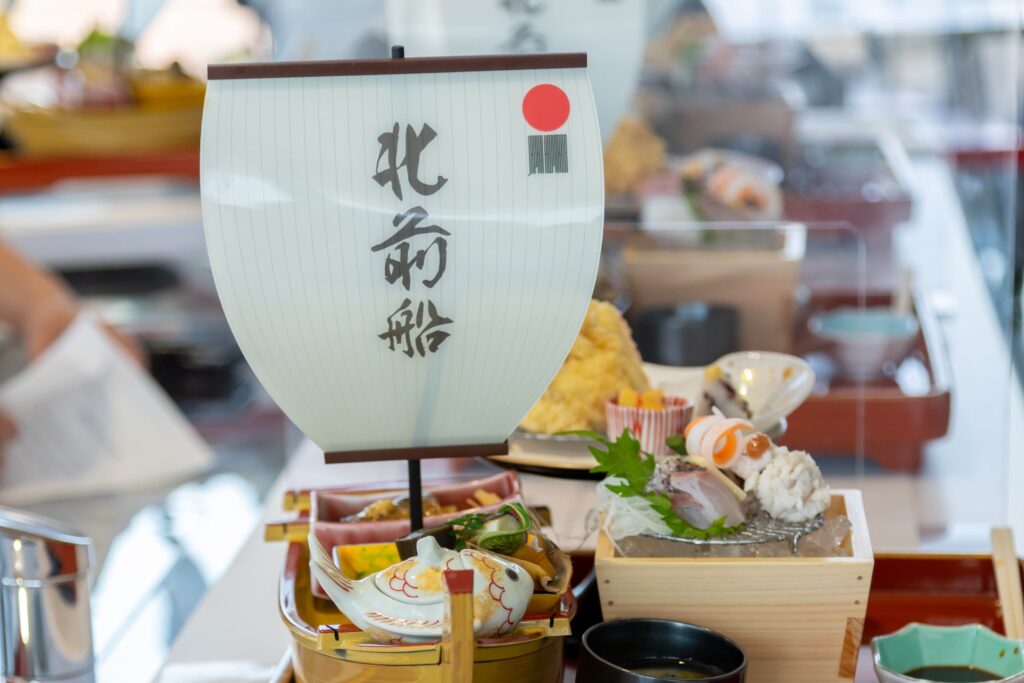
Takitaro is a restaurant that specializes in serving traditional local cuisine for both lunch and dinner. With lunch menus starting at 1200 yen per person, the focus is on showcasing the richness of local seafood. Depending on the season, Takitaro also features typical seasonal dishes, such as Yamagata’s imoni potato soup in autumn or the kandara-jiru black cod soup in winter.
For those seeking to experience the soulful flavors of Tsuruoka’s cuisine at affordable prices and conveniently located around the station (just an 8-minute walk away), Takitaro is a must-visit destination.
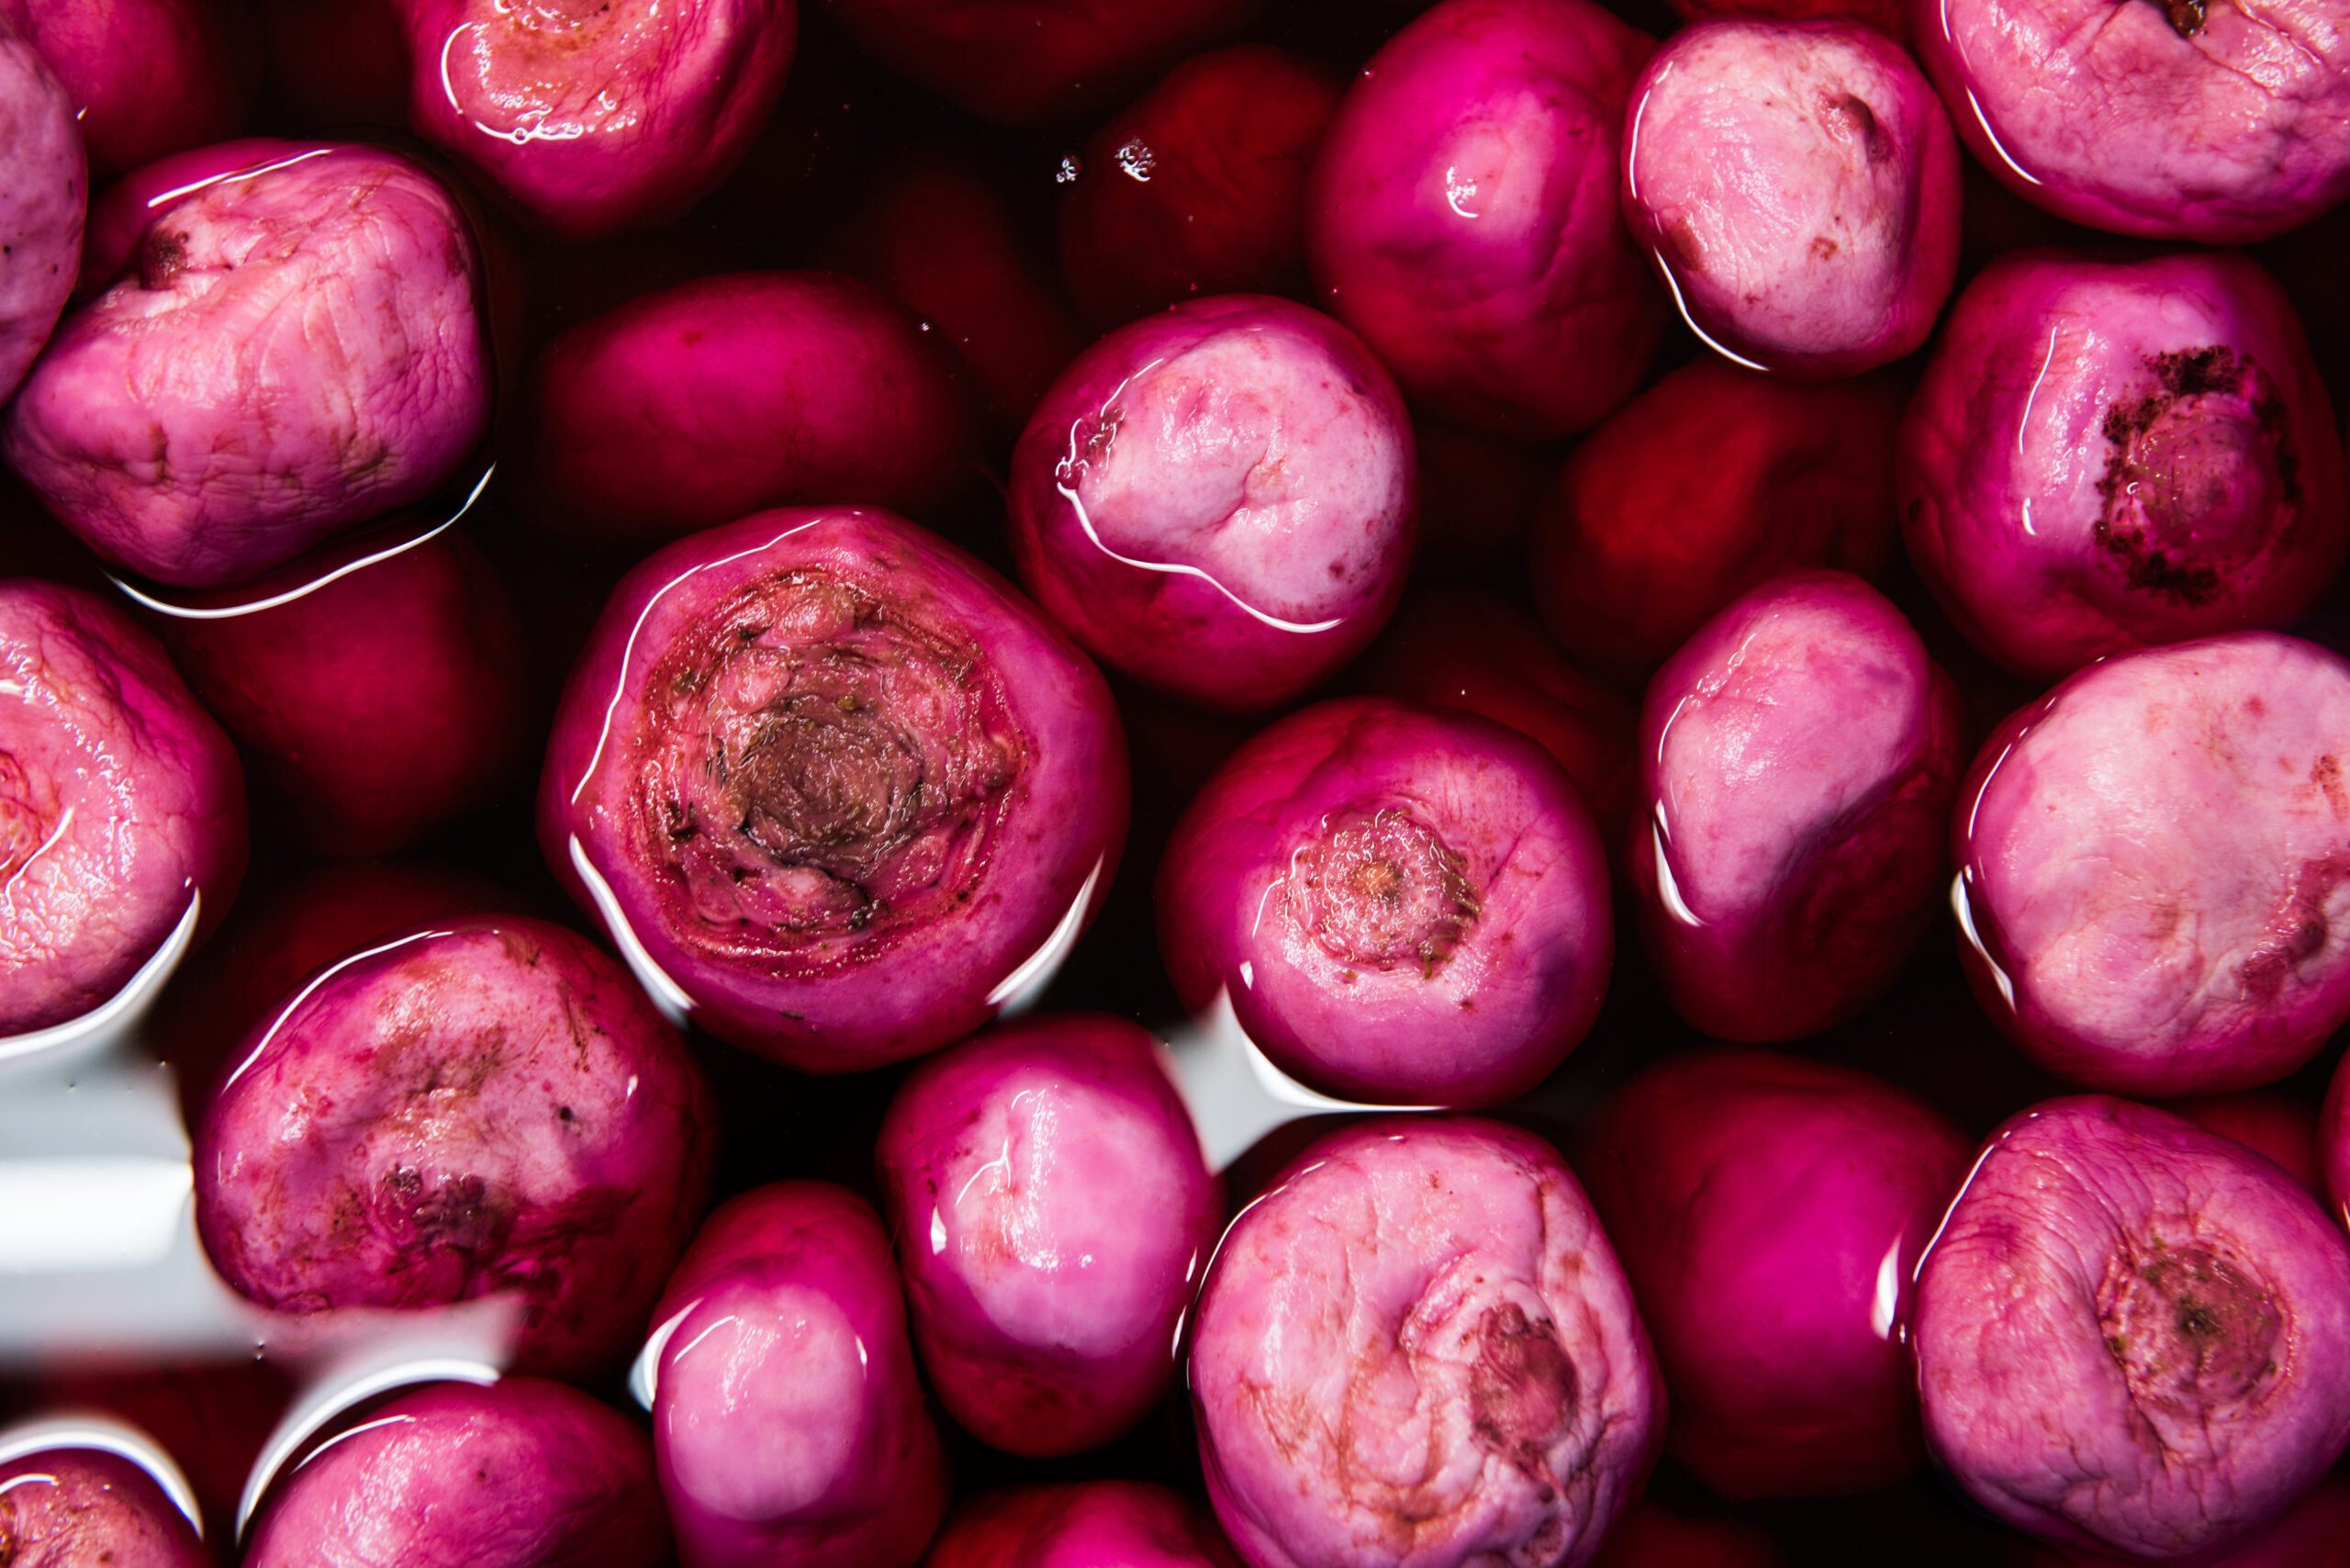
Atsumi-kabu : Atsumi’s red turnip
For over 330 years, the Atsumi region in Tsuruoka City has been practicing slash-and-burn cultivation for its red turnip: the “Atsumi-kabu”, making it one of the oldest surviving indigenous crops in Yamagata Prefecture. This crop, known as “Atsumi Kabu,” is renowned for its crisp texture, making it a delectable choice for pickling. Remarkably, historical records from over 200 years ago mention its high value, with 18 kabu being exchanged for one shō (a traditional Japanese unit of volume) of rice, highlighting its esteemed status.
It is mostly eaten as a sweet “tsukemono,” pickled in a mixture of vinegar, salt and sugar.
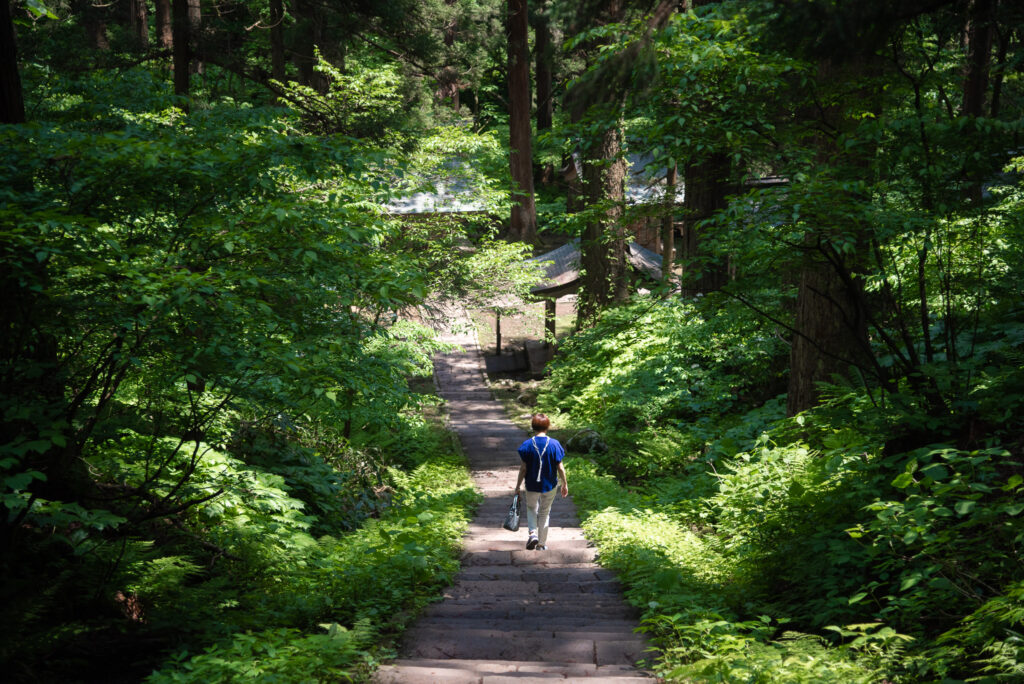
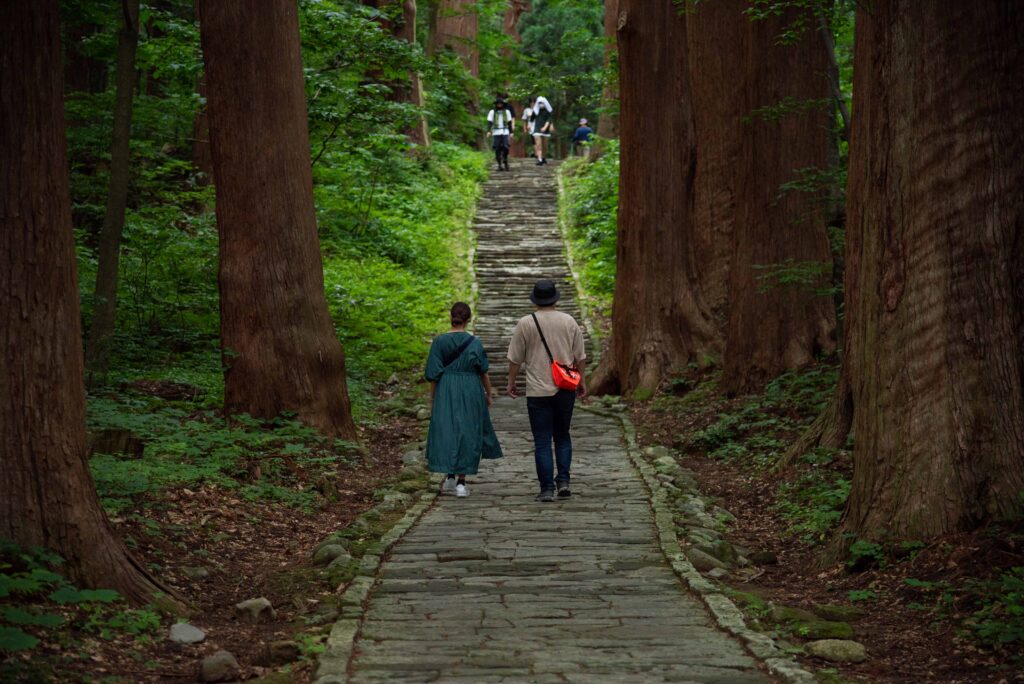
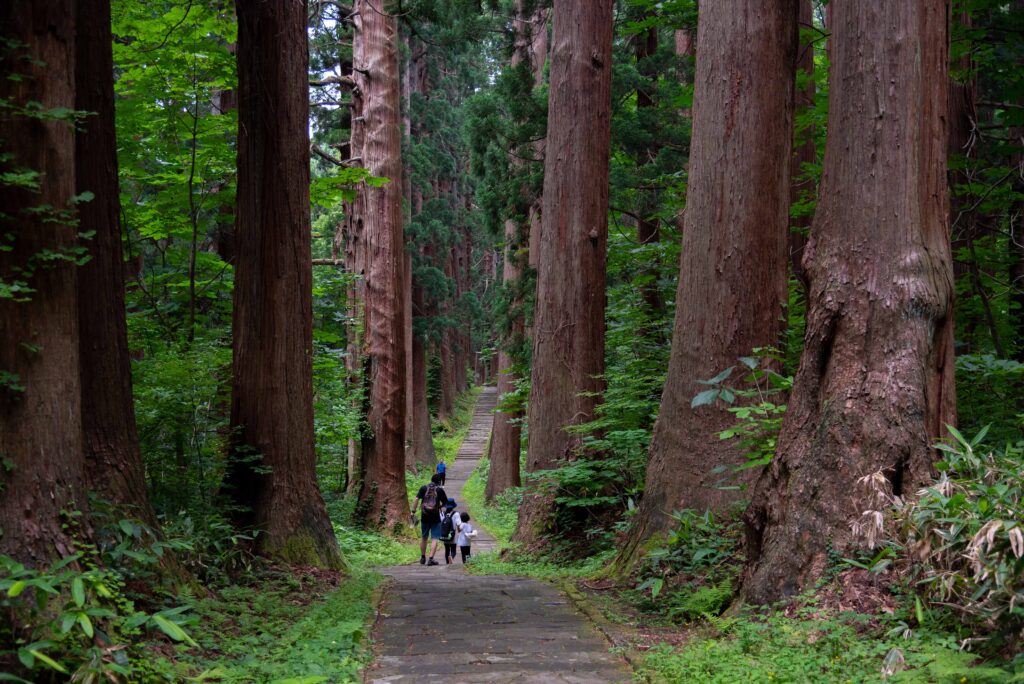
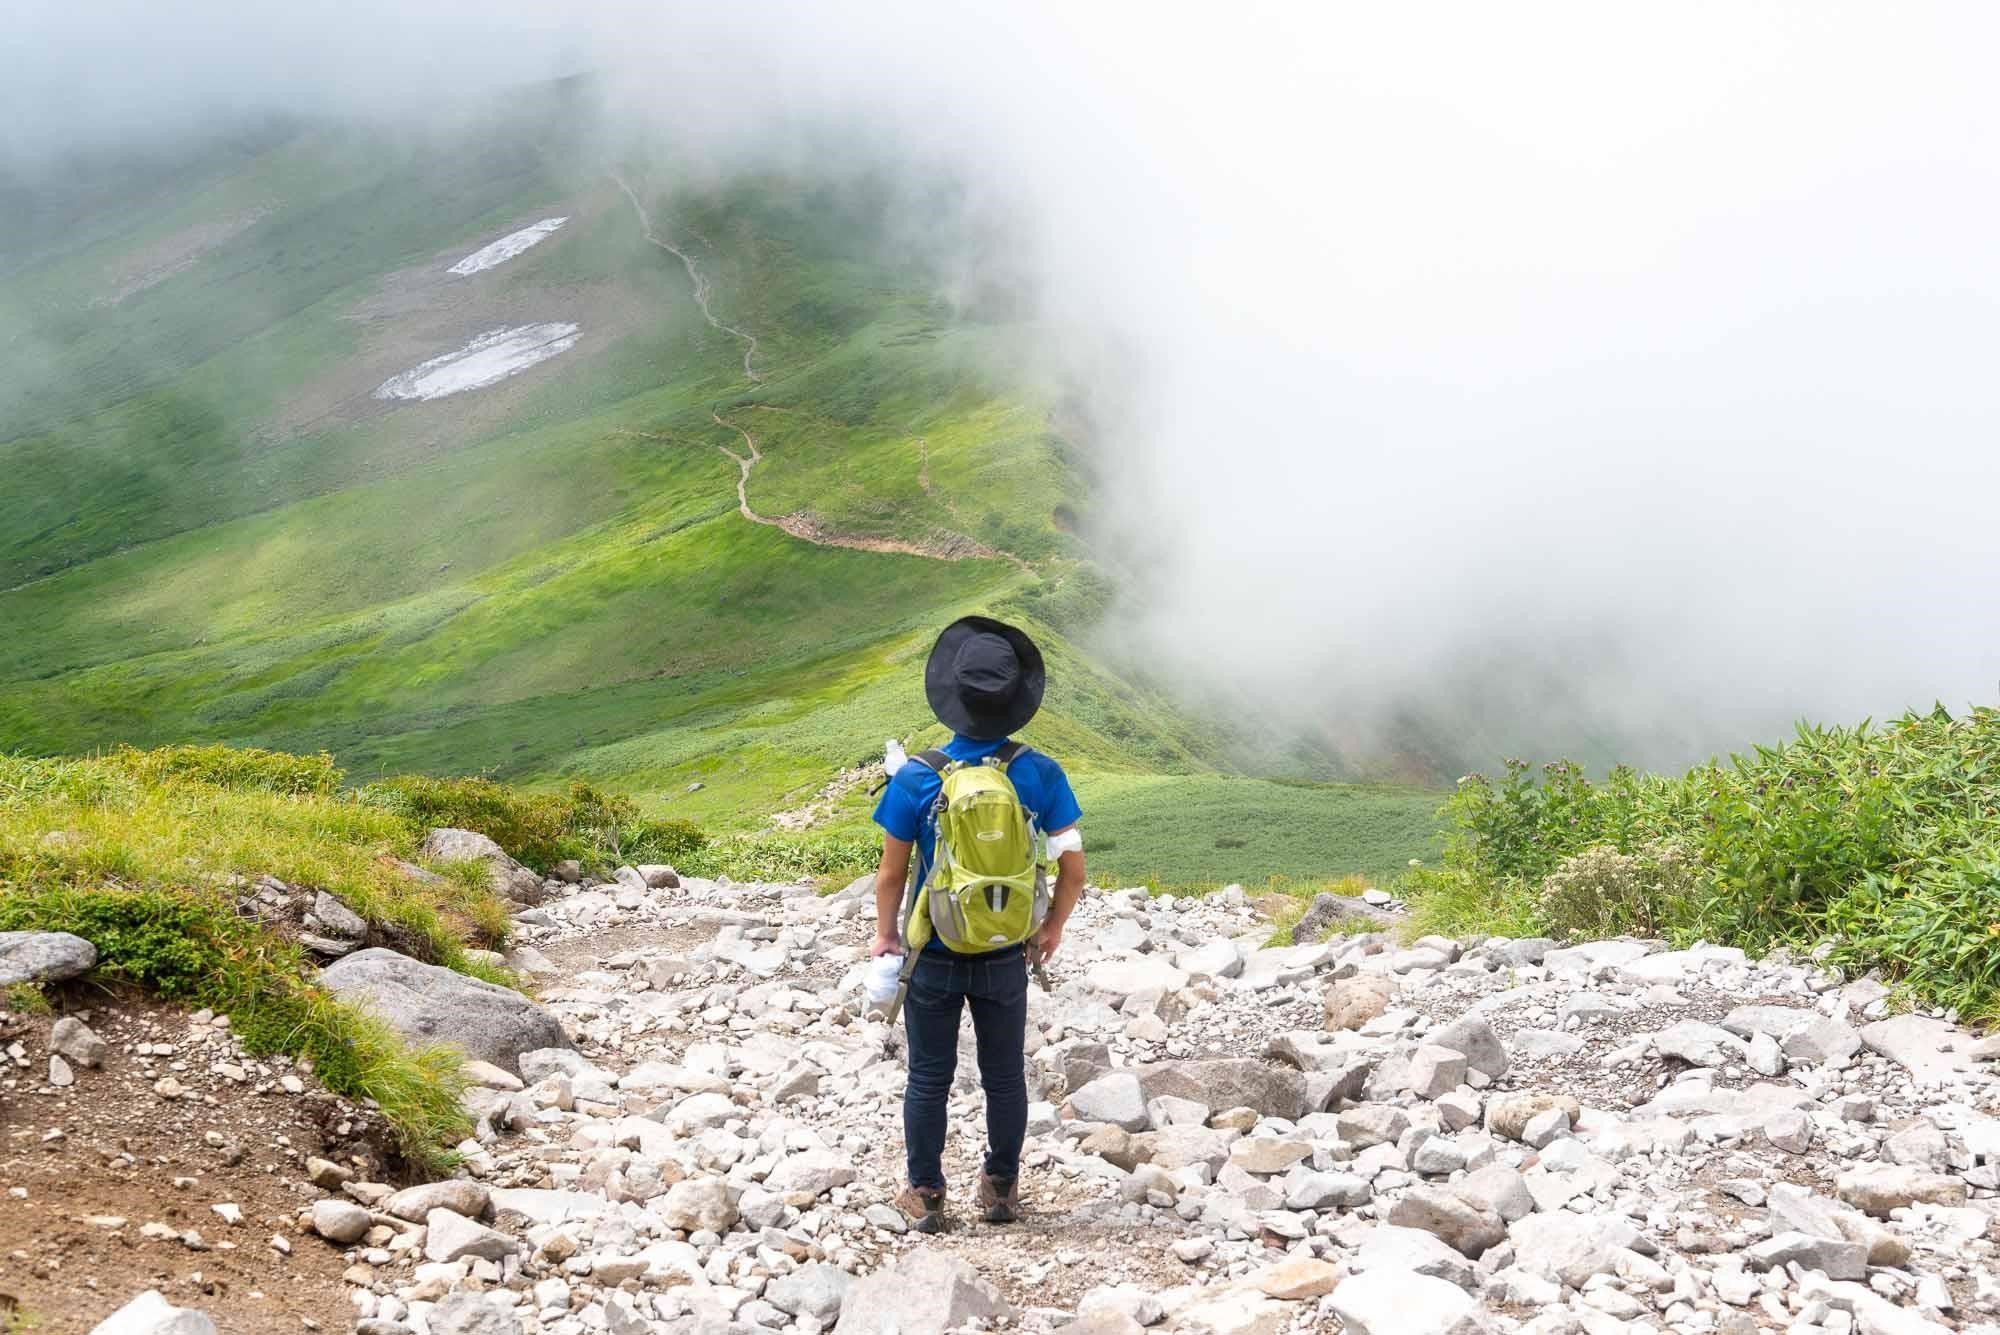
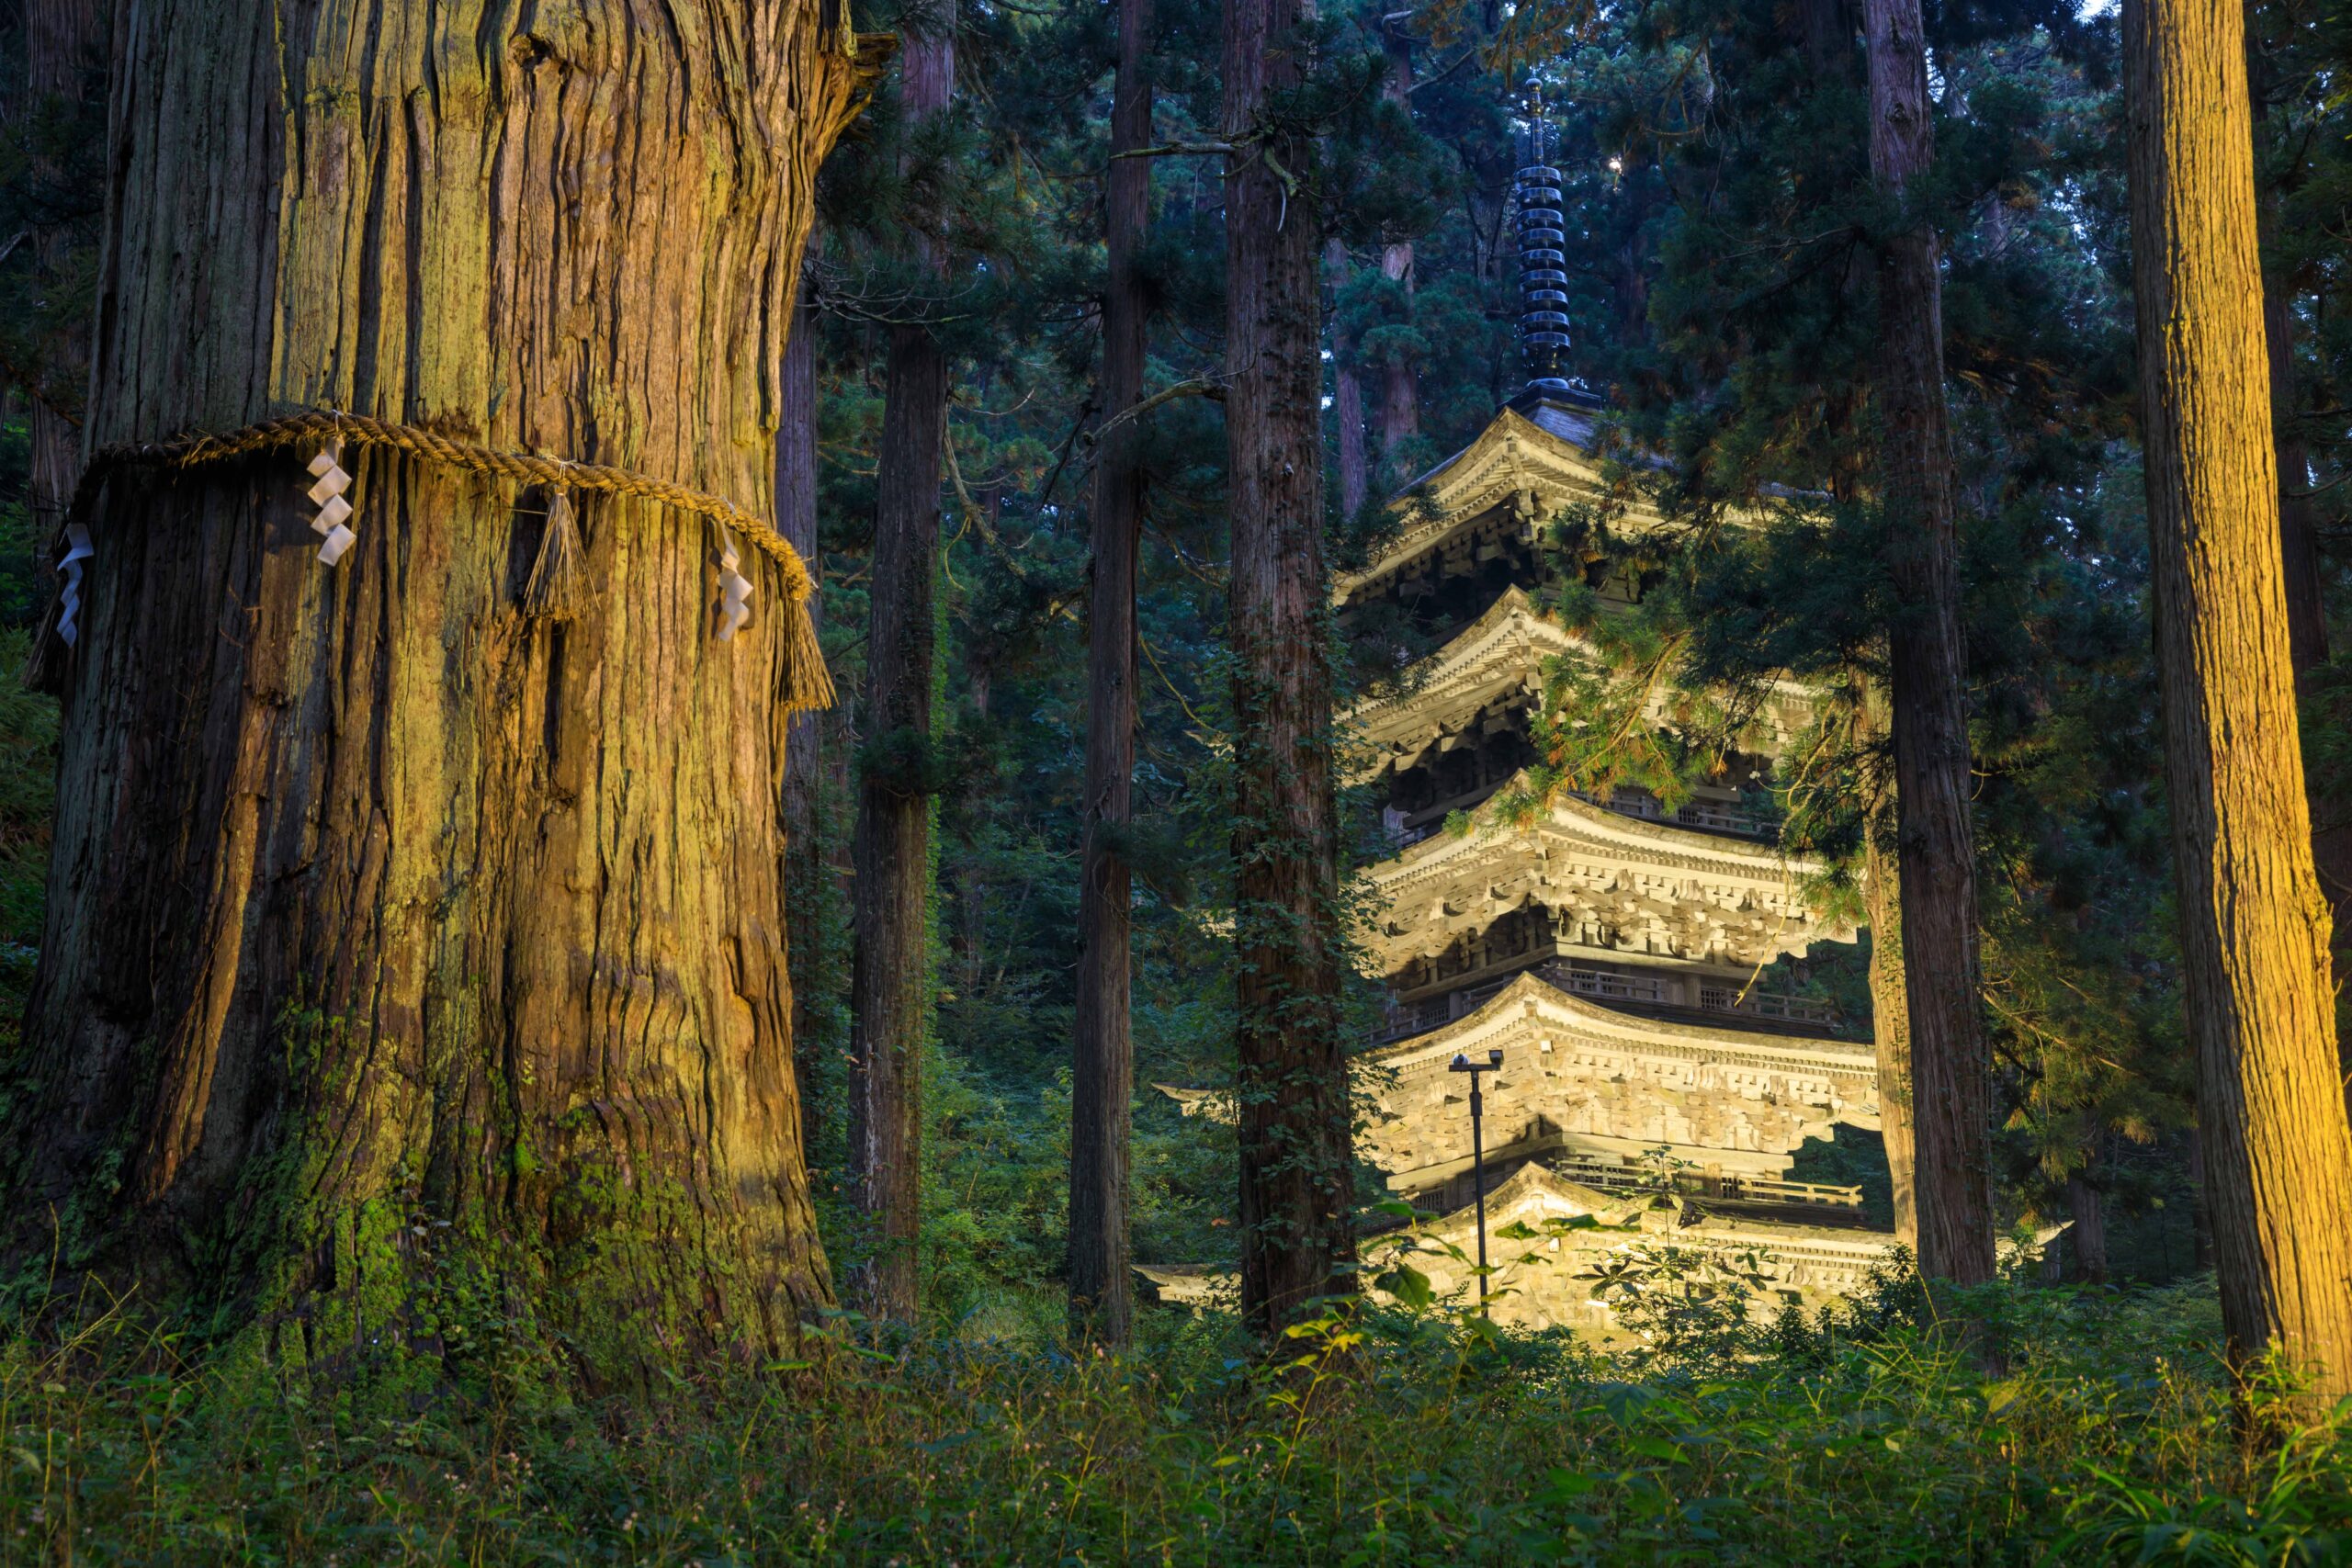
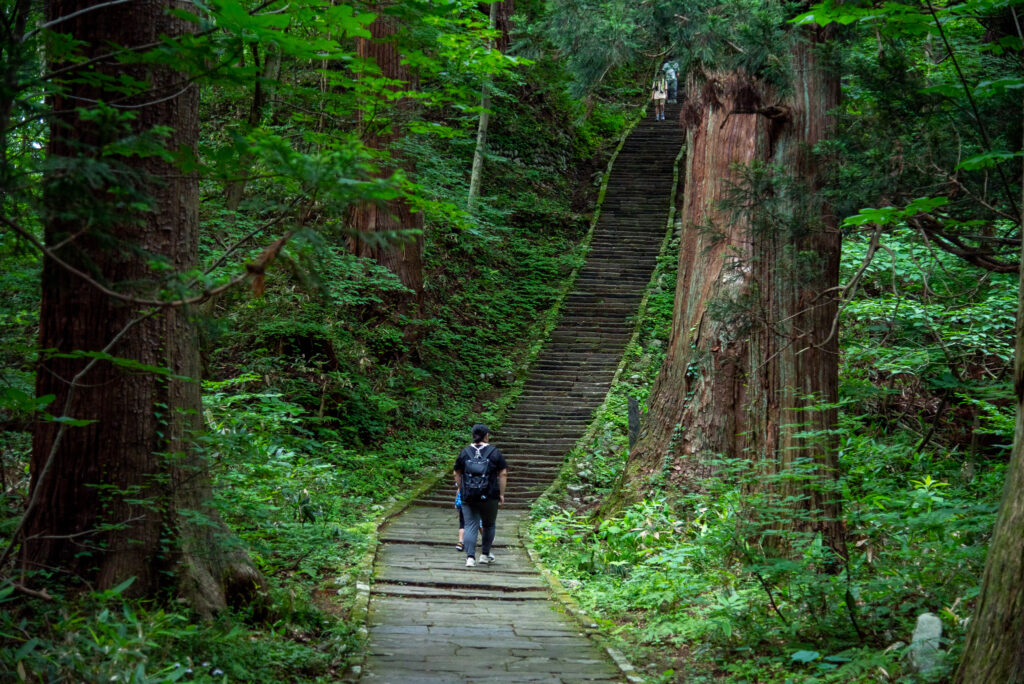
Hike to the top of Mt. Haguro
Climb the 2446 steps within the cedar forests that received 3 stars in the Green Michelin Guide.
Distance
3.5km
Elevation
310meters
Required Time
1.2h
Danger level
Rather safe *Dangers include:Heat strokes, Slippery when raining
Difficulty level (for beginners)
Moderate
Equipment needed
● Water ● Hiking shoes or sneakers ● Rainwear or umbrella
Difficulty levels have been designed for people who have a PAI (Personal Activity Intelligence) score inferior or equal to 60. Experienced hikers or persons with a PAI above 100 can withdraw two cases to know the average difficulty for their fitness level. Example: Trails noted “Hard for beginners” correspond to “average” trails for experienced hikers or people with a PAI above 100.
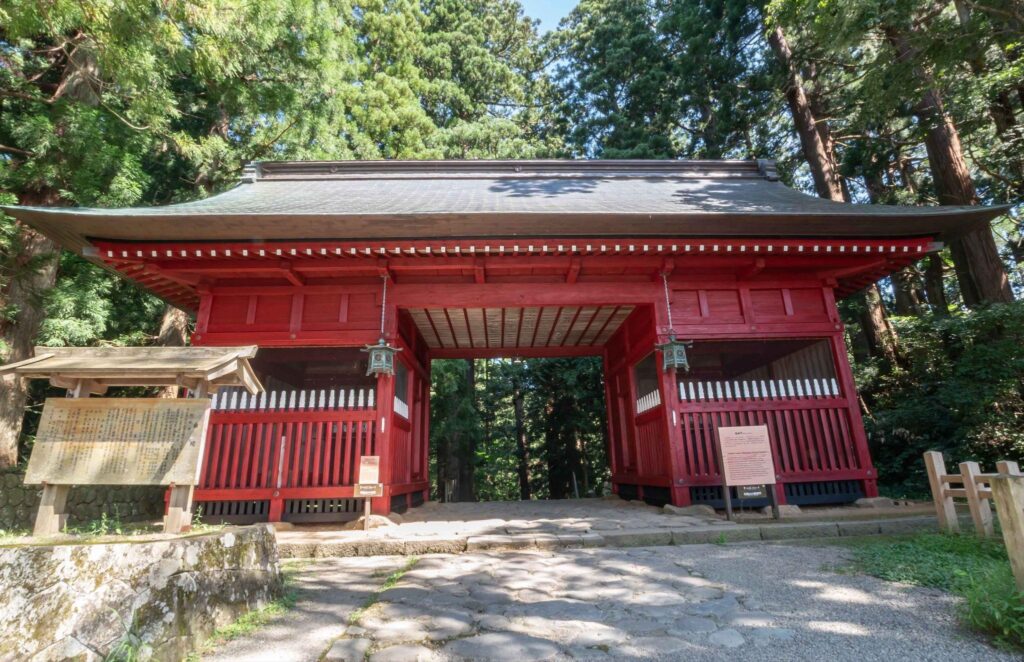
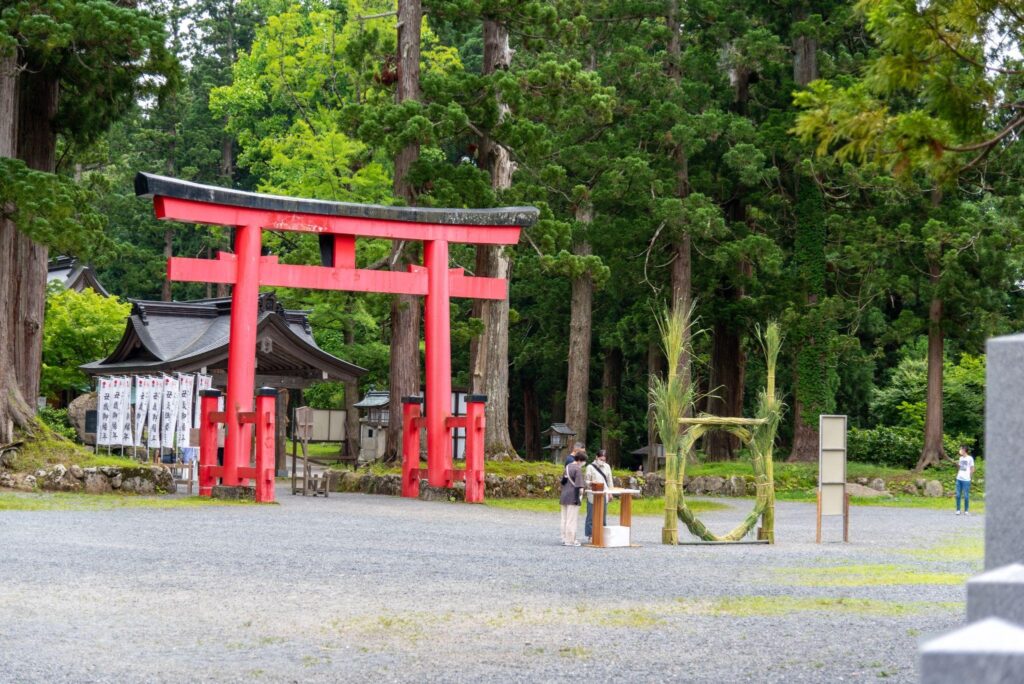
1. Start climbing from Zuishinmon
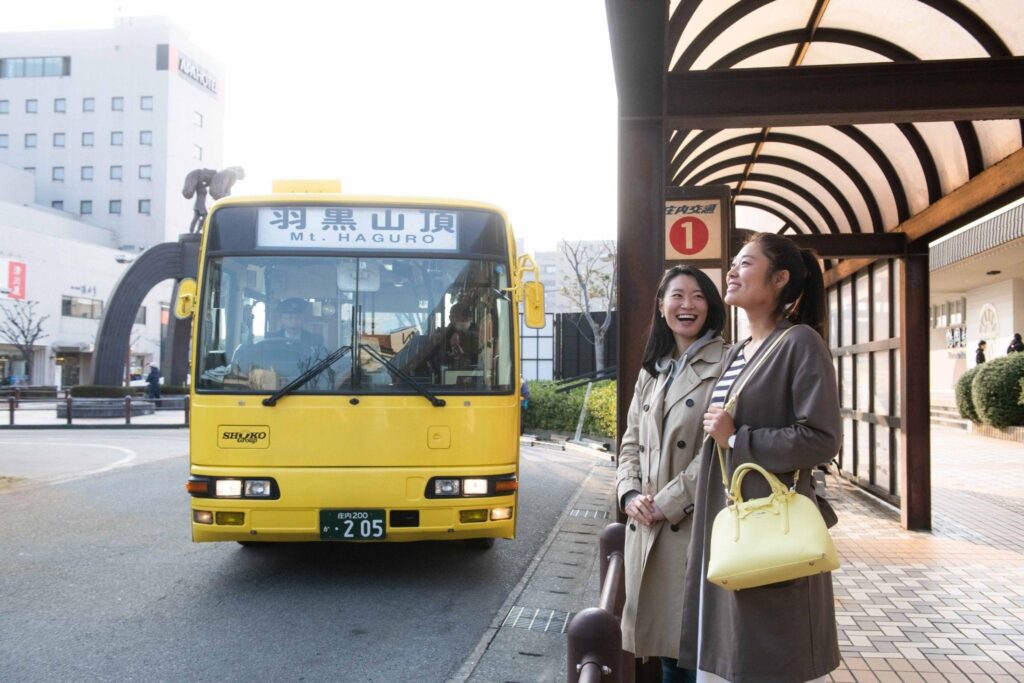
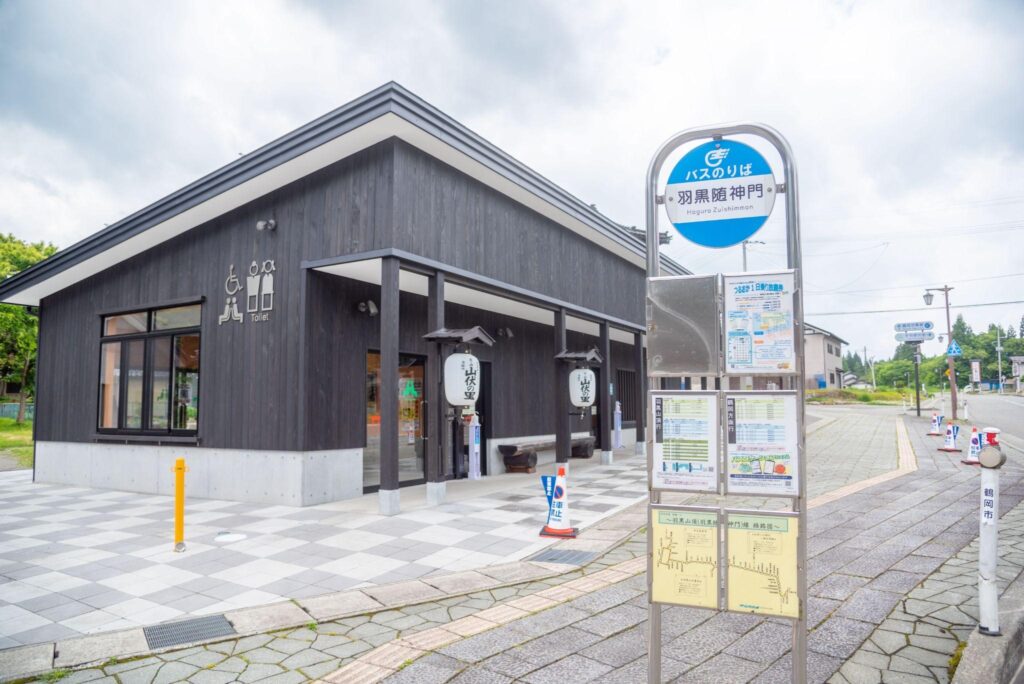
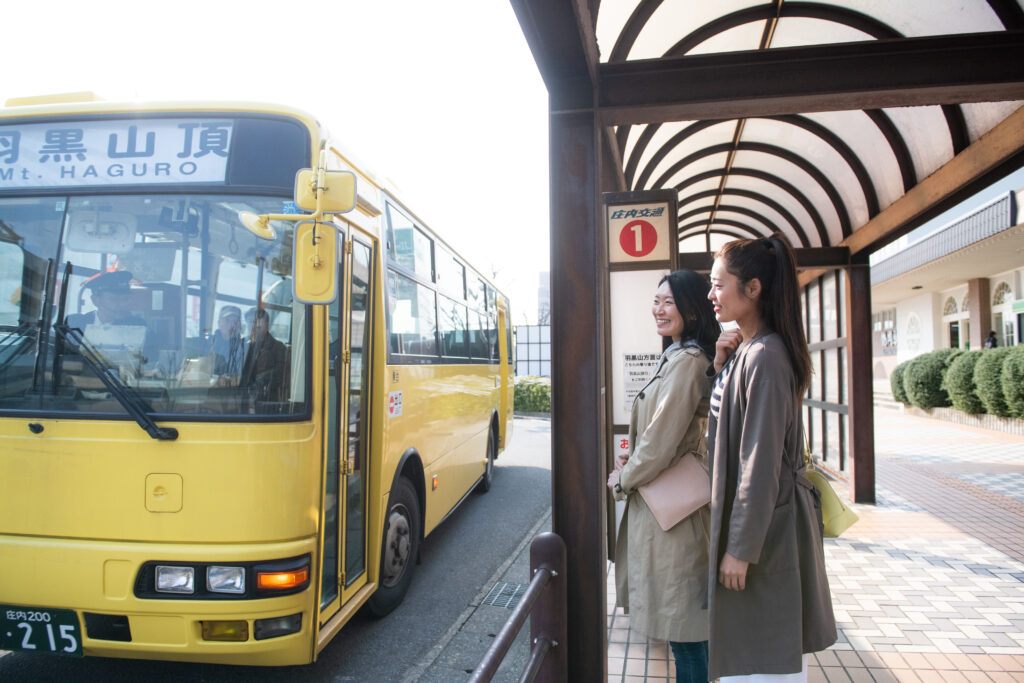
To come by bus from the Station, get on the bus bound for Hagurosan 羽黒山行き in front of the station (Tsuruoka ekimae 鶴岡駅前) at the bus stop n°1 バスのりば①, and get off the bus at Haguro Zuishinmon 羽黒随神門.
2. Beyond this point is the start of Haguro’s steps
2446 stone steps are waiting for you. Make sure to bring enough water with you.
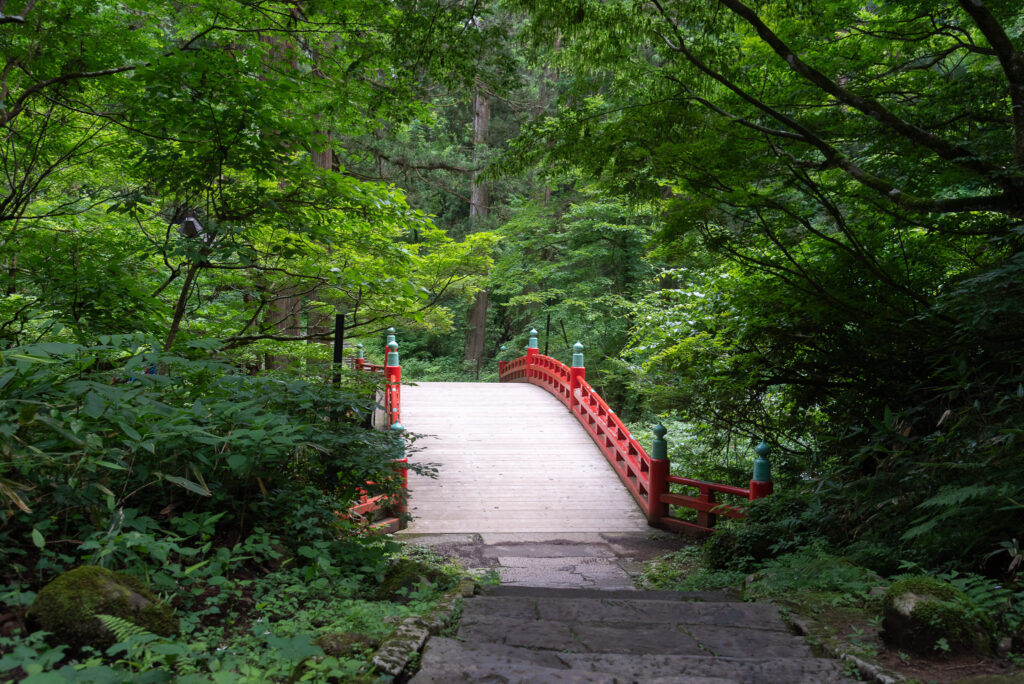
3. Go down the Mamako-zaka
Go down the Mamakozaka 継子坂, to arrive at the Haraikawa shrines 祓川. This place is the metaphor of hell in Dewa Sanzan’s Shugendo practices.
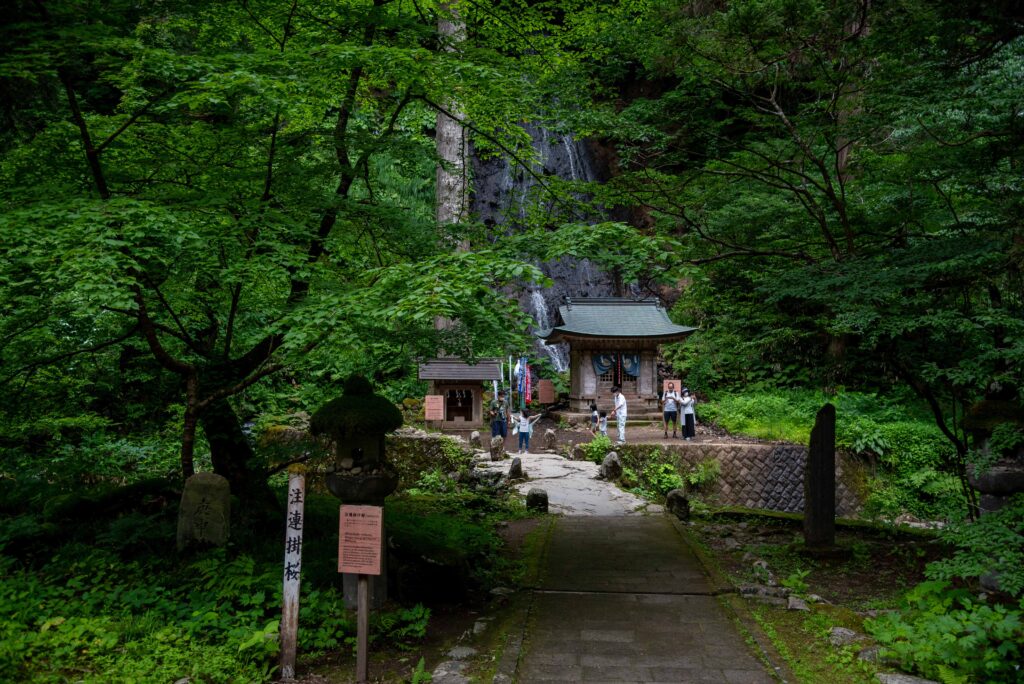
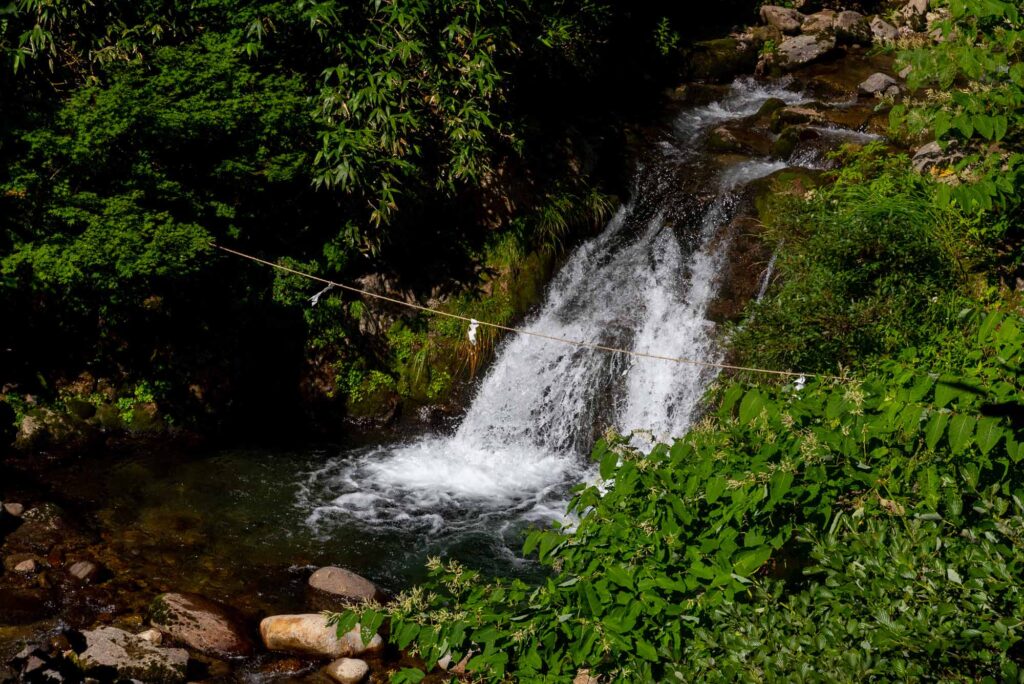
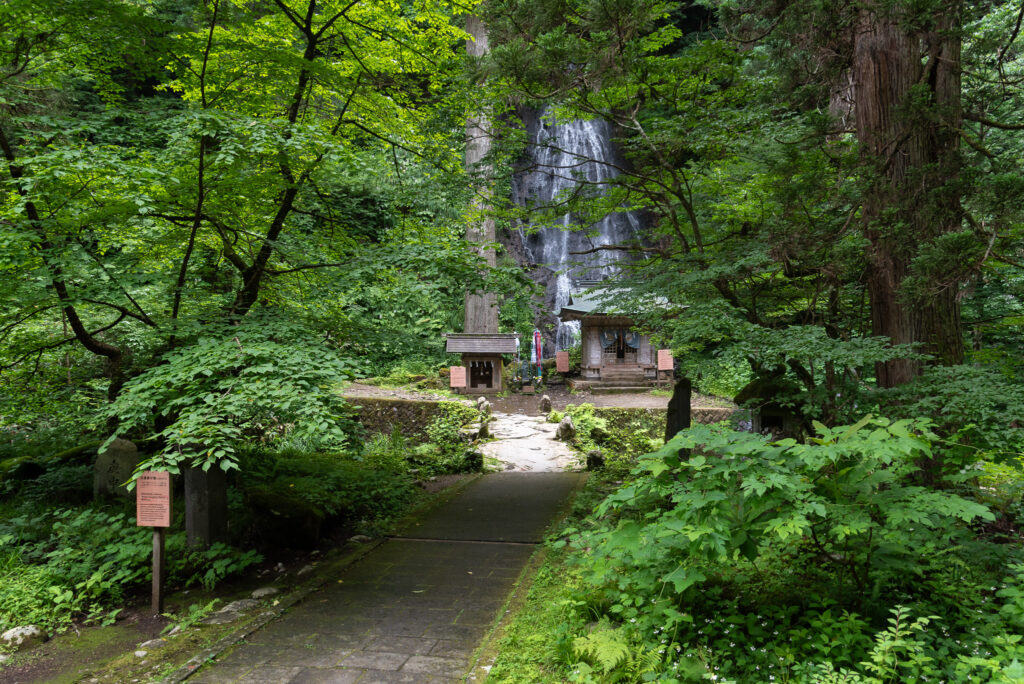
4. On your right, you will find the Suga Falls
The Suga falls 須賀の滝 are where the yamabushi priests of the Dewa Sanzan shrine accomplish the Omisogi cleansing ritual in late March.
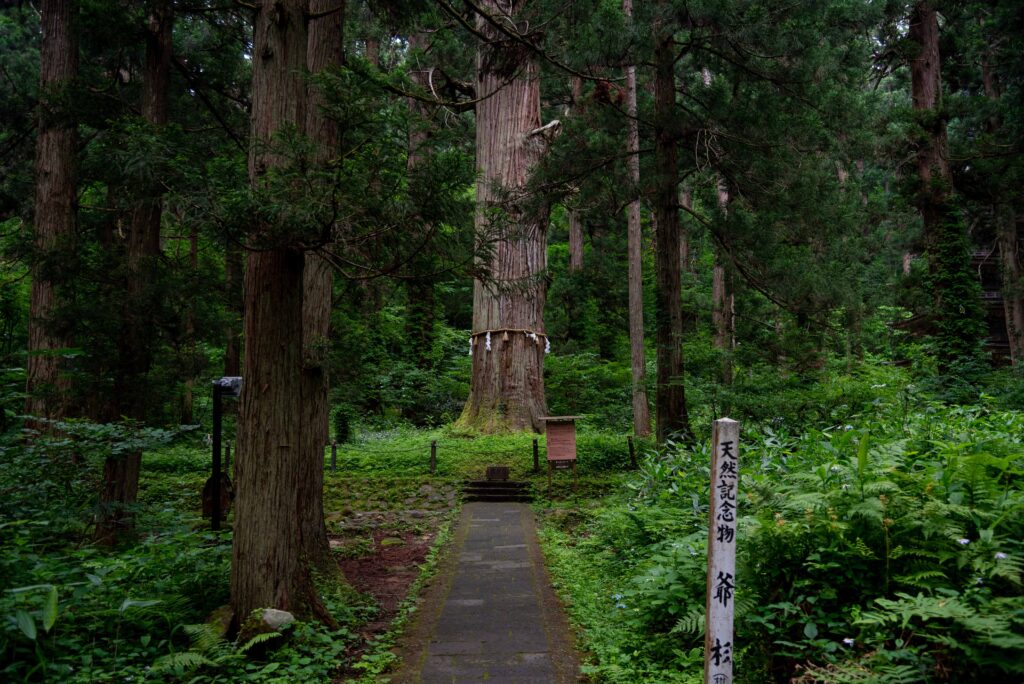
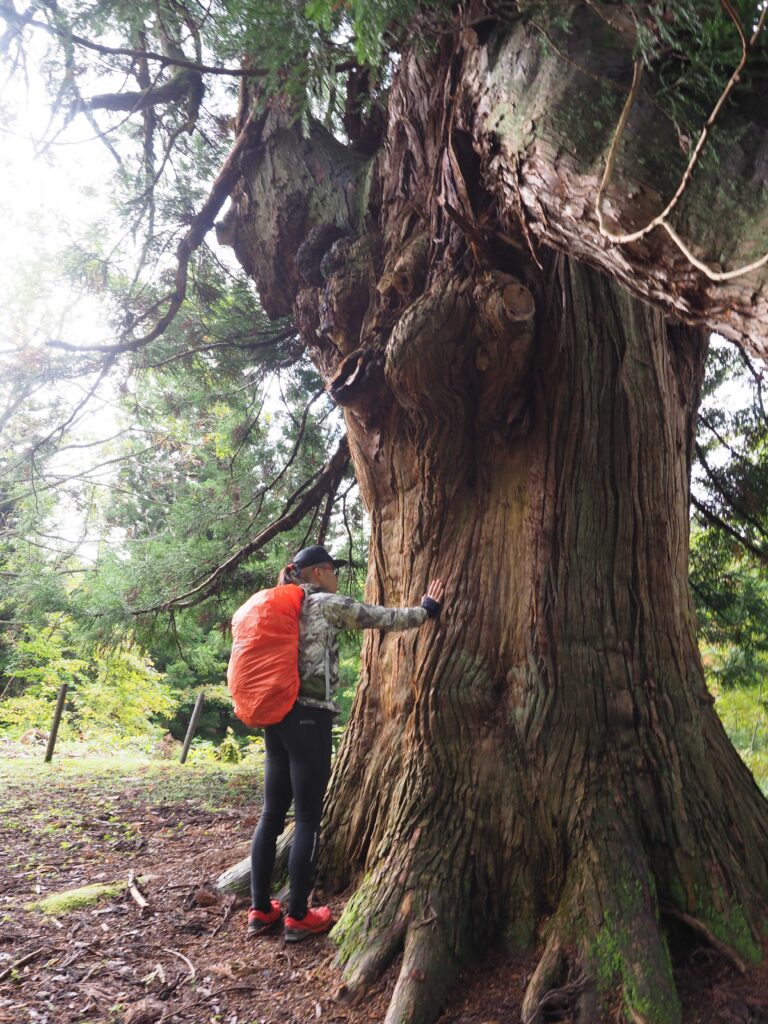
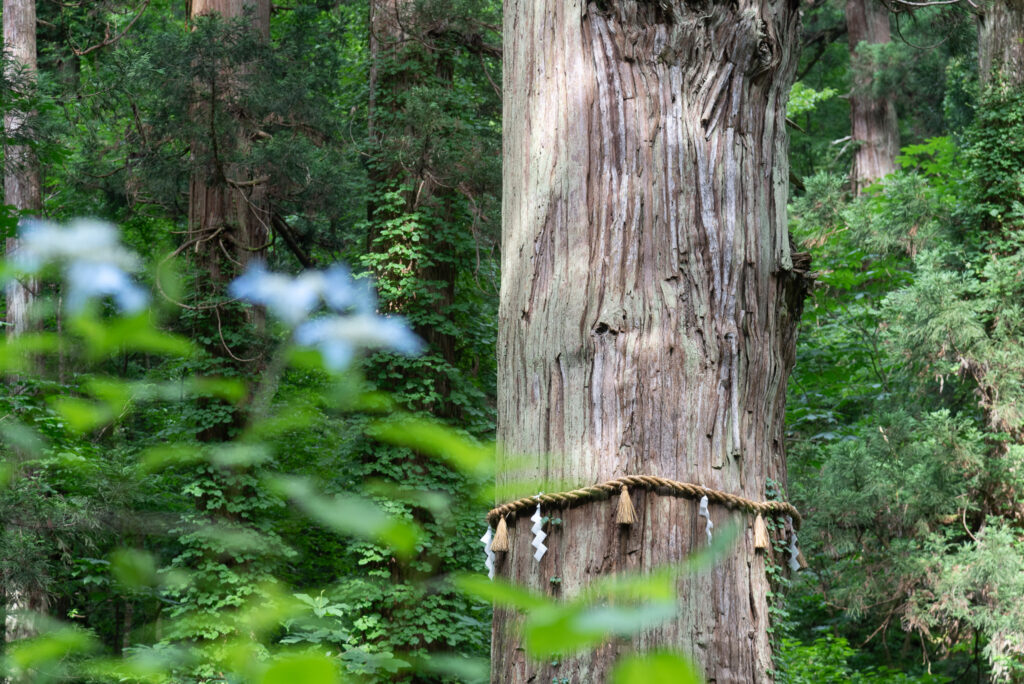
5. A little bit further, on your left, is Grandpa Cedar
Grandpa Cedar (Jiji-sugi 爺杉) is a Natural National Monument that has more than 1000 years old.
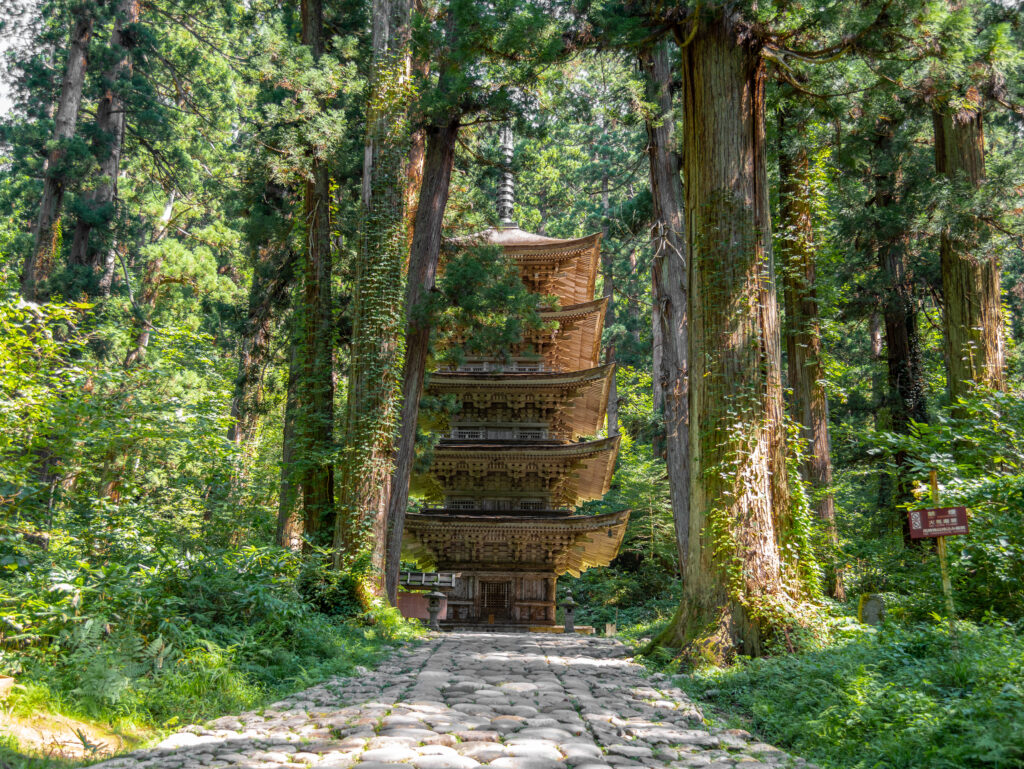
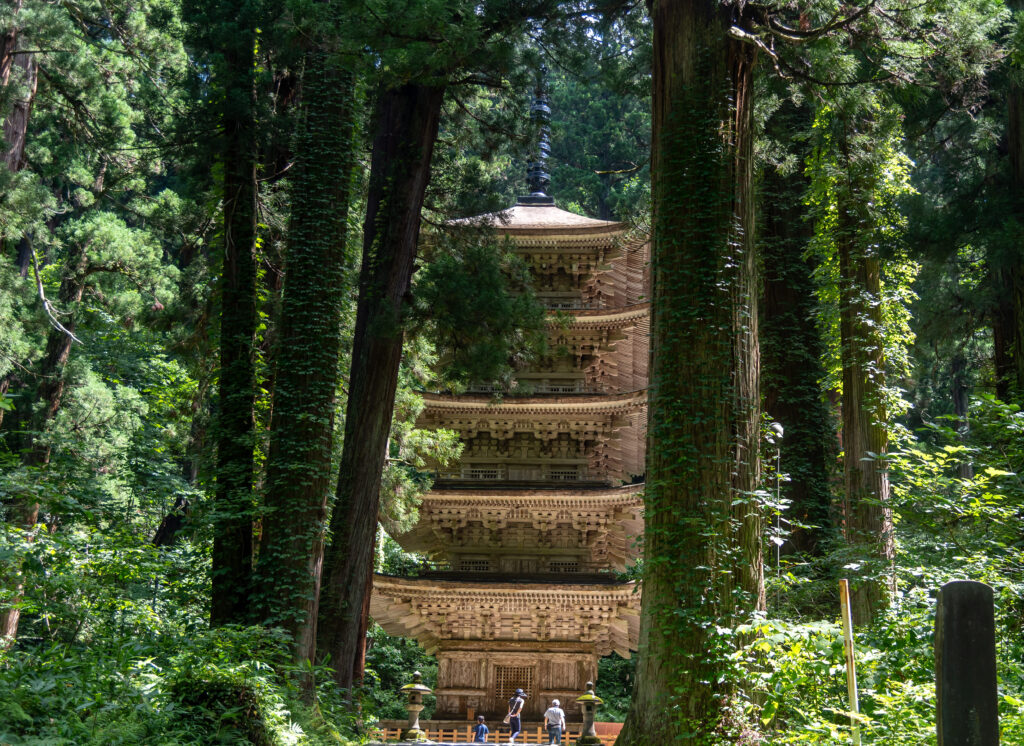
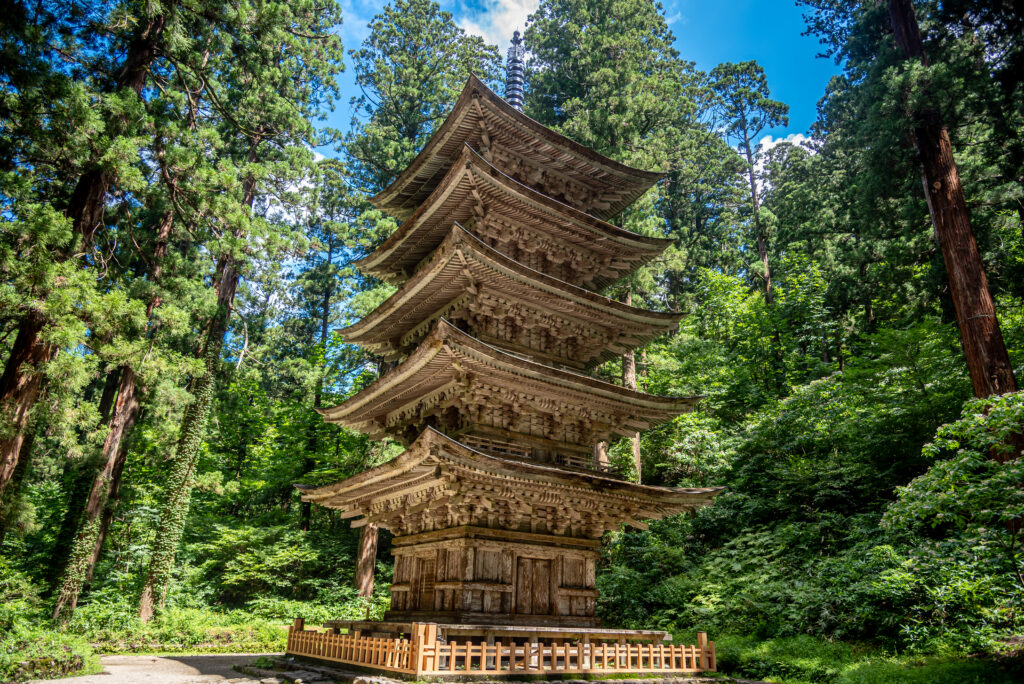
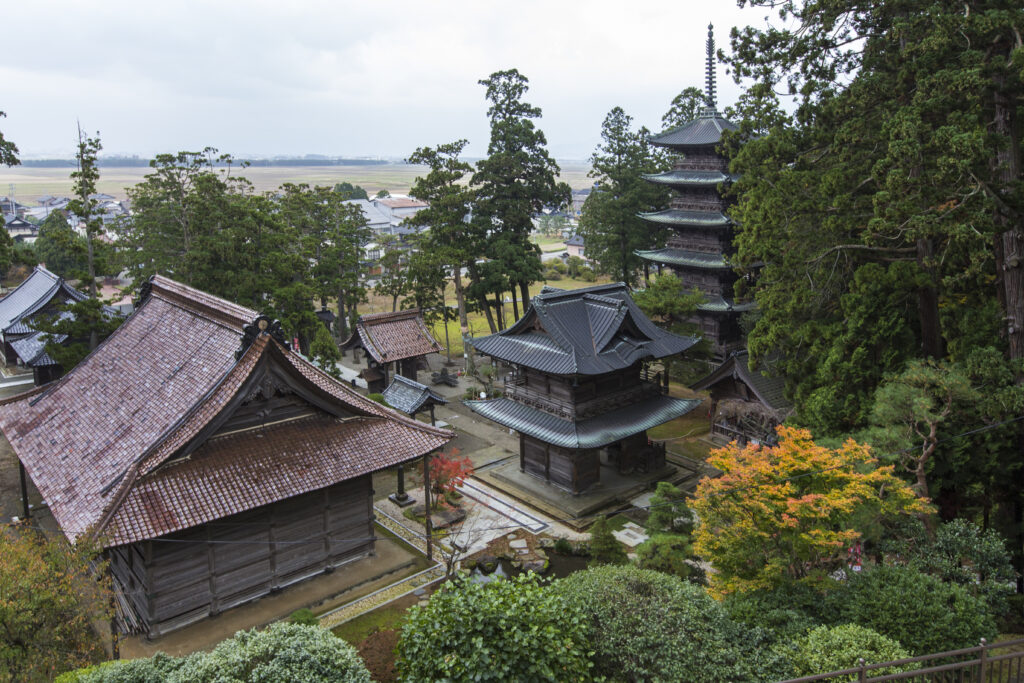
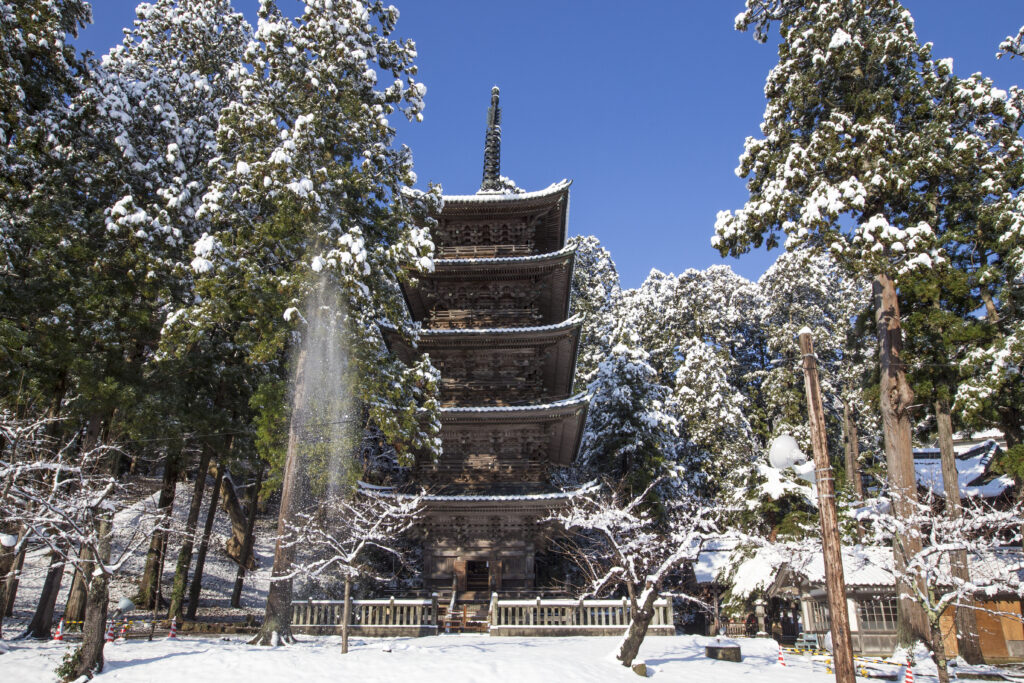
6. A little further, yo will find the Five-Storied Pagoda
A National Treasure.
7. Continue climbing
This is what the Oibunseki 追分石 looks like.
8. Continue
9. You will arrive at the Ninosaka slope
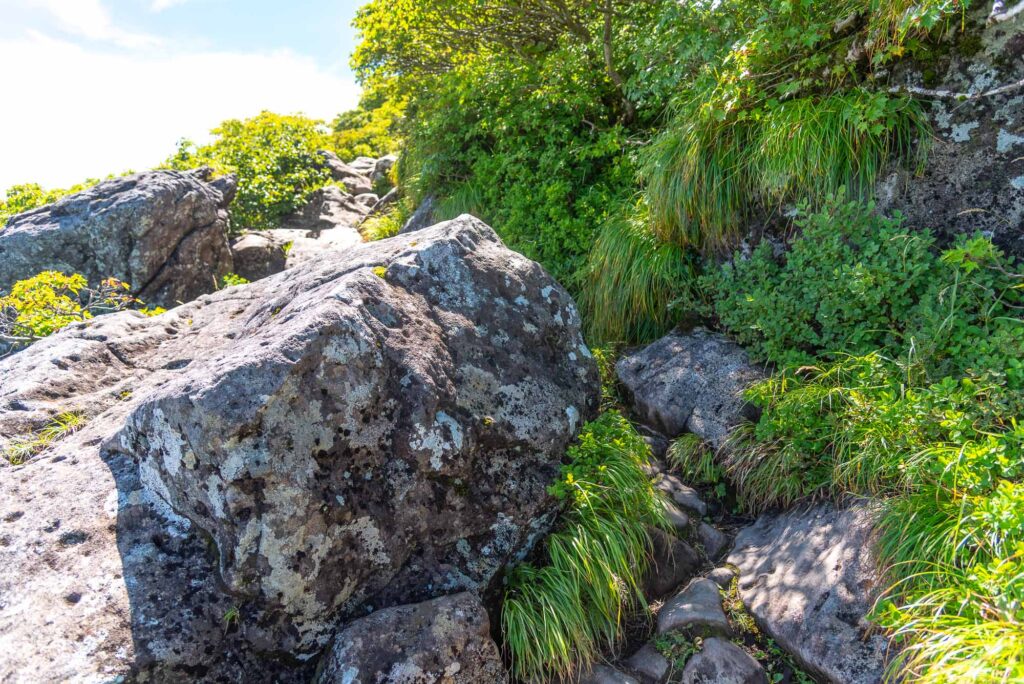
The Ninosaka 二ノ坂 slope is the steepest part of Mt. Haguro’s hike.
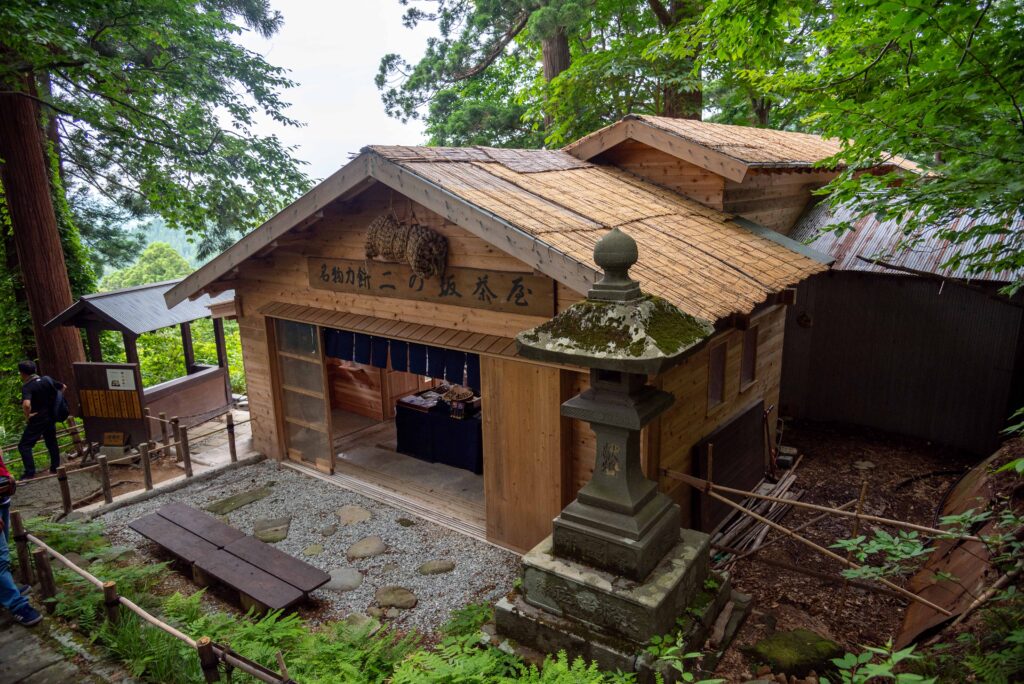
10. You can rest at Ninosaka Teahouse
Ninosaka Chaya 二ノ坂茶屋 is a teahouse that proposes tea, mochi cakes (chikara mochi 力餅), drinks and souvenirs. Please buy a little something if you wish to use the teahouse to rest.
11. Continue hiking
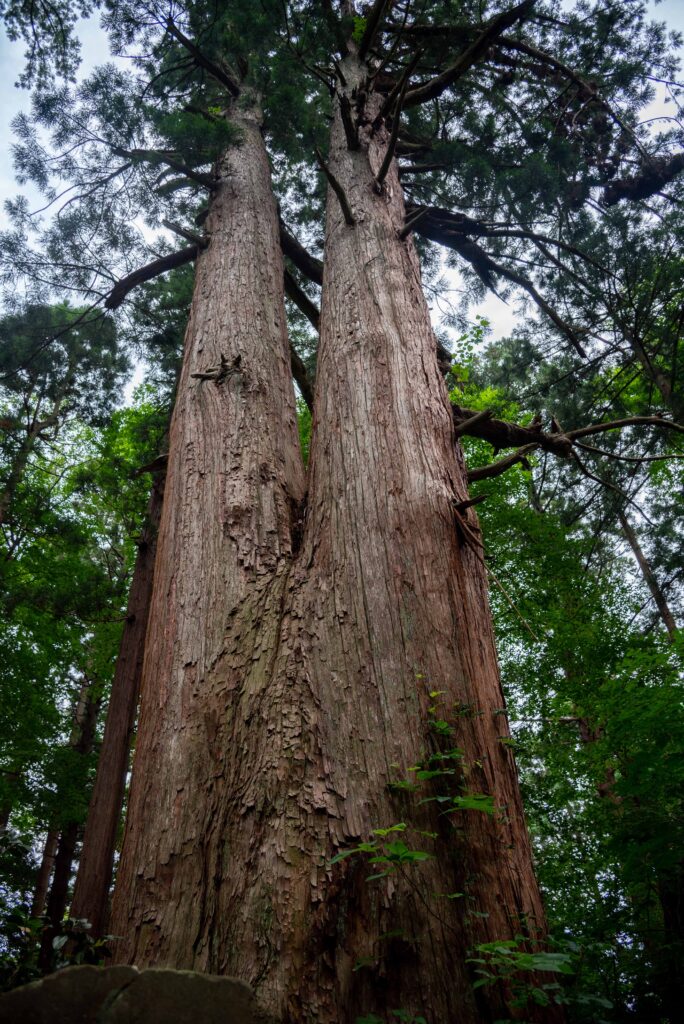
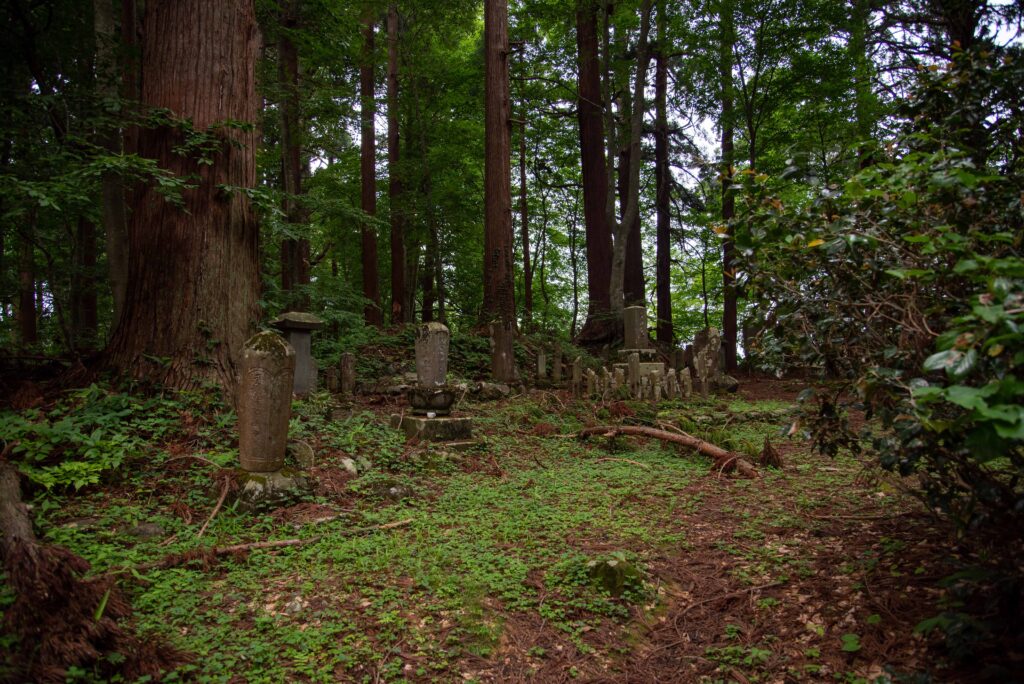
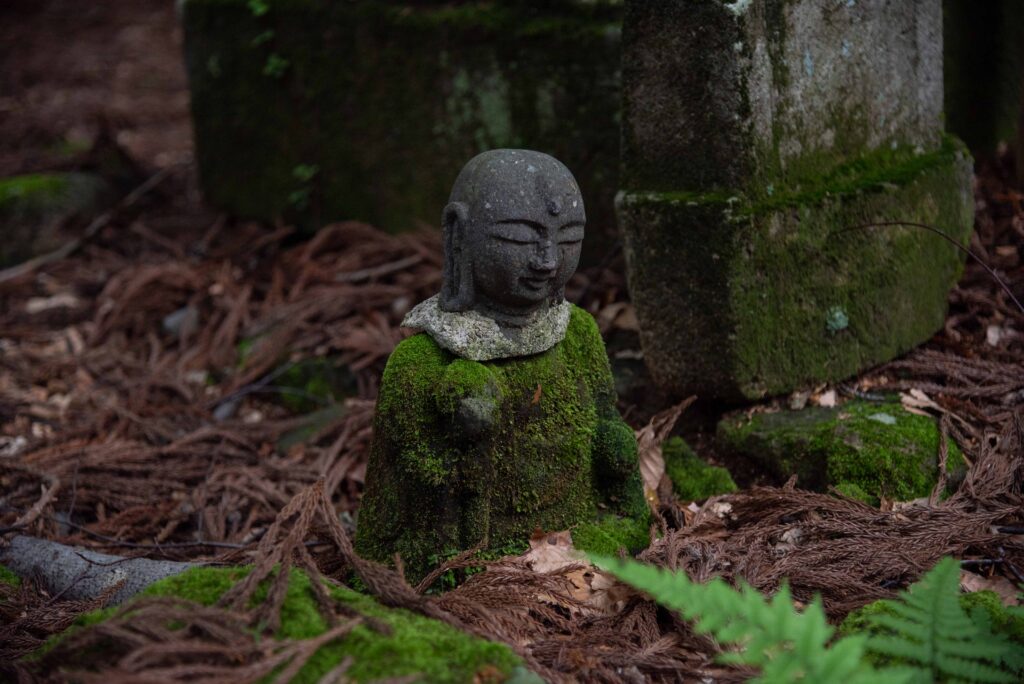
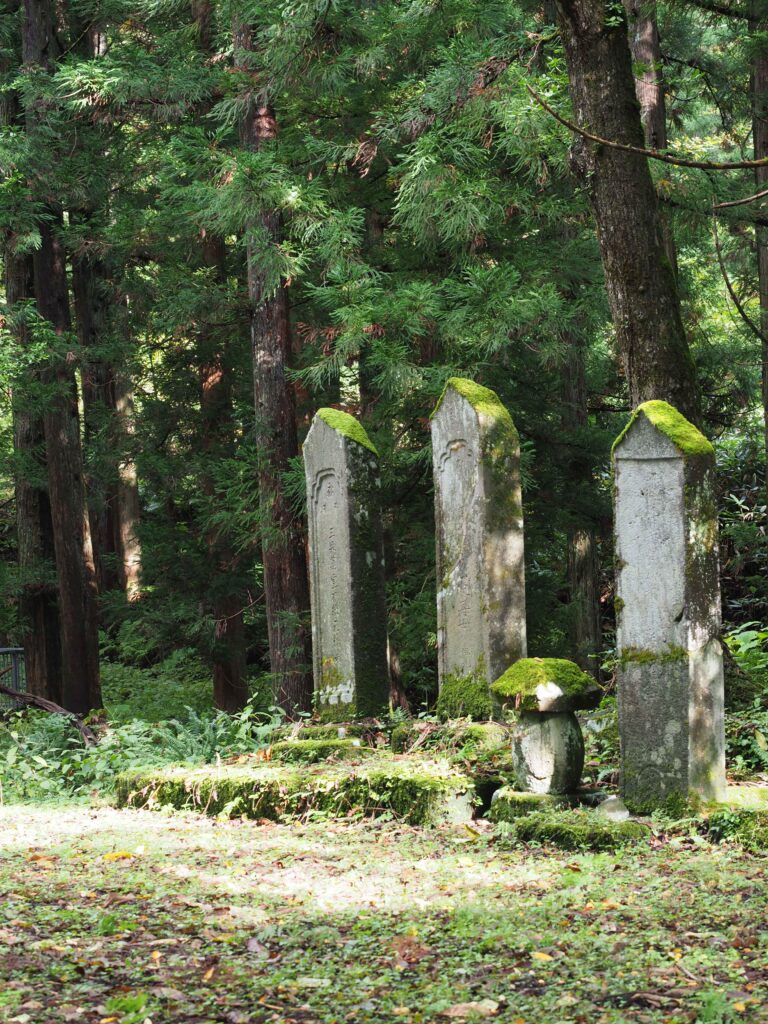
12.On your left, an ancient graveyard
A giant cedar tree divided in two trunks marks the spot of an ancient graveyard. It is authorized to visit and take pictures, but please remain respectful of the place when visiting.
13. Graveyard
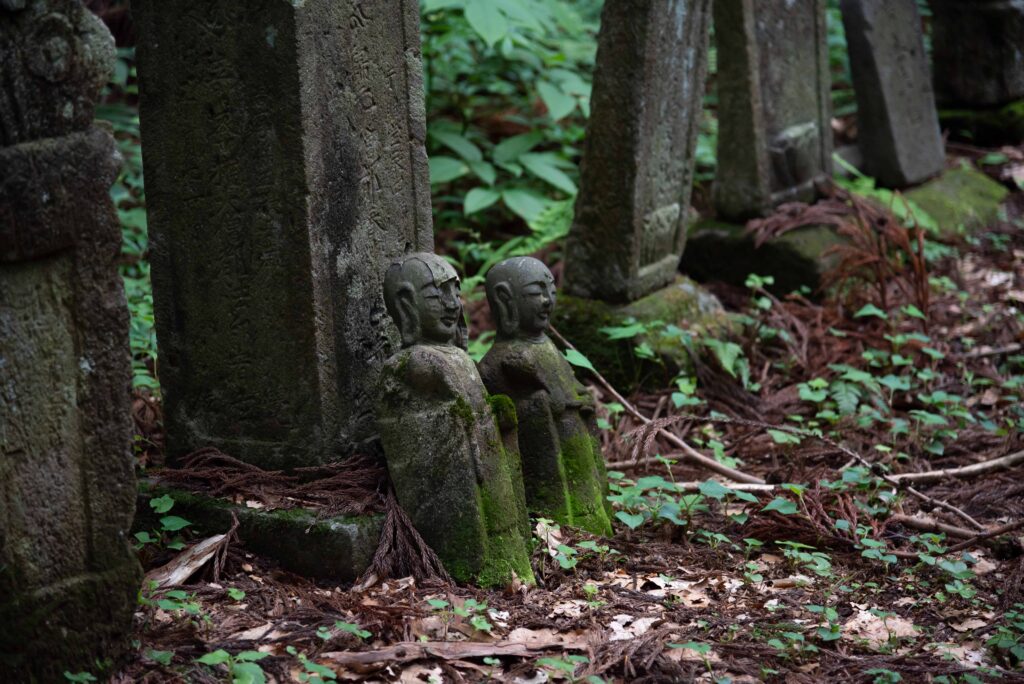
14. Ancient Buddhist statues
15. Ancient Buddhist statues
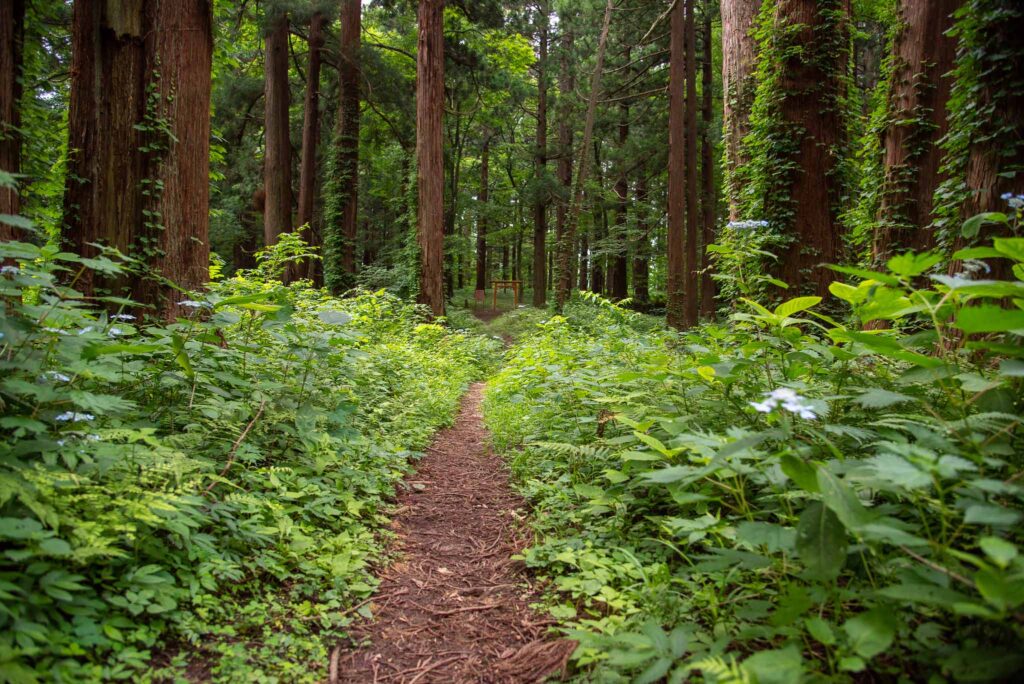
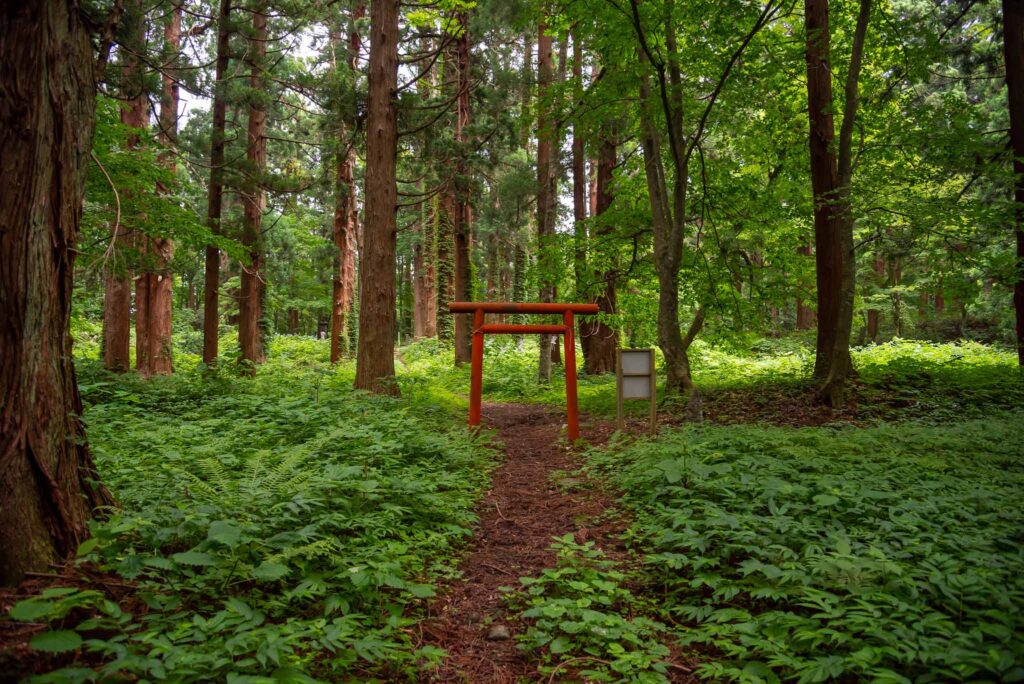
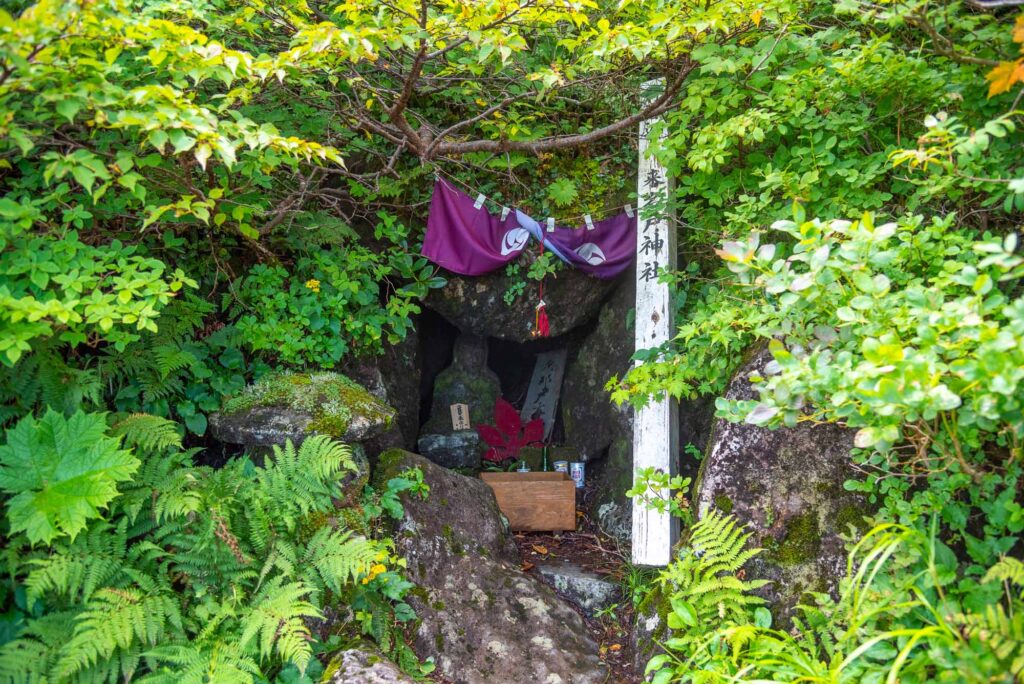
16.In front of the graveyard, the Izanagi shrine
17. The Izanagi shrine ruins and its torii
18. Continue hiking
19. A little further, on your right, the path to Minamidani.
It takes 15 minutes to arrive to Minami dani’s ruins.
20. If you followed the path to Minamidani, you arrive to the lake
Minami-dani is the place where the poet Matsuo Basho retreated during his visit of Mt. Haguro to write haïkus. Go back to the path you came by to go back to Mt. Haguro’s hiking trail.
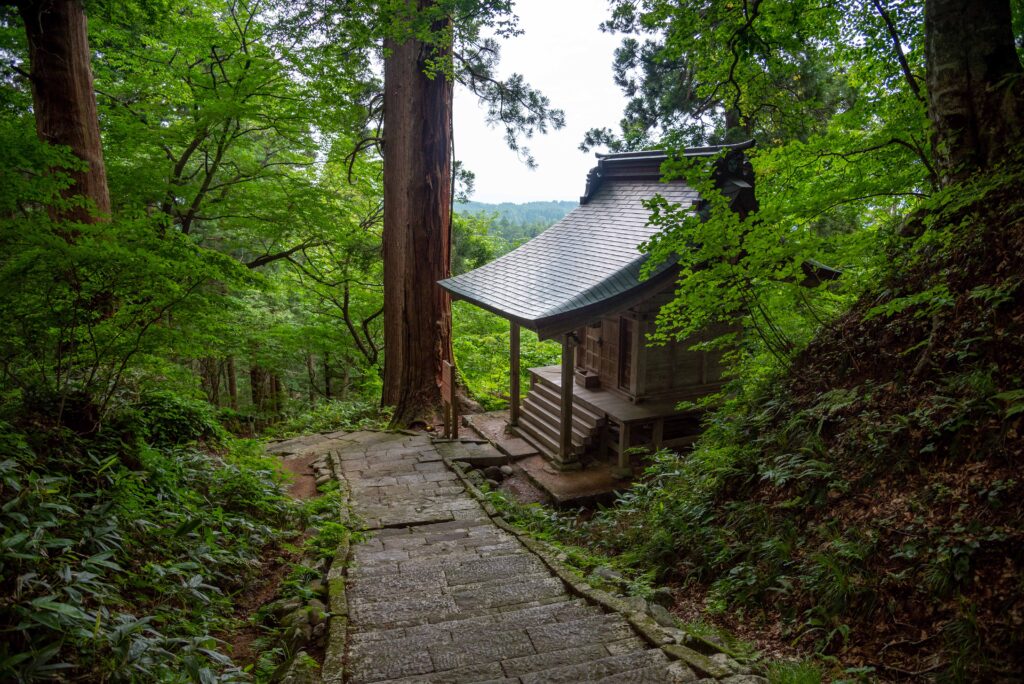
21. After climbing the Sannosaka, you arrive at the Haniyamahime Shrine
This shrine binds couples for eternity and boosts the couples’ fertility.
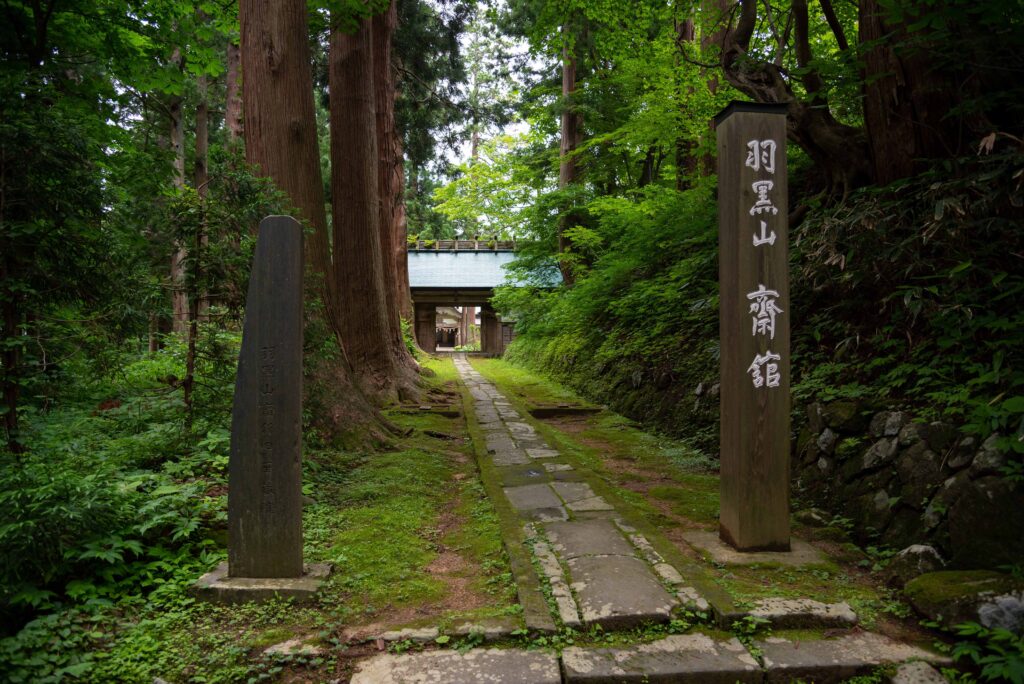
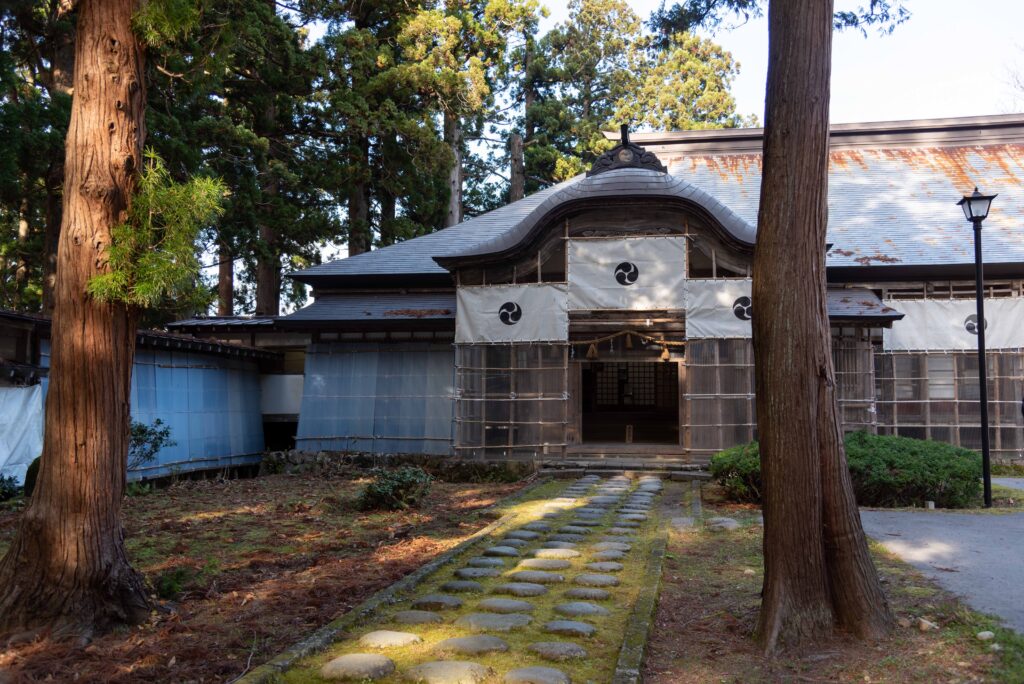
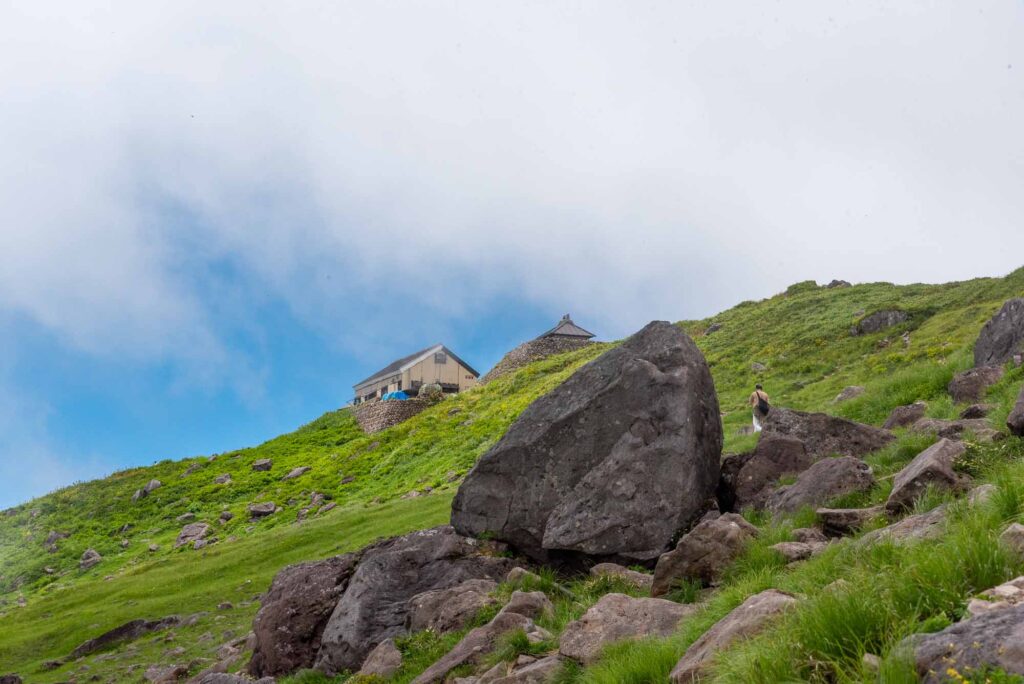
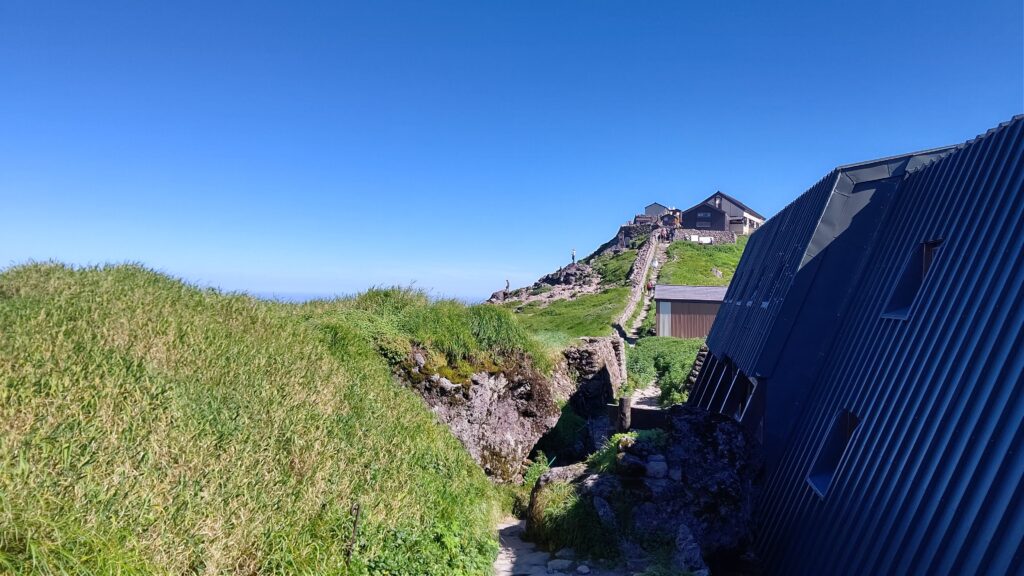
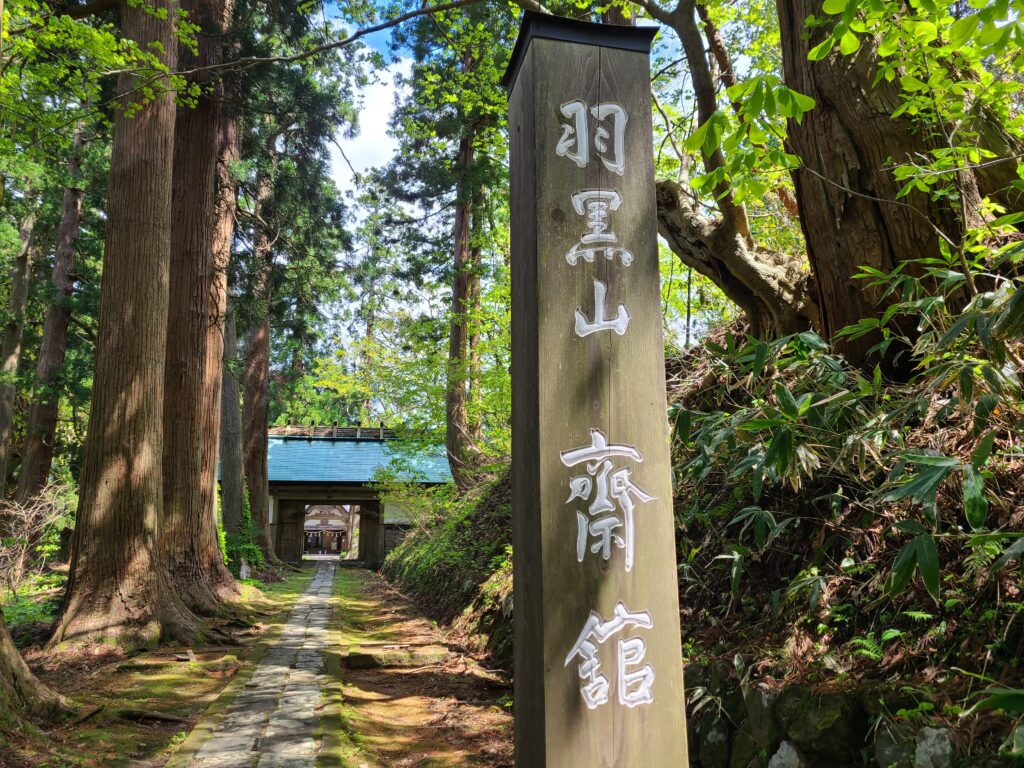
22. A little further, on your left: Saikan
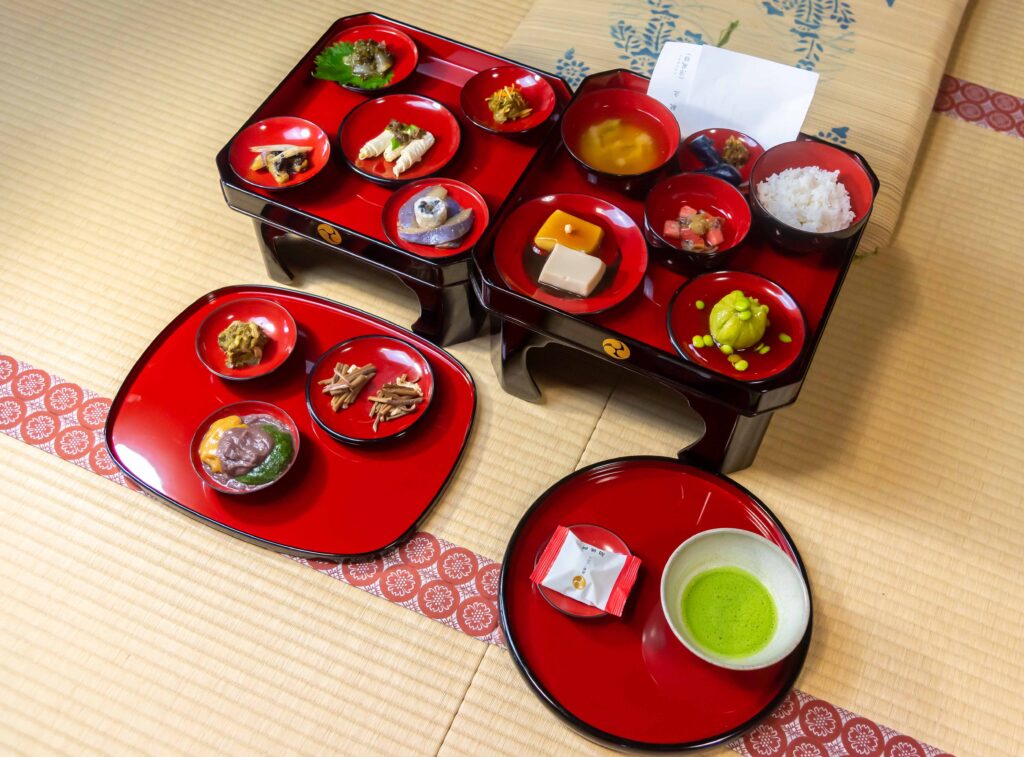
Saikan can serve shojin-ryori for lunch (on reservation) and also proposes lodging for the night.
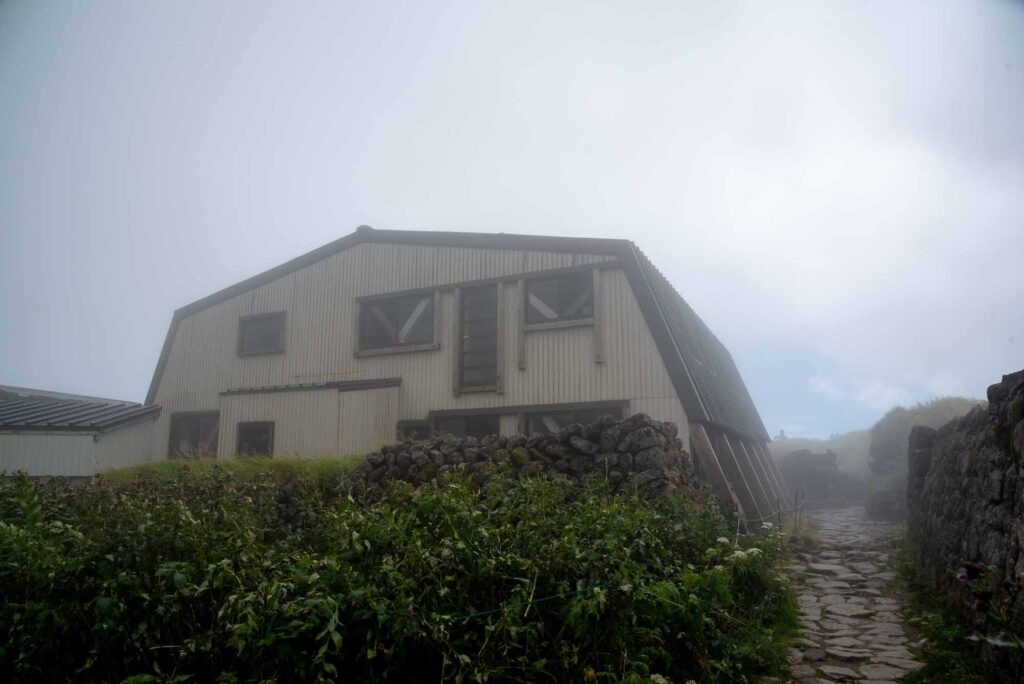
23. Saikan’s entrance
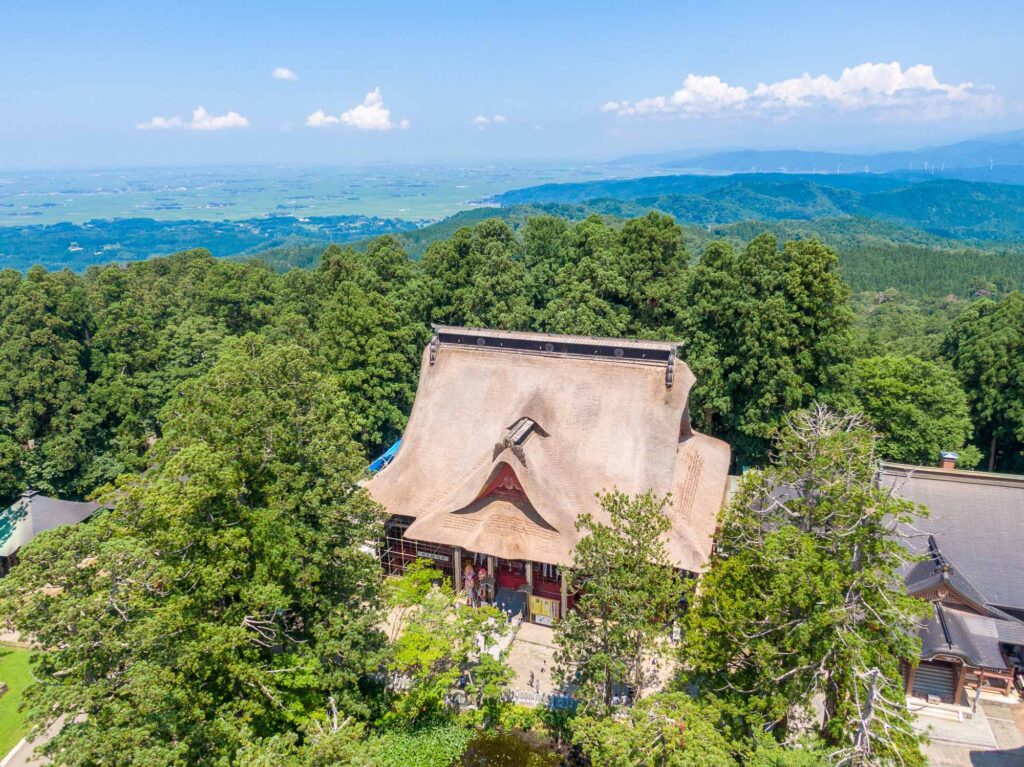
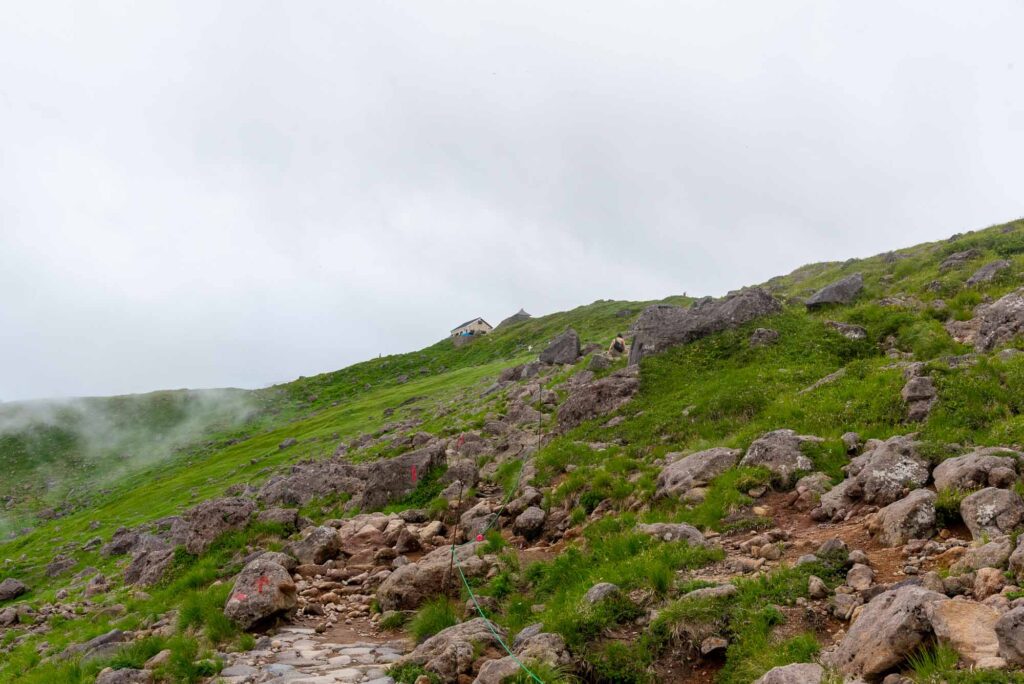
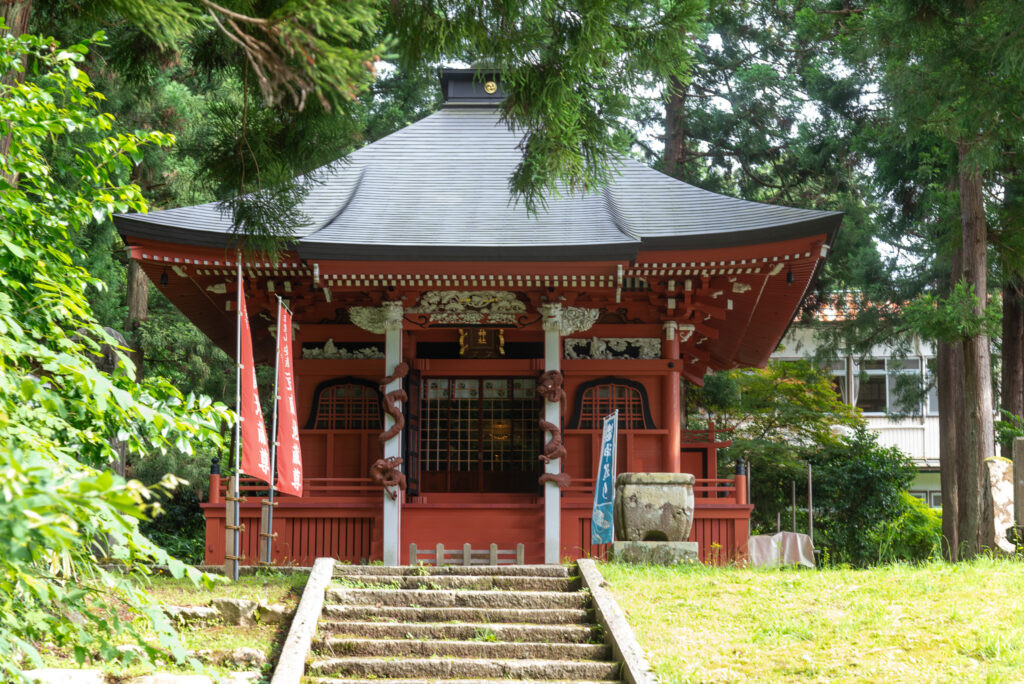
24. A little further, the top of Mt. Haguro
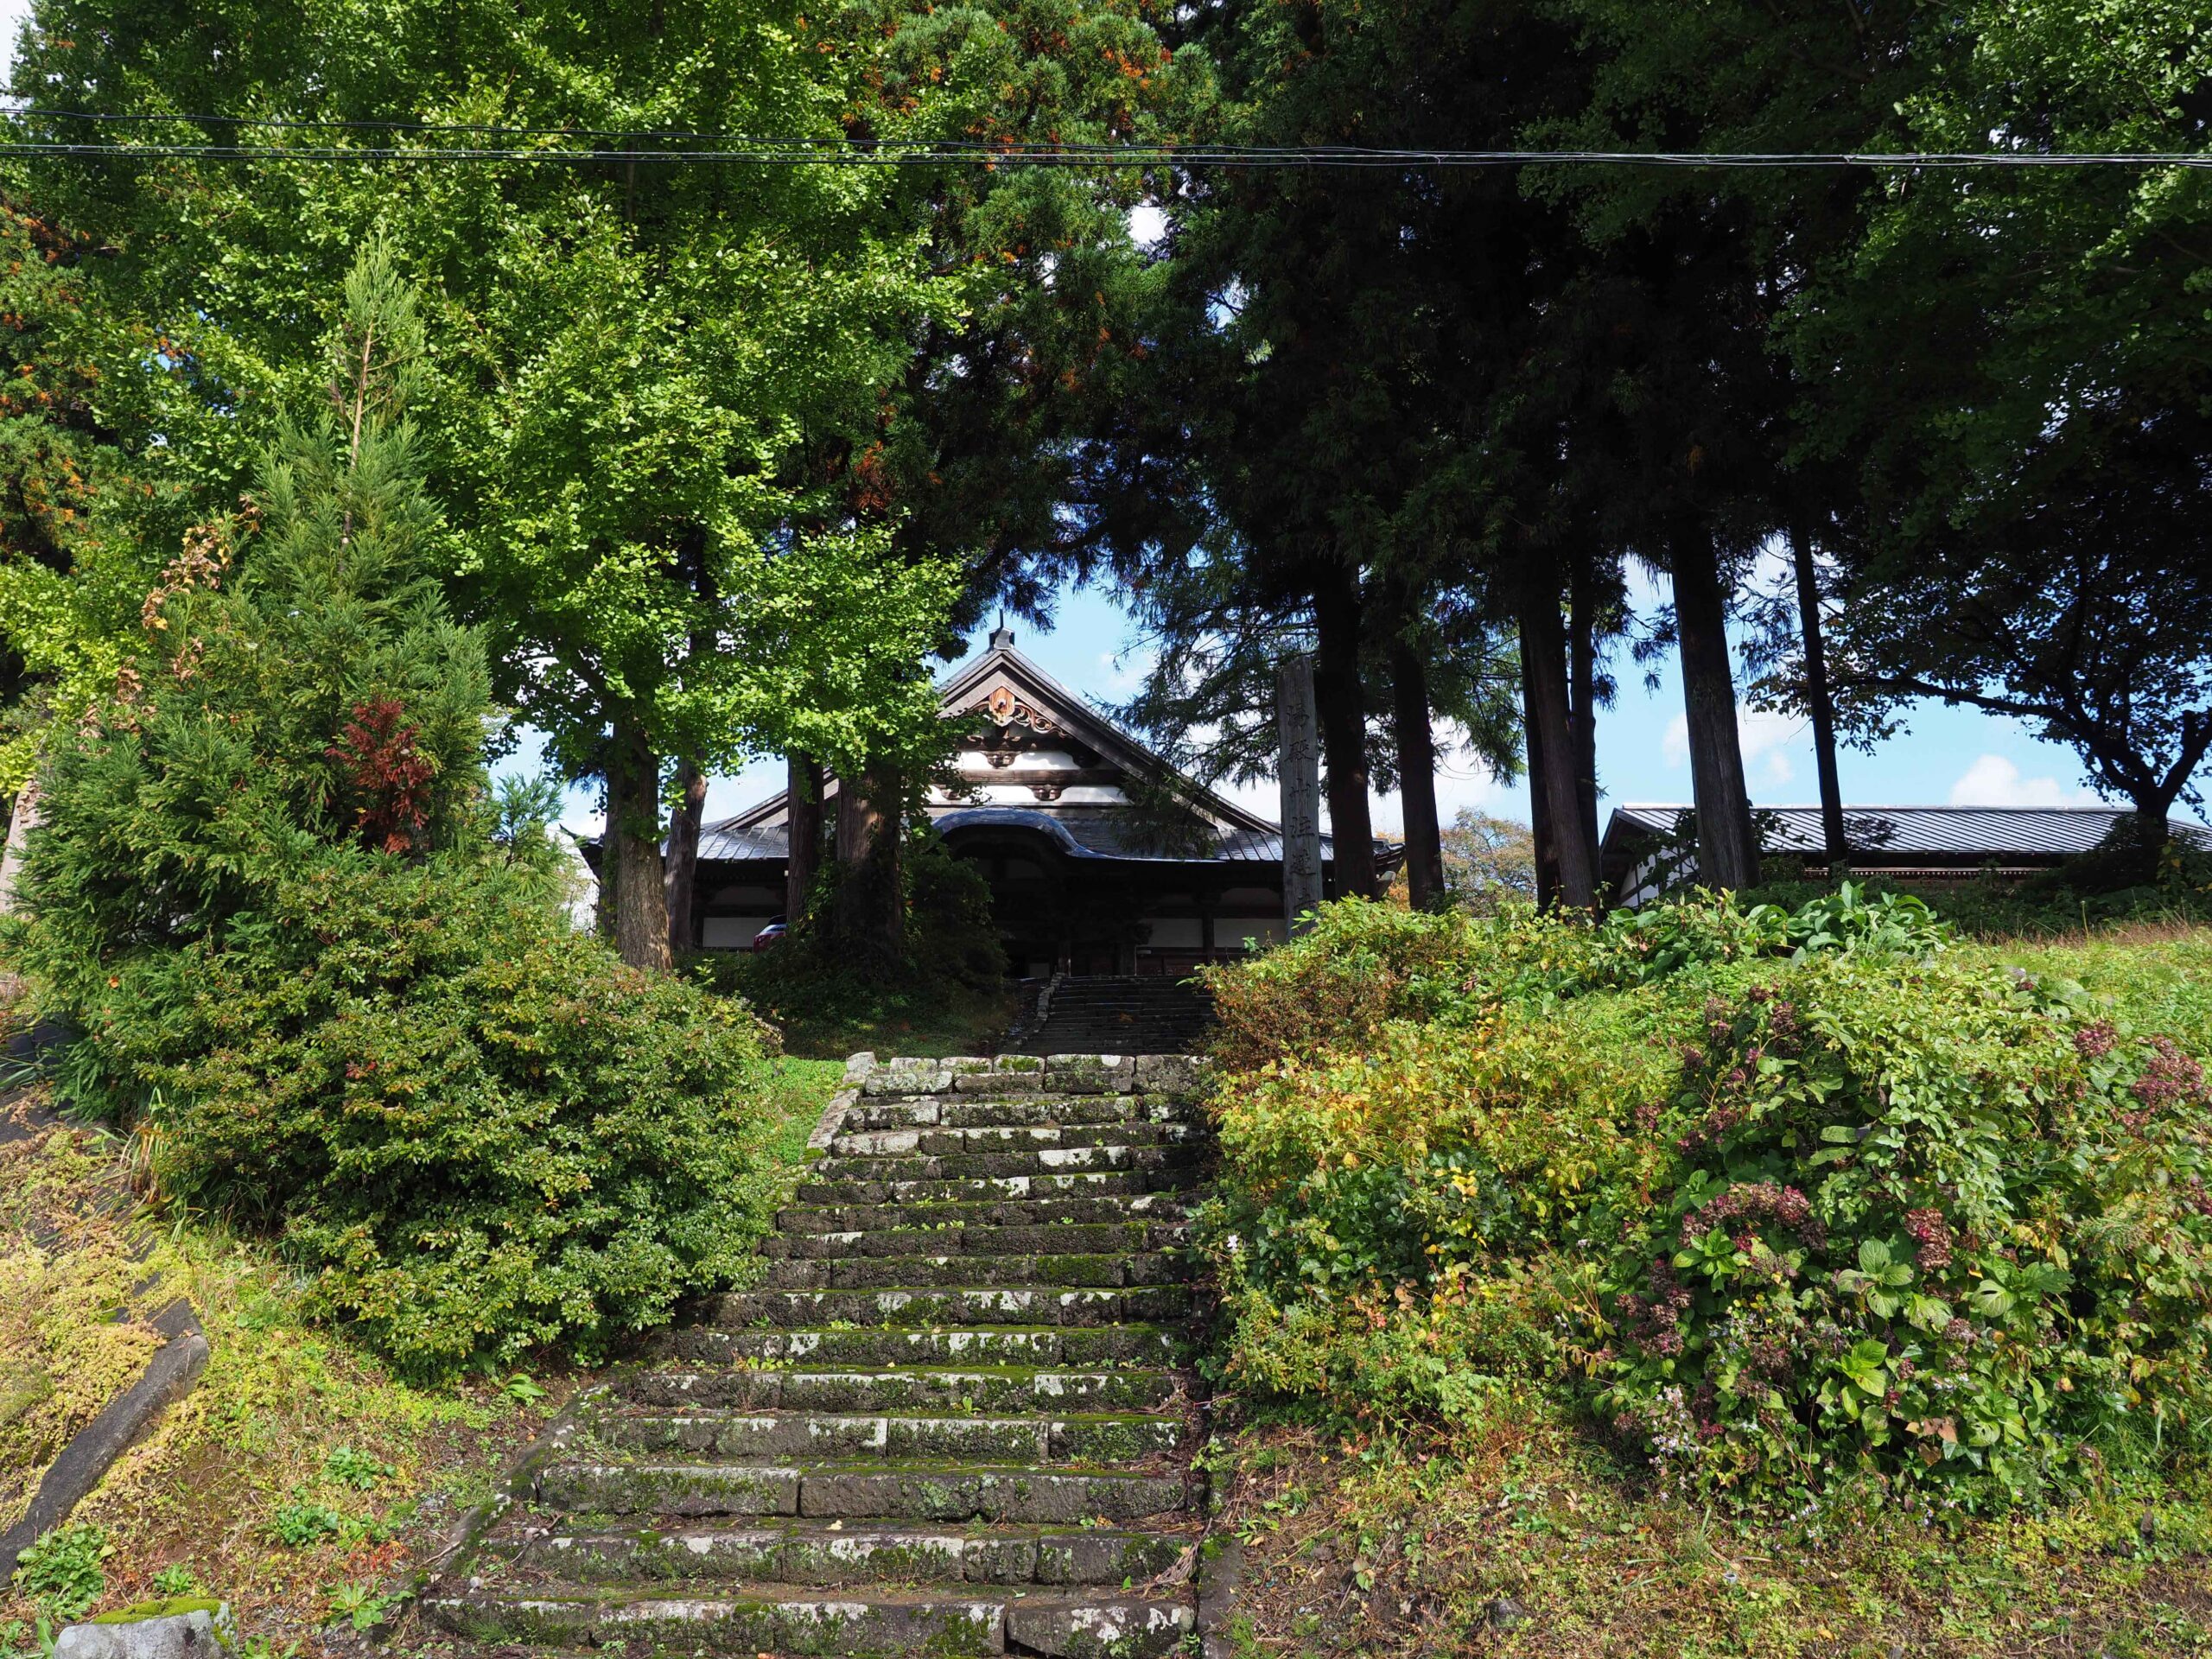
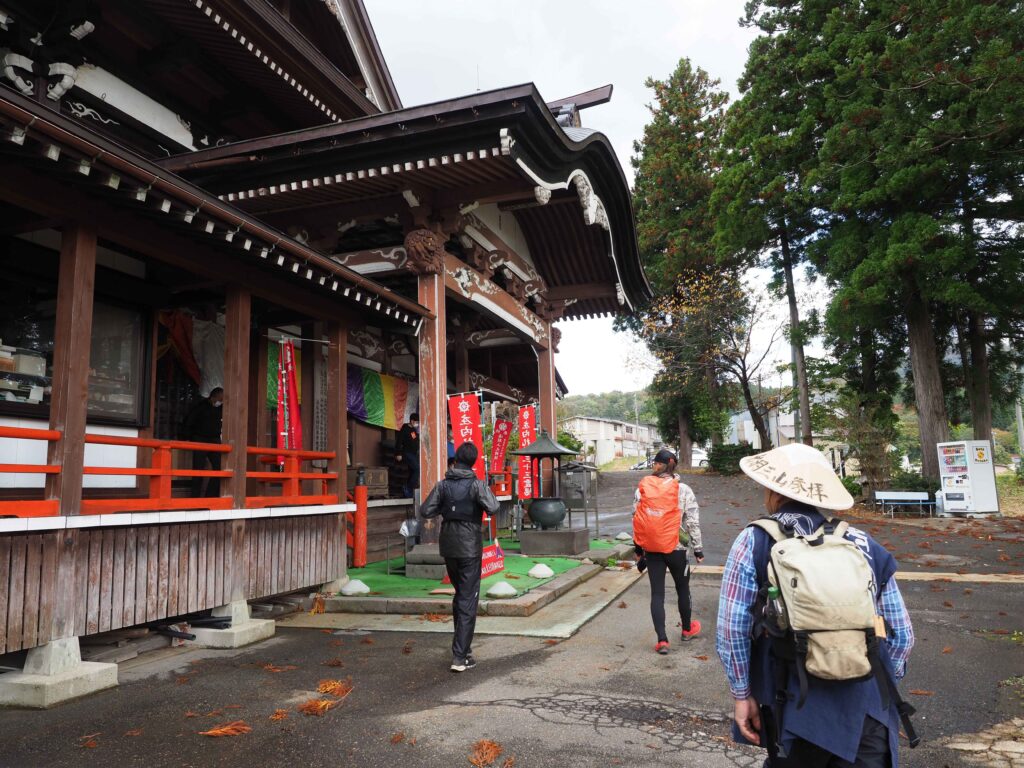
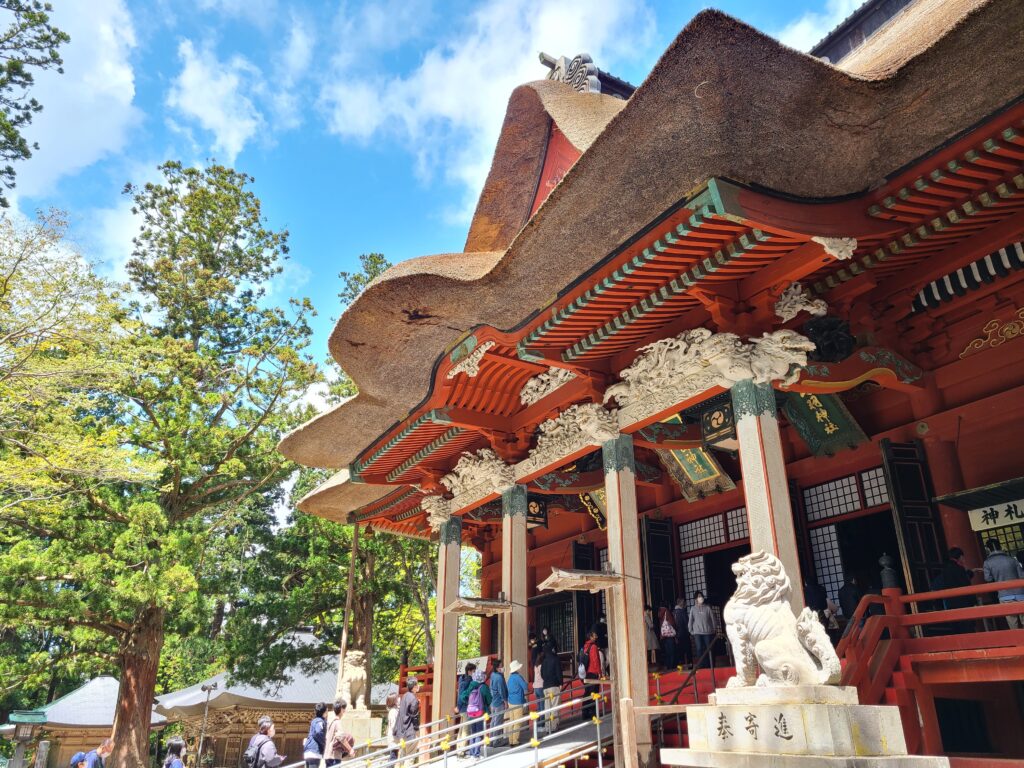
When you have arrived to the big thatched-roof shrine (Sanjingosaiden), your hike has ended. Otsukaresama deshita! お疲れ様でした! (“congratulations for your efforts!”)
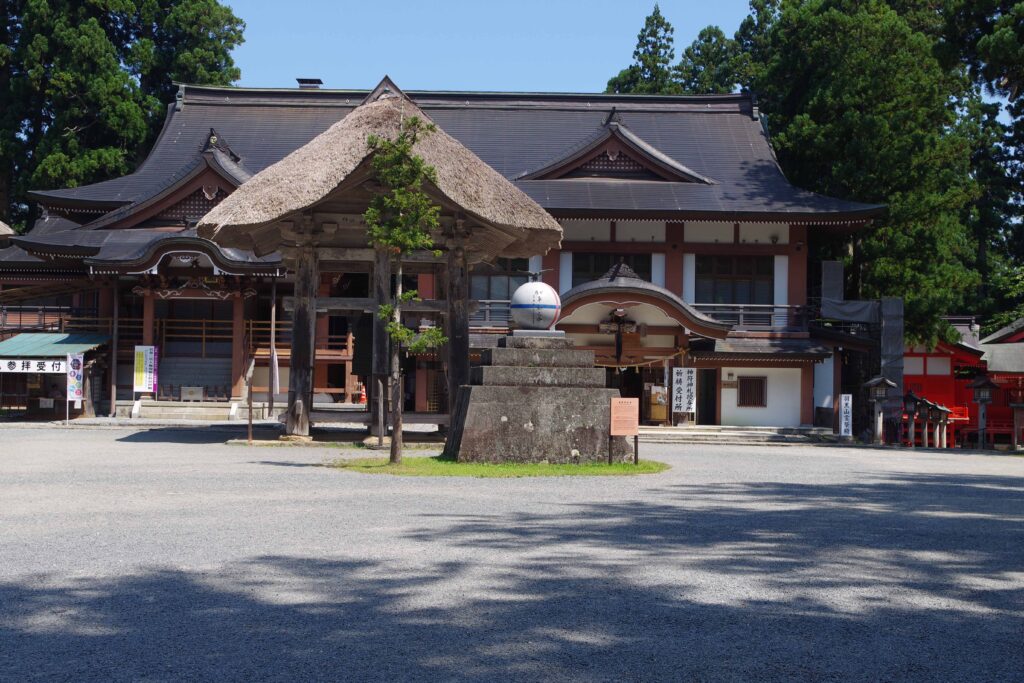
25. You can rest inside Sanshuden
Sanshuden 参集殿 is free to access for everybody who wish to rest. You can find drinks, amulets and a museum (free) inside.
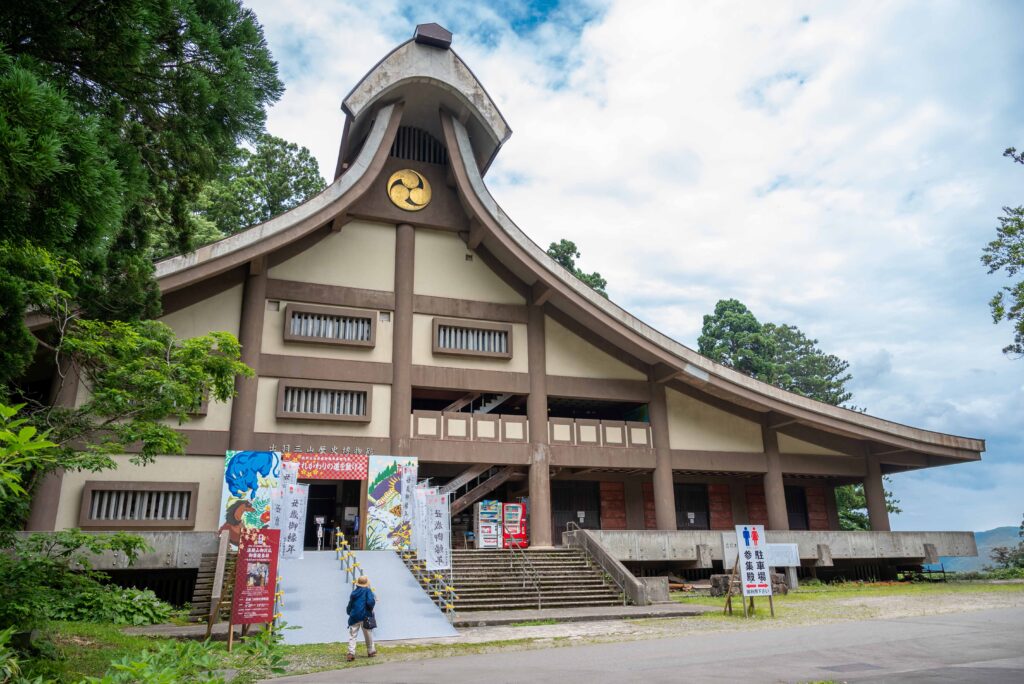
26. If you continue straight: the Dewa Sanzan Museum
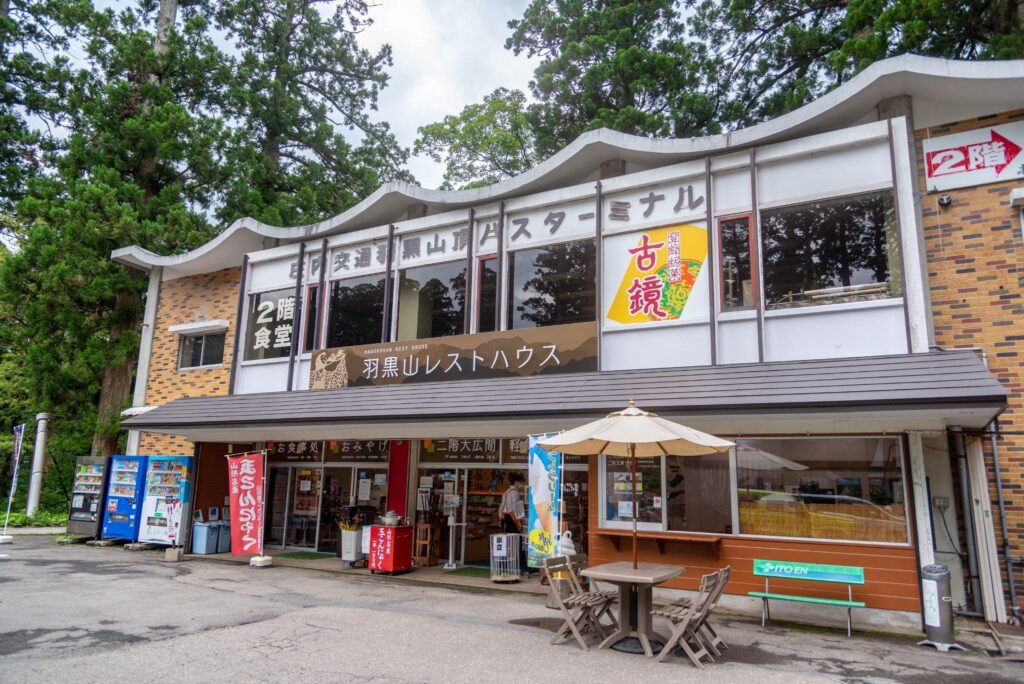
Further this point, you will arrive at Hagurosan Sancho’s parking lot, where you will also find food stands, souvenir shops and toilets.
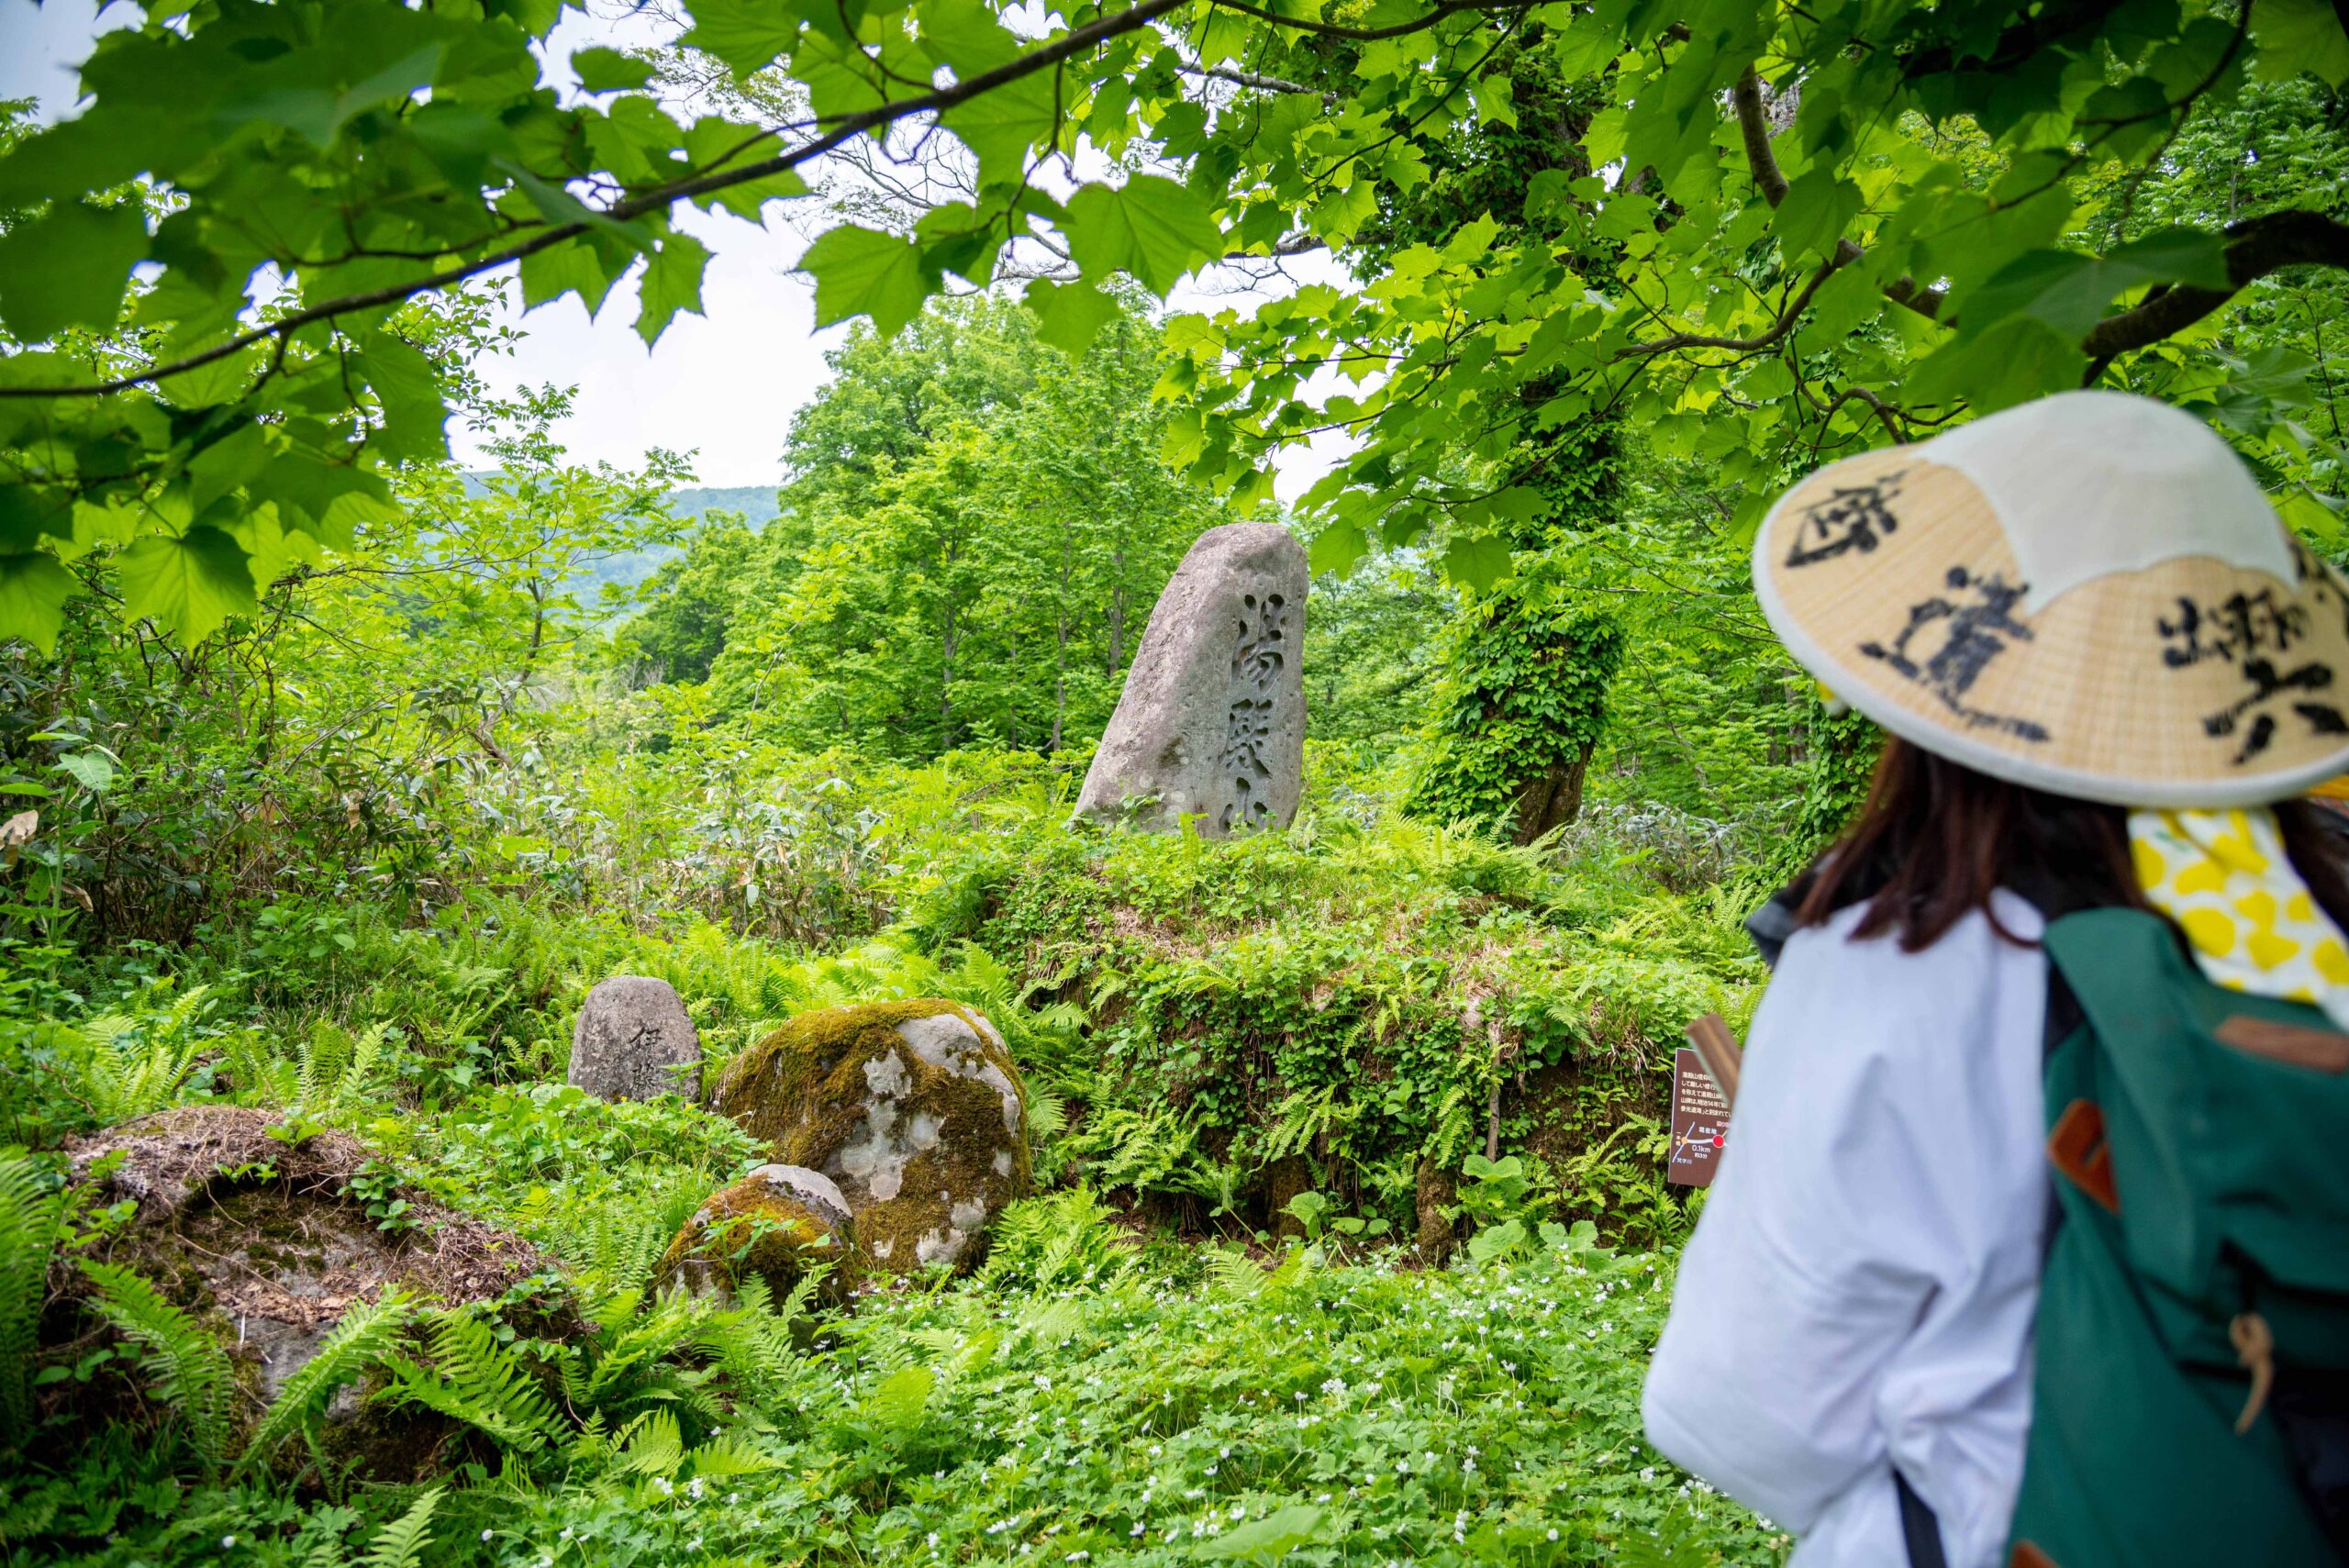
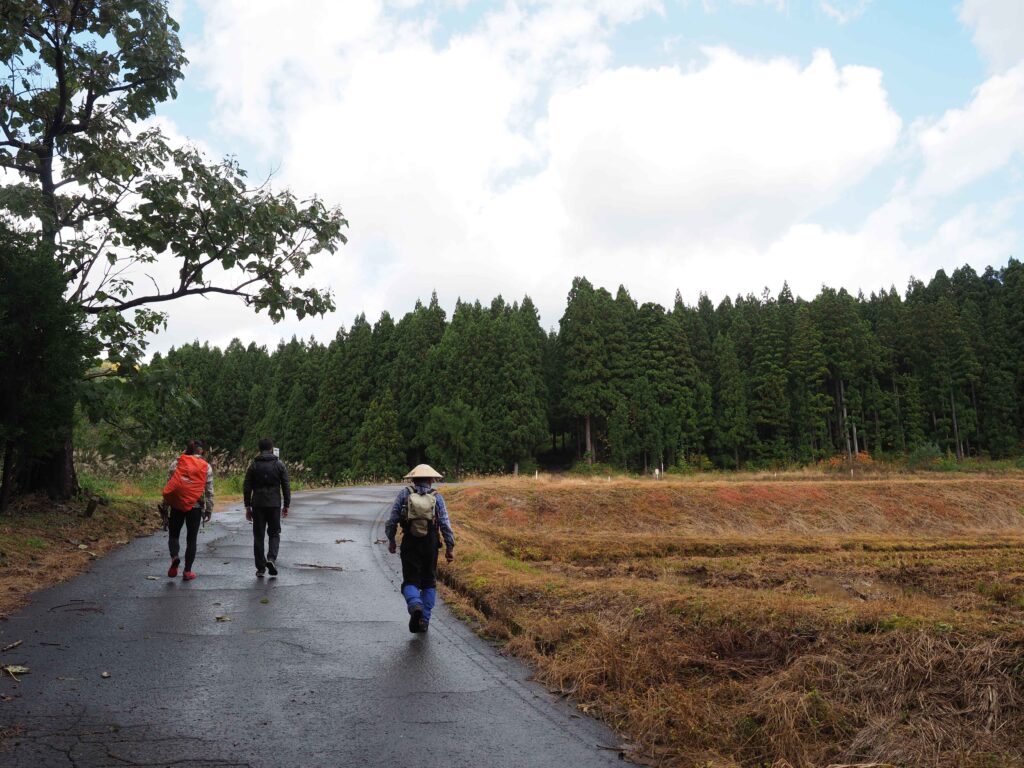
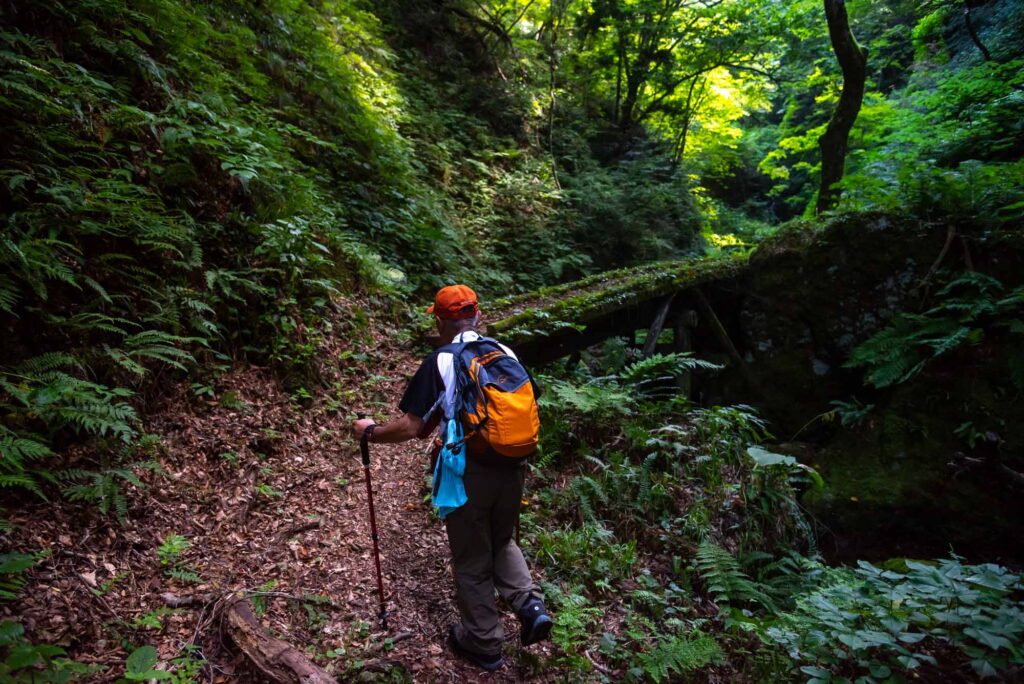
Rokujurigoe-Kaido: From the Nanatsu falls to Yudono
The final step before reaching Mt. Haguro through the Rokujurigoe-Kaido pilgrim trail.
● Water ● Hiking shoes ● Rainwear ● Sun hat ● Hiking sticks ● Food or snacks
Difficulty levels have been designed for people who have a PAI (Personal Activity Intelligence) score inferior or equal to 60. Experienced hikers or persons with a PAI above 100 can withdraw two cases to know the average difficulty for their fitness level. Example: Trails noted “Hard for beginners” correspond to “average” trails for experienced hikers or people with a PAI above 100
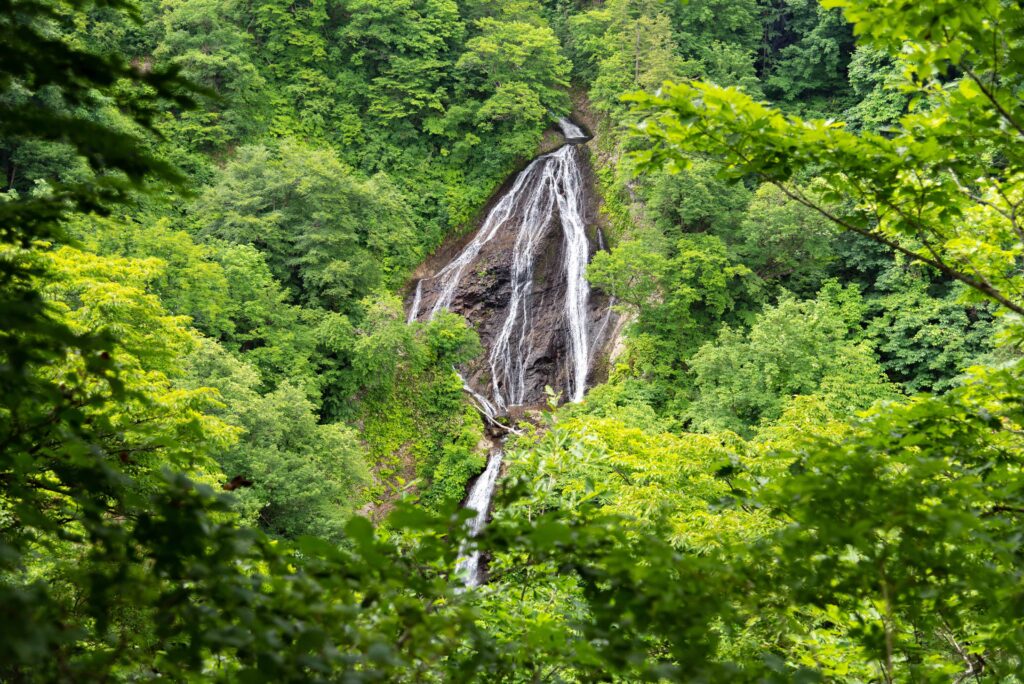
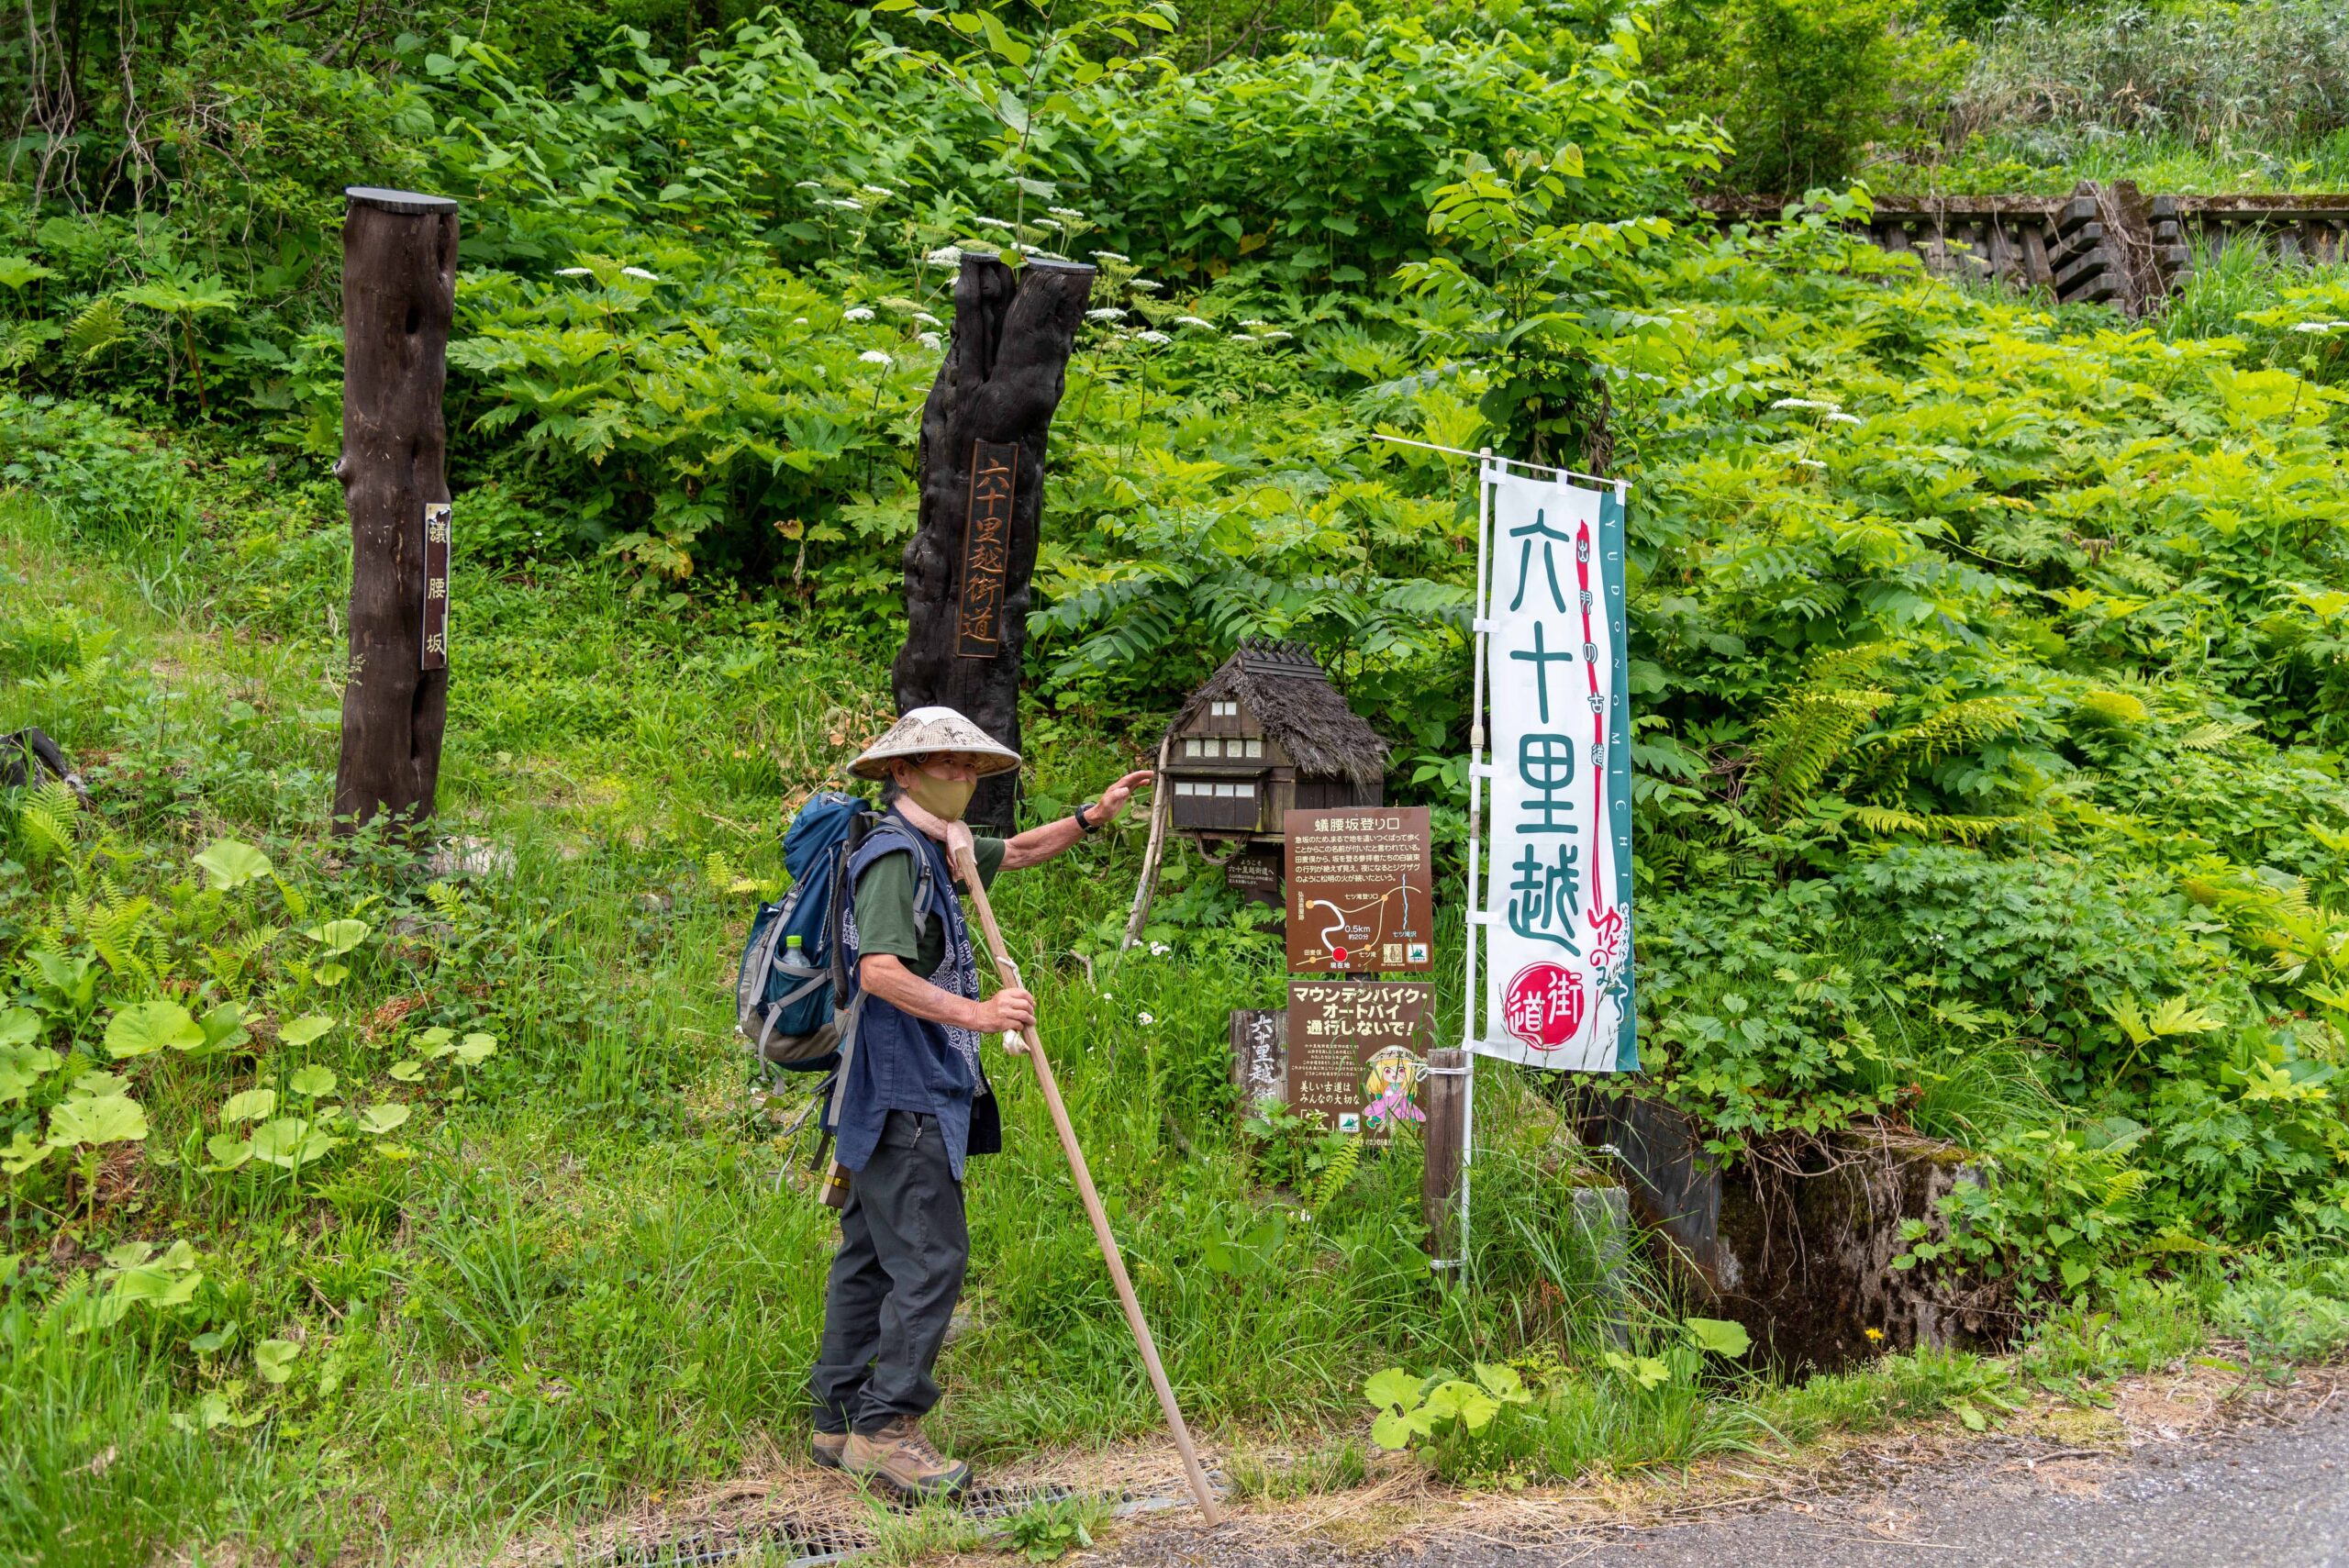
1. Locate the Nanatsu Falls
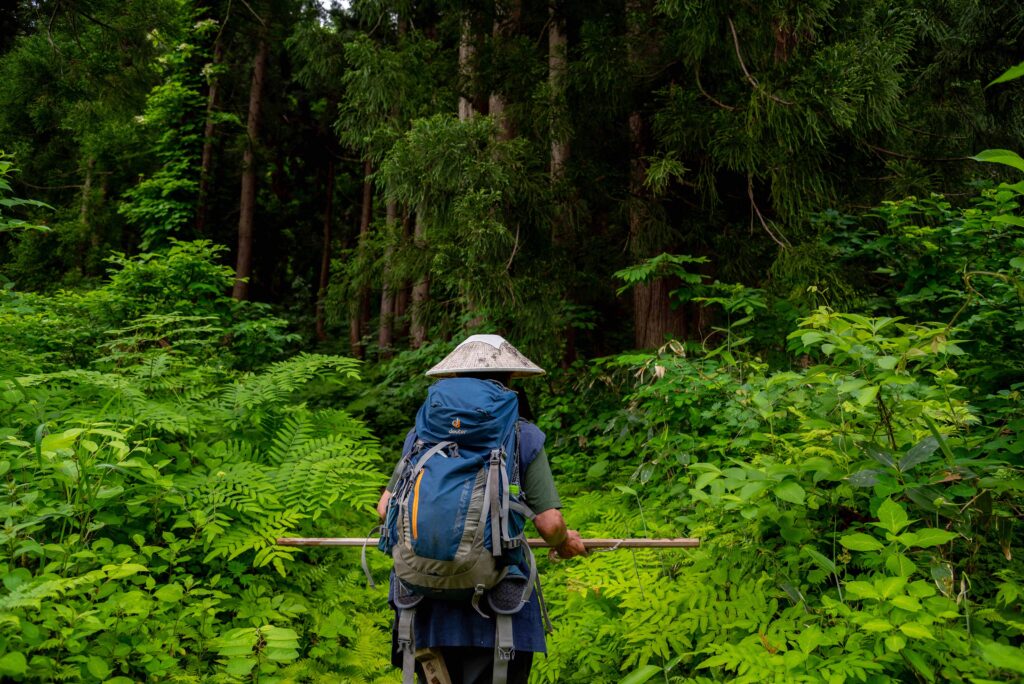
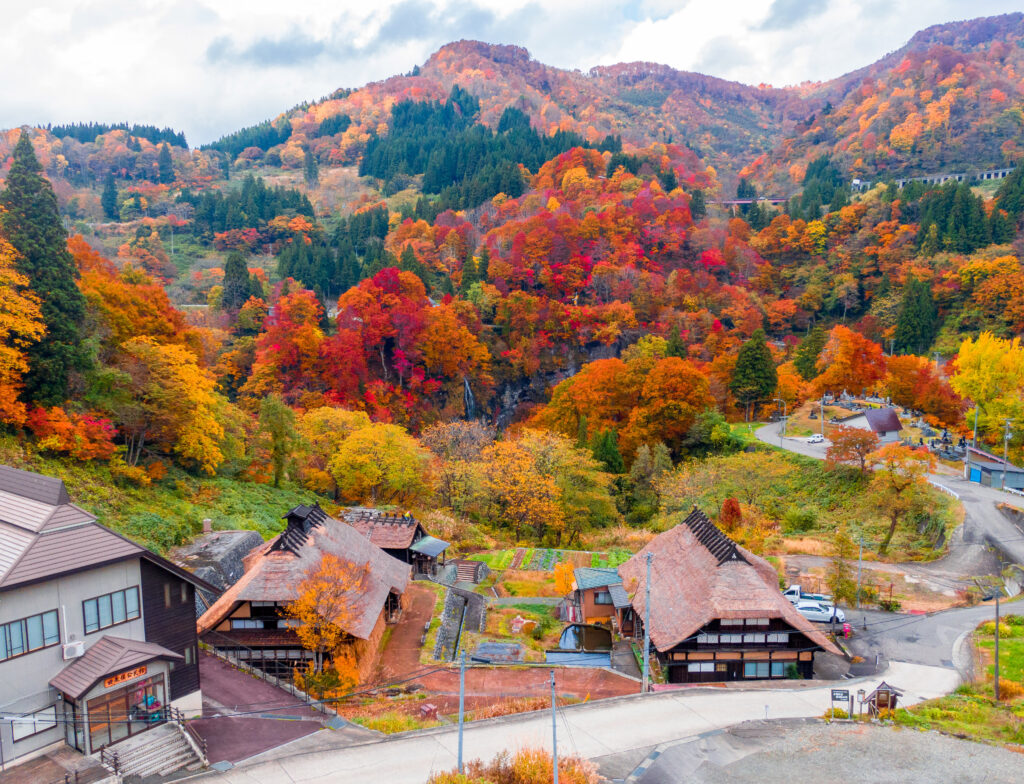
The Nanatsu Falls are located up a small village called Tamugimata 田麦俣. You can recognize Tamugimata by its thatched-roof houses like the Tasôminka 多層民家. If you come by bus, get off the bus at Tamugimata bus stop 田麦俣バス停. Walk up the waterfalls for 15 minutes from there.
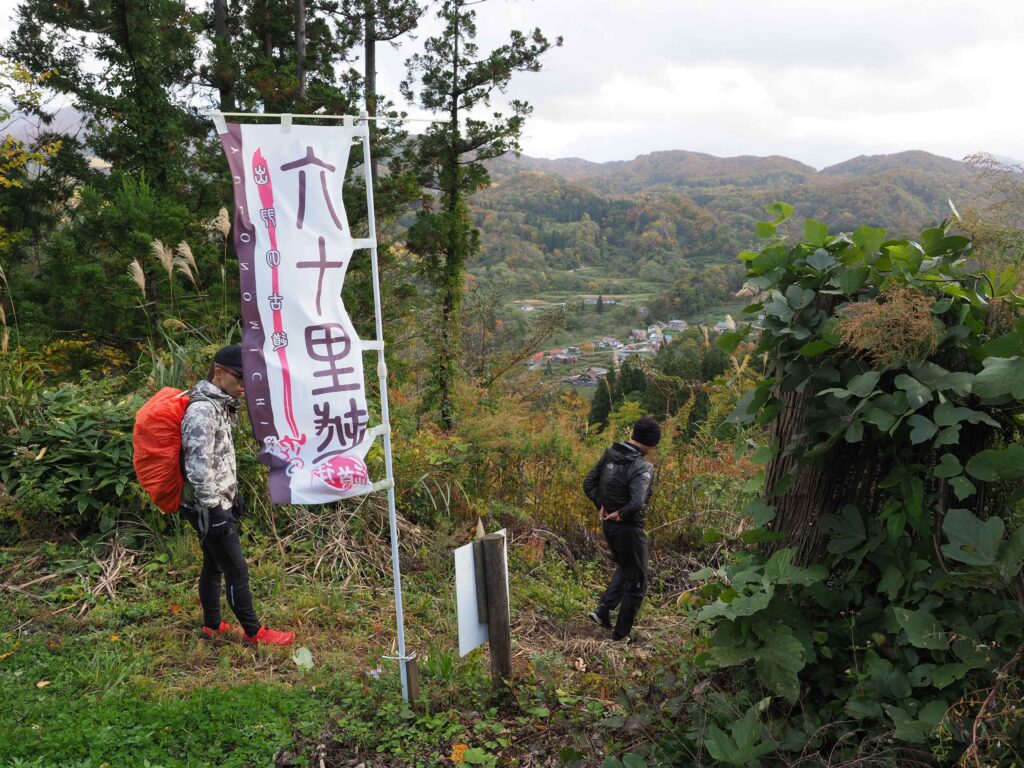
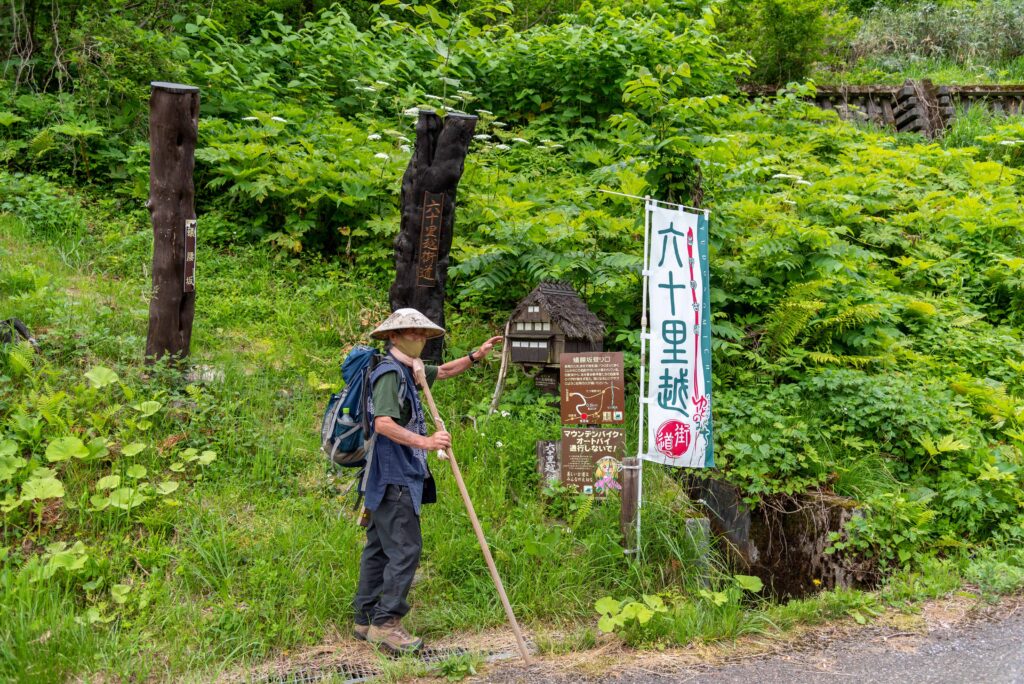
You can recognize the start of the trial at the flag floating around. Don’t forget to write your name in the notebook inside the little wooden house. It will help us rescue you if needed. You need a bear bell from here.
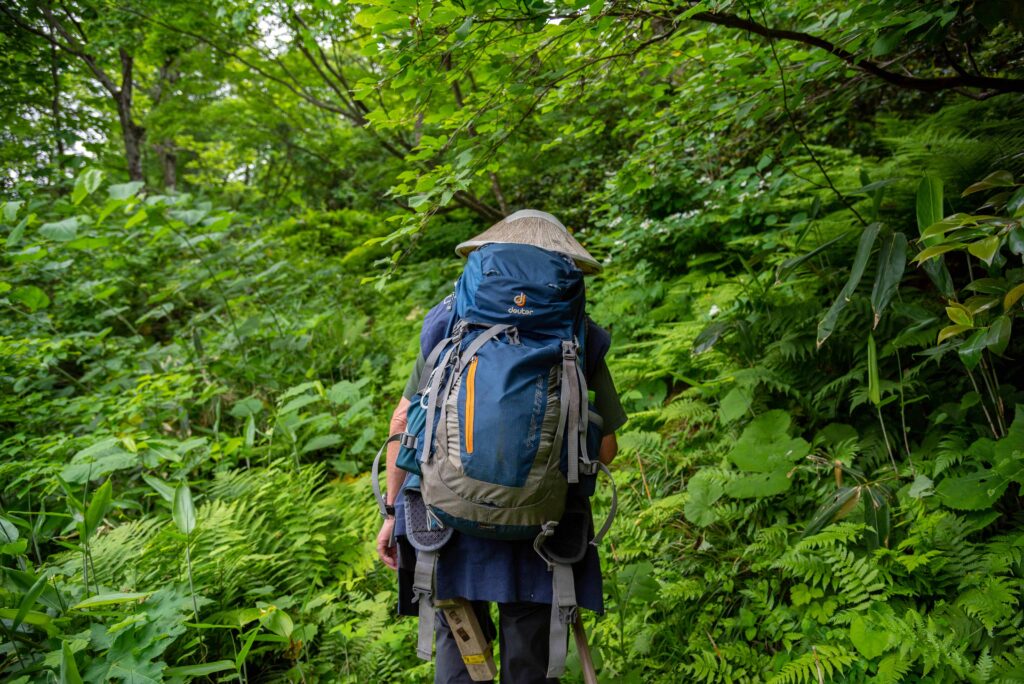
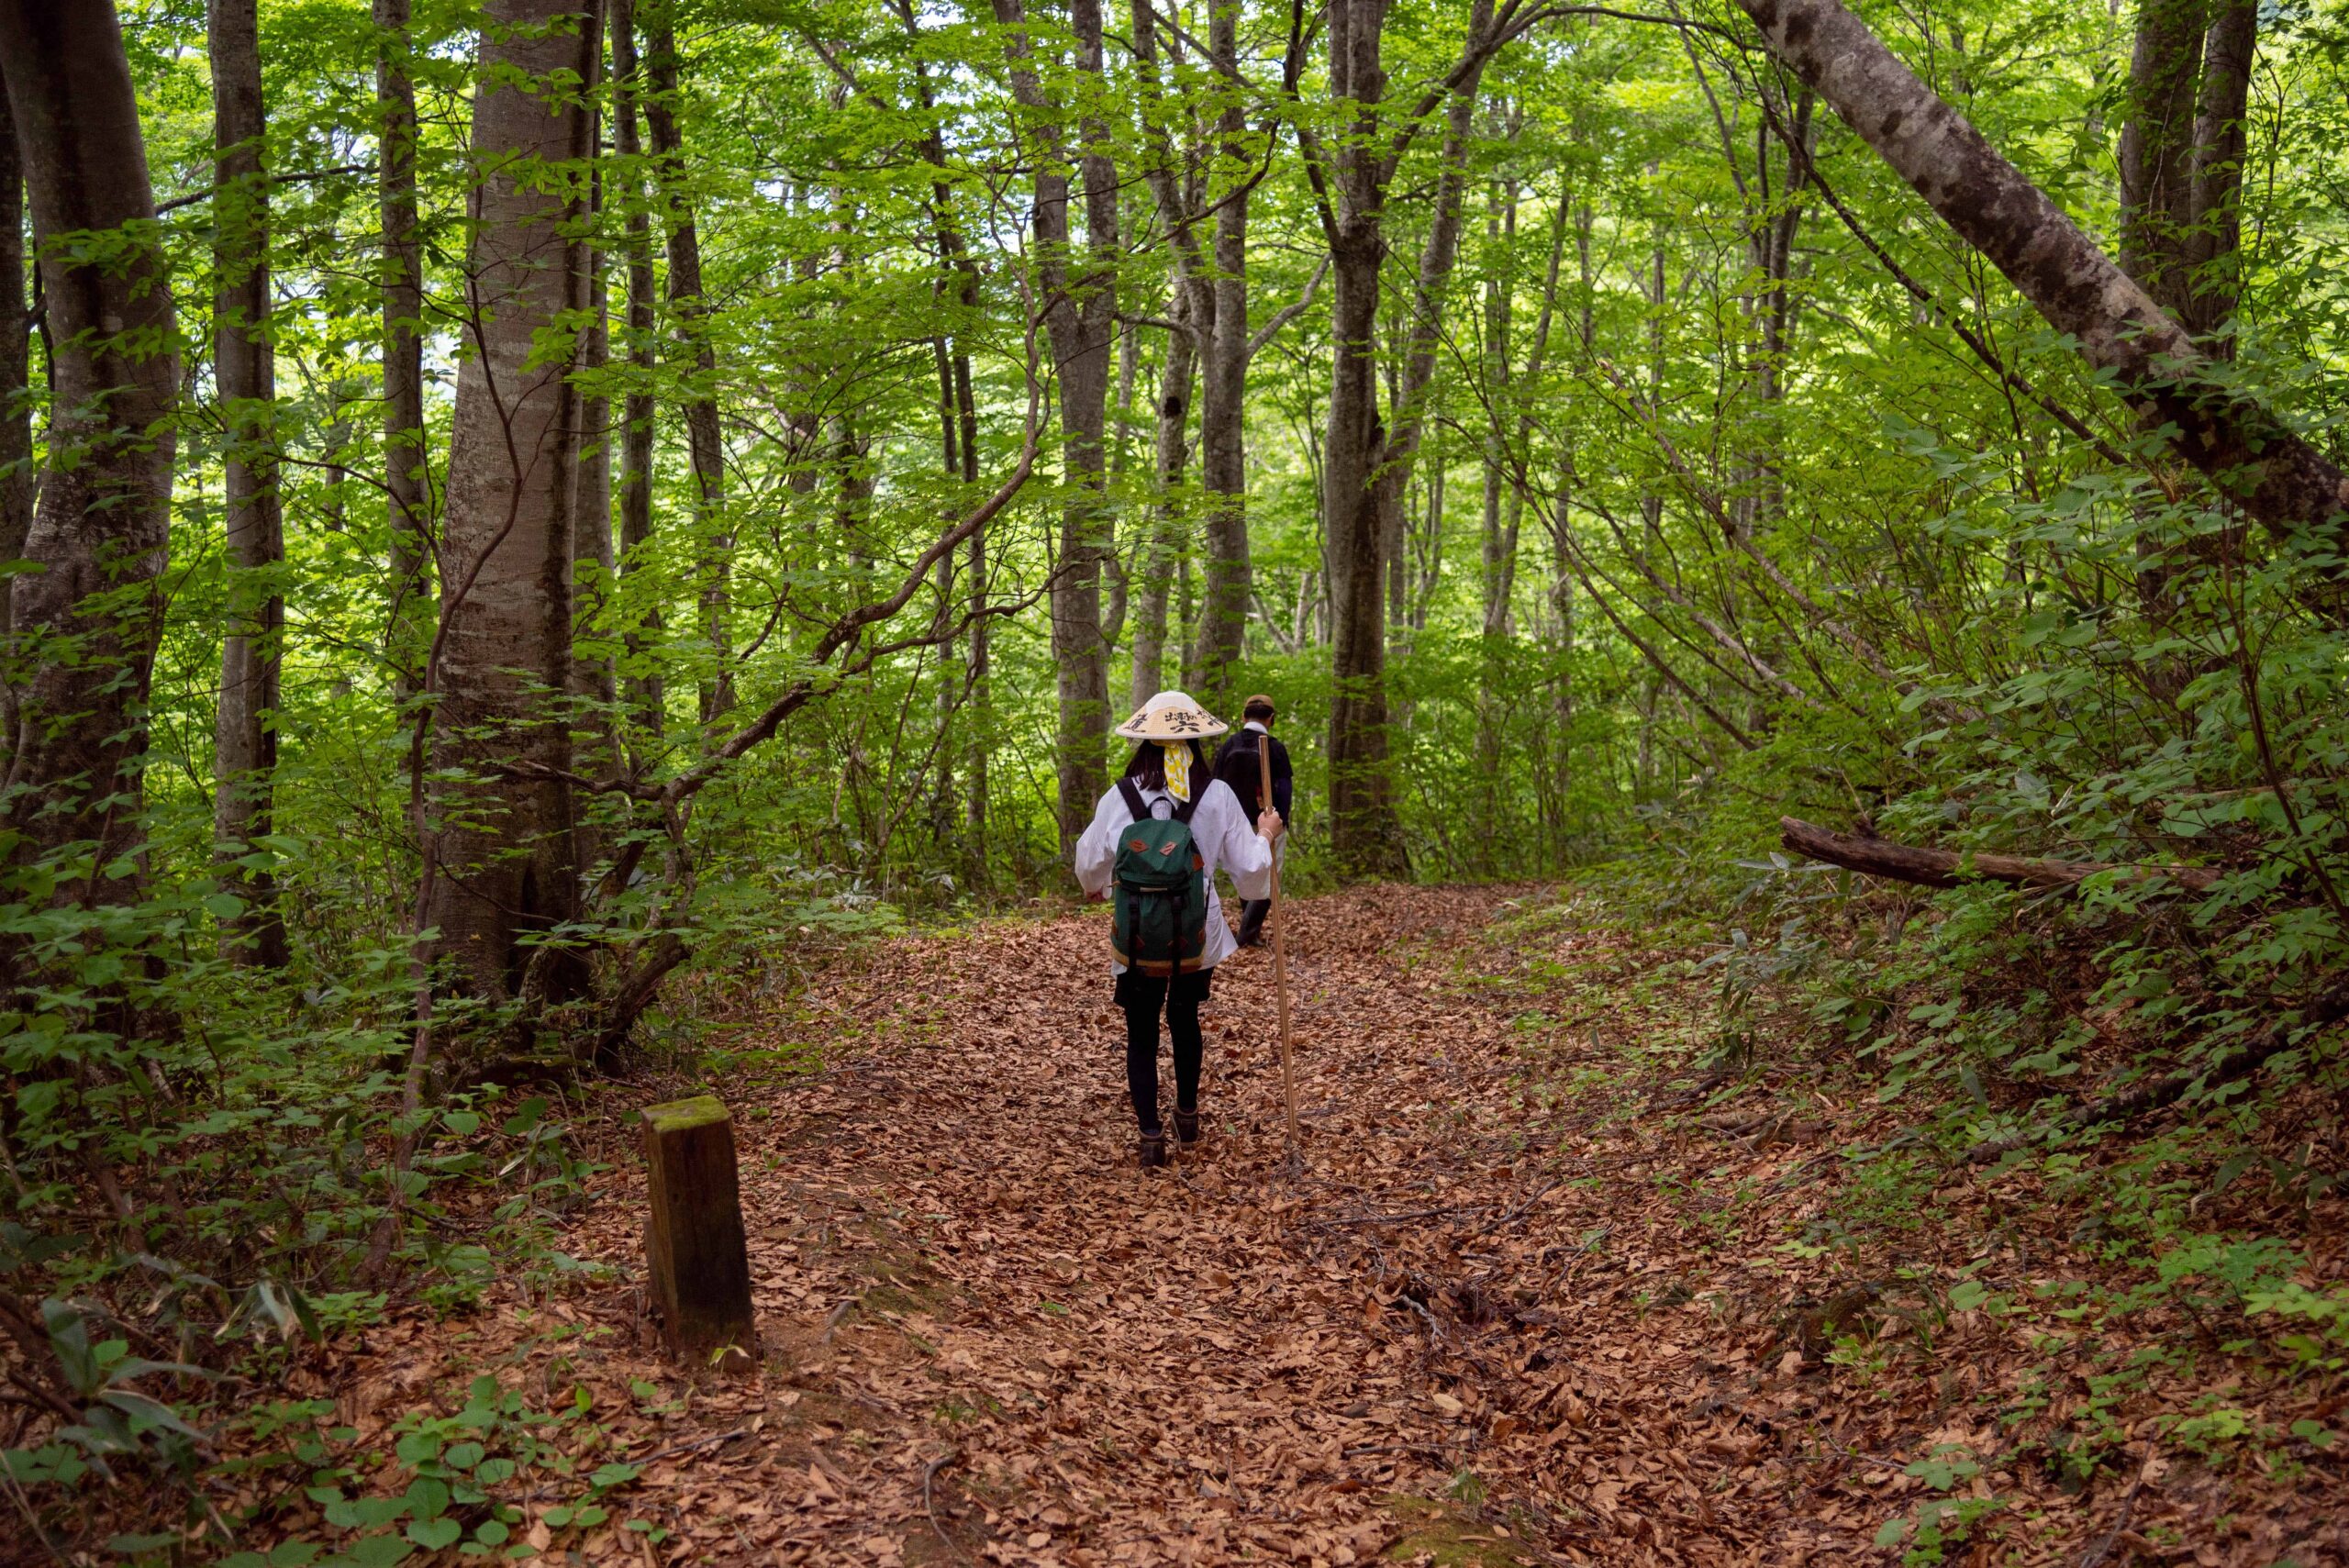
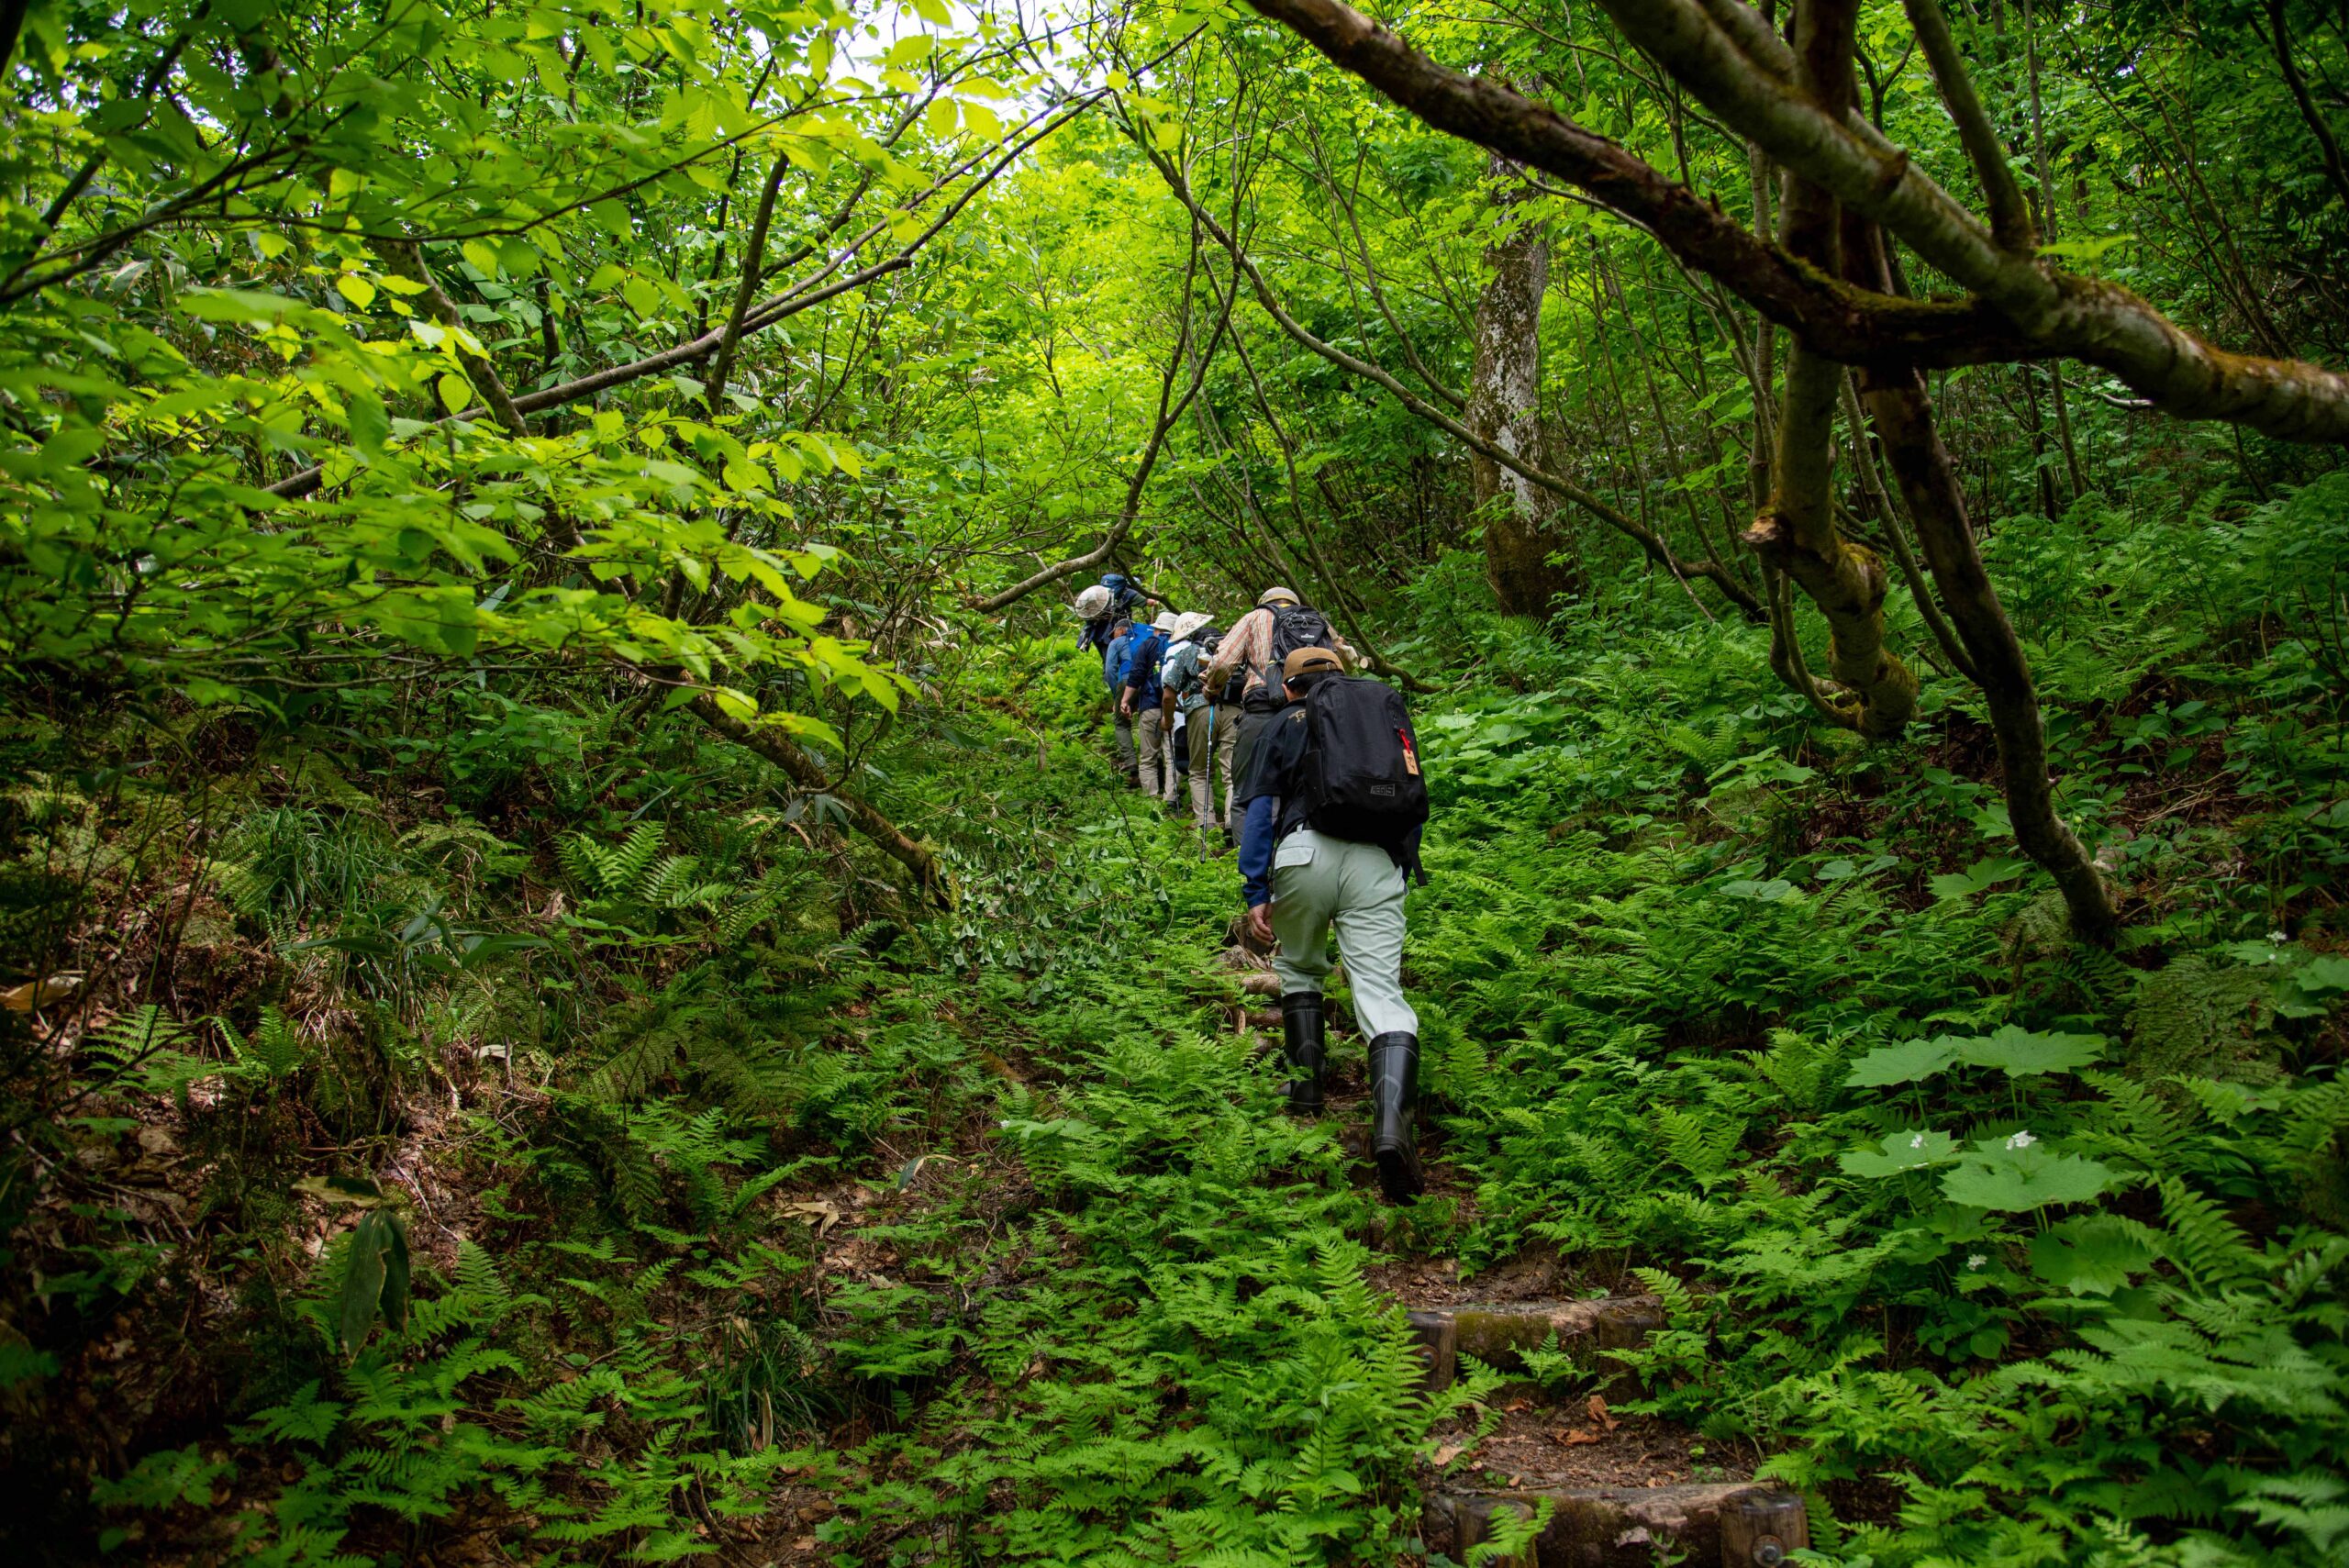
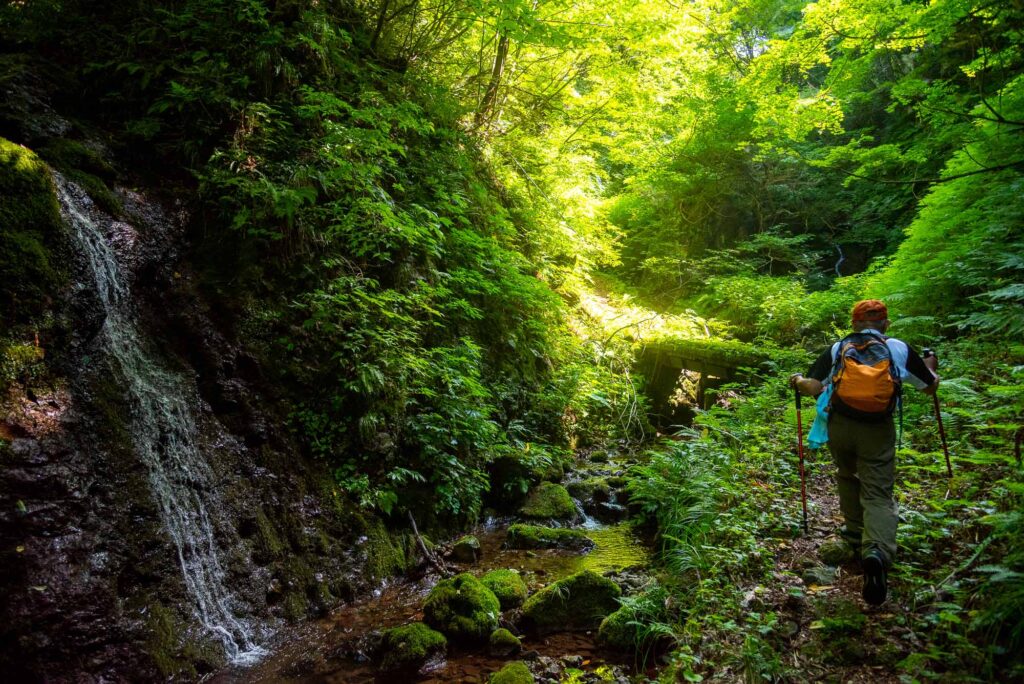
3. Enter the wild forest
4. The forest continues
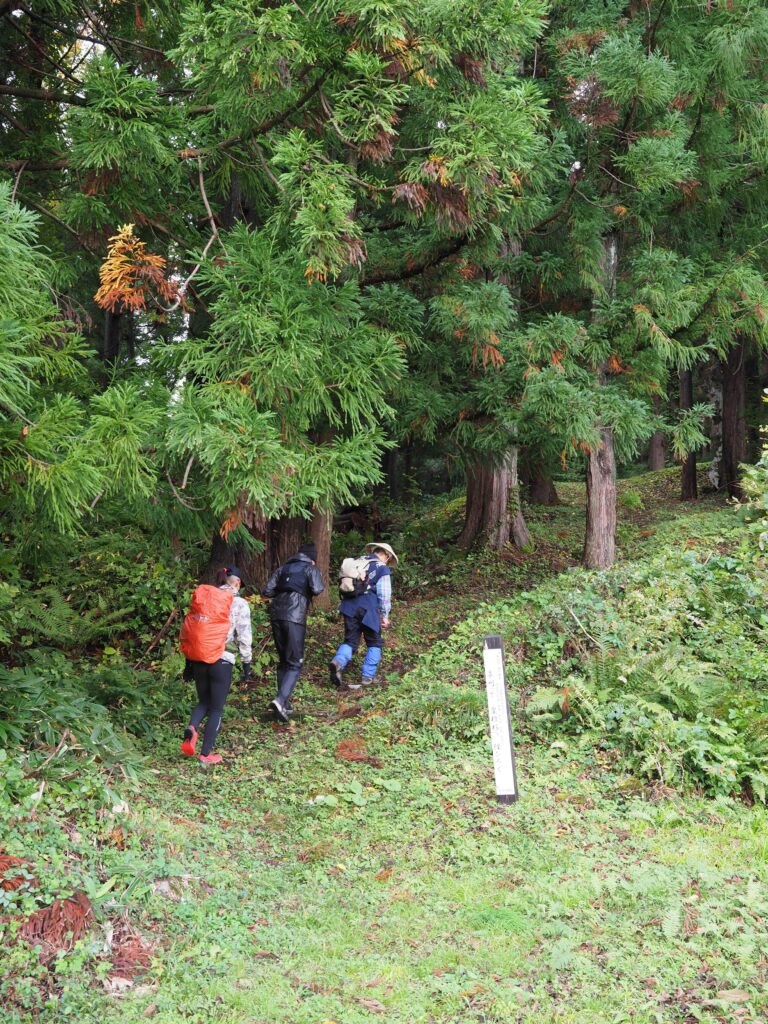
5. You enter a cedar forest
Make sure your bear bell is making enough noise before entering here.
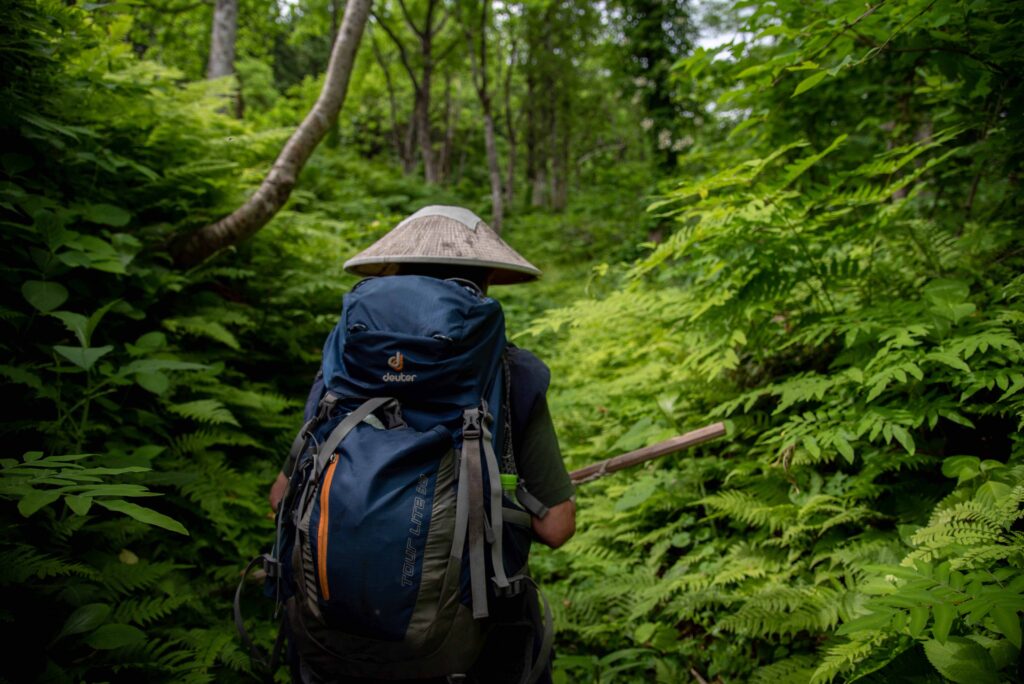
6. Follow the path in the cedar forest
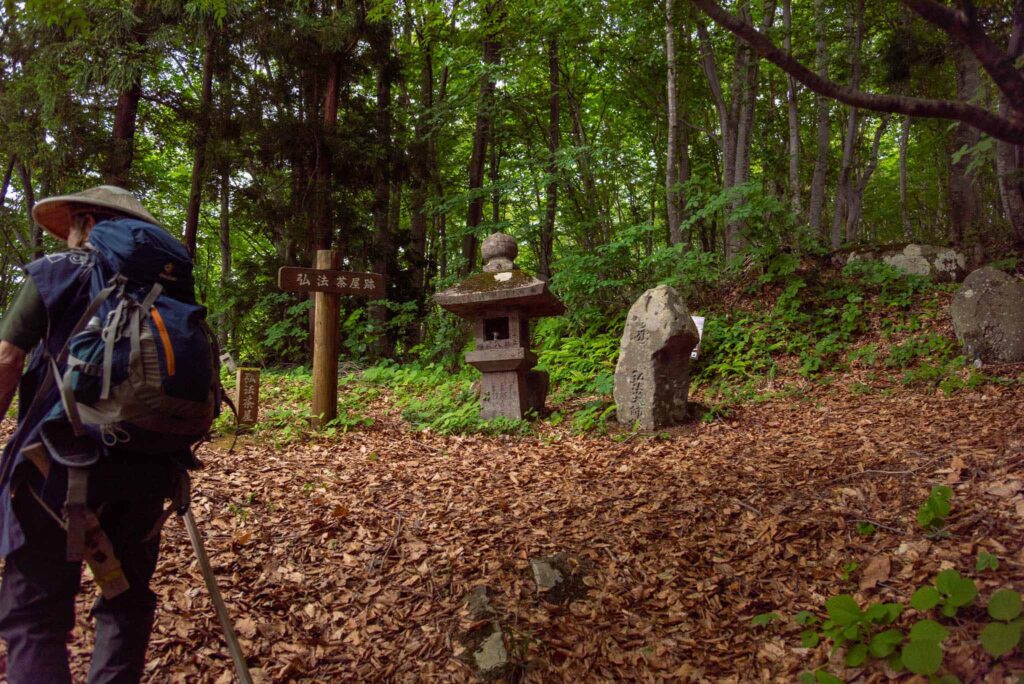
7. You arrive at the Kobo Chaya
The Kobo Chaya 弘法茶屋 are the ruins of a teahouse where Kobo Daishi (also known as Kukai), the founder of Shingon Buddhism is said to have stayed during his trip here.
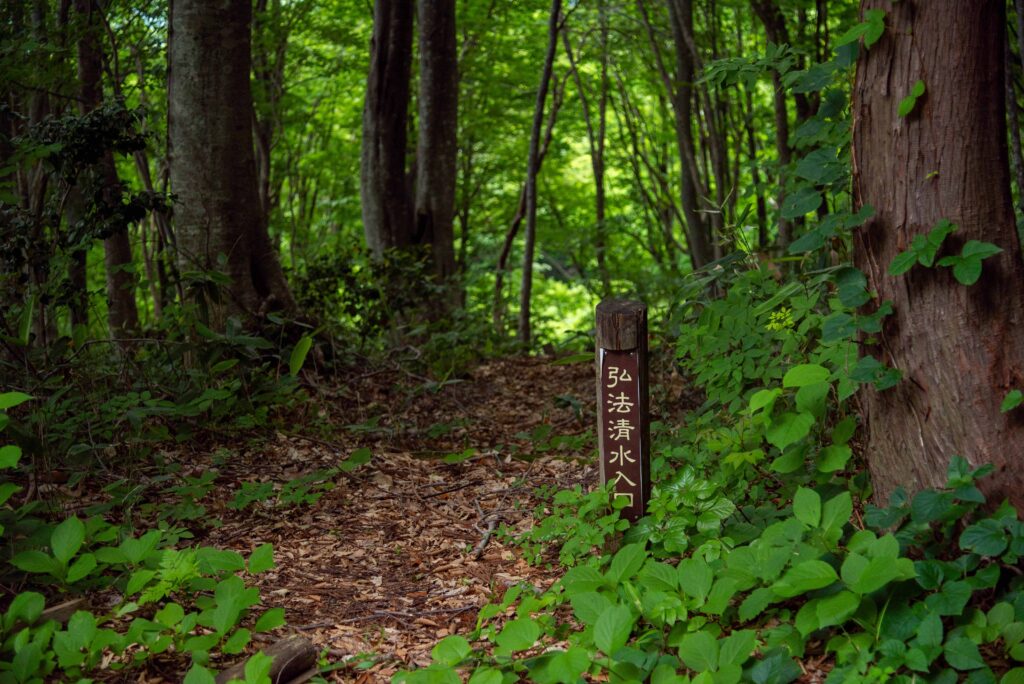
8. (Optional) Go further this point to find the Kobo Spring
Fill your water bottle here. The Kobo Spring (弘法清水) is said to have been found by Kobo Daishi himself.
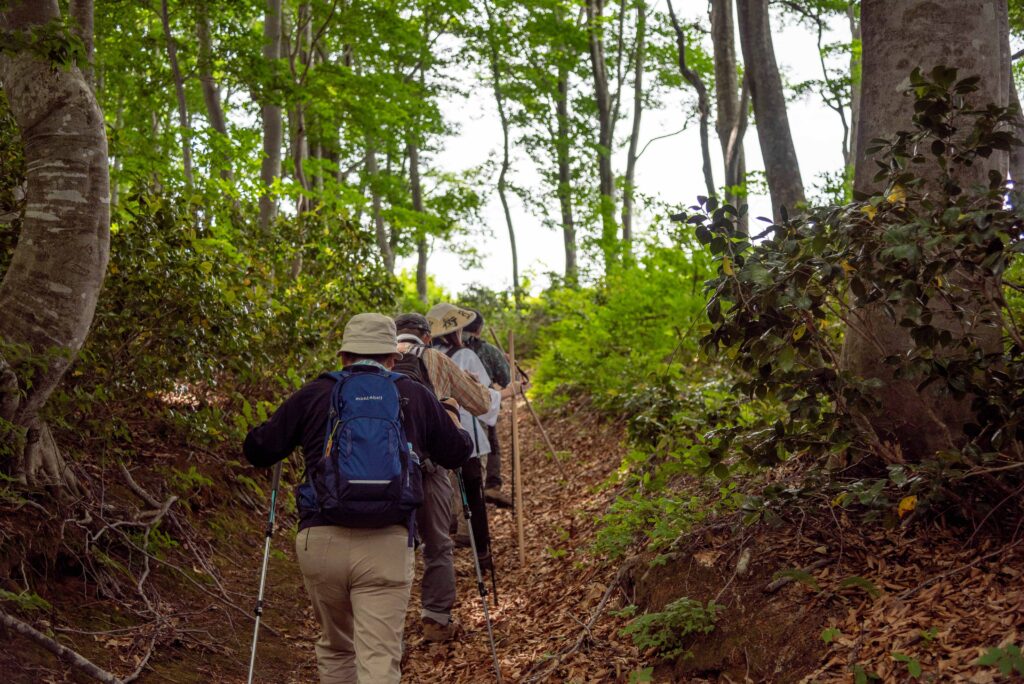
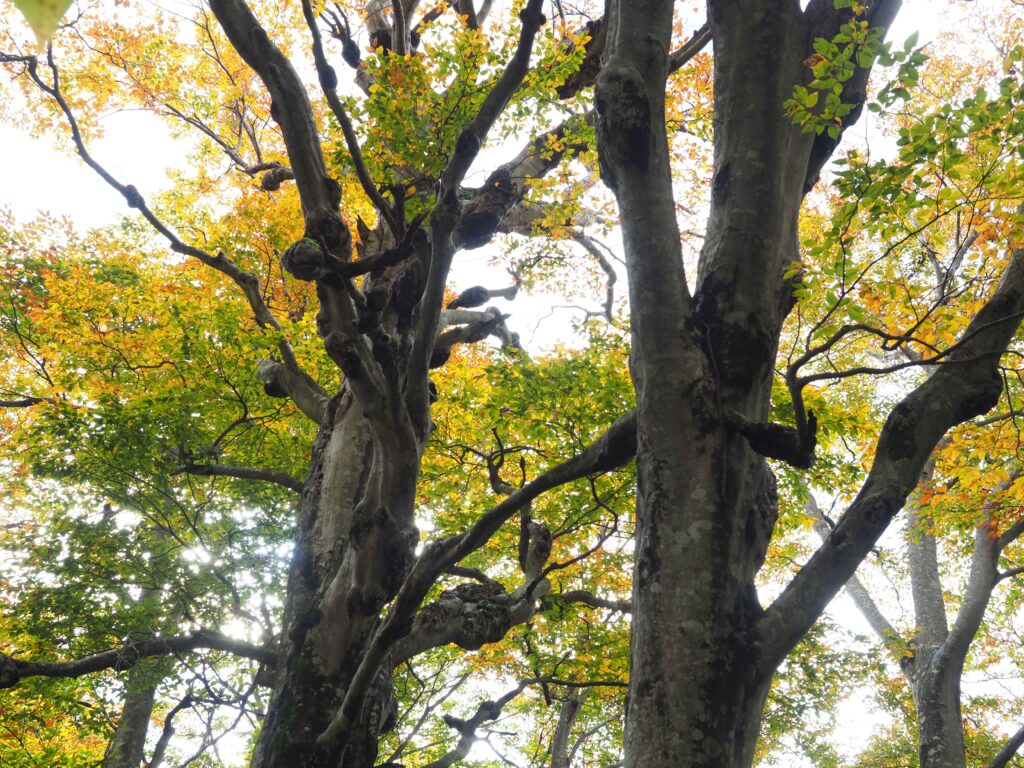
9. Follow a path to the beech forest
You leave the cedar forest to enter the beech tree forest.
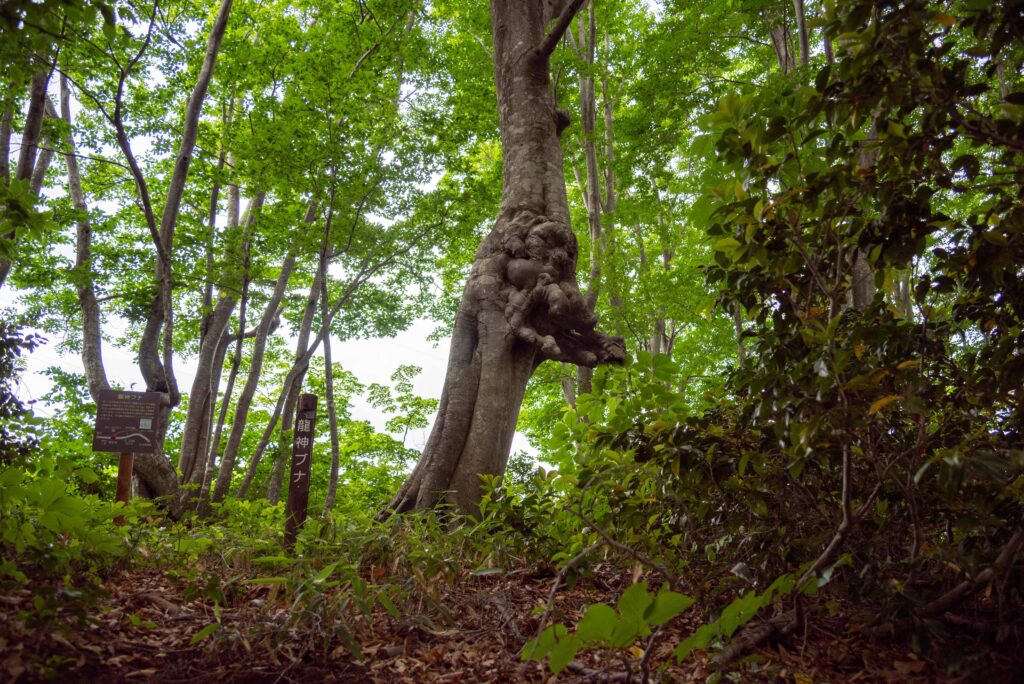
10. You spot the Dragon God Beech Tree
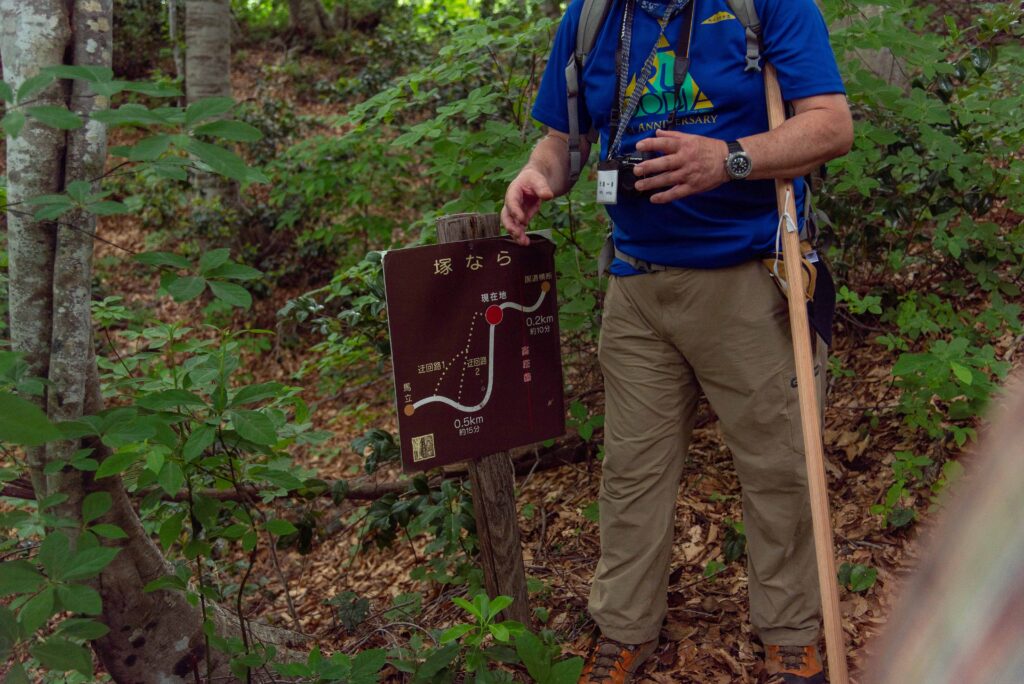
11. Follow the Tsukanara
Follow the path called Tsukanara 塚なら.
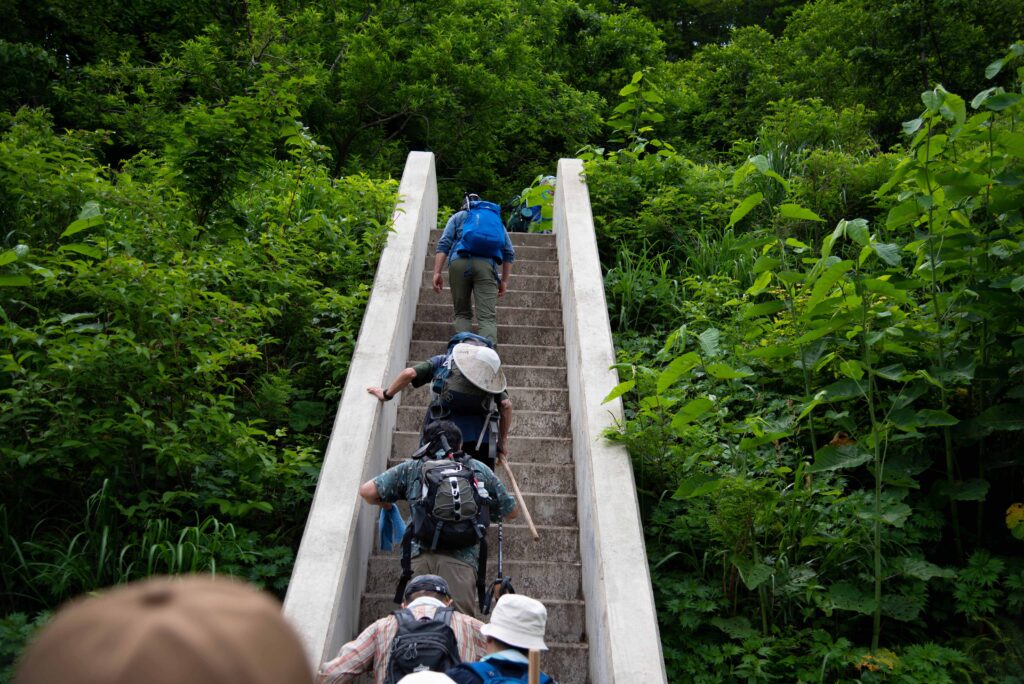
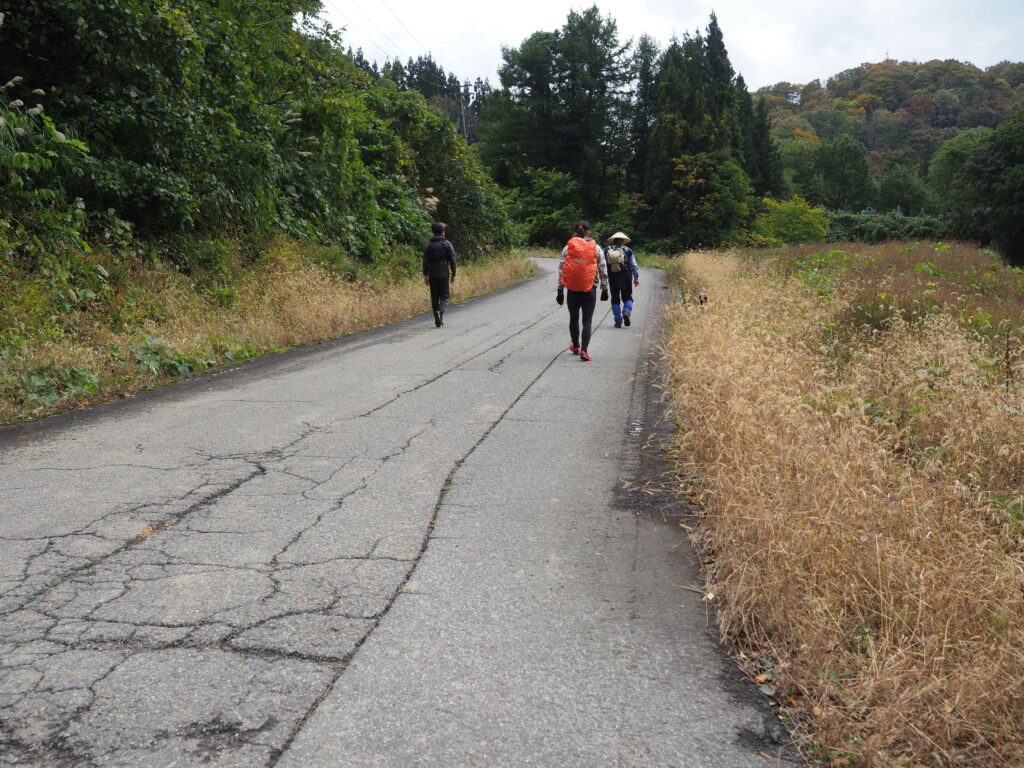
12. Get out of the forest
At some point, you will leave the forest to find a paved road. If you feel unwell, do not go further and seek help to return to the city. If you feel well enough, take the elevated bridge to go back to the forest.
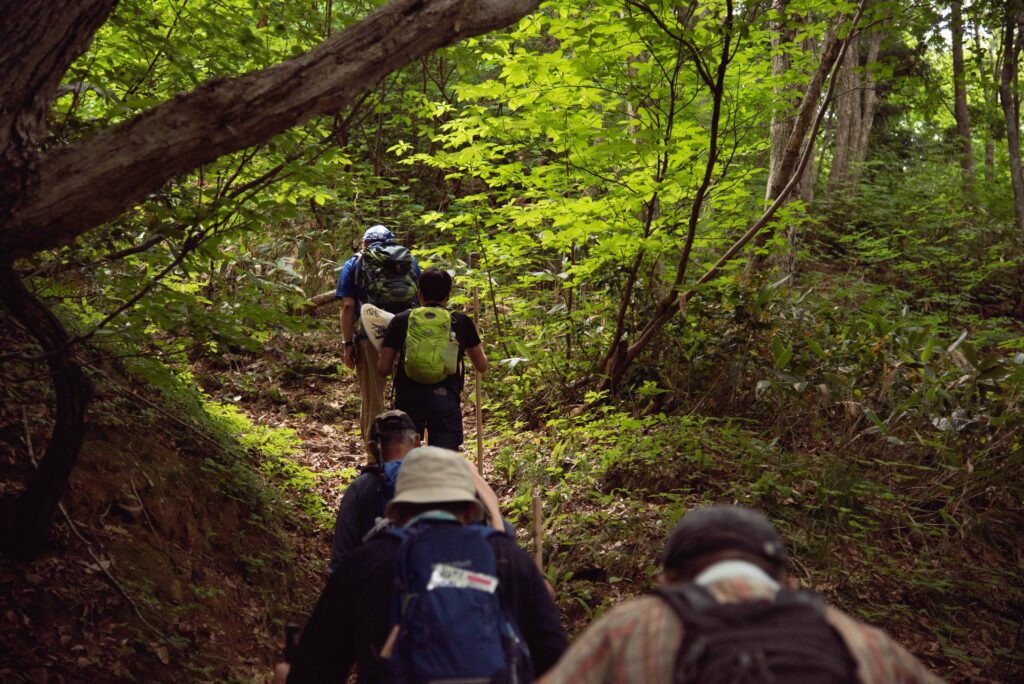
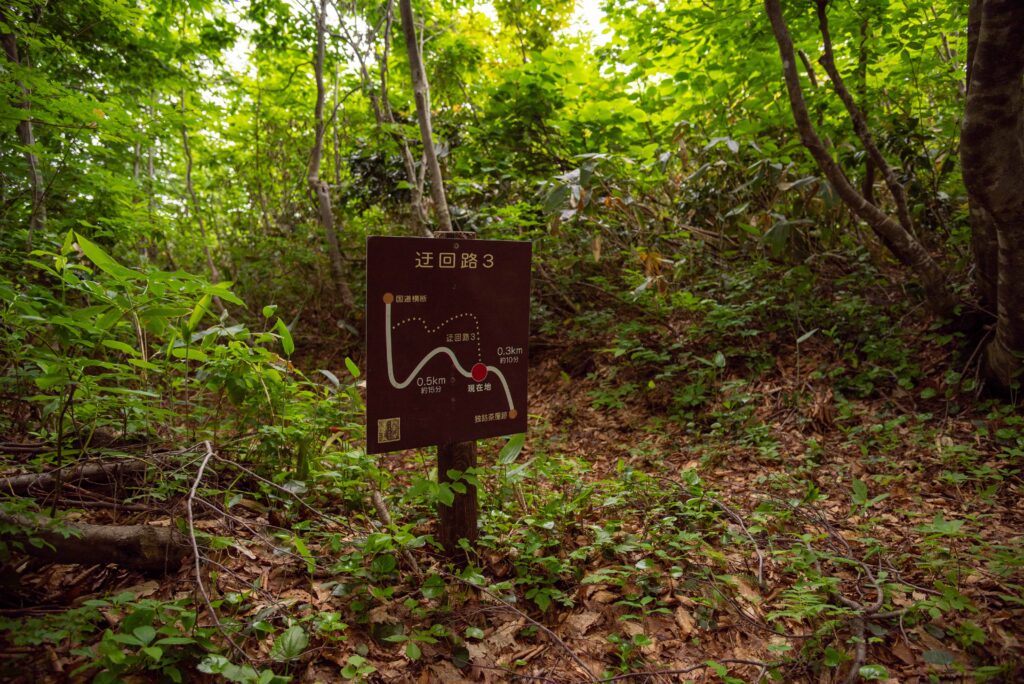
13. You come across a detour road
14. Follow the path inside the beech forest
15. There is another detour road
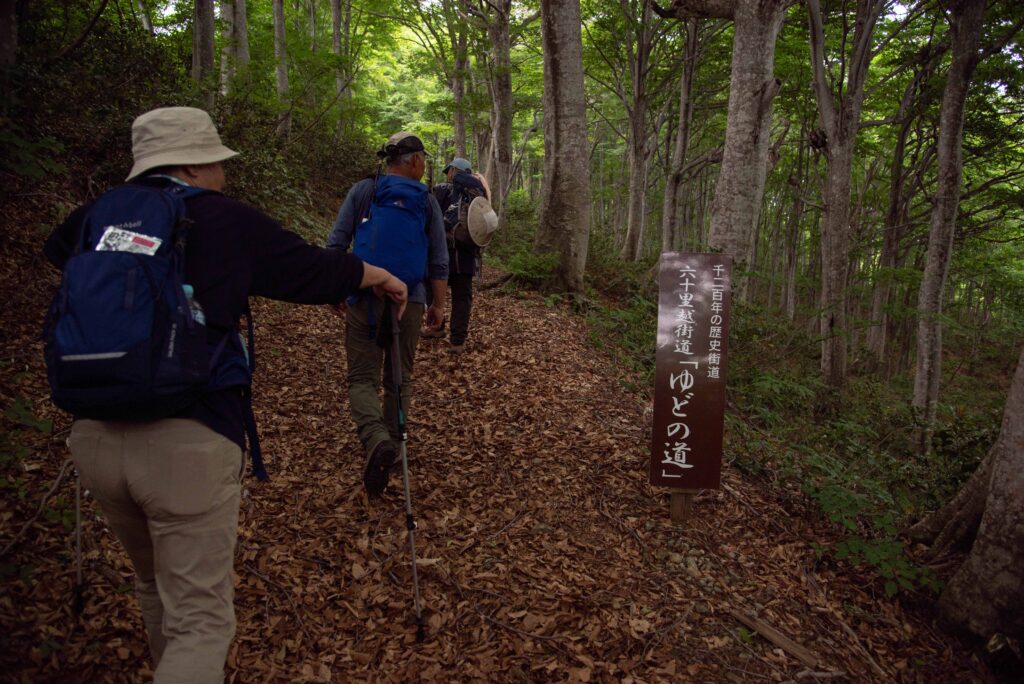
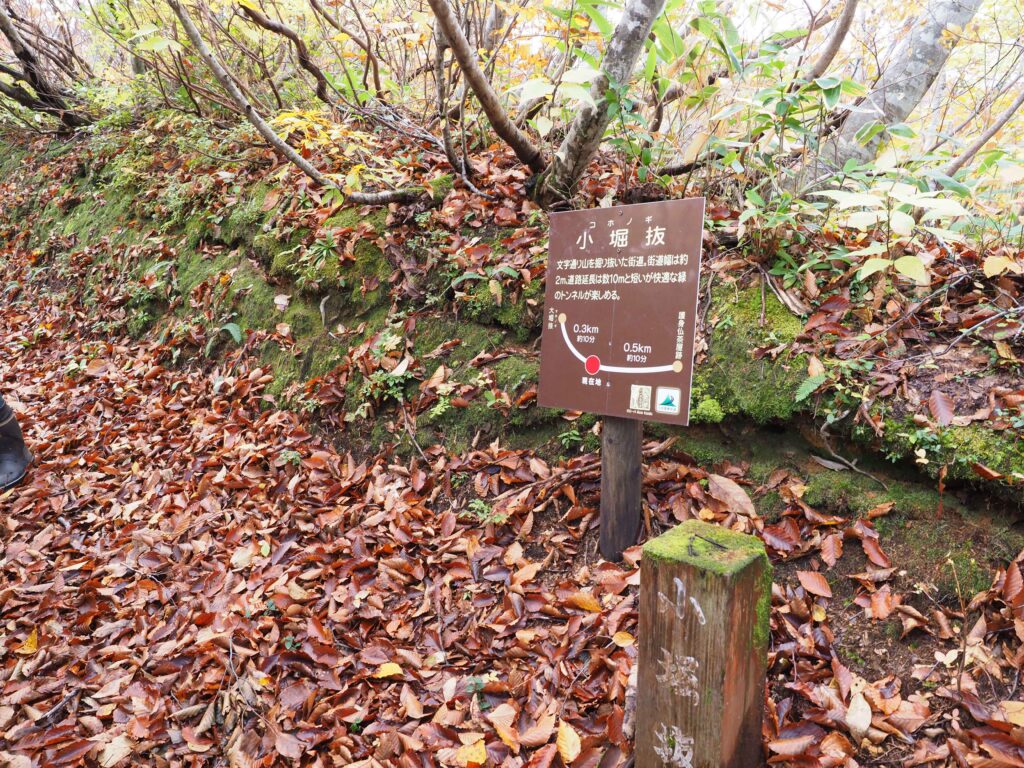
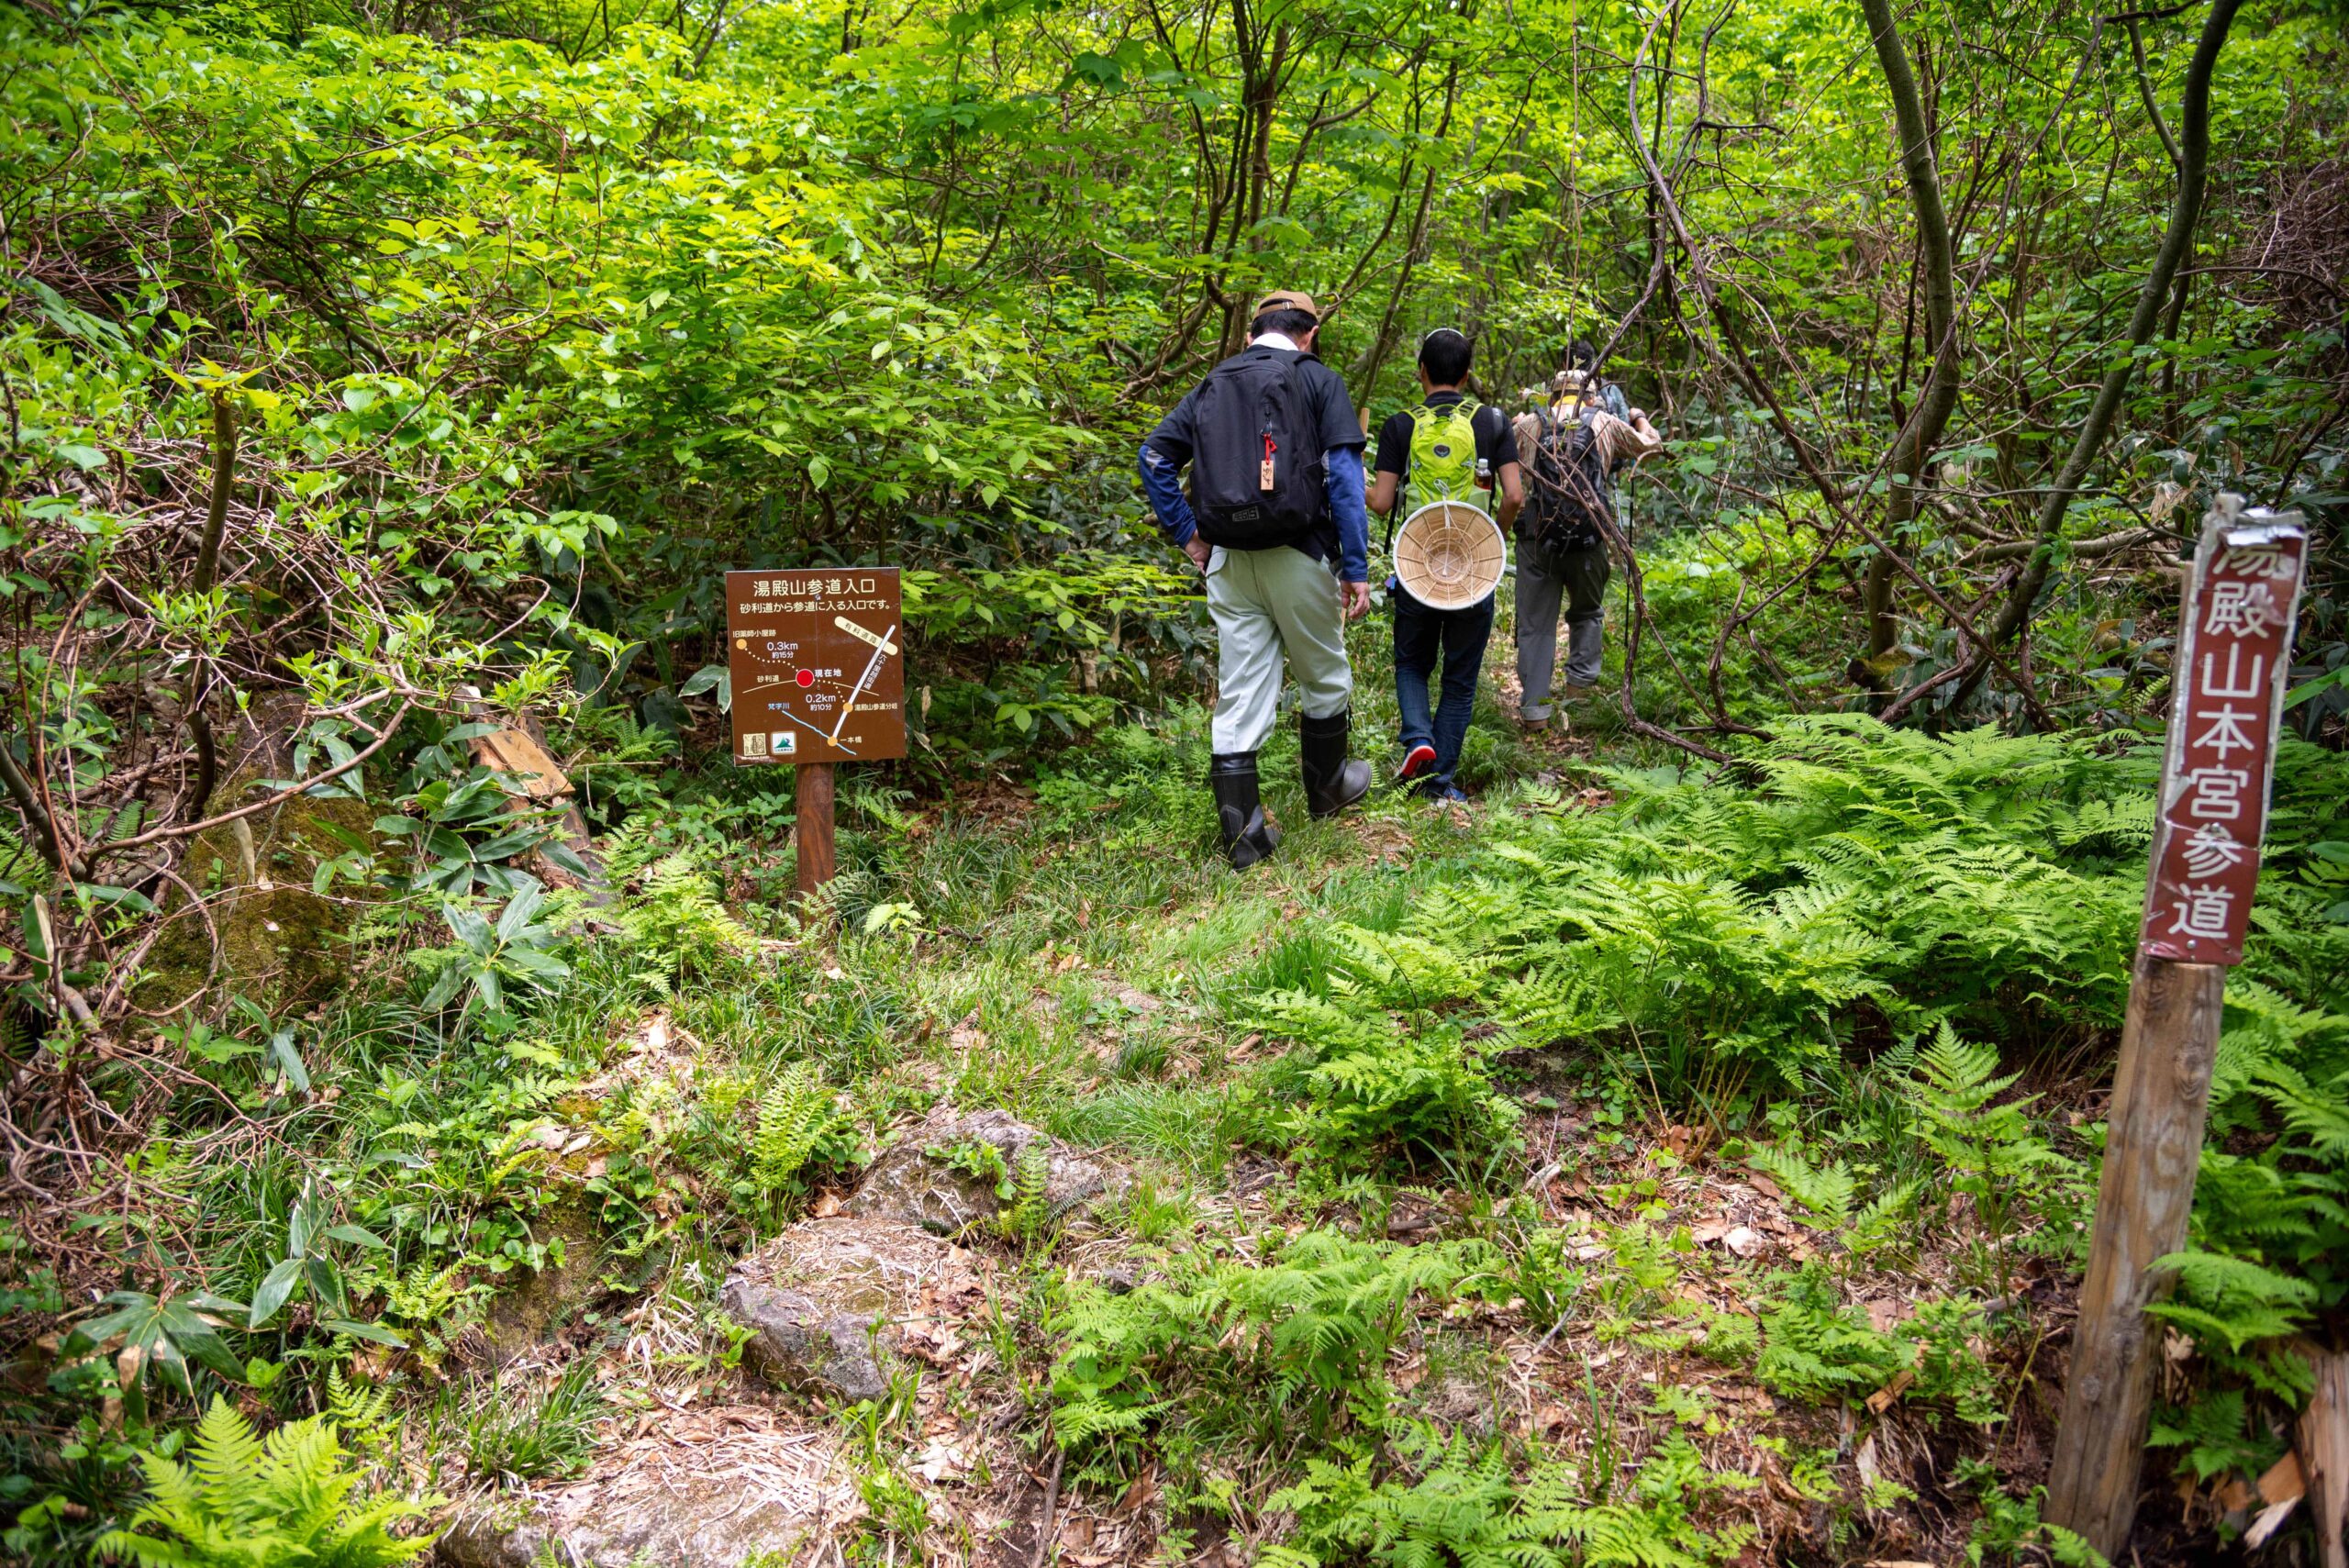
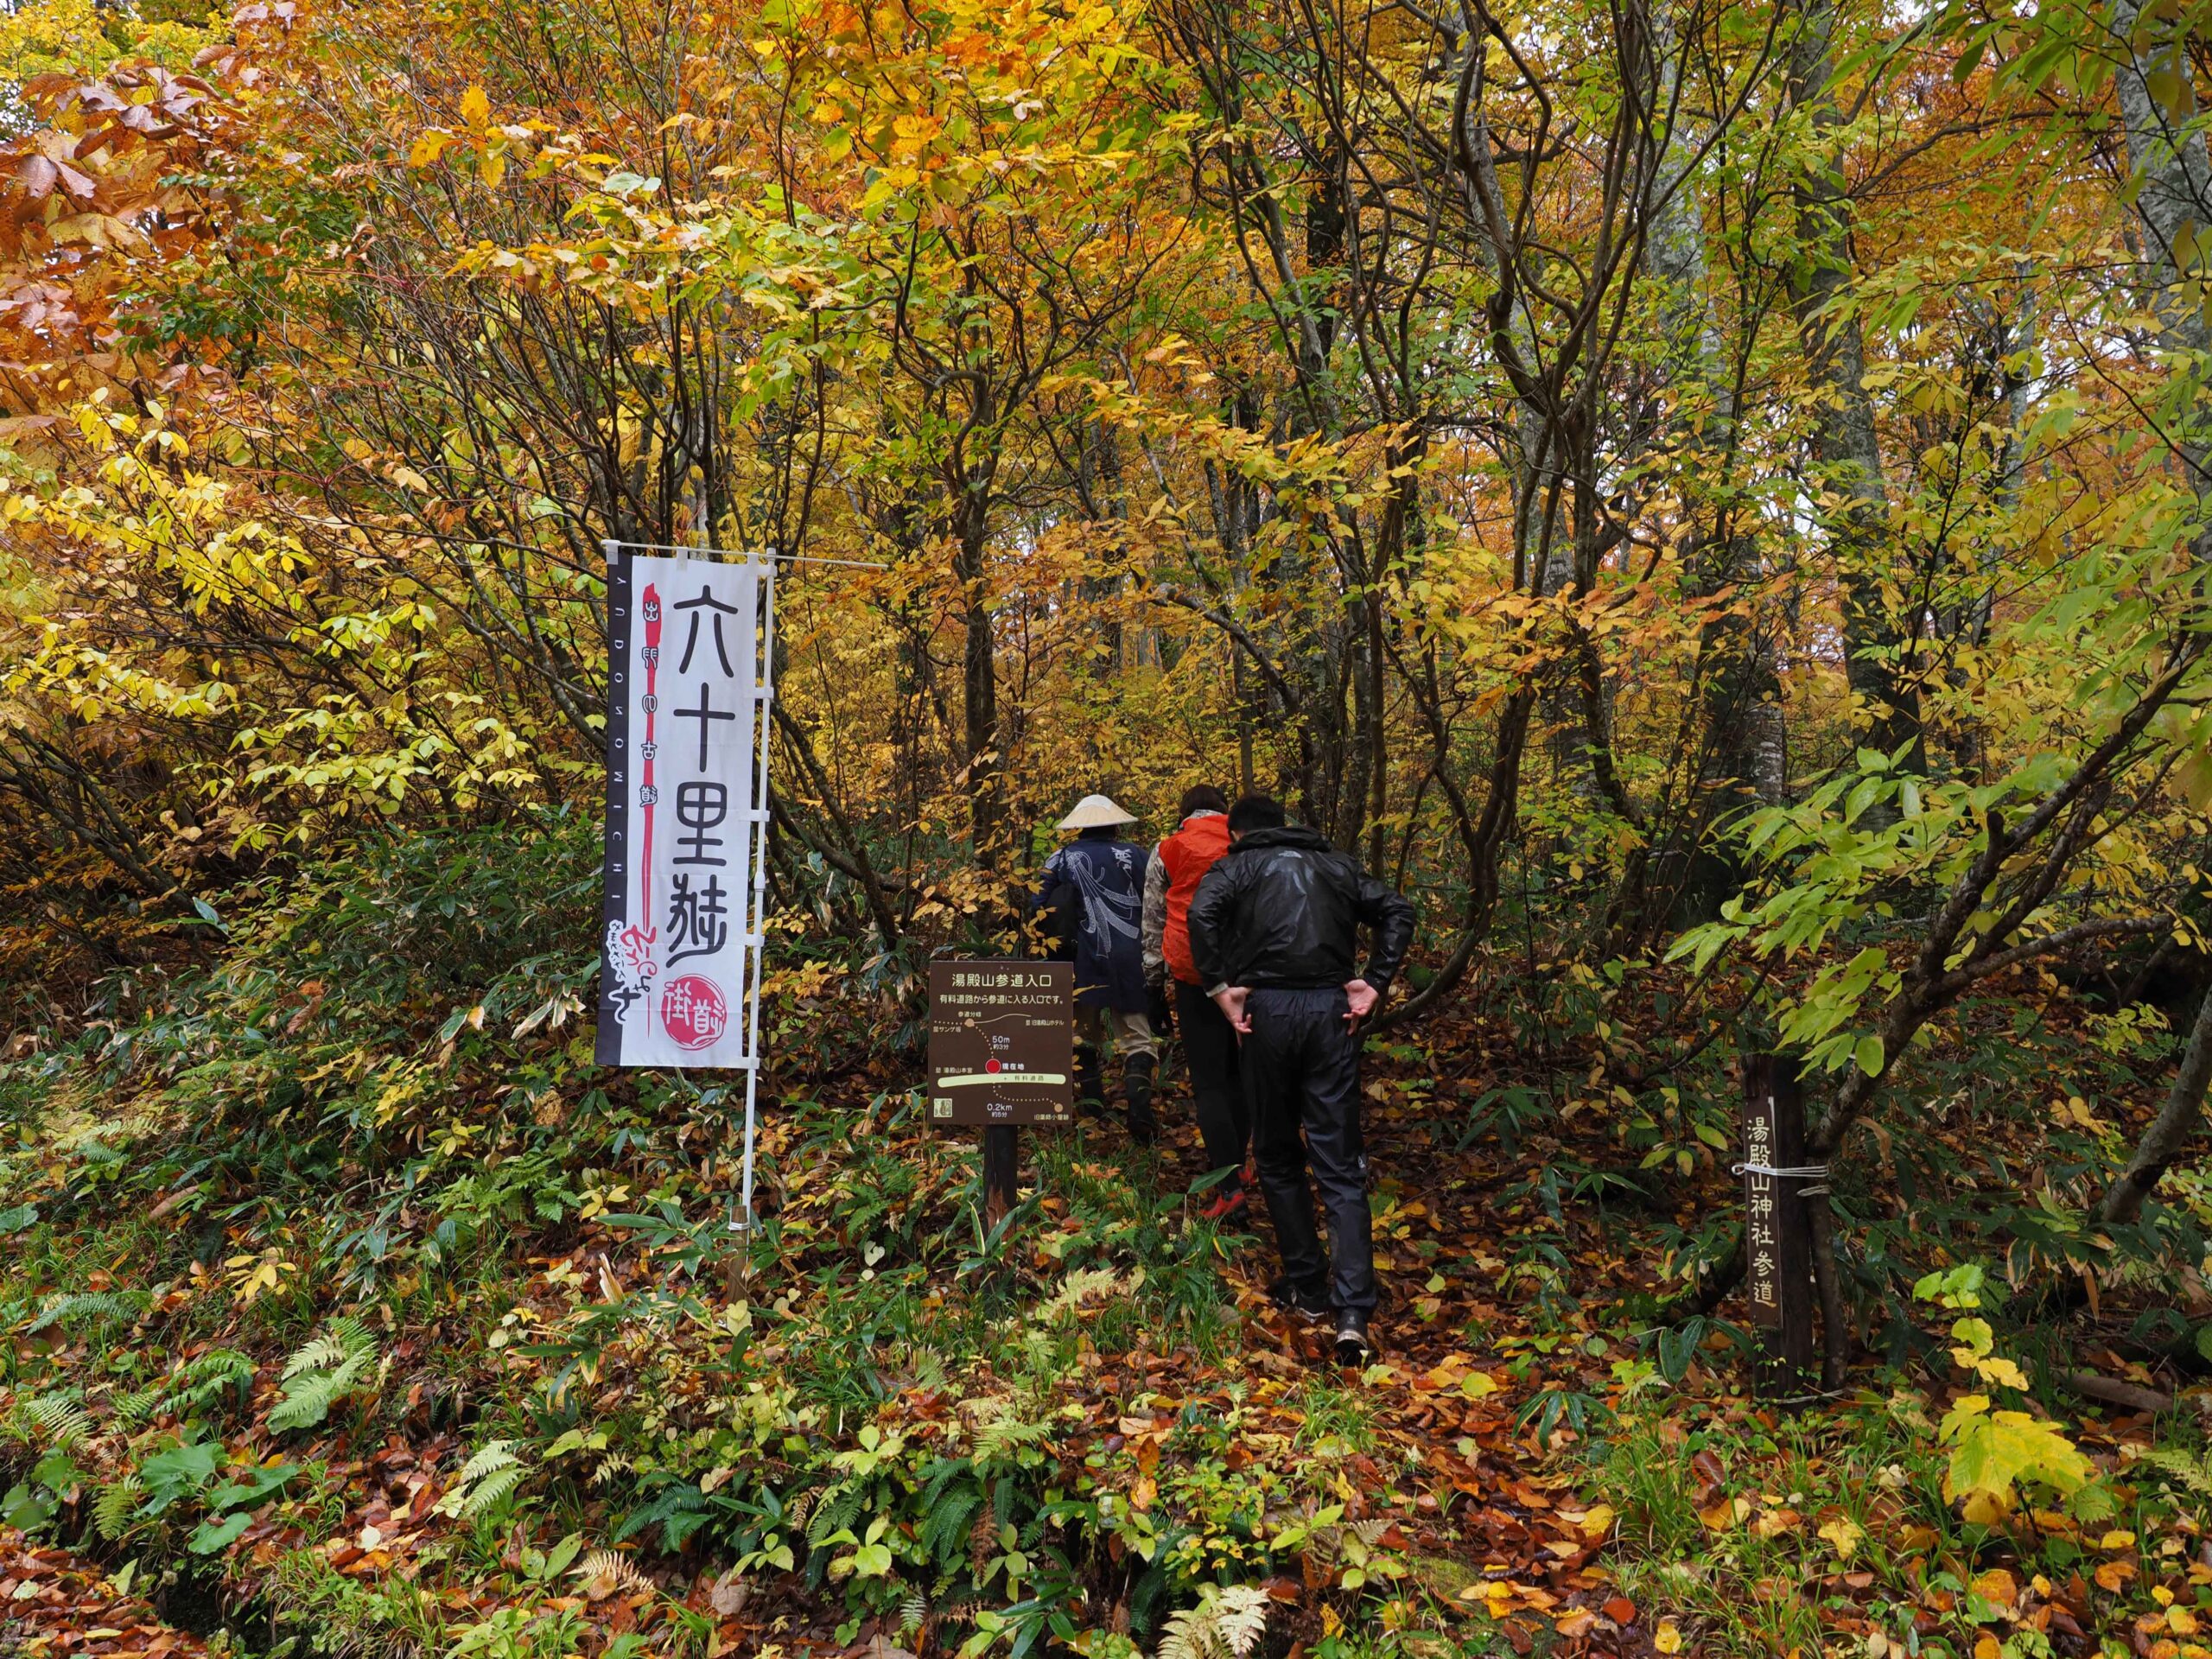
16. You come across this sign
The sign says: “Rokujurigoe Kaido: the pilgrimage to Mt. Yudono” 六十里越街道:「ゆどの道」
17. Spot the “Lovey-dovey beeches”
Those trees are connected by one branch, making them look like two lovers holding hands, hence their name: “the Lovey-Dovey Beeches” (Raburabuna ラブラブナ)
18. You come across this Buddhist stele
19. You arrive to the Dokko Chaya
Use the portable toilet if needed.
20. Use the portable toilet.
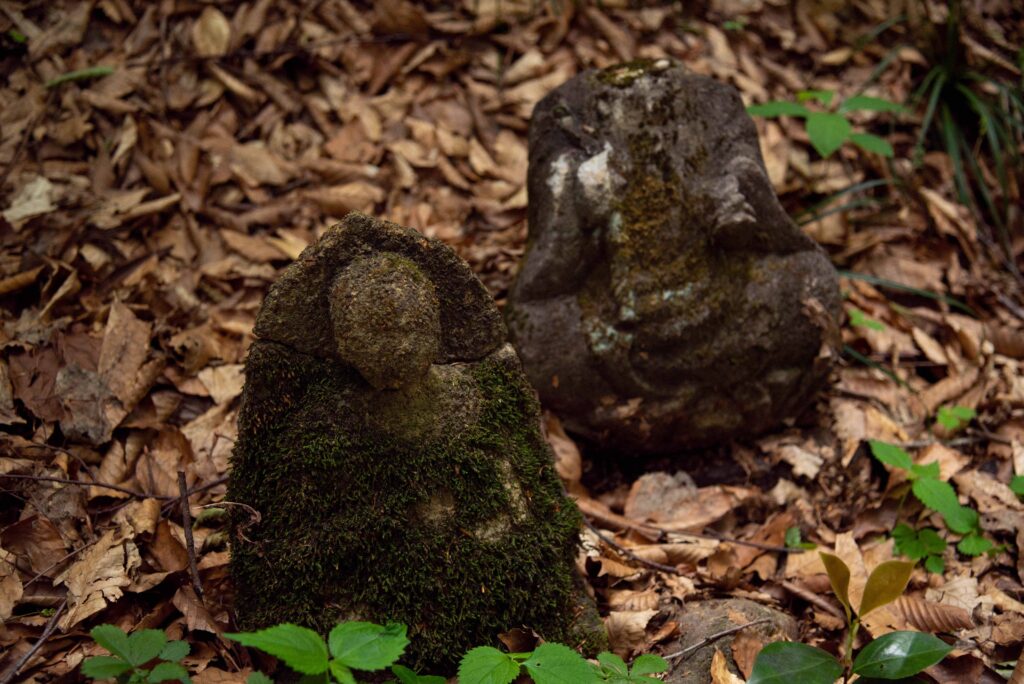
21. Buddhist statues next to the
If you follow the path to the Dokko Springs 独鈷清水, you will find these Buddhist statues that got their heads severed during the Buddhist purge in the 19th century.
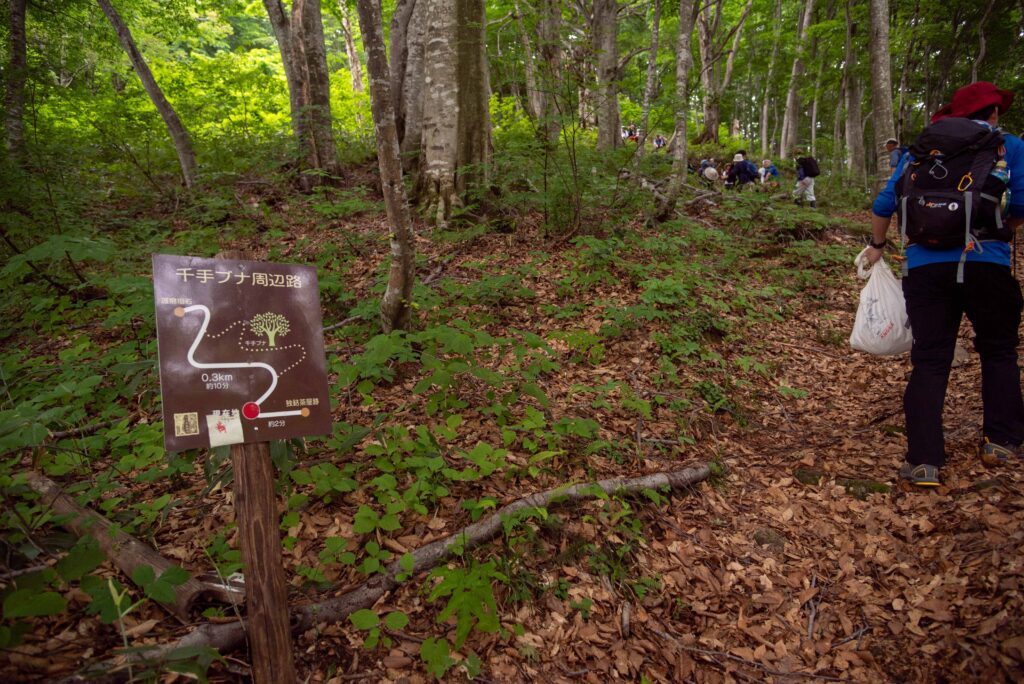
22. Spot this sign to the Senju Buna tree
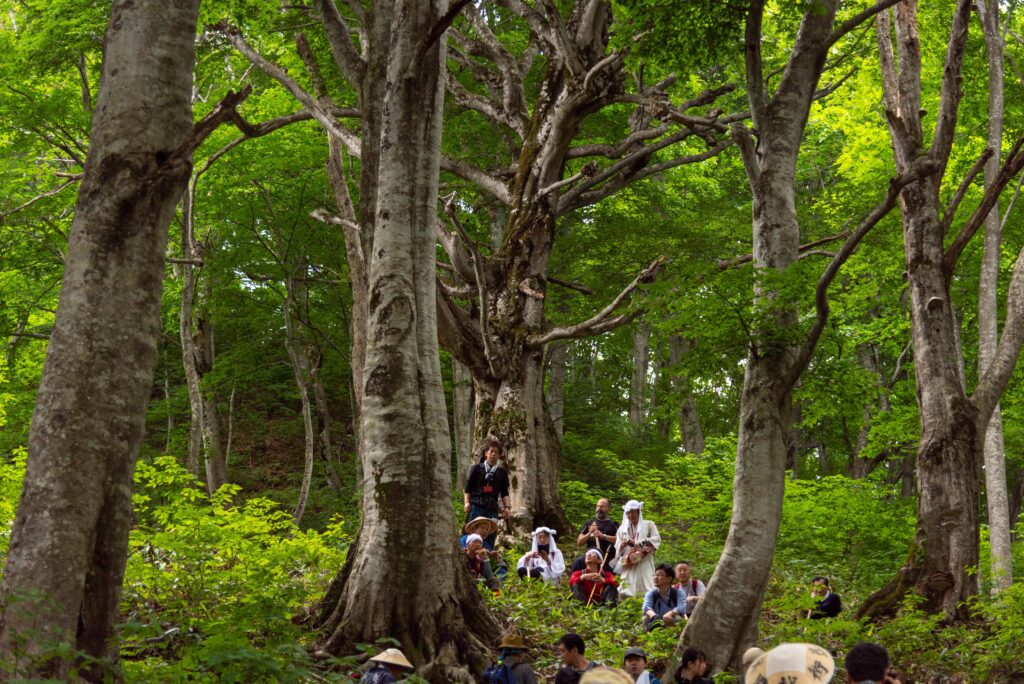
23. Arrive at the Senju Buna Tree
Senju Buna 千手ブナ means: “The Thousand-Handed Beech tree”.
24. Arrive at the Kohonogi Beech Tree Tunnel
You arrive at the Kohonogi 小堀抜: The “Small Beech Tree Tunnel”.
25. Follow the Ohonogi Beech Tree Tunnel
A little further from the Kohonogi is the Ohonogi 大堀抜: the “Big Beech Tree Tunnel”.
26. Follow the path
27. You arrive at an intersection
Both paths lead to the same end.
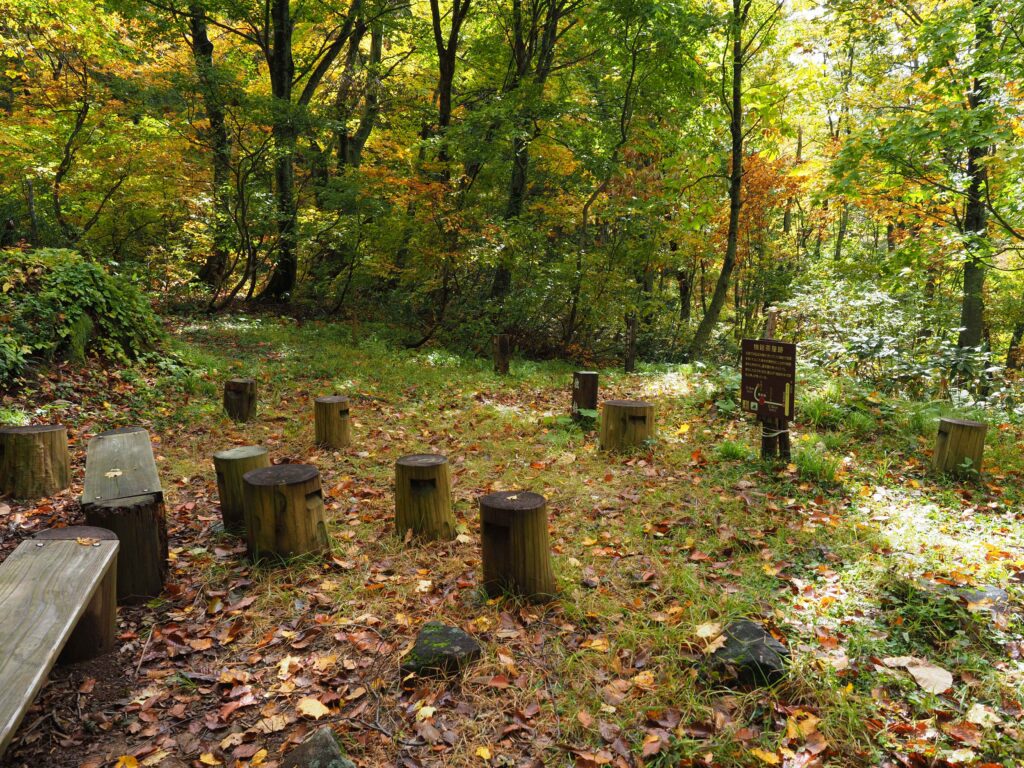
28. You arrive at the Hosogoe rest area
Hosogoe-toge 細越峠 is recognizable by its logs and stela.
29. Have a view on Mt. Yudono
This spot is called Yudonosan Yôhaijo 湯殿山遥拝所
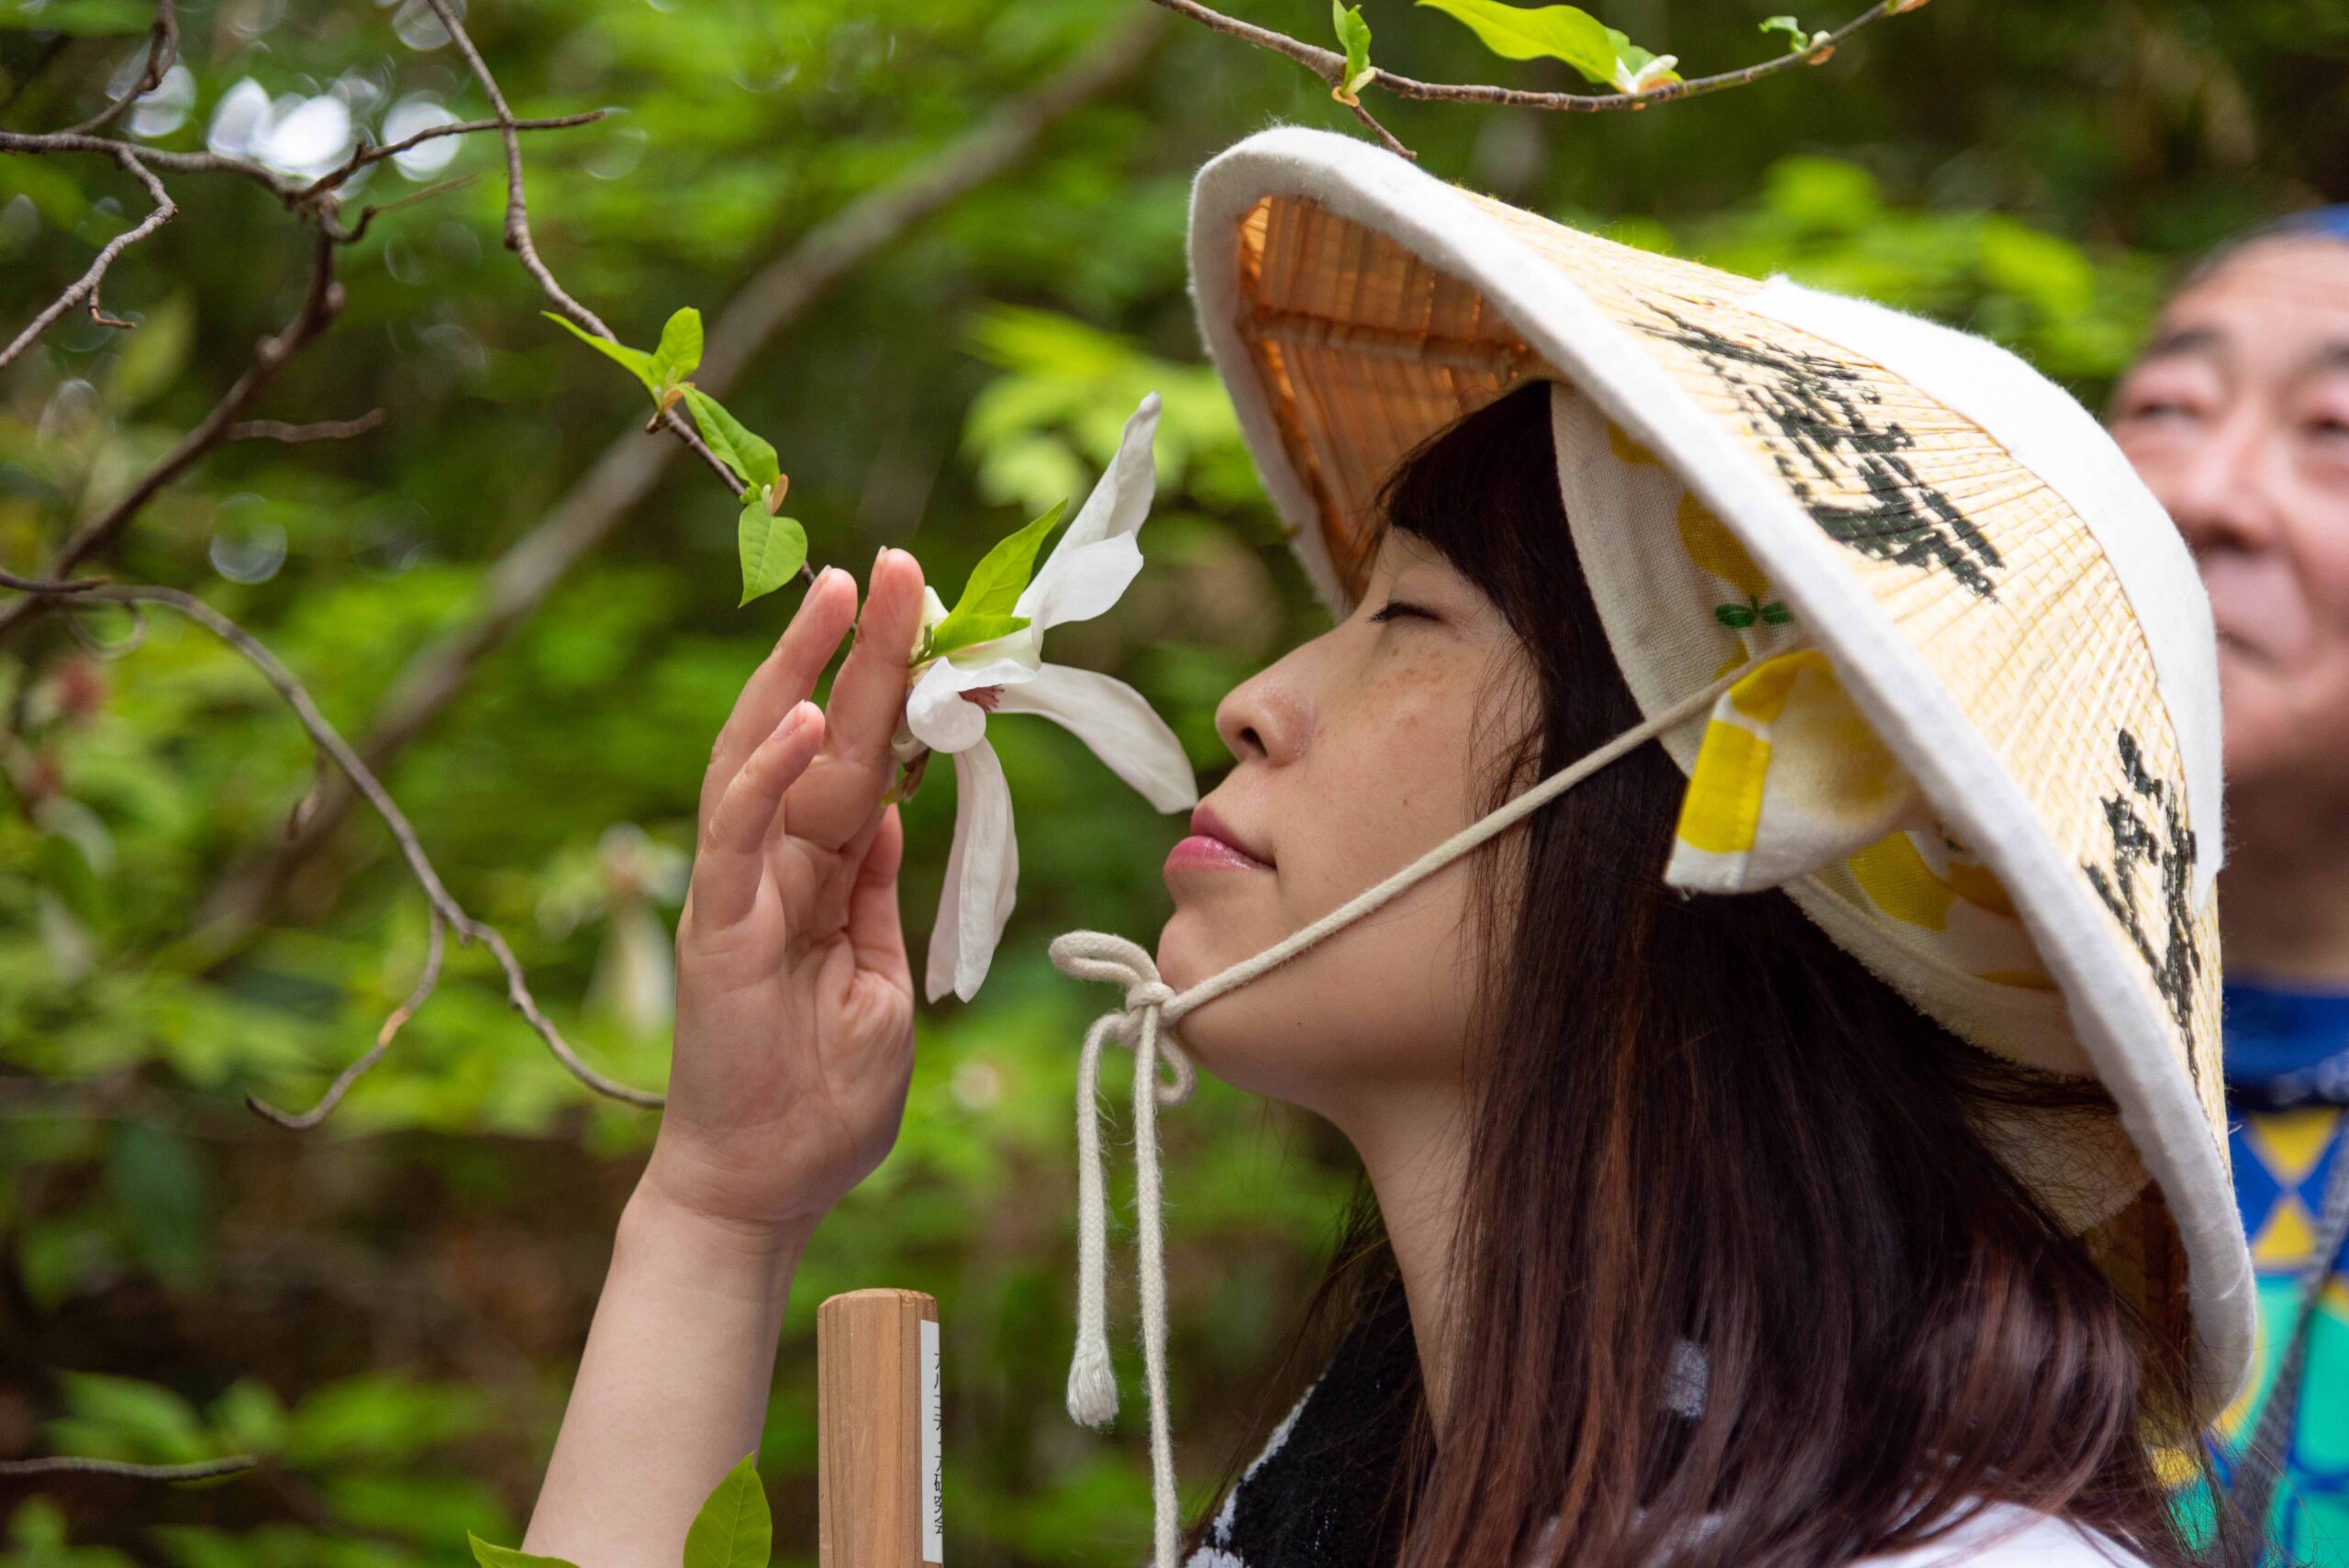
30. Spot the wild flowers on trees
31. Follow the descending slope
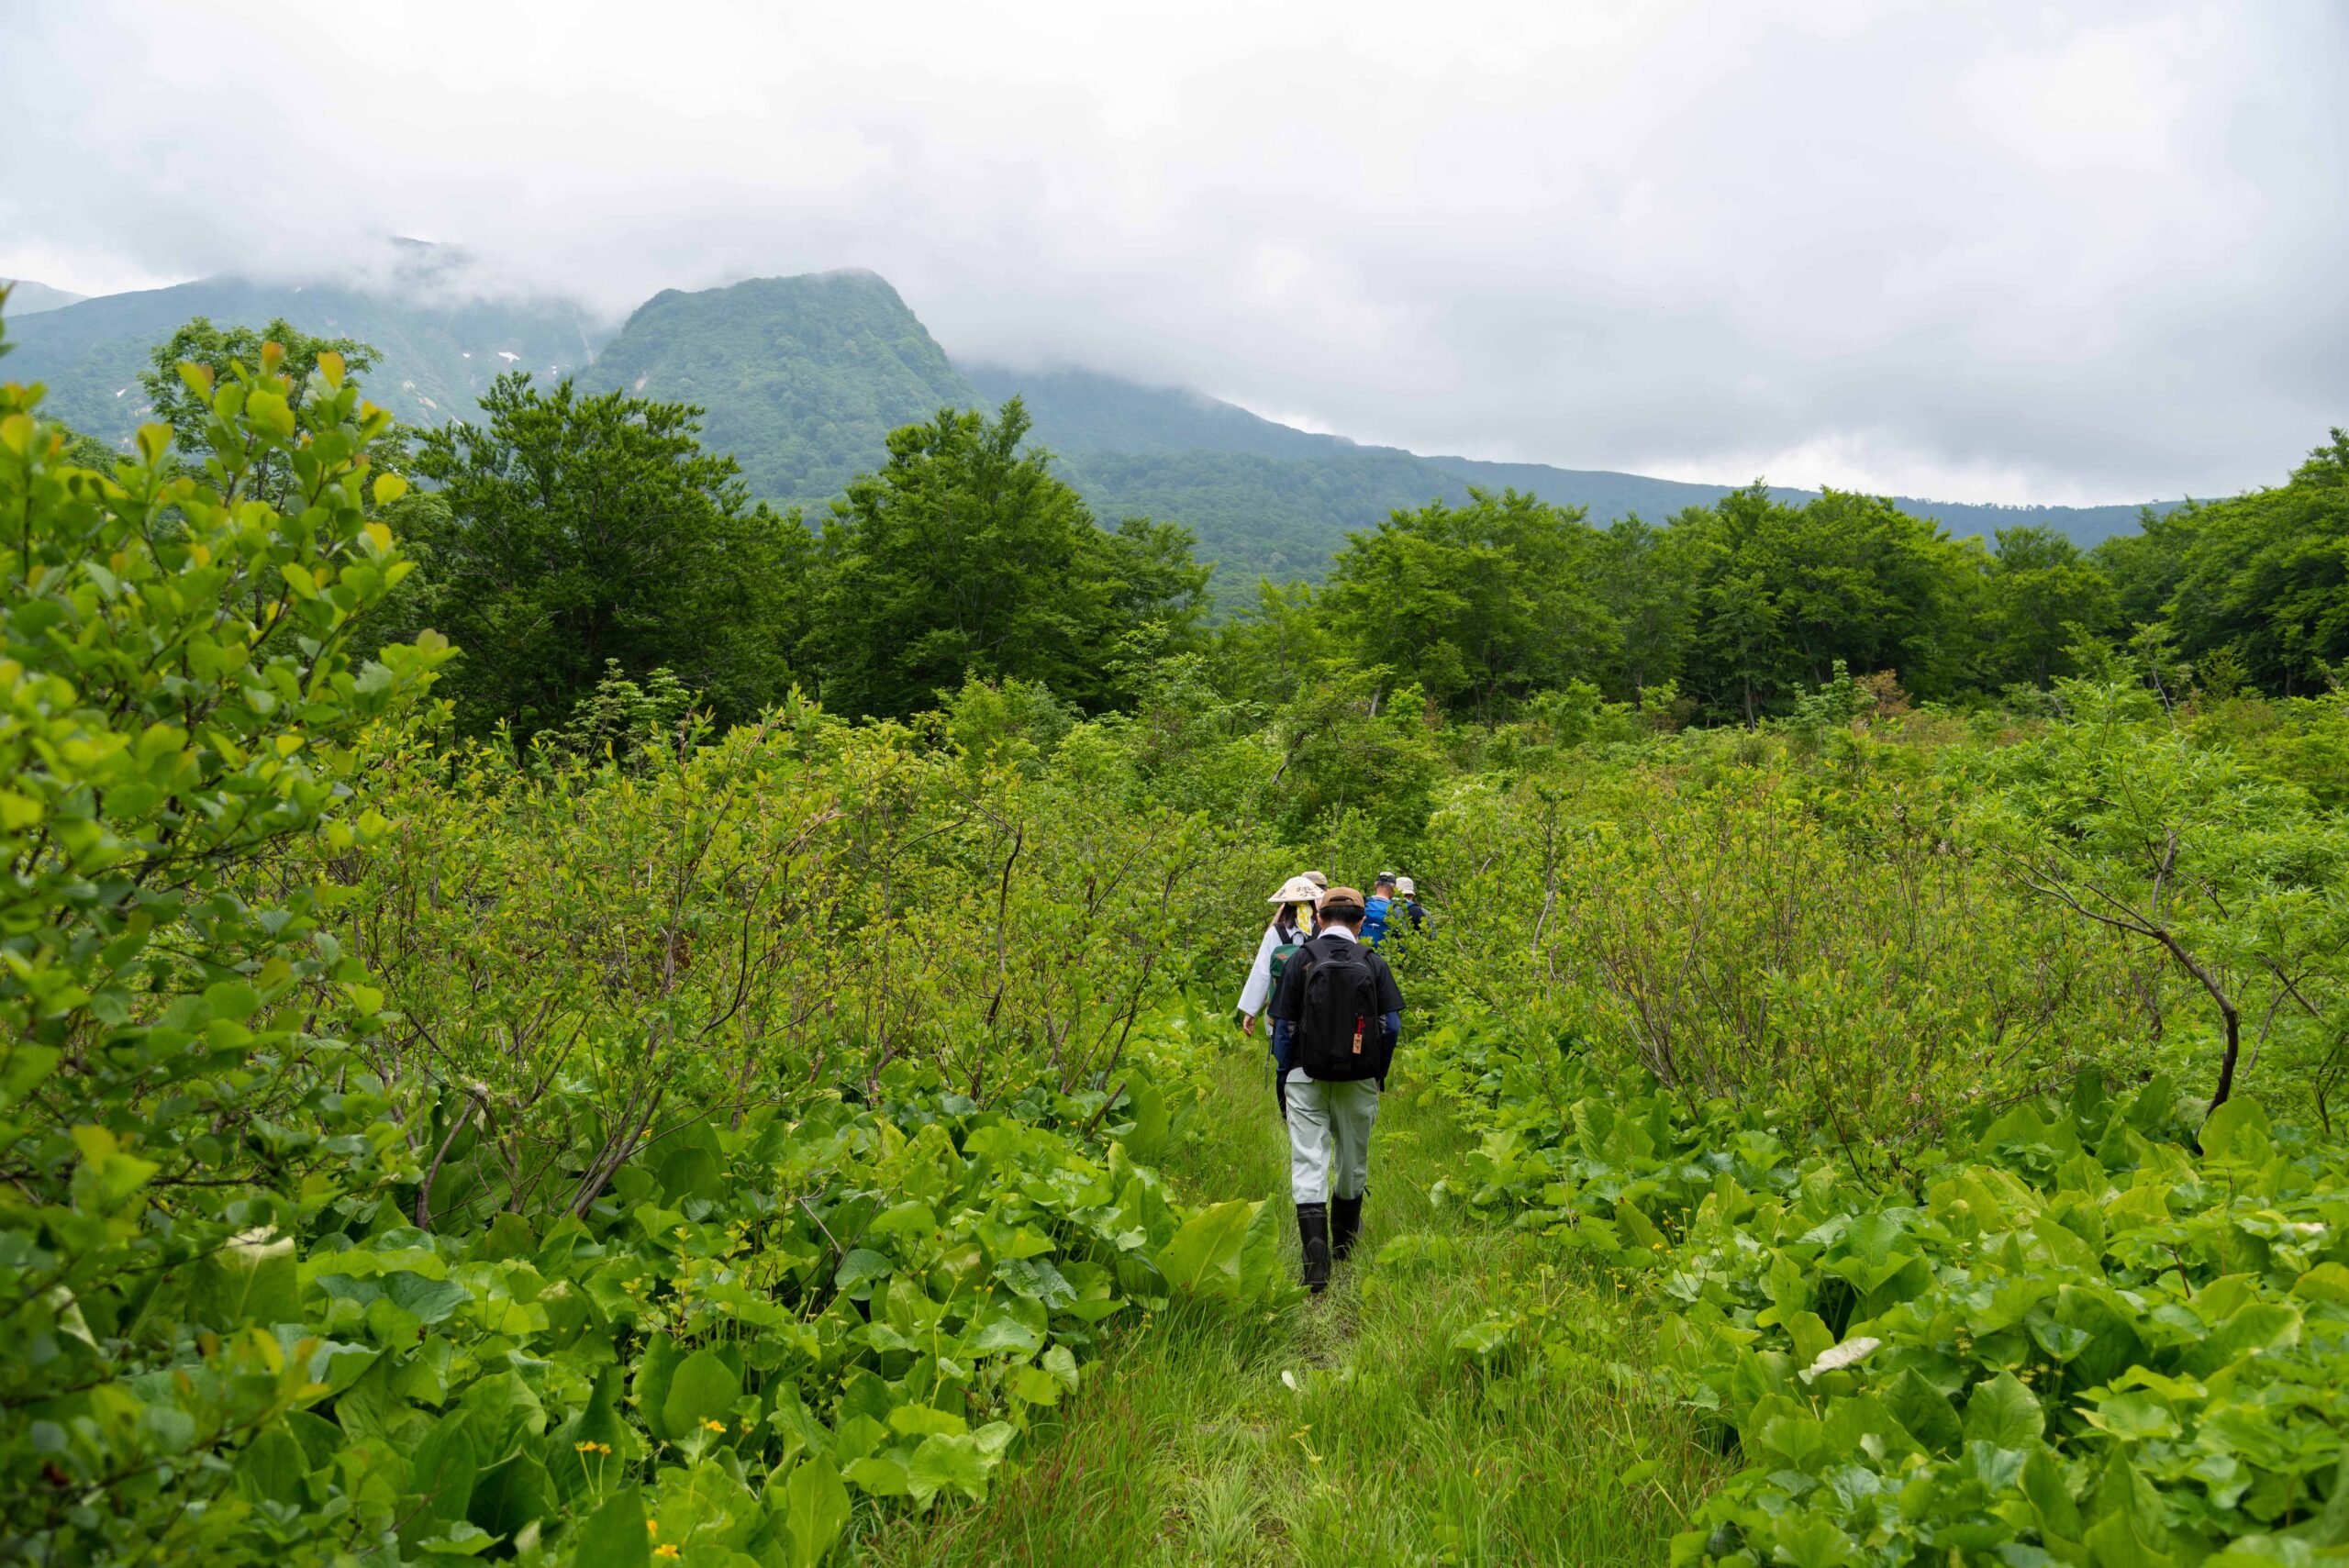
32.You exit the forest
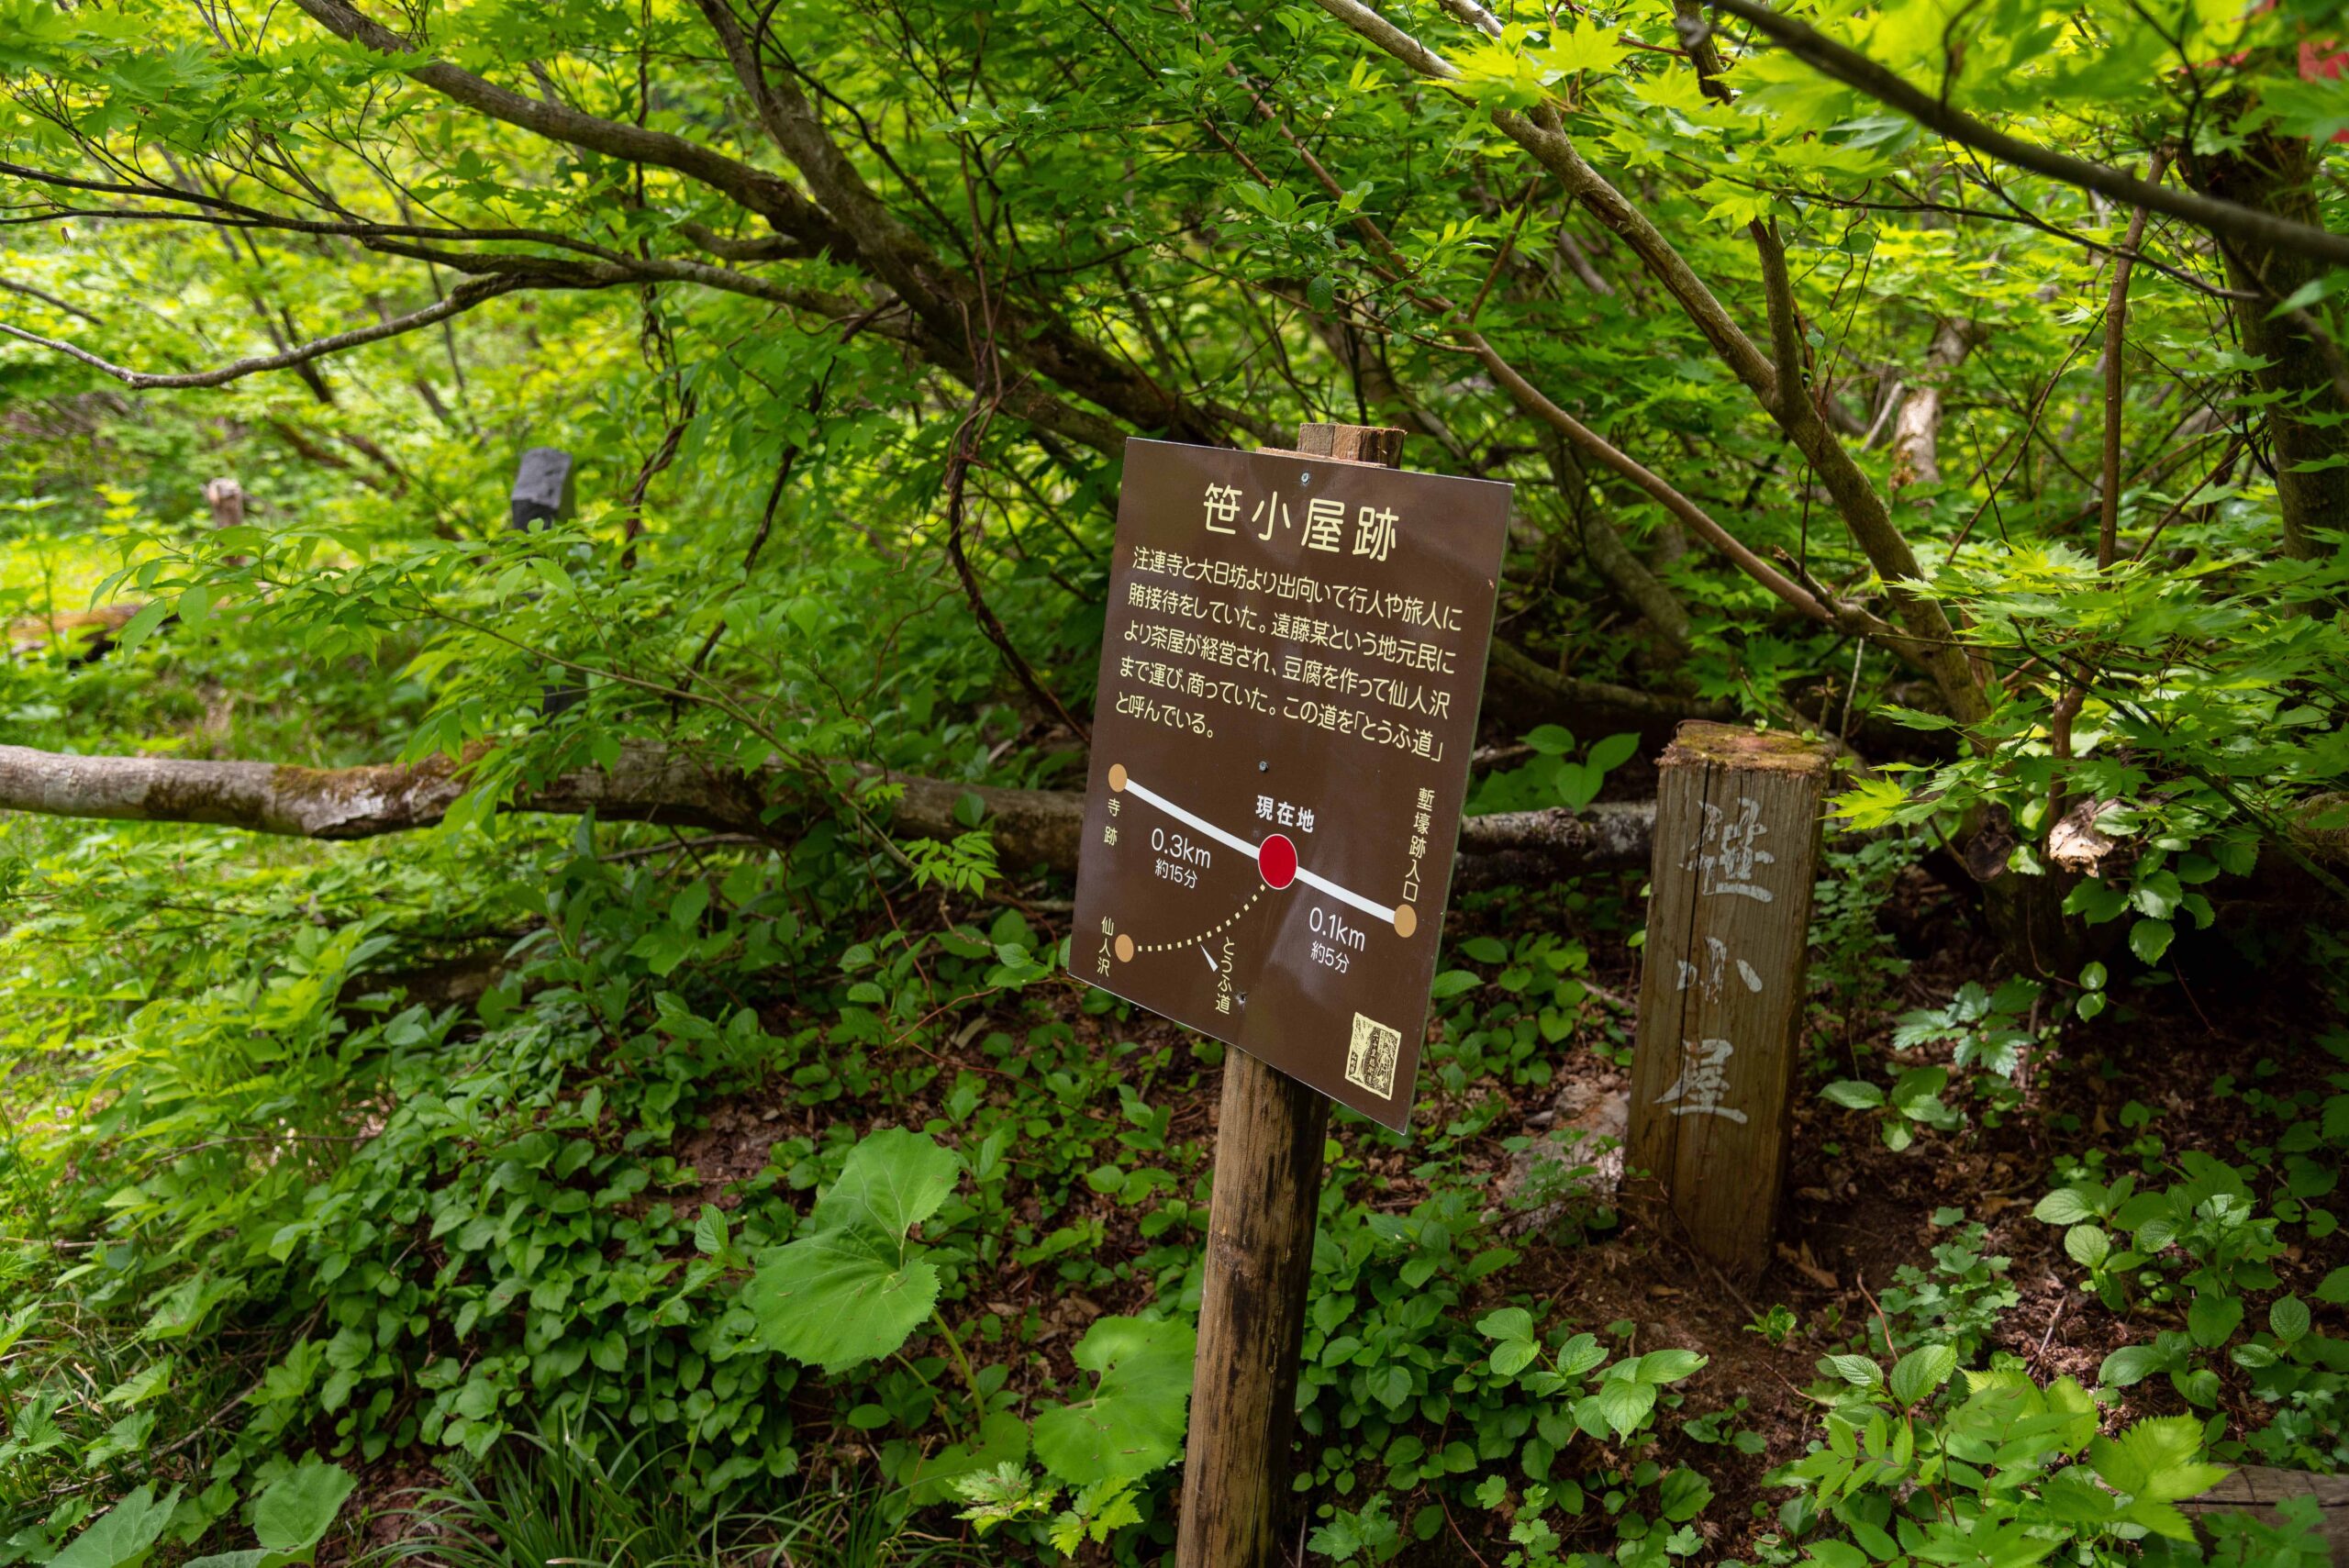
33. A sign indicates the Sasagoya Ruins
There was once a thatch-roofed teahouse here, but the lack of pilgrims through the years had it close down. Now, only the logs are remaining.
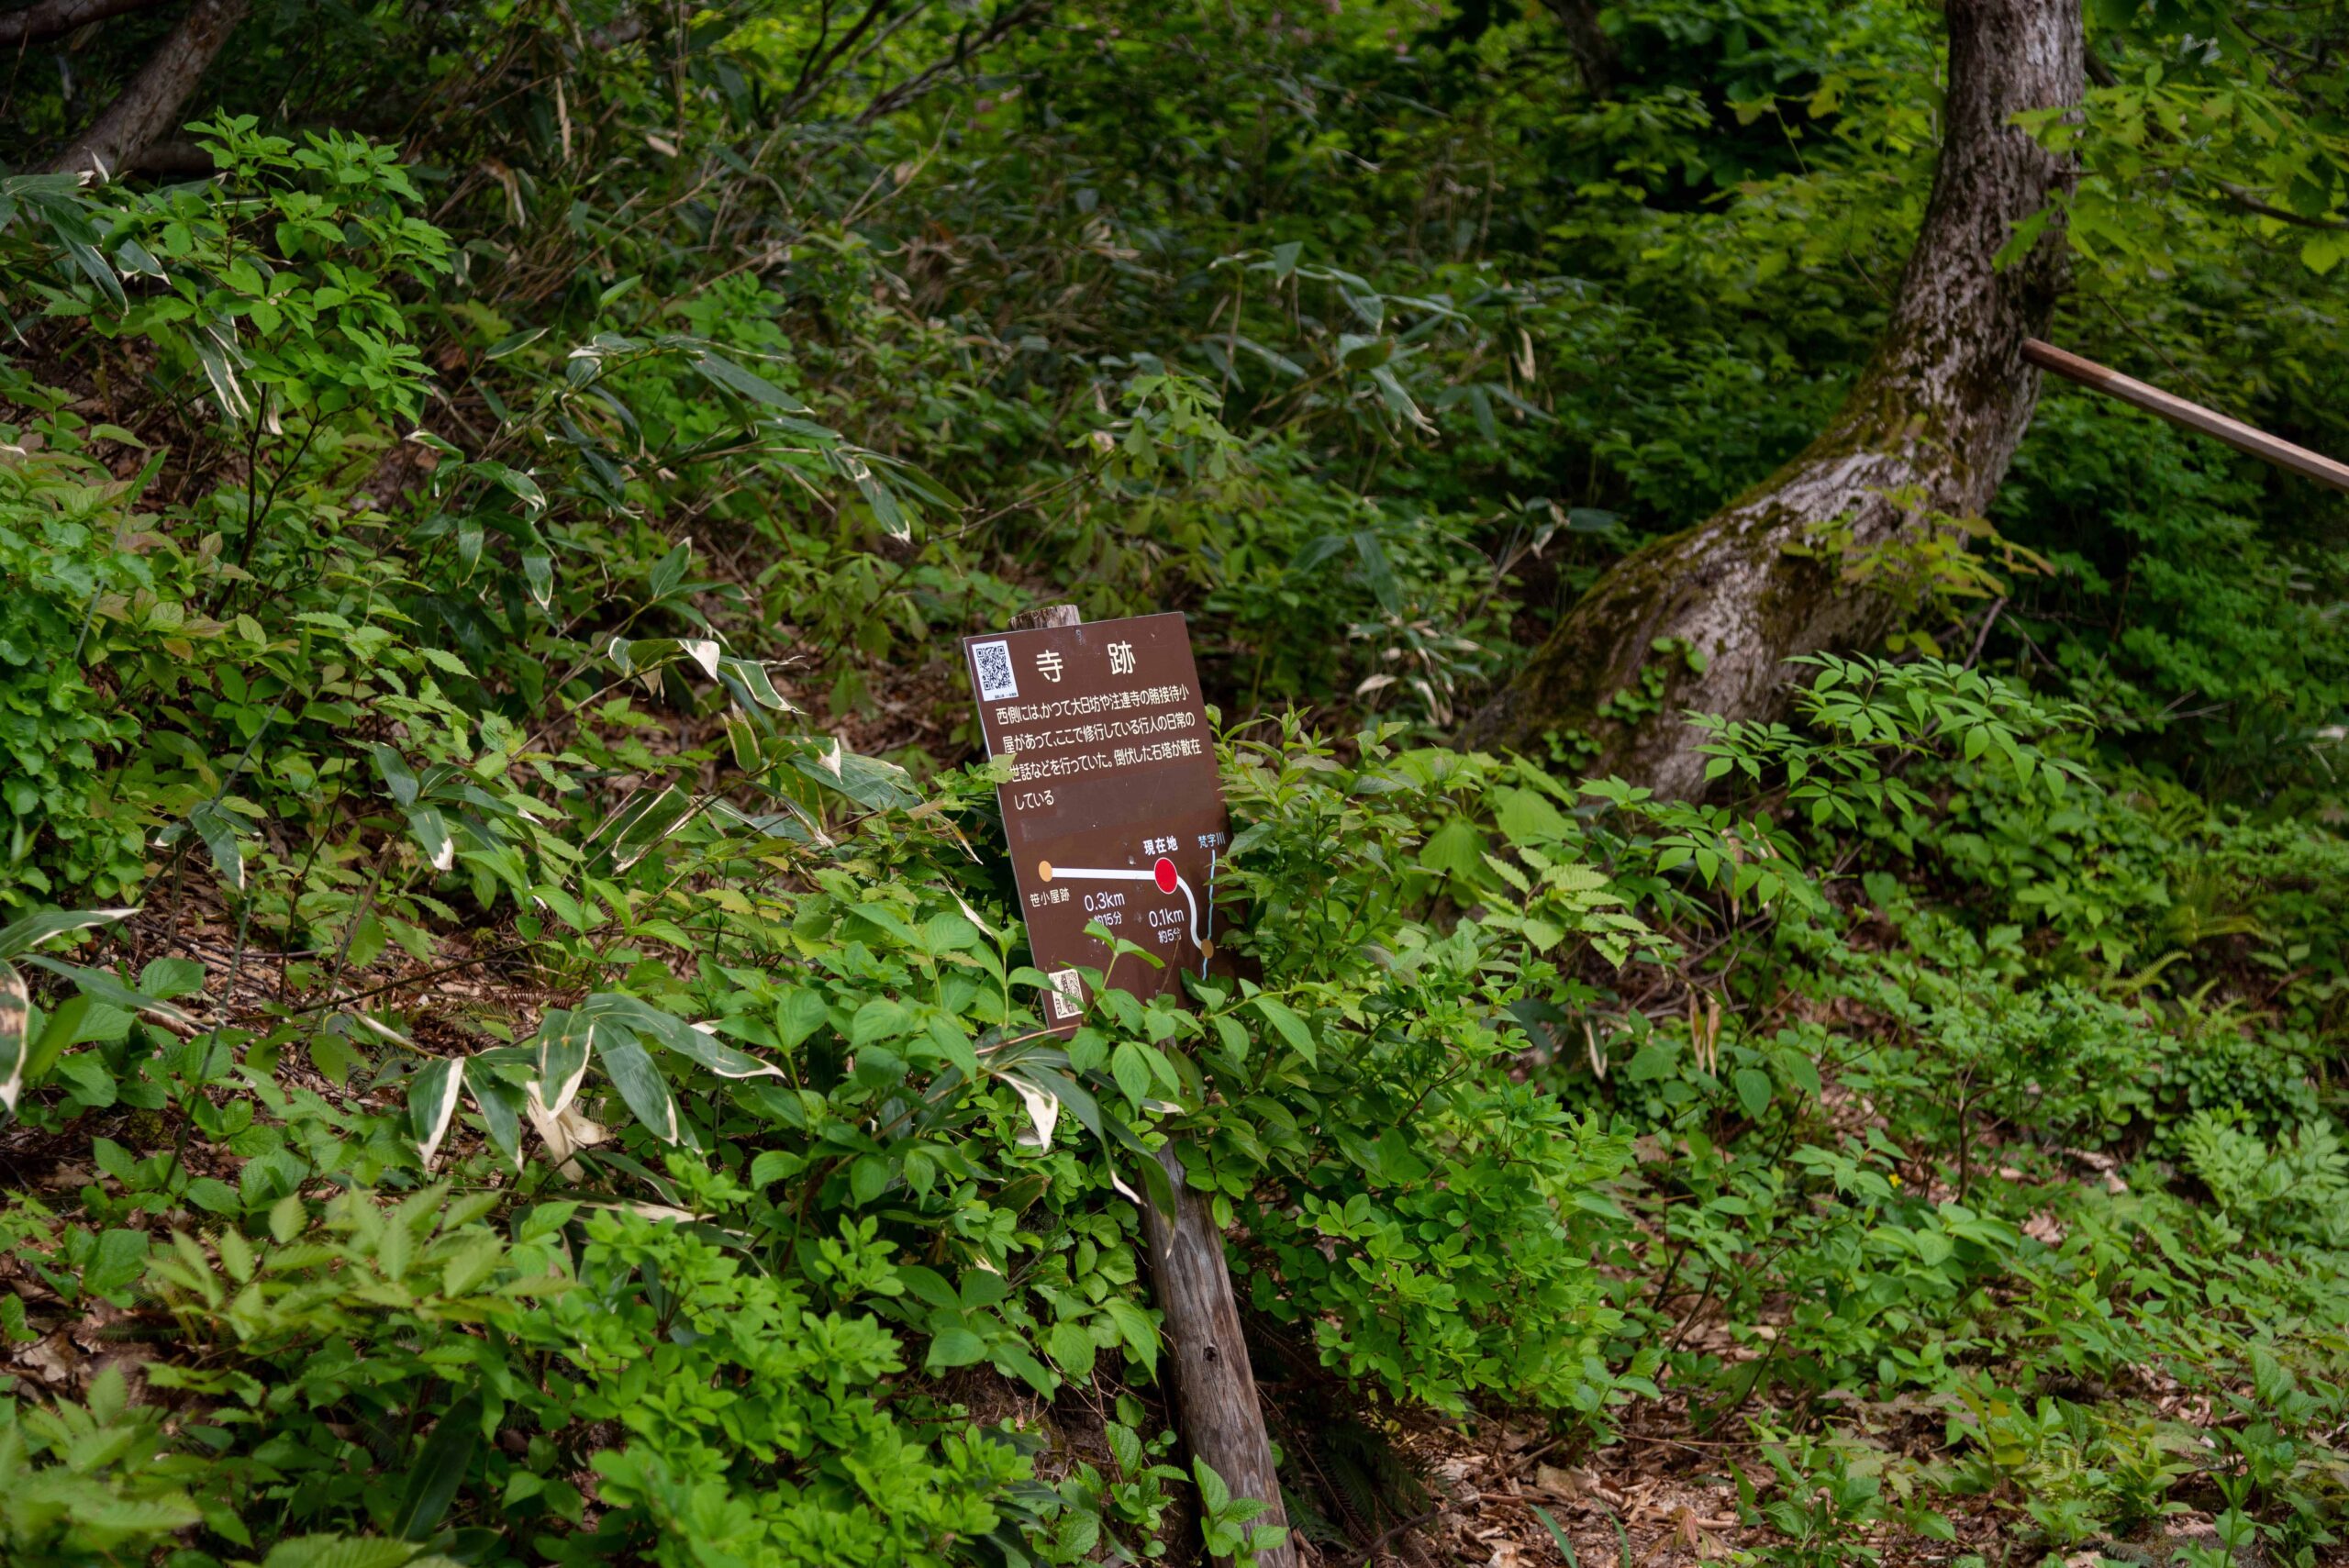
34. A sign indicates the steles of Churenji & Dainichibo temples
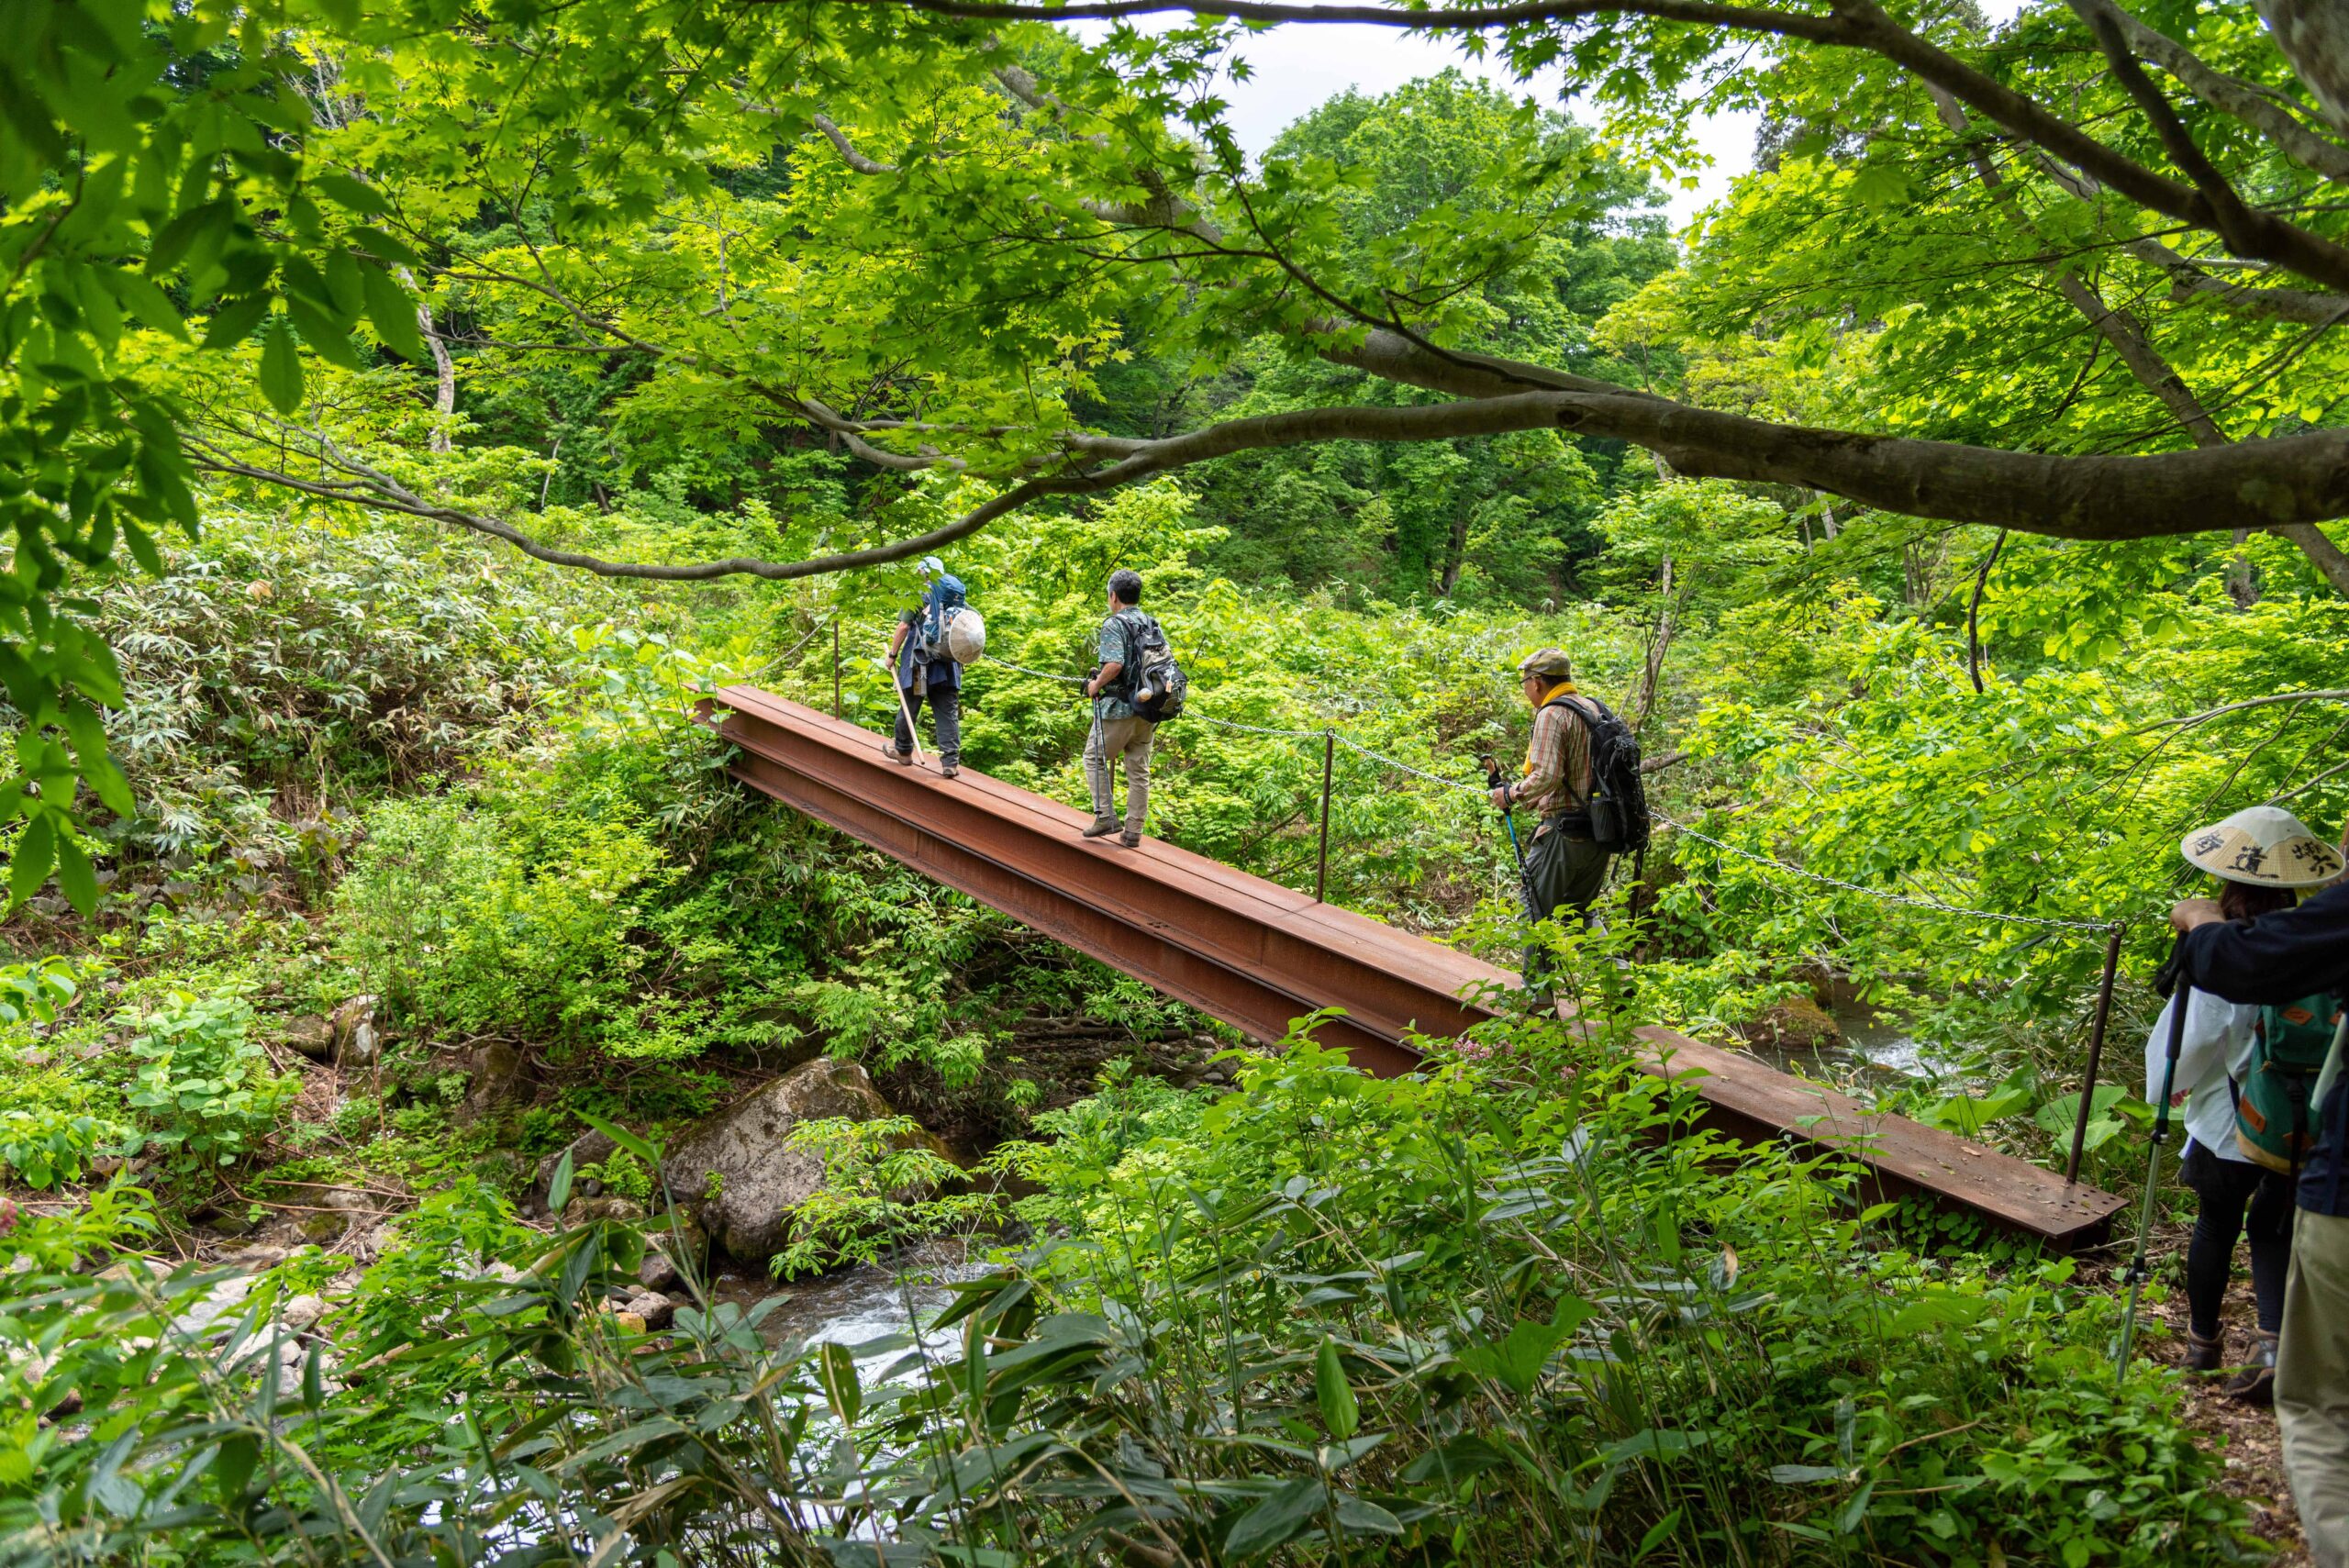
35. Cross the bridge
36. You are getting near Mt. Yudono
This stele worships Mt. Yudono’s gods.
37. Follow the narrow road to Mt. Yudono
38. After this slope, you’ll arrive to a paved road
39. Cross the road to climb the final path to Mt. Yudono
Be careful to approaching cars & buses!!
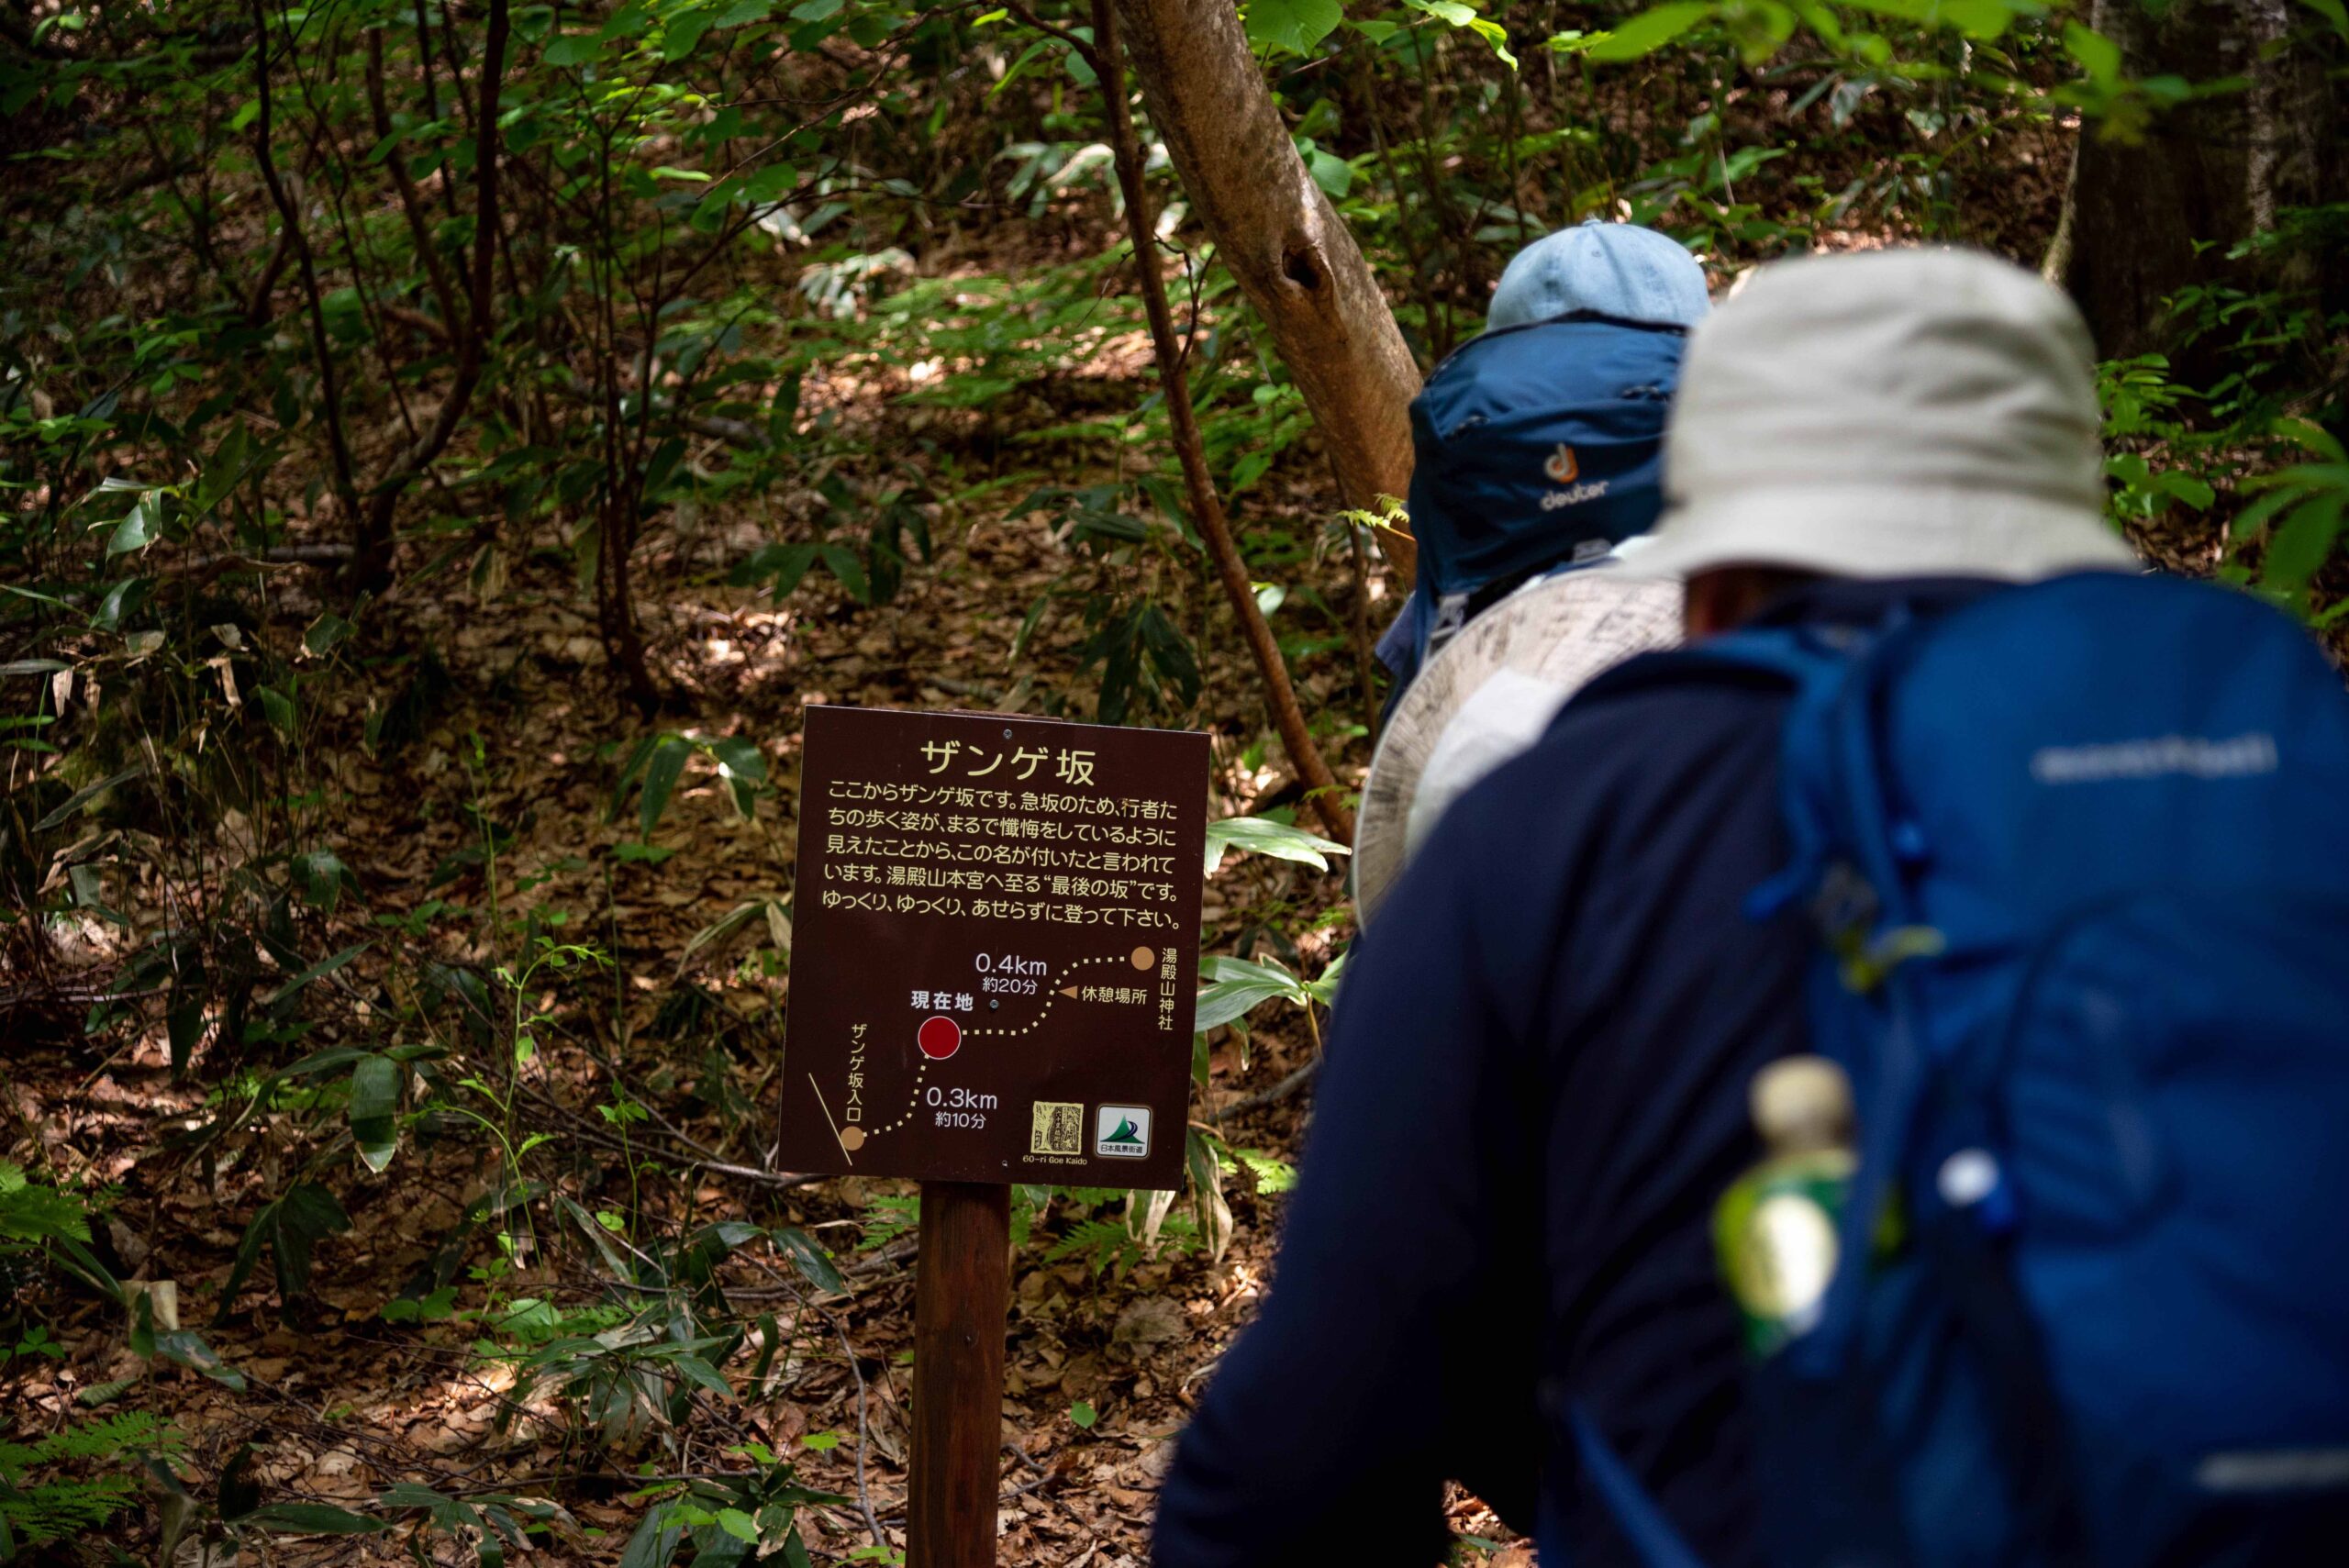
40. Climb the “Repentance Slope”
The Zange-zaka ザンゲ坂 (“The Repentance Slope”) is the final step to Mt. Yudono. It is a bit steep, so brace yourselves.
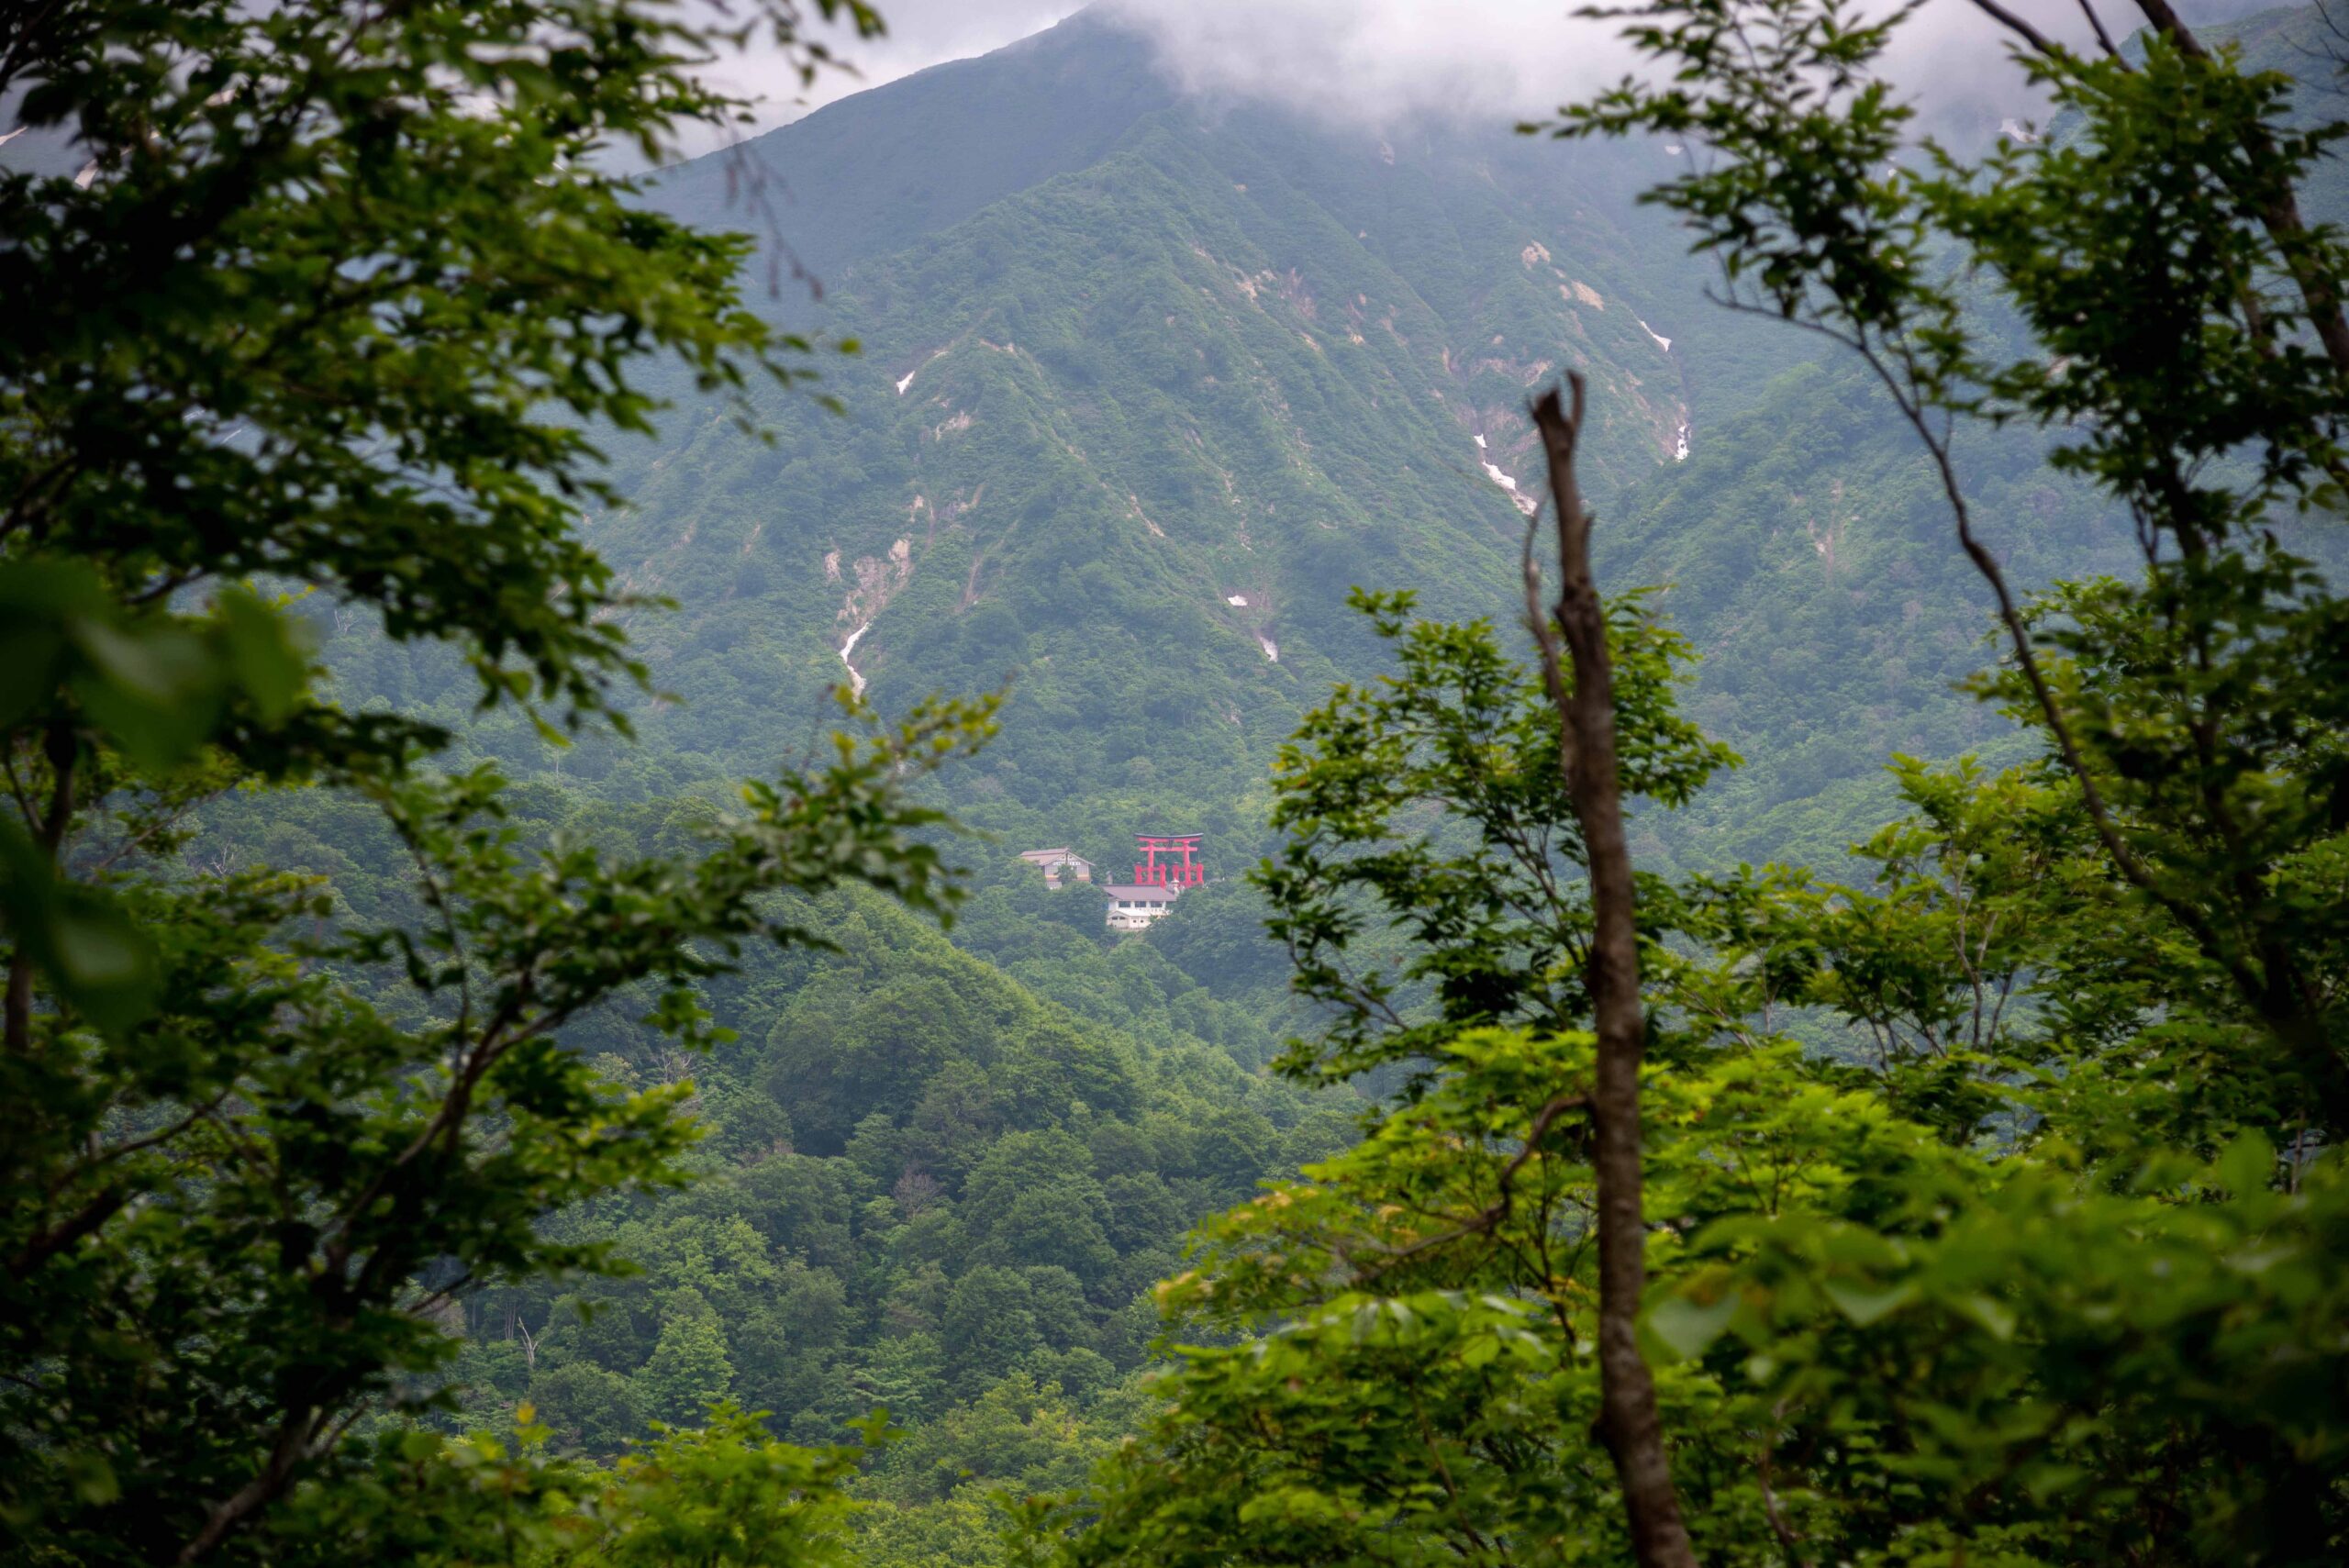
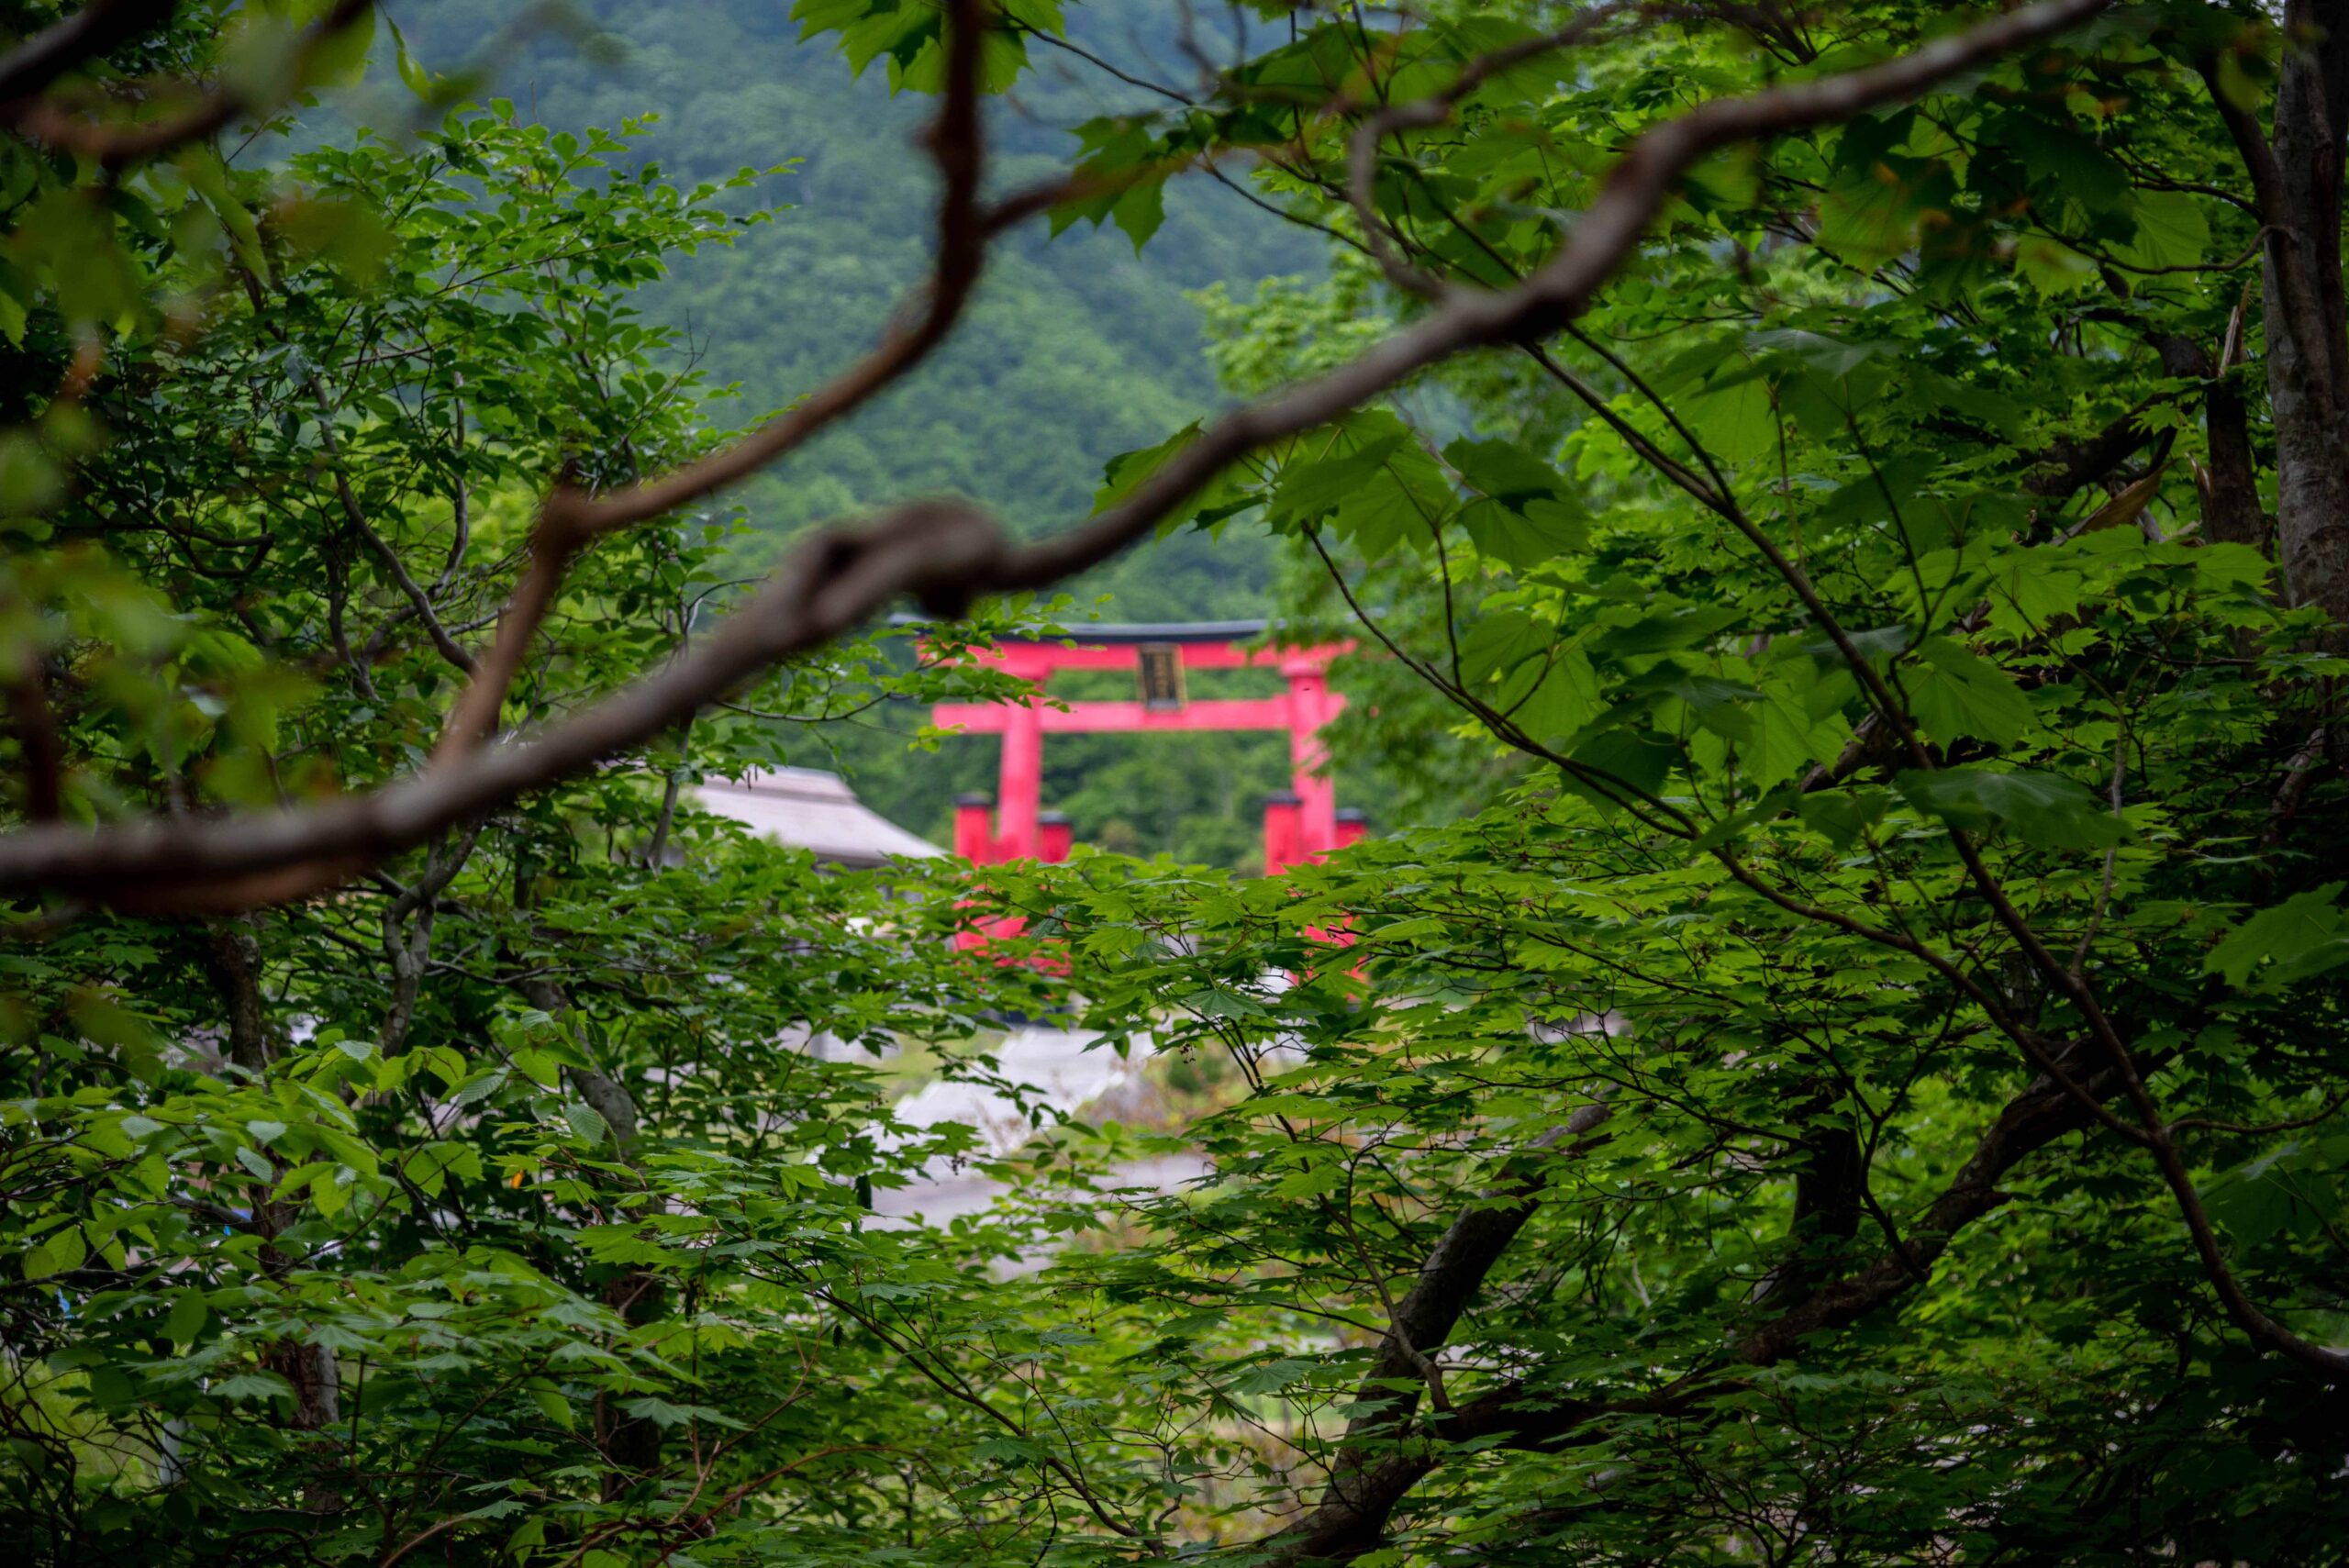
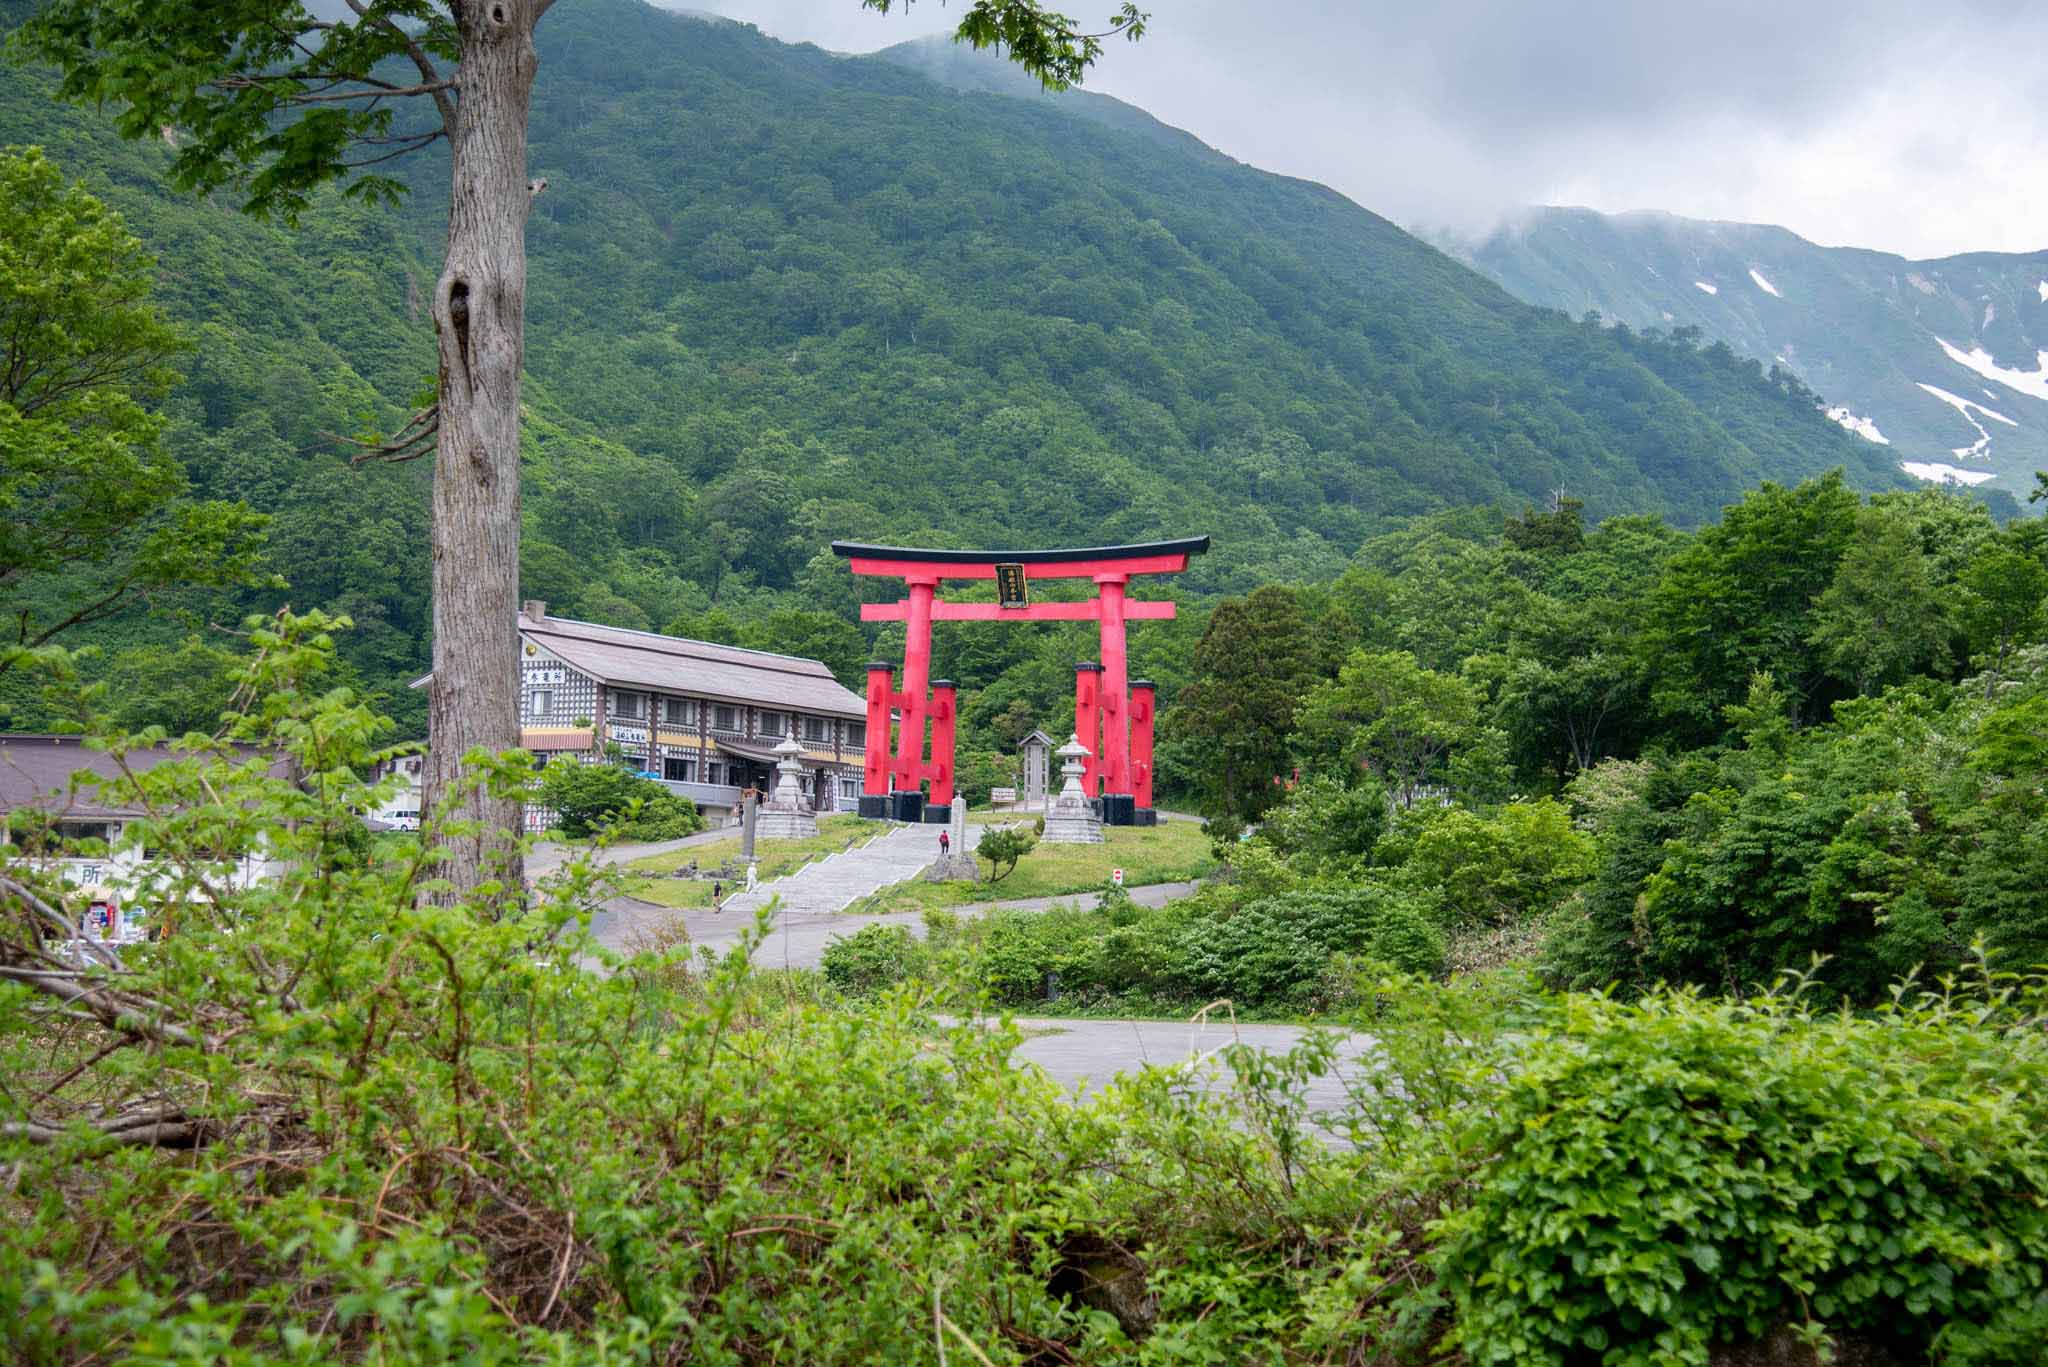
41. You can spot Yudono’s torii gate
42. You arrive at Yudonosan Senninzawa
This is the end of your hike to Mt. Yudono. You can take it further by following the Yamabushi path, only if you are guided by a Yamabushi monk/priest.
Rokujurigoe-Kaido: From Dainichibo Temple to the Nanatsu Falls
Leave the mummies village to go back to the Rokujurigoe-Kaido forests.
Distance
4km
Elevation
160meters
Required Time
1.5h
Danger level
Caution advised *Dangers include:Bear presence
Difficulty level (for beginners)
Easy
Equipment needed
● Water ● Hiking shoes ● Rainwear ● Sun hat ● Hiking sticks
Difficulty levels have been designed for people who have a PAI (Personal Activity Intelligence) score inferior or equal to 60. Experienced hikers or persons with a PAI above 100 can withdraw two cases to know the average difficulty for their fitness level. Example: Trails noted “Hard for beginners” correspond to “average” trails for experienced hikers or people with a PAI above 100
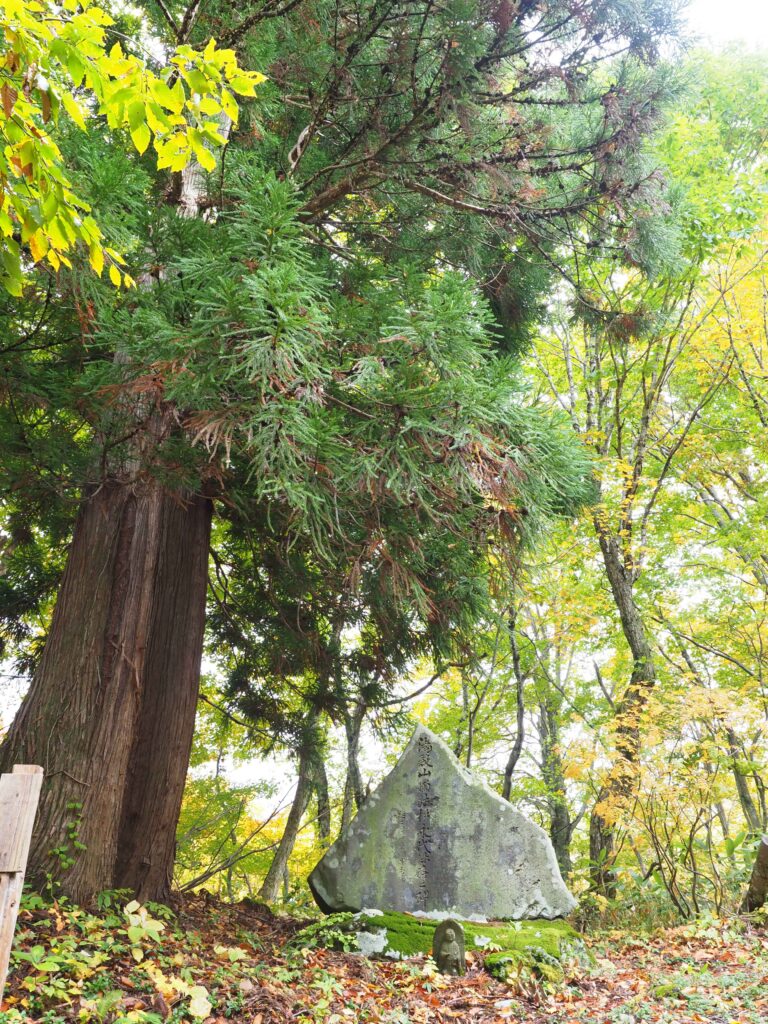
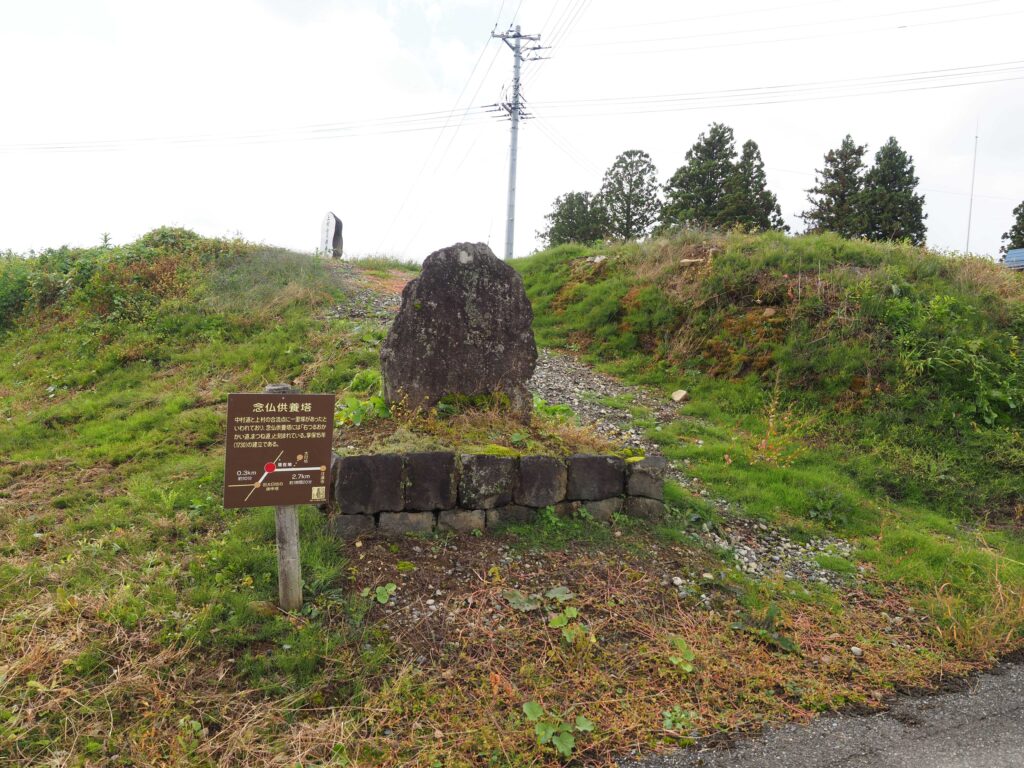
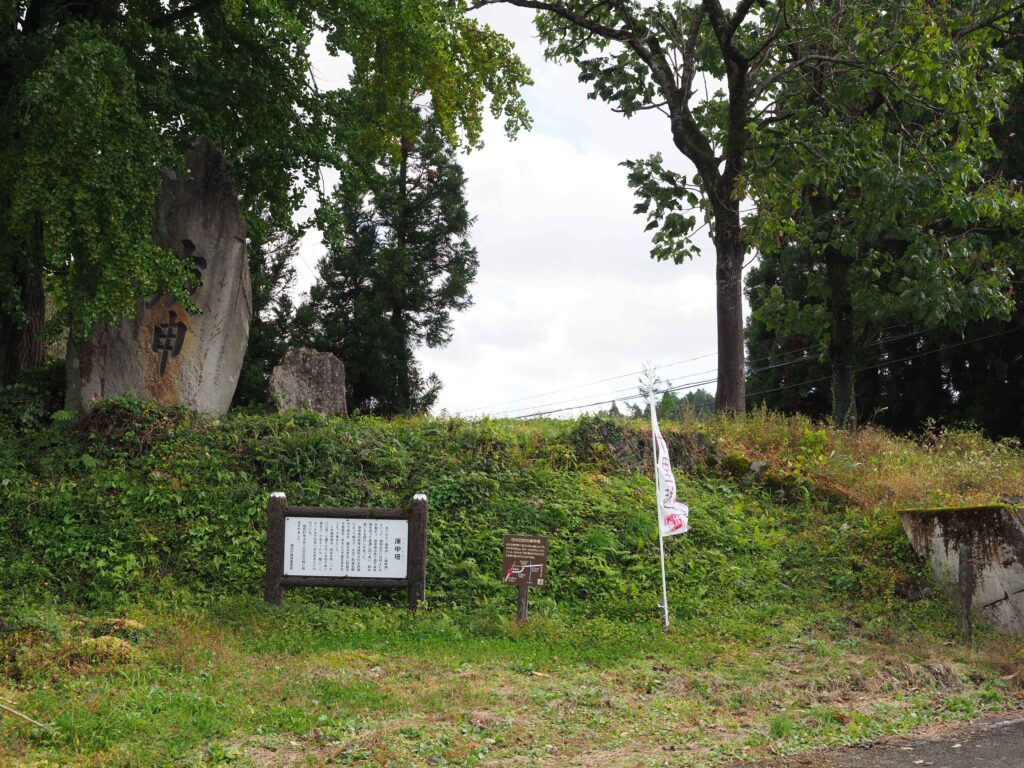
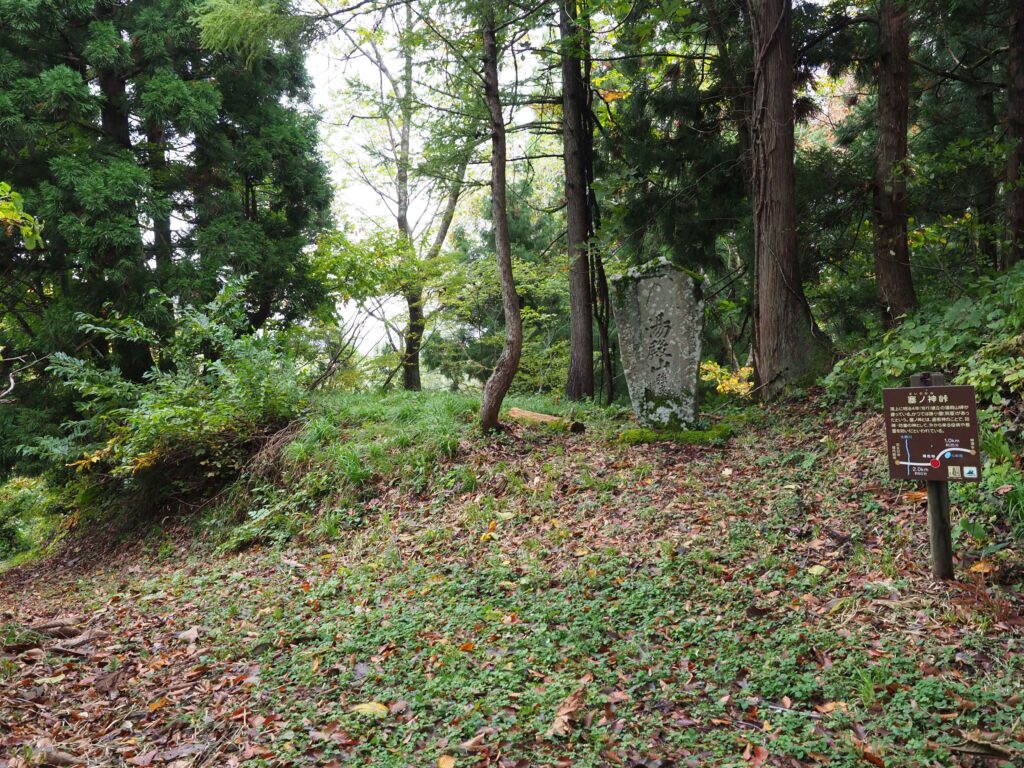
3. You spot this stele that indicates the location of the Odan no sugi
4. The giant stele on the left indicates the presence of the Odan no Sugi
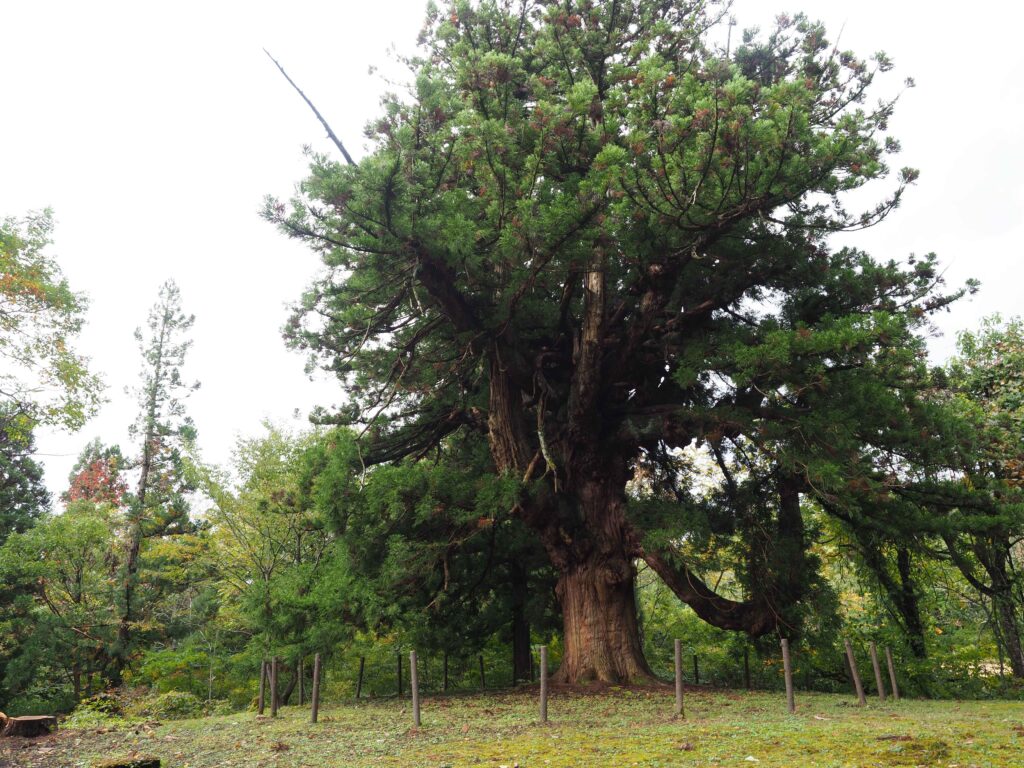
5. You see the Odan no Sugi
6. Odan no sugi
The Odan no sugi 皇壇ノ杉 is a giant cedar tree which age is estimated beyond 1000 years old. It is said Emperor Keiko’s son is buried under the tree.
7. Go for Dainichibo’s graveyard
8. Dainichibo’s graveyard
9. Follow the paved road
10. A sign tells you the direction to go to go to Tamugimata village
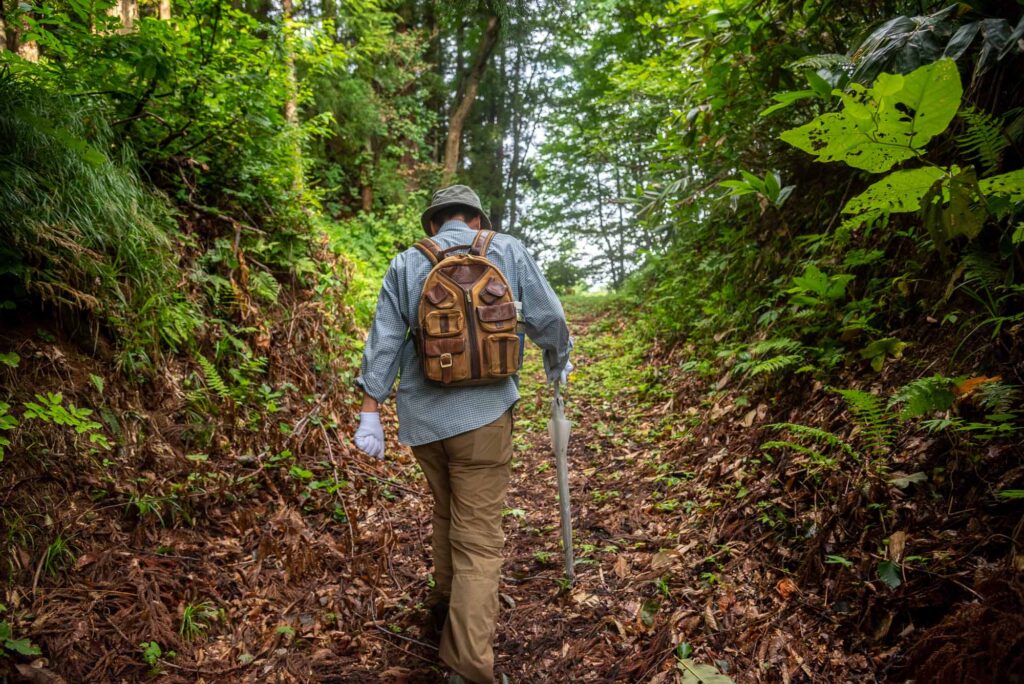
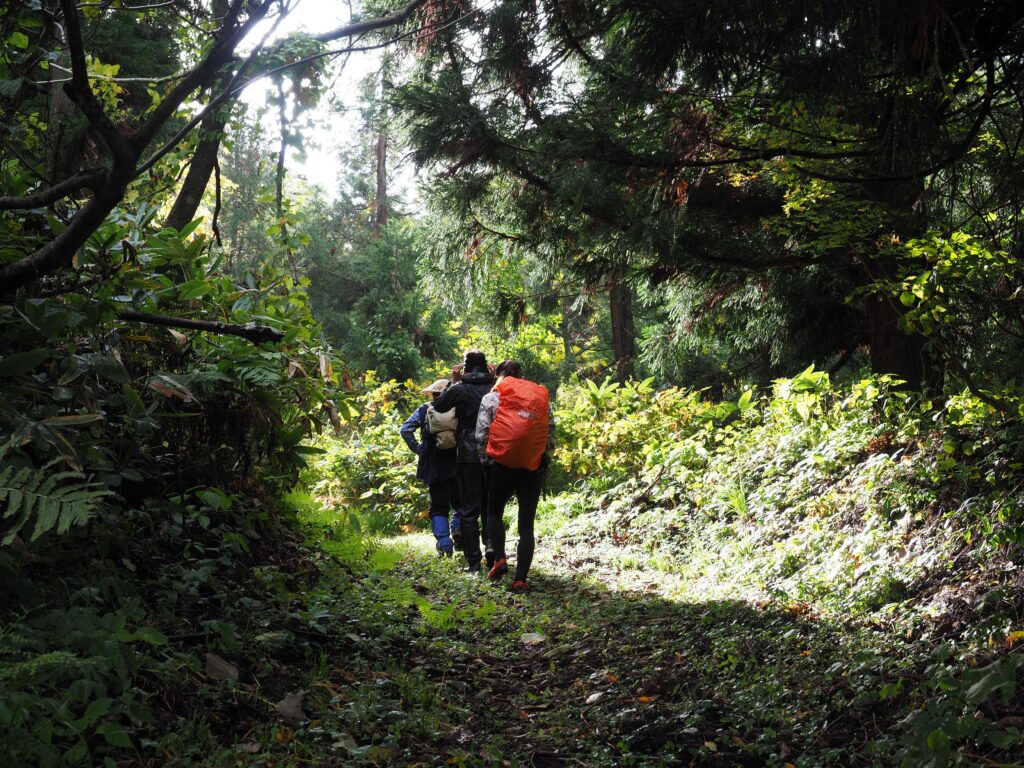
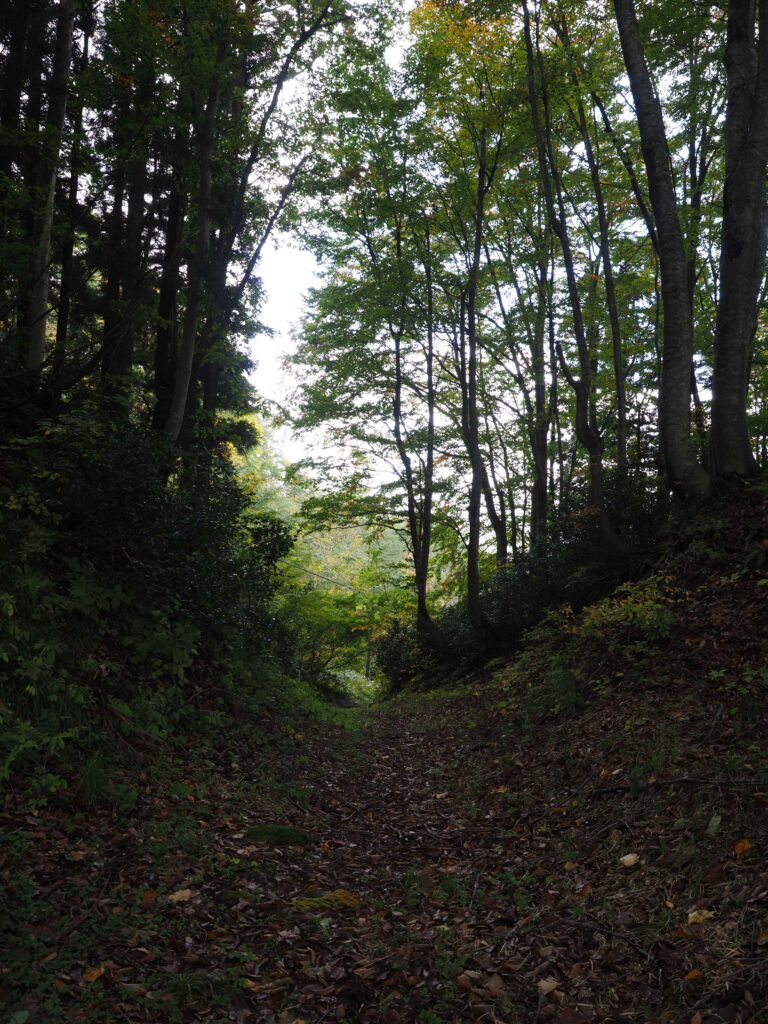
11. Follow the path
12. You enter a beech forest
13. Continue
14. You arrived at the Sainotoge
The Sainotoge 塞ノ峠 ruins are those of a former pilgrim teahouse that was once thriving. This is the proof of the popularity the Rokujurigoe-kaido had among the pilgrims at the time.
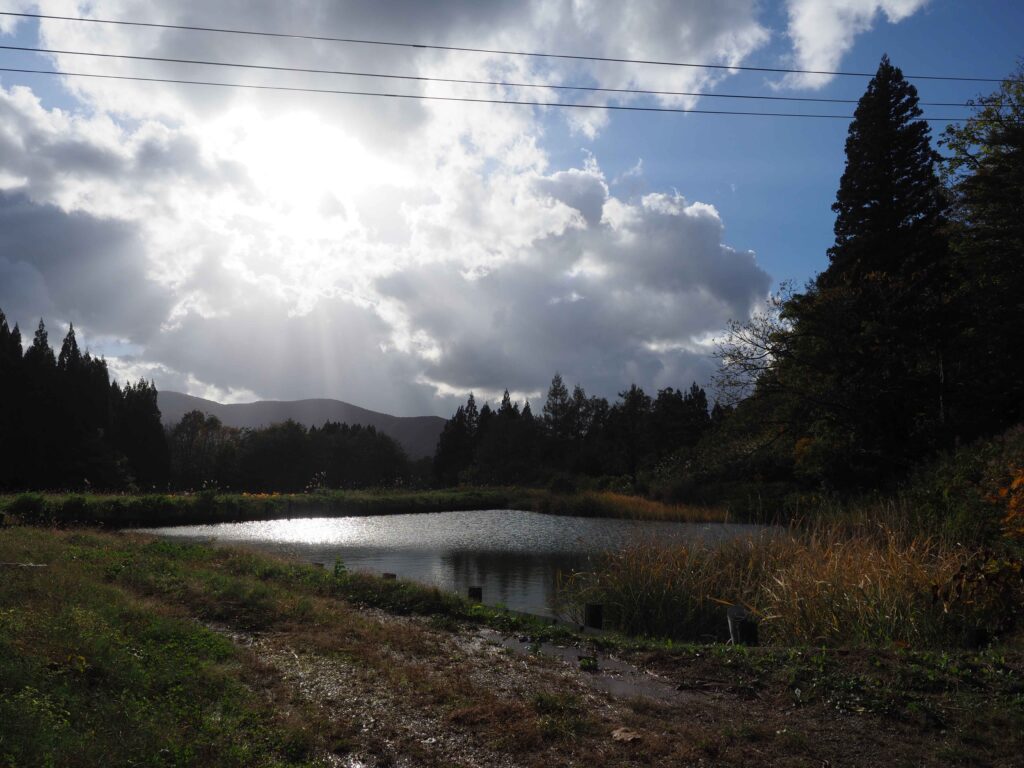
15. Follow straight
16. You arrive at a pond
17. Follow the dirt road on the left
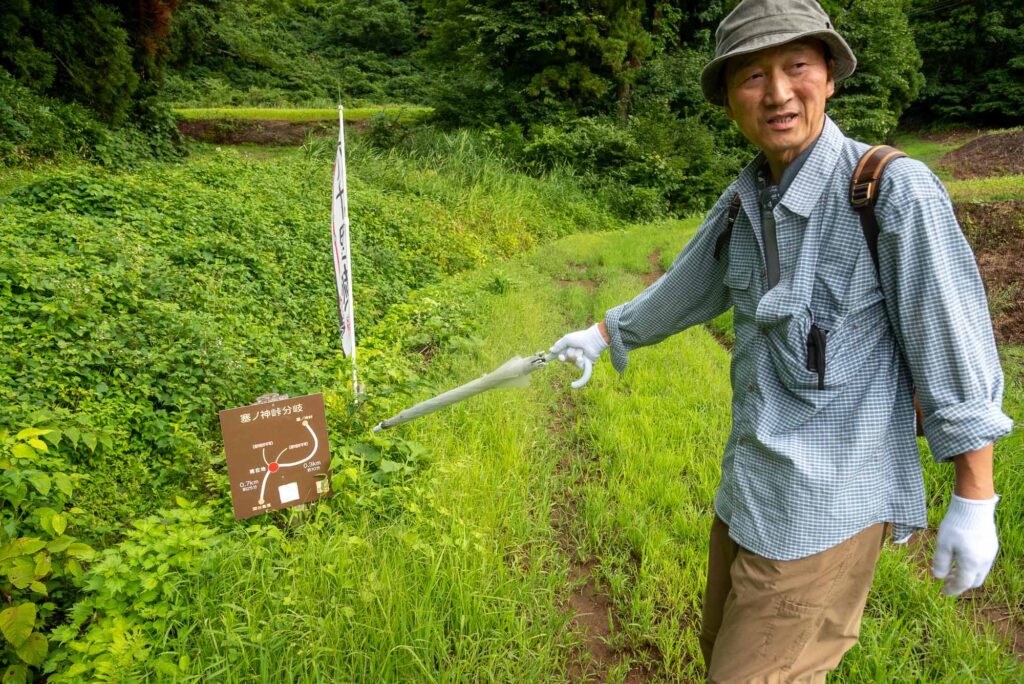
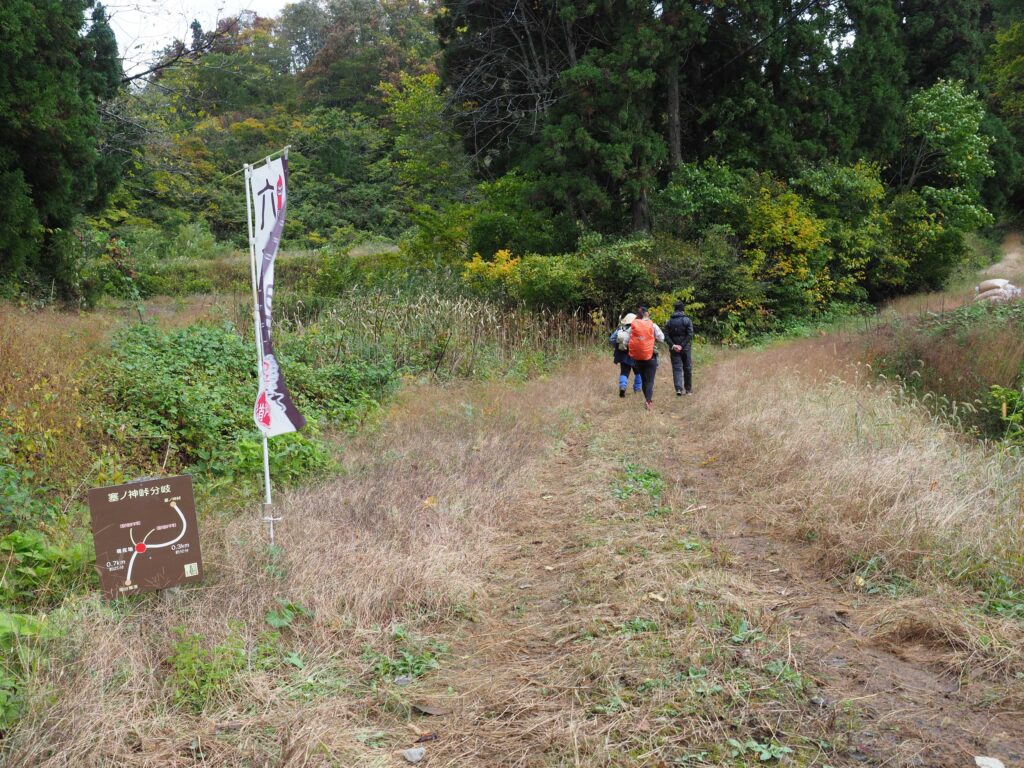
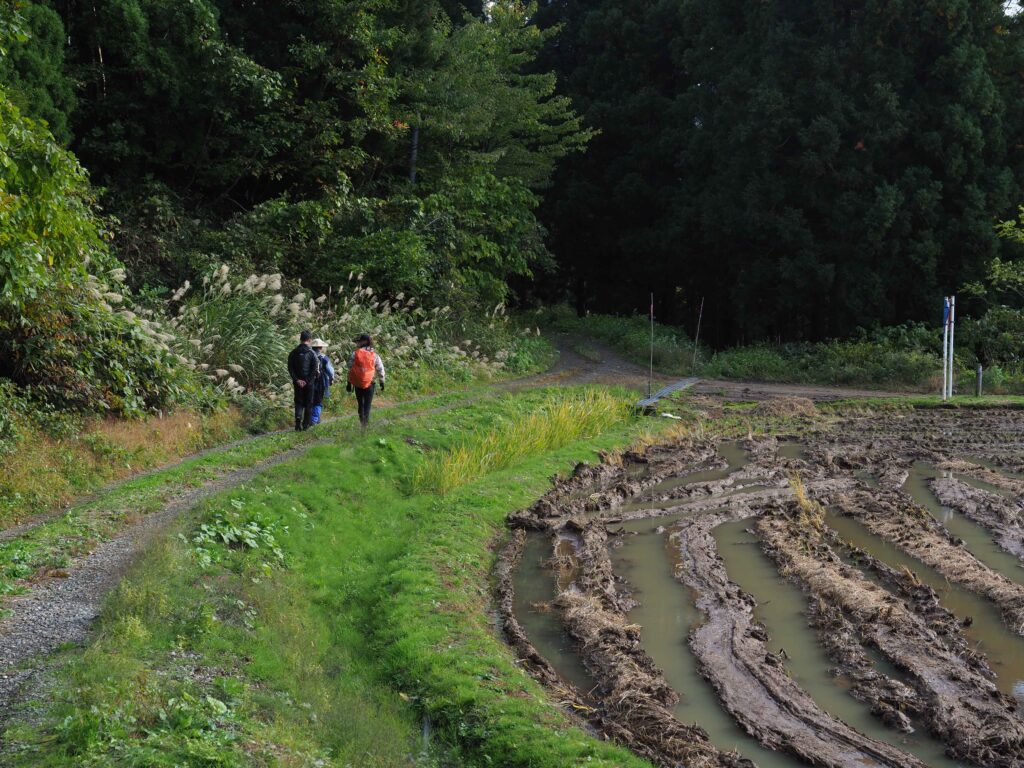
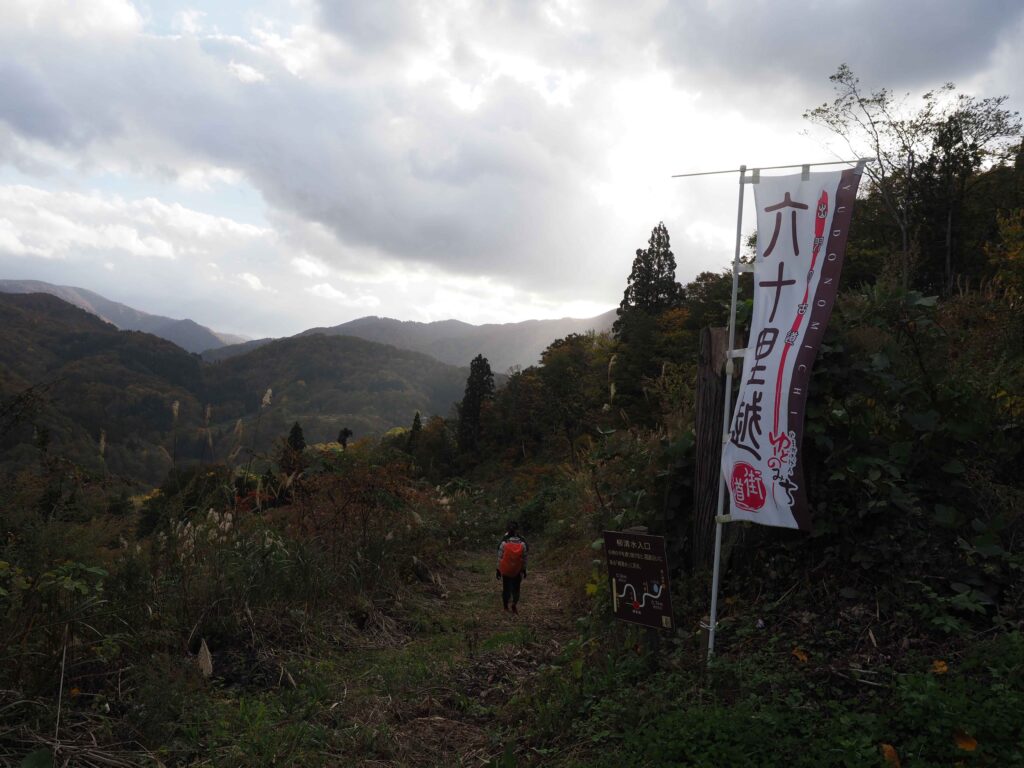
18. You come by this flag.
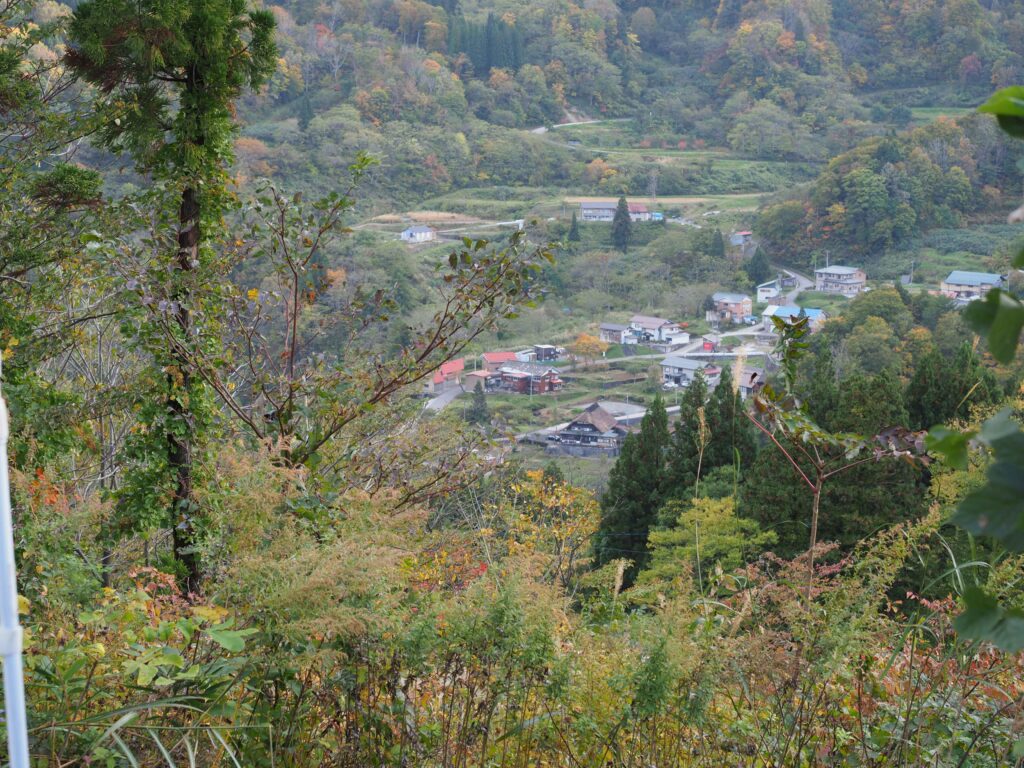
19. Below is the village of Tamugimata
20. Follow the path to Tamugimata village
OLYMPUS DIGITAL CAMERA
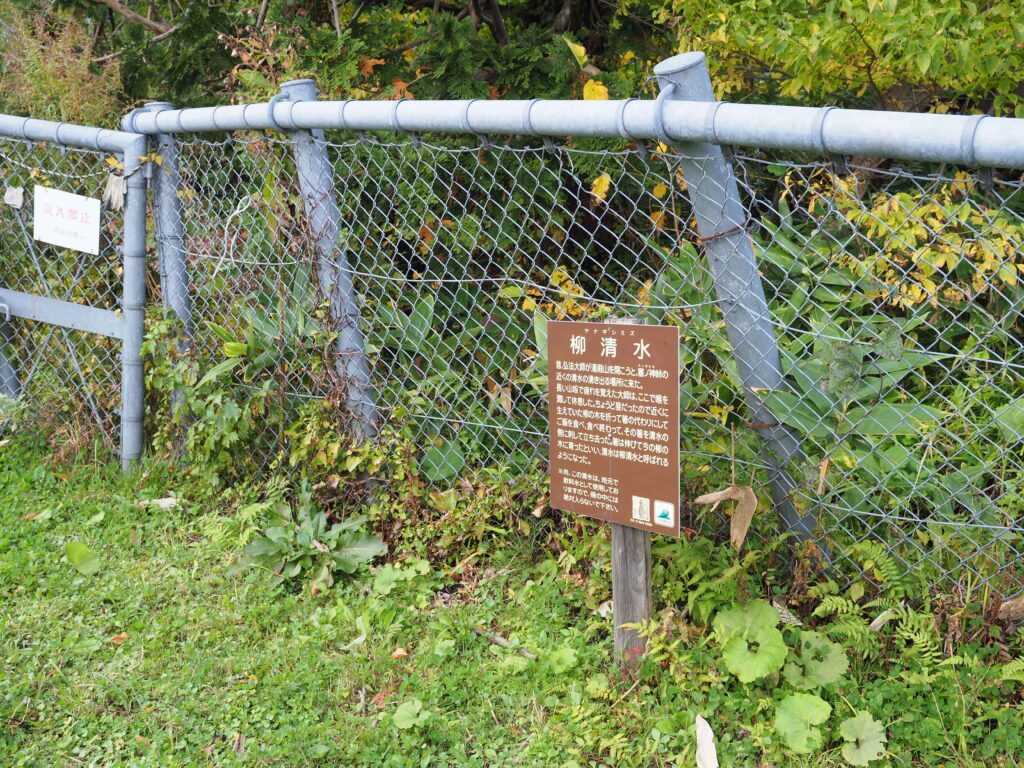
21. You arrive by a road. This sign indicates a spring that is not for use anymore.
22. Further, the NanakamadoTei inn.
Stay here if it’s late or if you want to have lunch.
23. Cross the road
Soon you’ll arrive by a river
24. A stele tells you you’re in the right direction
25. You cross a river
26. Soon, you arrive at a village with two big thatch-roofed houses.
This is Tamugimata village. Follow the path up the village to find the next entrance to the Rokujurigoe-kaido pilgrim trail.
27. After a while, you come by the Arikoshizaka entrance
This is the entrance you will need to take to get to Mt. Yudono. But we suggest you take a look at the Nanatsu falls before heading for the last step of the pilgrimage.
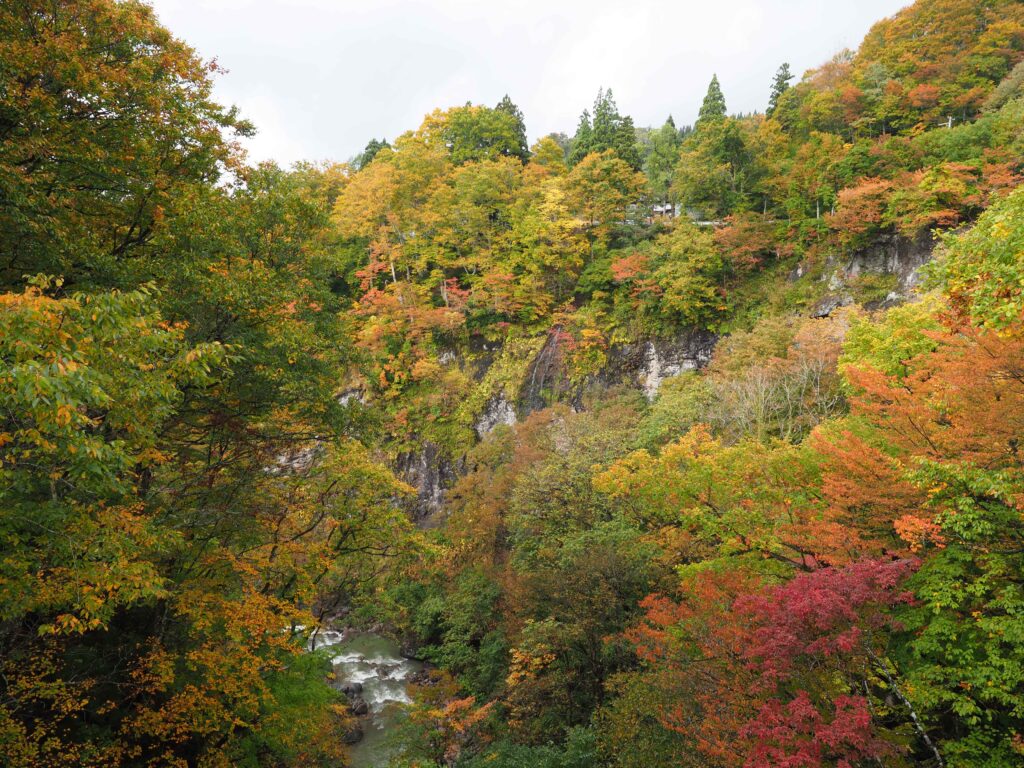
28. A little further the Arikoshizaka: the Nanatsu Falls
One of Japan’s 100 most beautiful waterfalls.
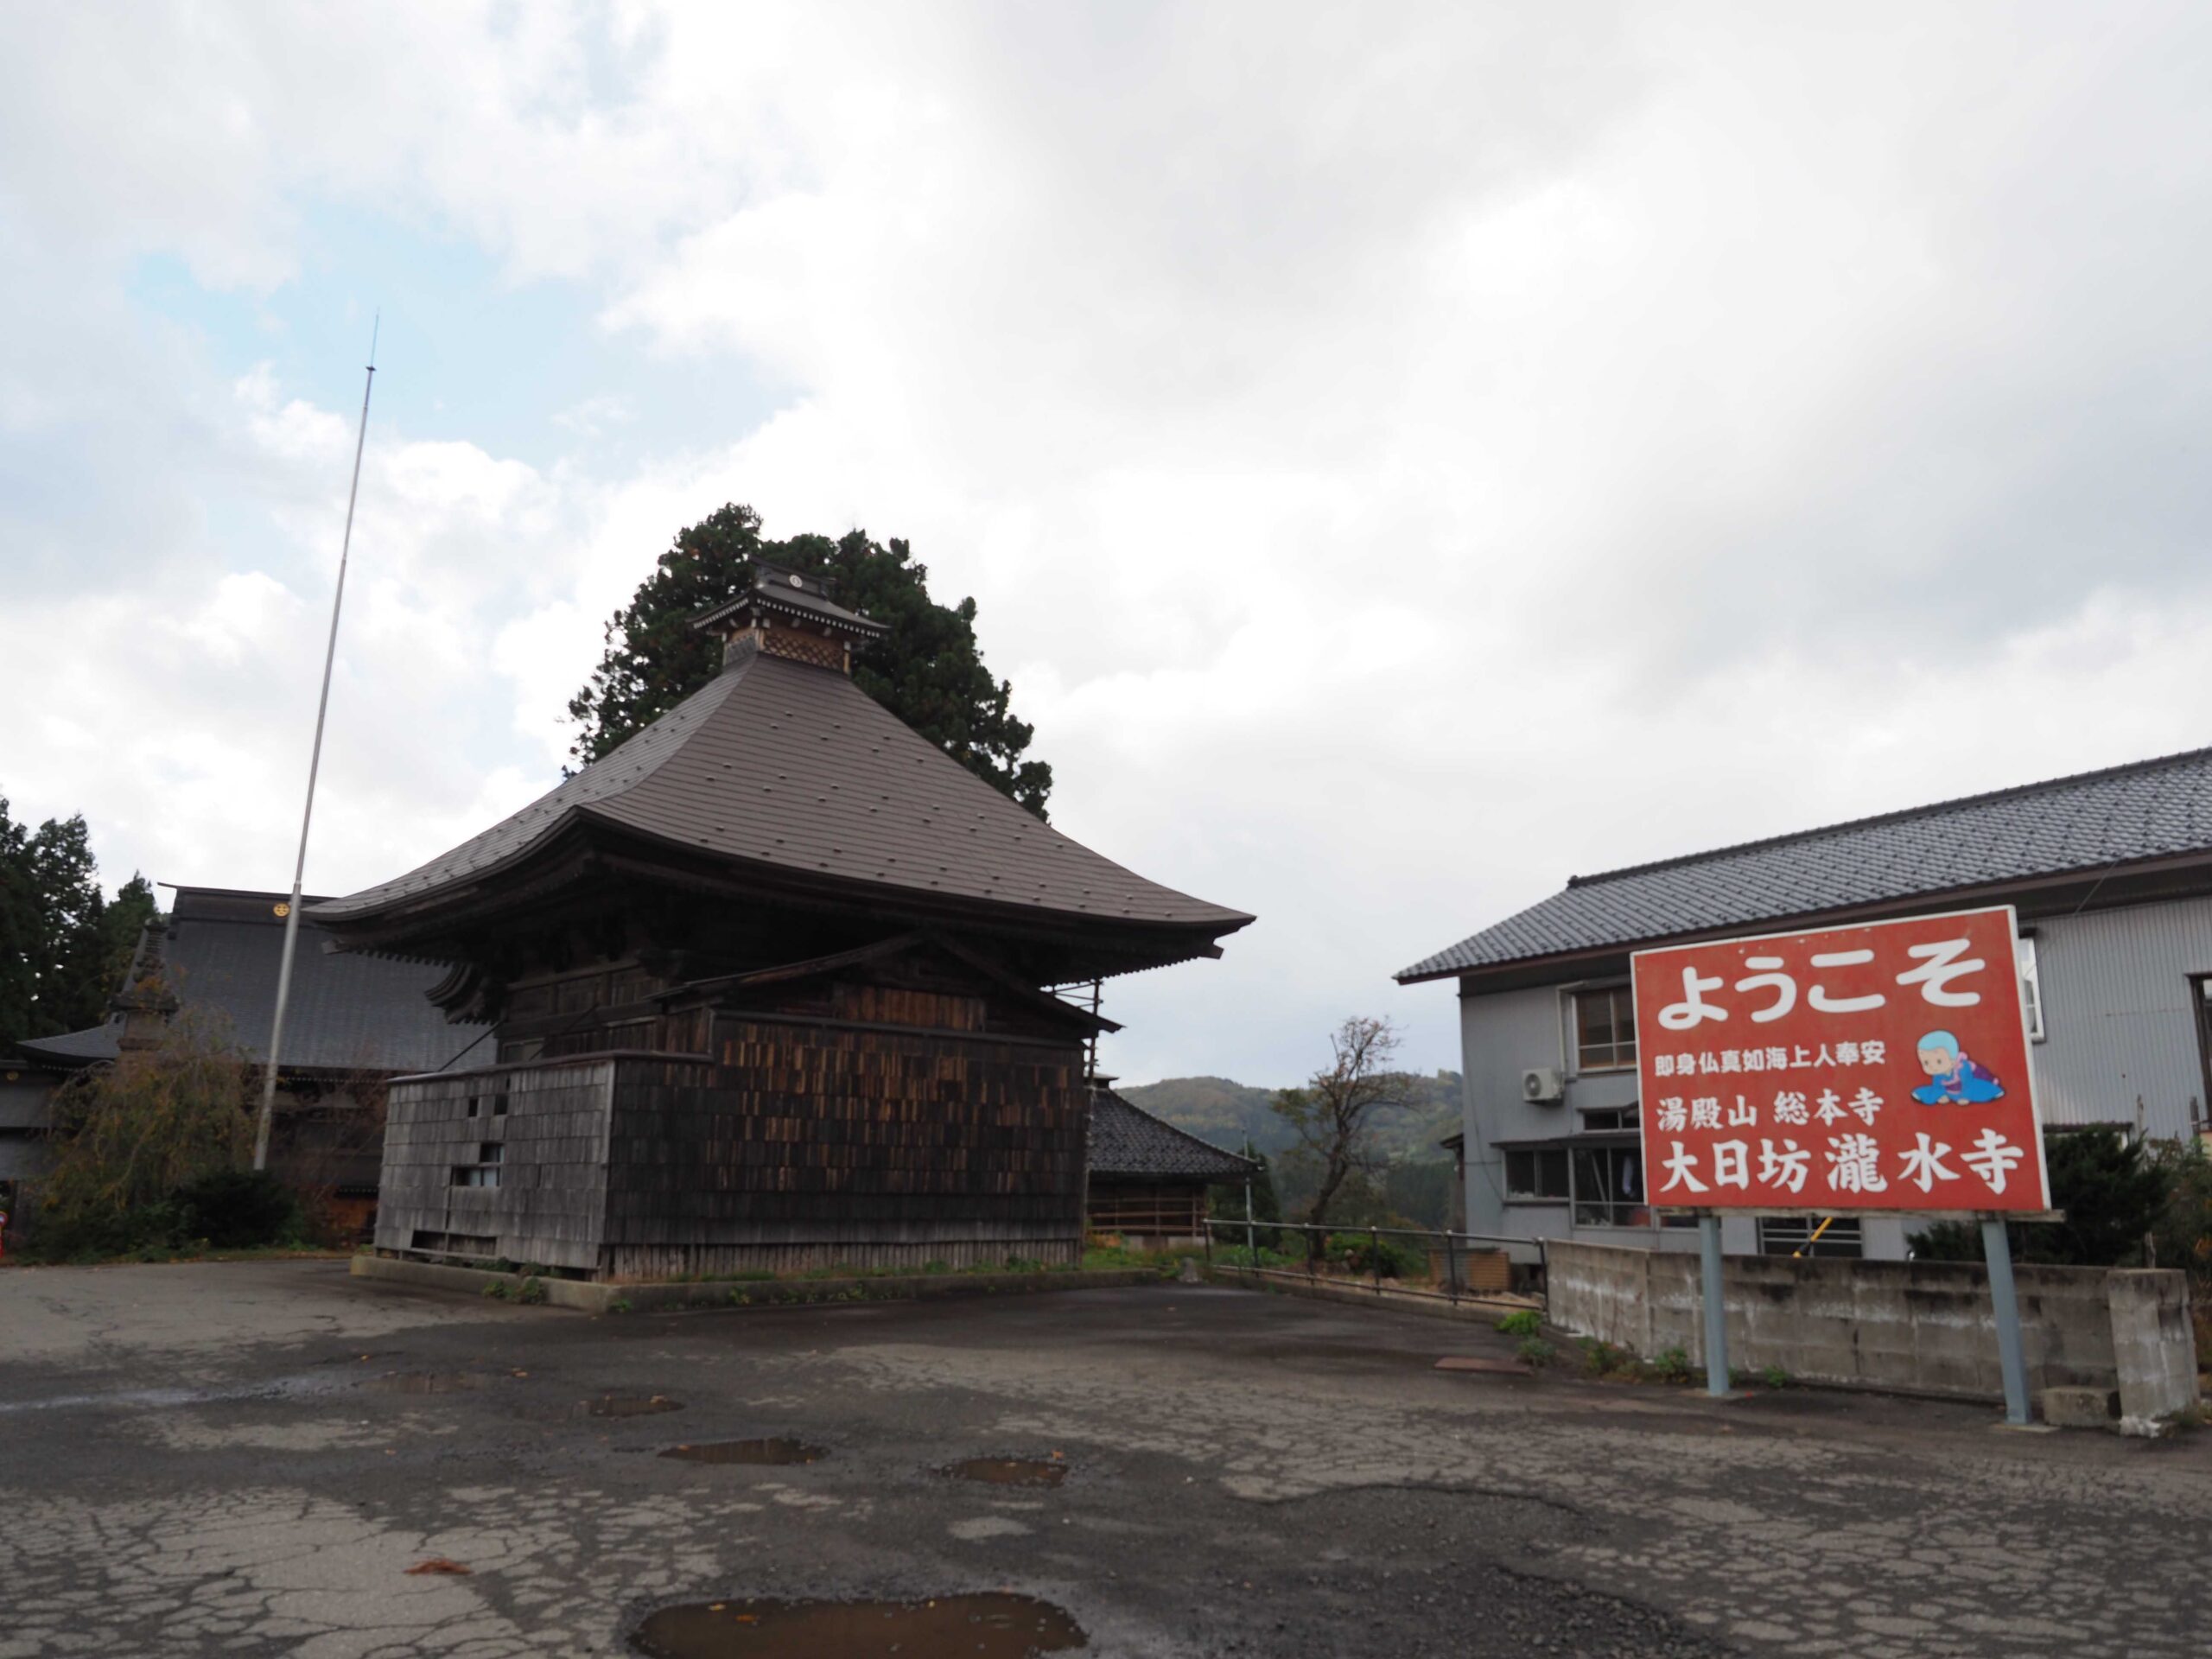
Rokujurigoe-Kaido: From Churenji to Dainichibo Temple
The road that connects two of the most important temples in Mt. Yudono’s history, each entombing a Sokushinbutsu mummy.
Difficulty levels have been designed for people who have a PAI (Personal Activity Intelligence) score inferior or equal to 60. Experienced hikers or persons with a PAI above 100 can withdraw two cases to know the average difficulty for their fitness level. Example: Trails noted “Hard for beginners” correspond to “average” trails for experienced hikers or people with a PAI above 100
Also called “The Realm of the Dead”, or “The Mountain of the Past”, Mt. Gassan is the most important step in the Dewa Sanzan’s yamabushi training.
Distance
5.1km
Elevation
-1130meters
Required Time
2.3h
Danger level
Dangerous *Dangers include:Slippery slopes, Snow, Heat strokes, Slippery when raining, Snow (risks of slipping), Strong winds, Ladders
Difficulty level (for beginners)
Hard
Equipment needed
● Water ● Hiking shoes ● Rainwear ● Sun hat ● Hiking sticks ● Snow grips (especially in July) ● Food or snacks
Difficulty levels have been designed for people who have a PAI (Personal Activity Intelligence) score inferior or equal to 60. Experienced hikers or persons with a PAI above 100 can withdraw two cases to know the average difficulty for their fitness level. Example: Trails noted “Hard for beginners” correspond to “average” trails for experienced hikers or people with a PAI above 100.
1. Go behind the Gassan Chojo Goya lodge
2. A sign indicates the direction you have to follow
This direction is called: “Yudonosan Ubasawa hômen 湯殿山姥沢方面”
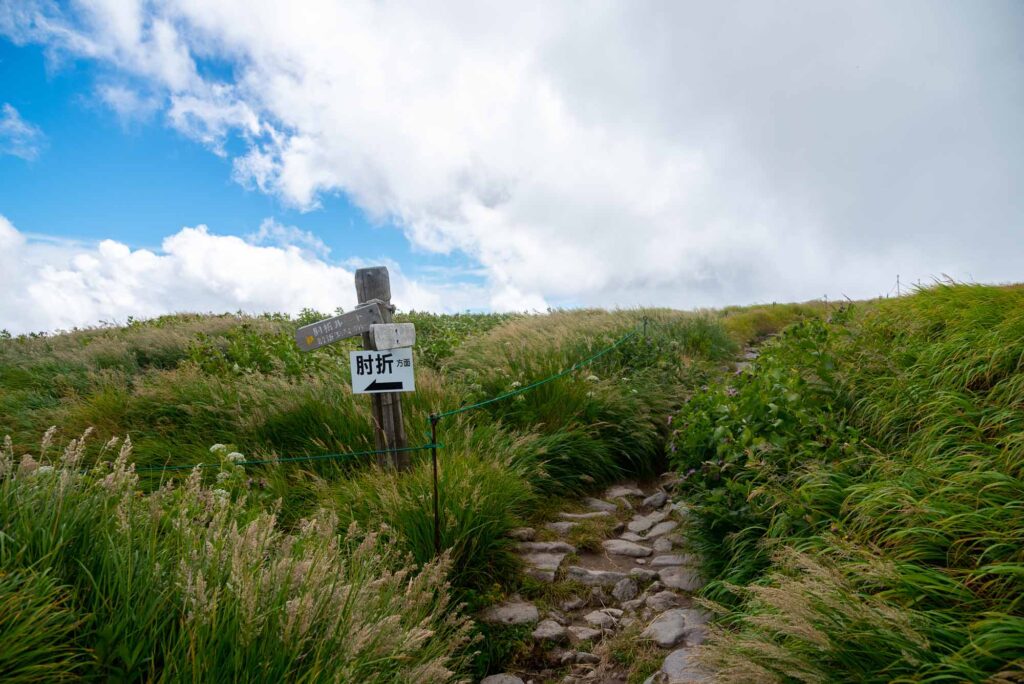
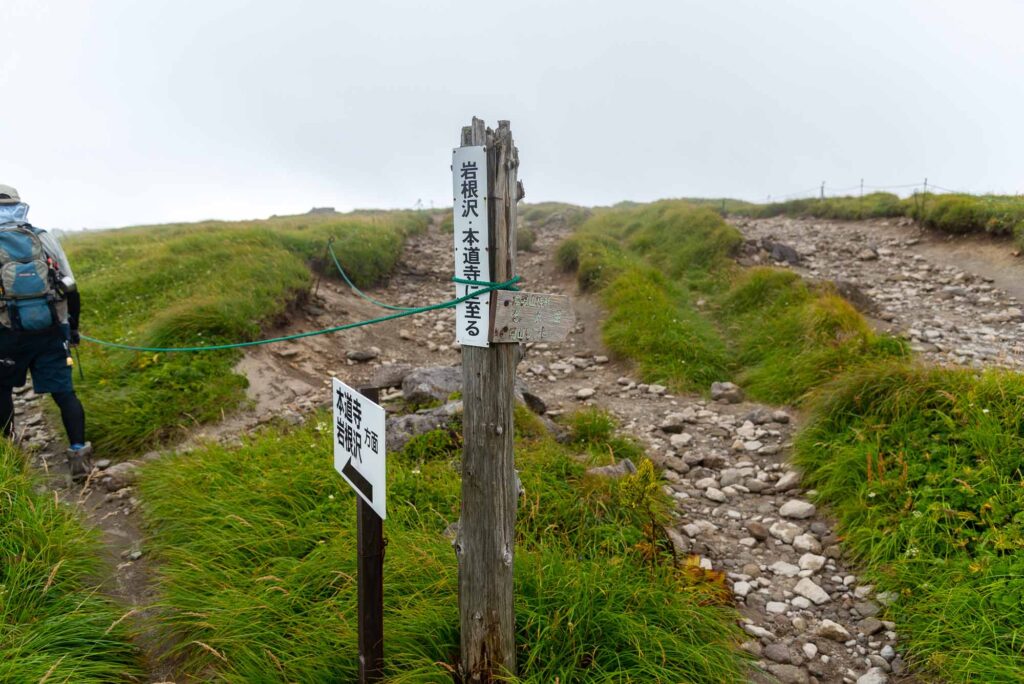
3. Do Not turn left at this point
If you turn left, you will arrive at Hijiori.
4. Do not turn left
Turning left will bring you to Hondôji temple.
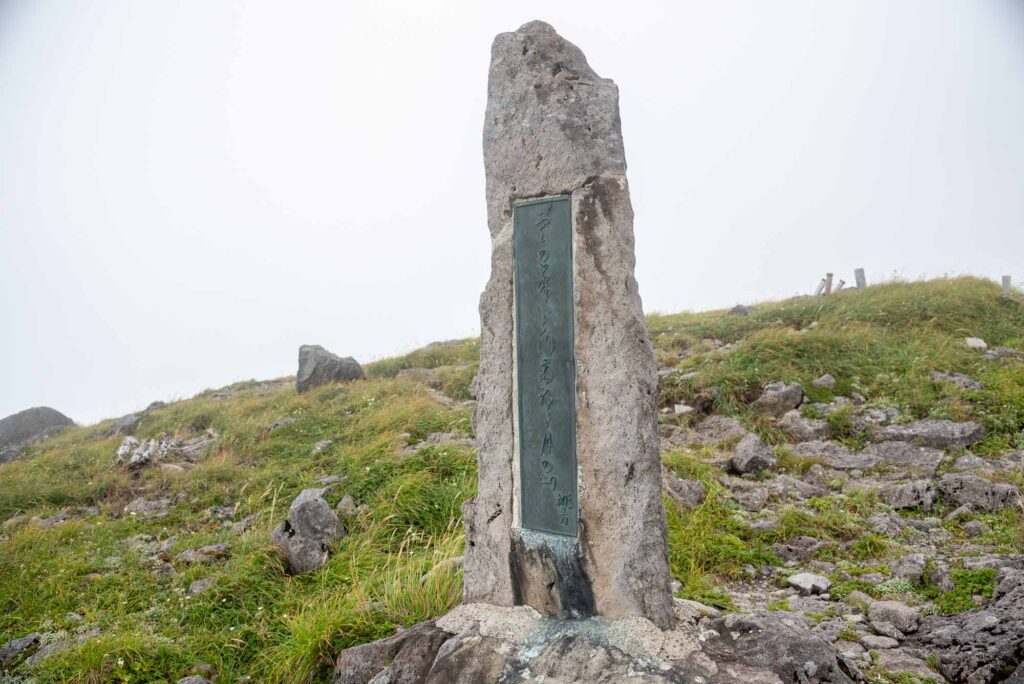
5. You spot this stele with a haiku written on it
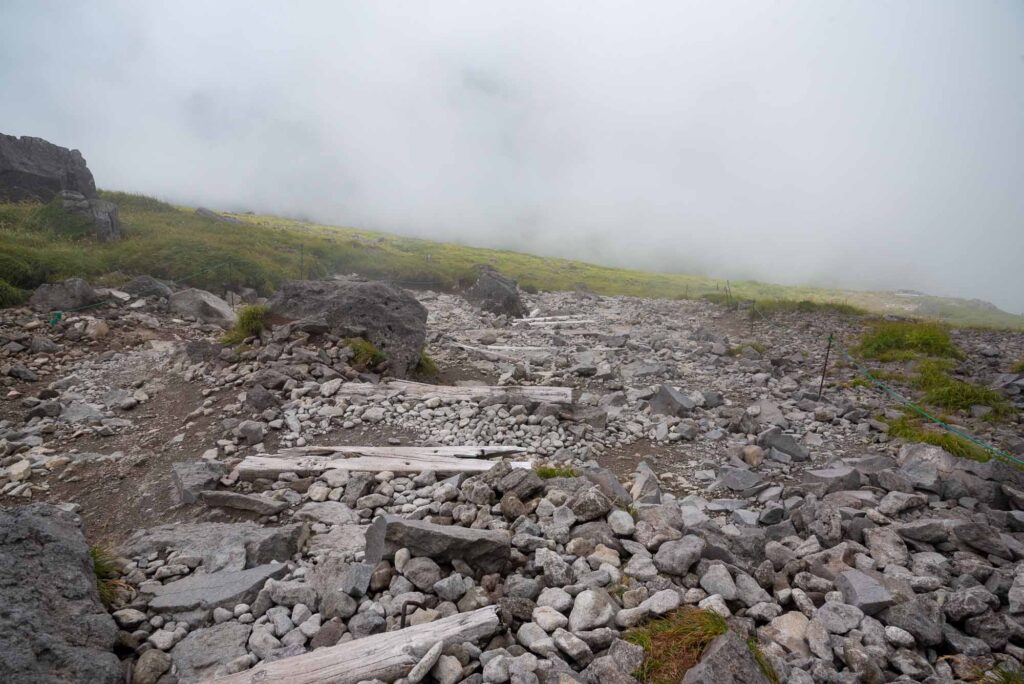
6. You start your descent
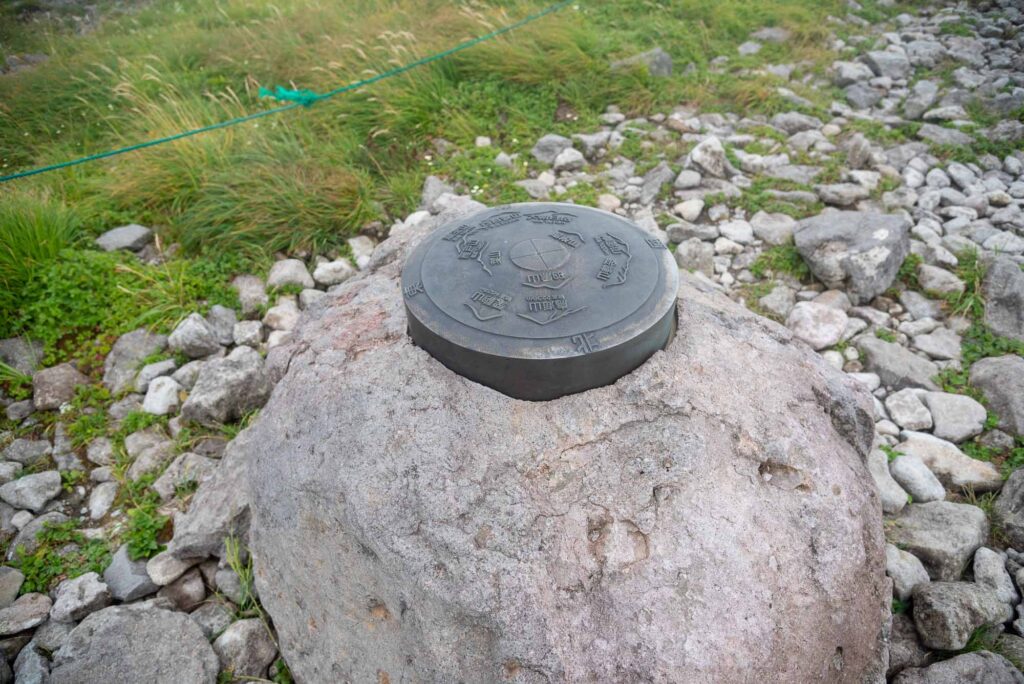
7. This metallic map indicates the position of every mountain in the surroundings
8. Find the Kaji Inari shrine
9. The view from Kaji gakkô
10. Continue going down
11. Ushikubi crossing. Continue straight
12. Approaching Kanauba
13. It’s still straight ahead!
14. Turn right at the Kanauba crossing
15. You should be arriving onto a track with wild vegetation
16.After a while, you arrive by a river
17. The vegetation is getting wild
18. You’re approaching Mt. Yudono
19. If you spot this stone monument, you’re on the right way
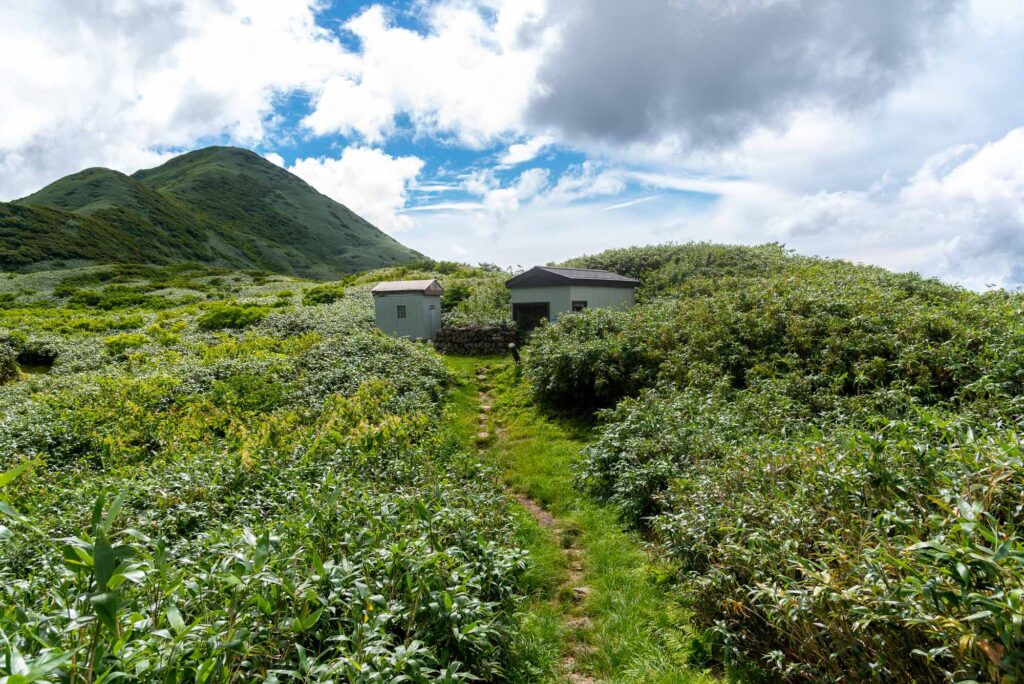
20. You arrive at the Shozokuba emergency lodge
21. You need to turn right to go to Mt. Yudono
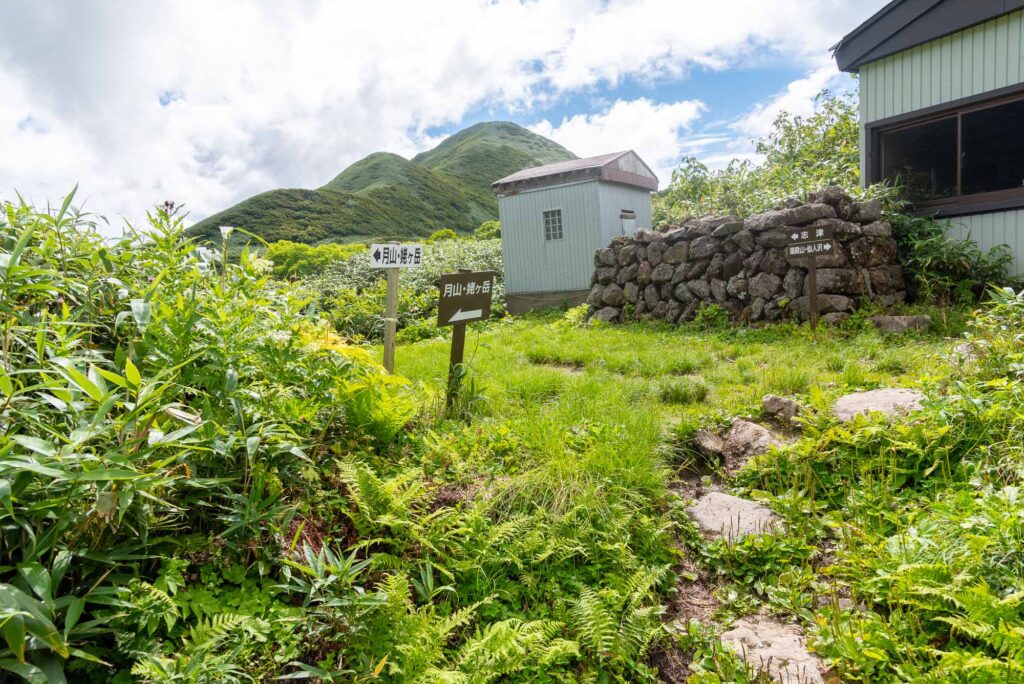
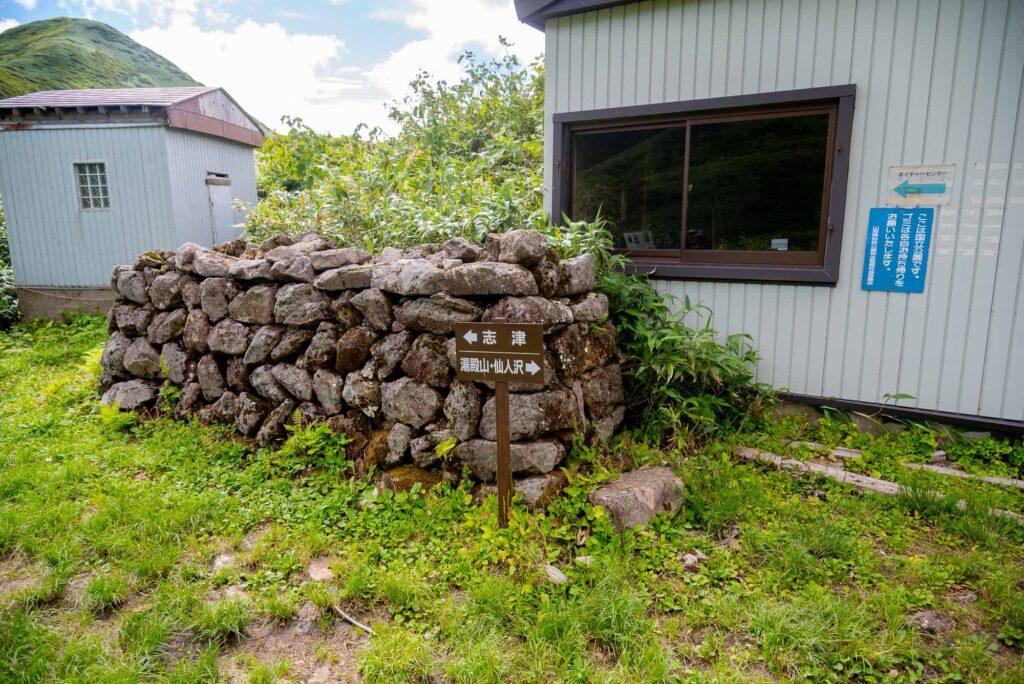
22. Do NOT turn left
If you turn left, you’ll arrive at Shizu Onsen.
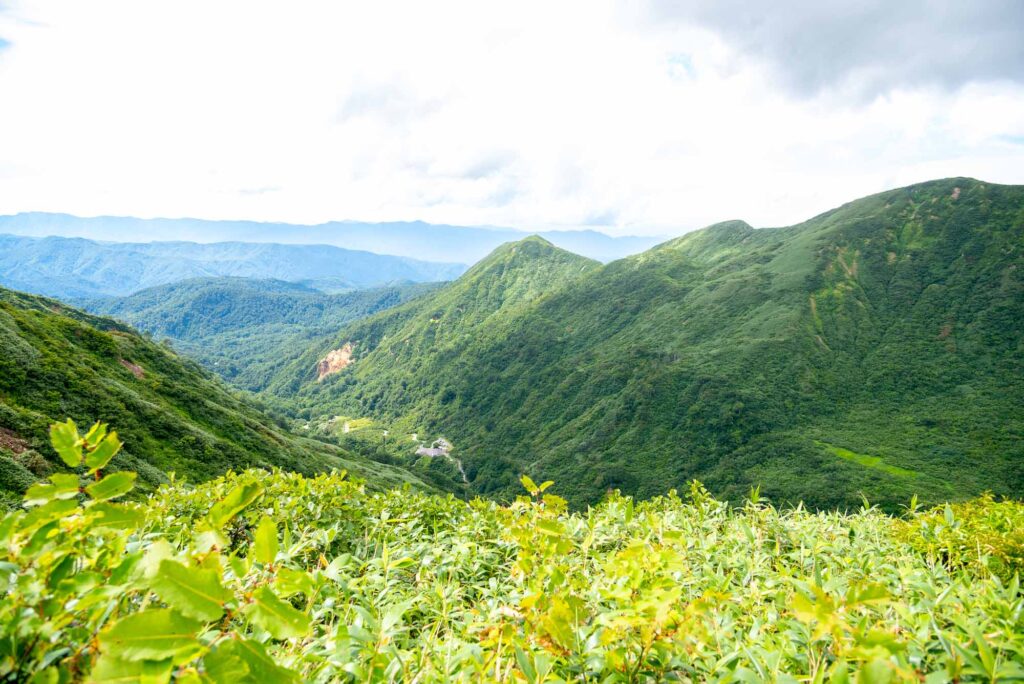
23. Appreciate the view on Yudono before getting into the jungle
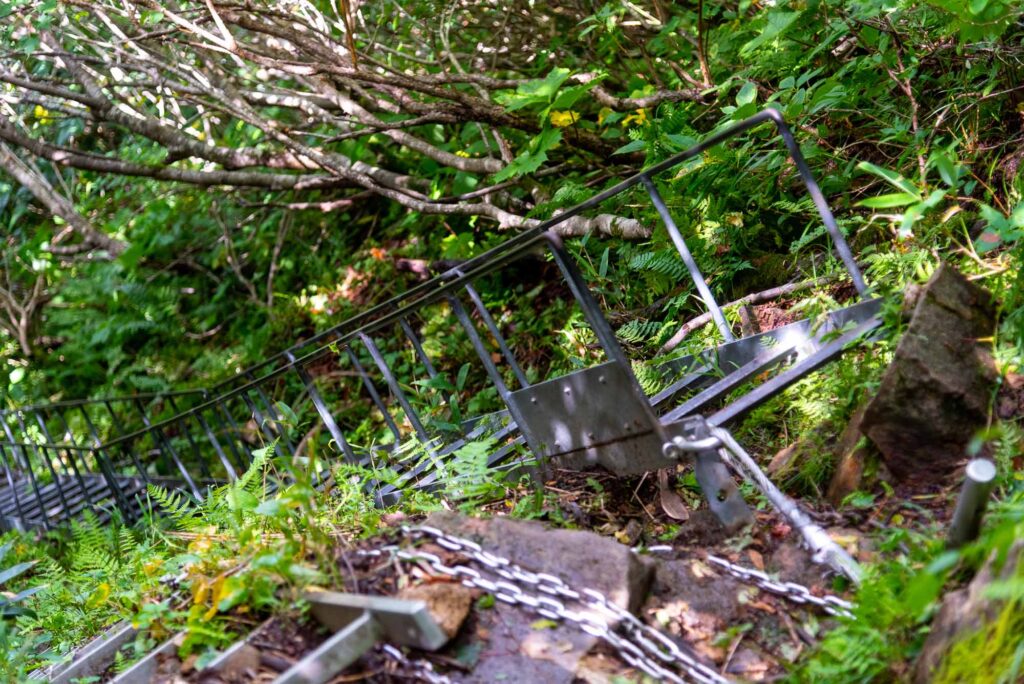
24. You are approaching the Gakkôzaka slope
25. This is the Gakkôzaka
This is the most dangerous part of the trail. Several ladders allow you to go down to Mt. Yudono. But be careful: it can be very slippery especially after the rain.
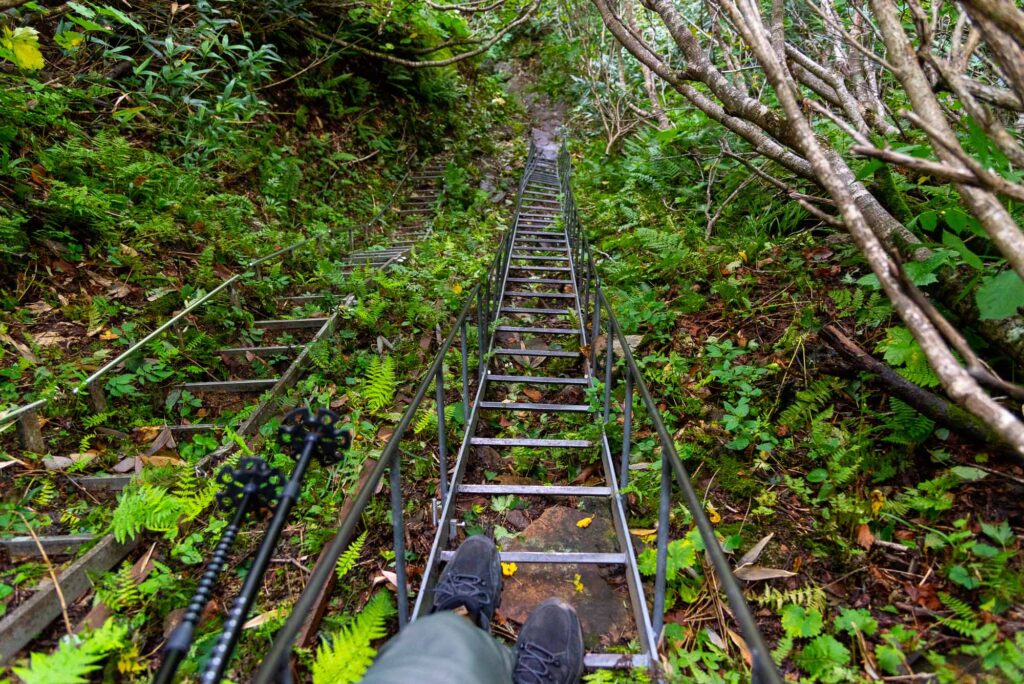
26. Go down with extra caution
27. Another ladder
28. Yes, it’s another ladder
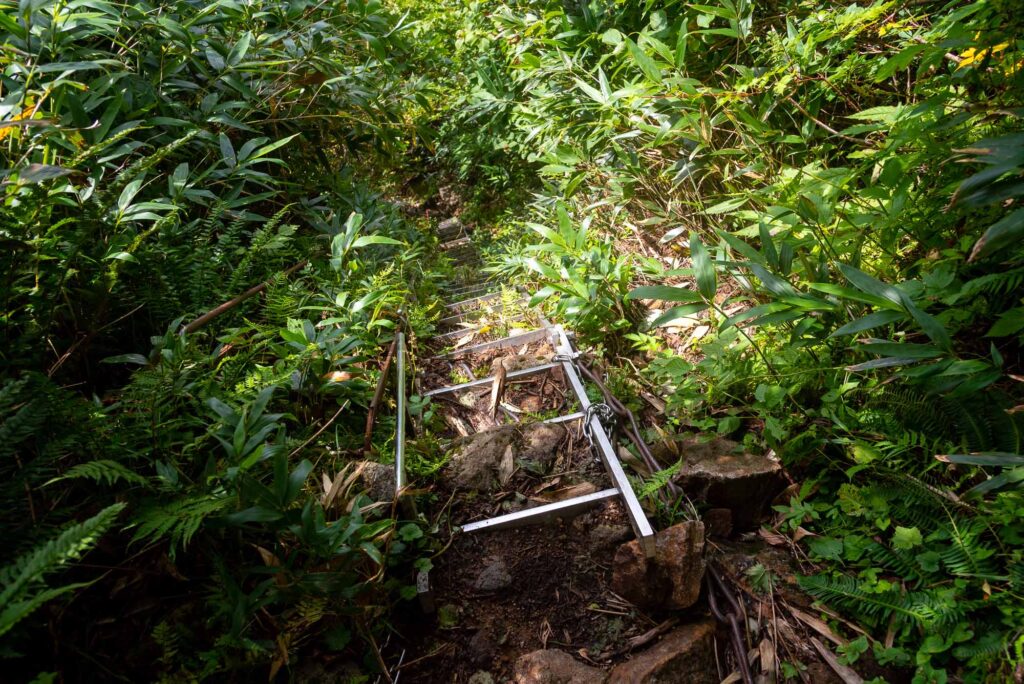
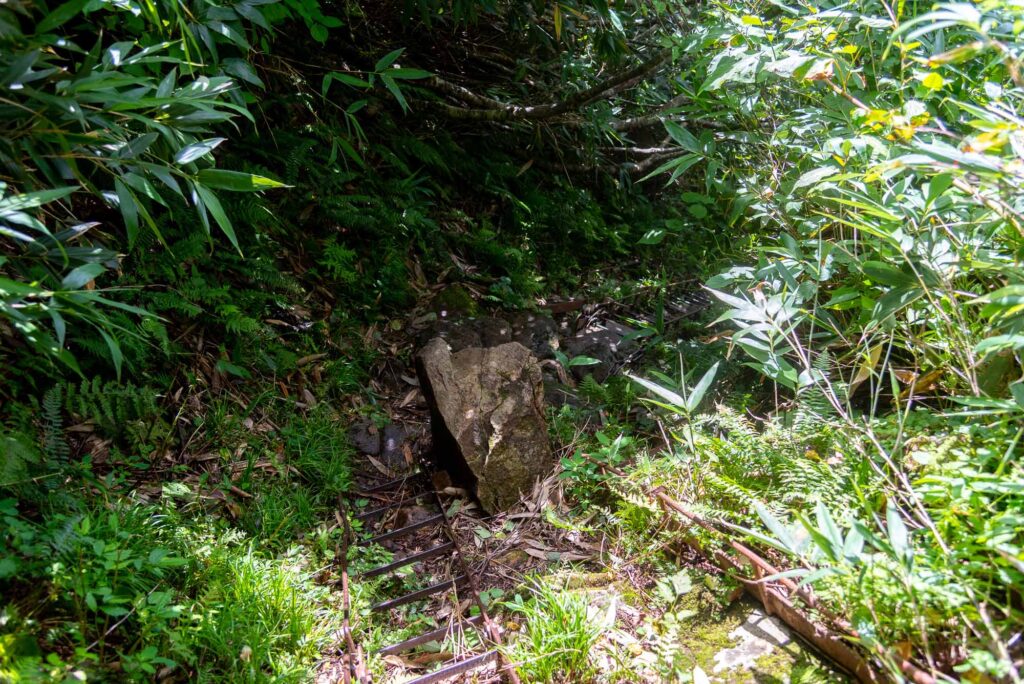
29. This is what it looks like from below.
30. Rest assured: no more ladder from this point
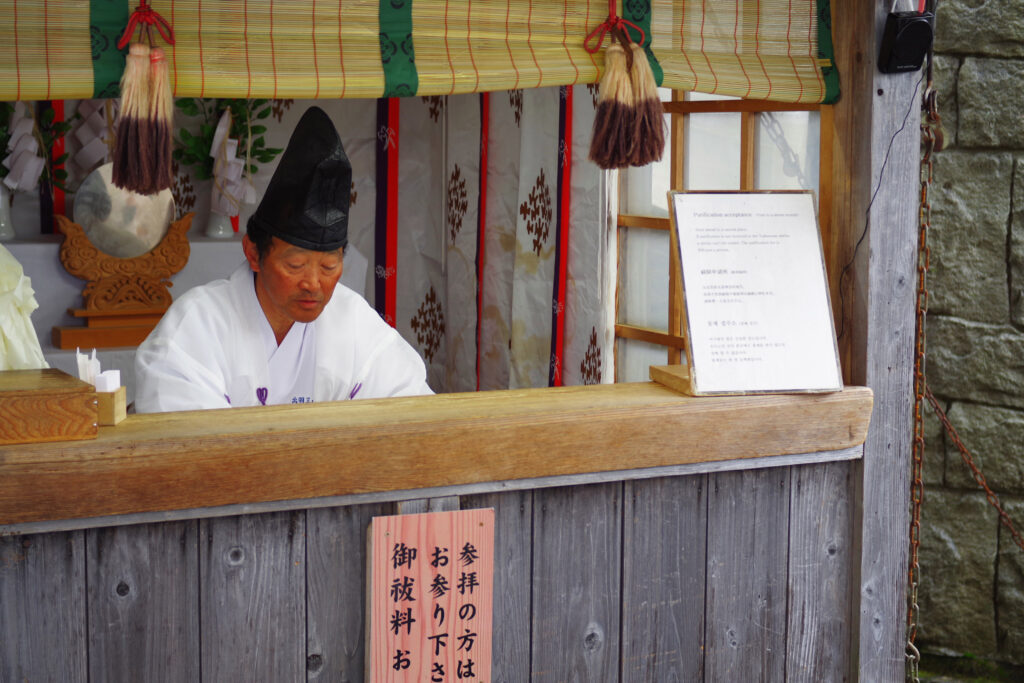
31. Mt. Yudono’s purification ritual post
32. Yudonosan shrine
You need to take the purification prayer (500 yen/person) to get access to the shrine.
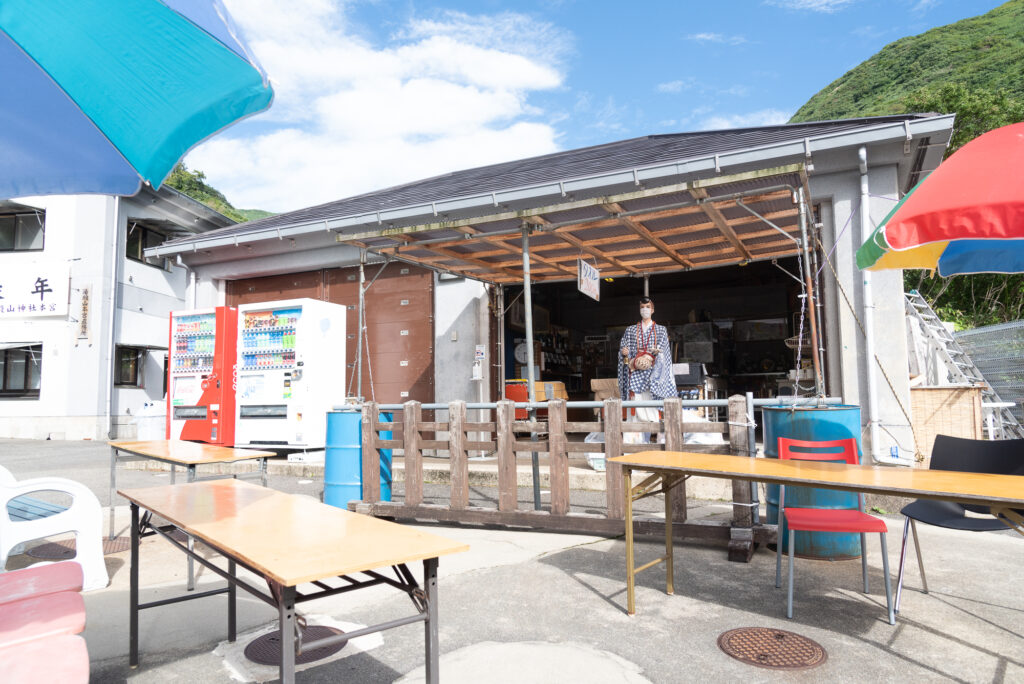
33. Shuttle bus stop & souvenir shop
The shuttle bus stop costs 200 yen (one-way) or 300 yen (round trip) to go back to Yudonosan Senninzawa.
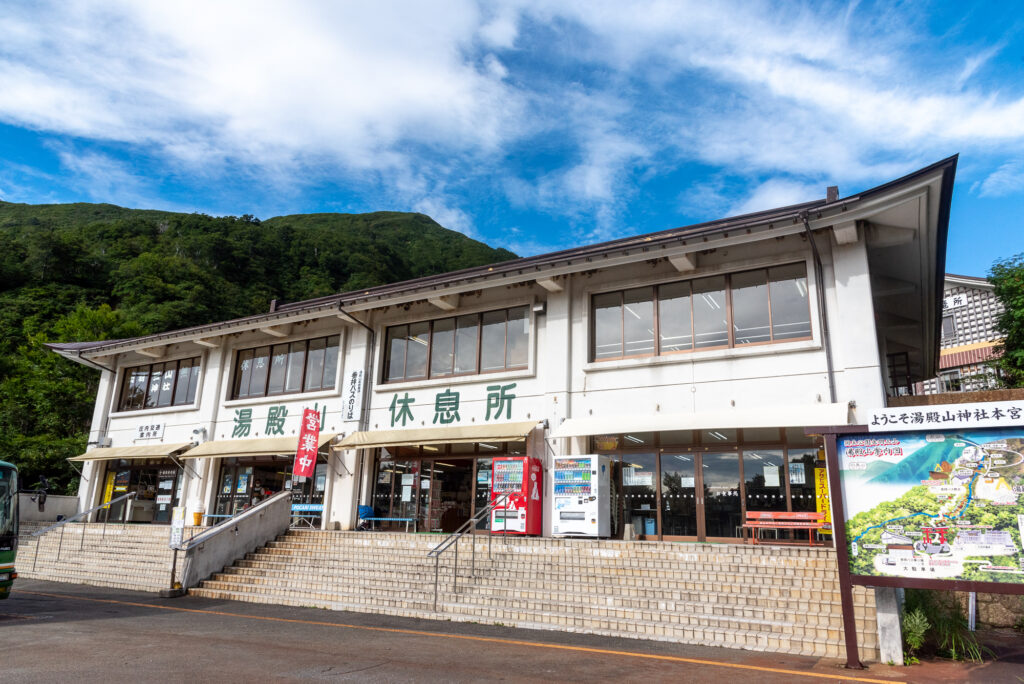
34. Yudonosan Kyukeijo
This is where the shuttle bus will drop you. You can use the toilet or have some food, drinks, or buy souvenirs here. The parking lot in front of the shop also serves as a bus stop for the bus bound for Tsuruoka station (only operates during a limited period of time).
35. Yudonosan Senninzawa
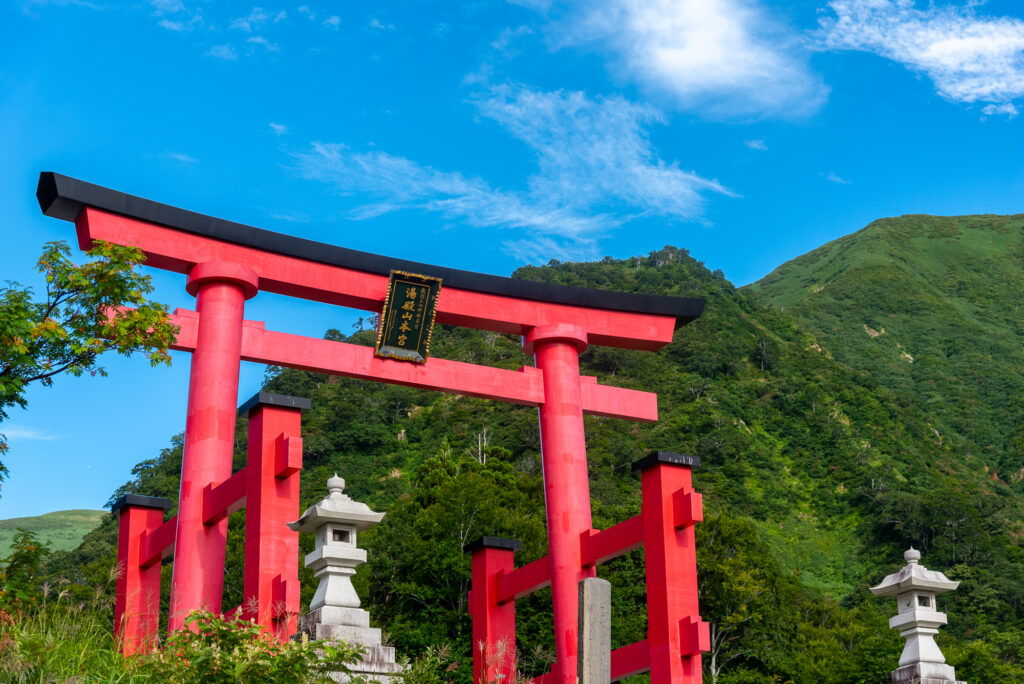
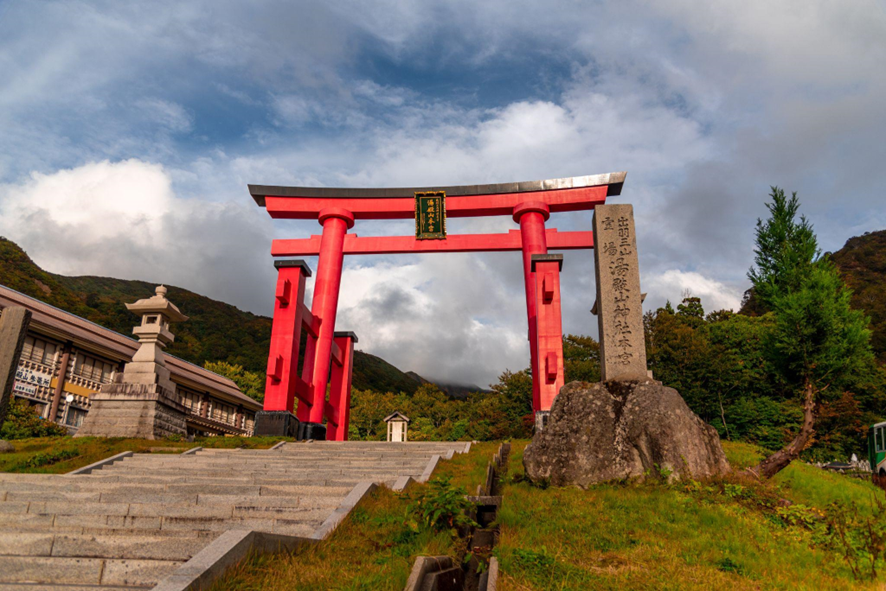
This is Mt. Yudono’s torii gate.
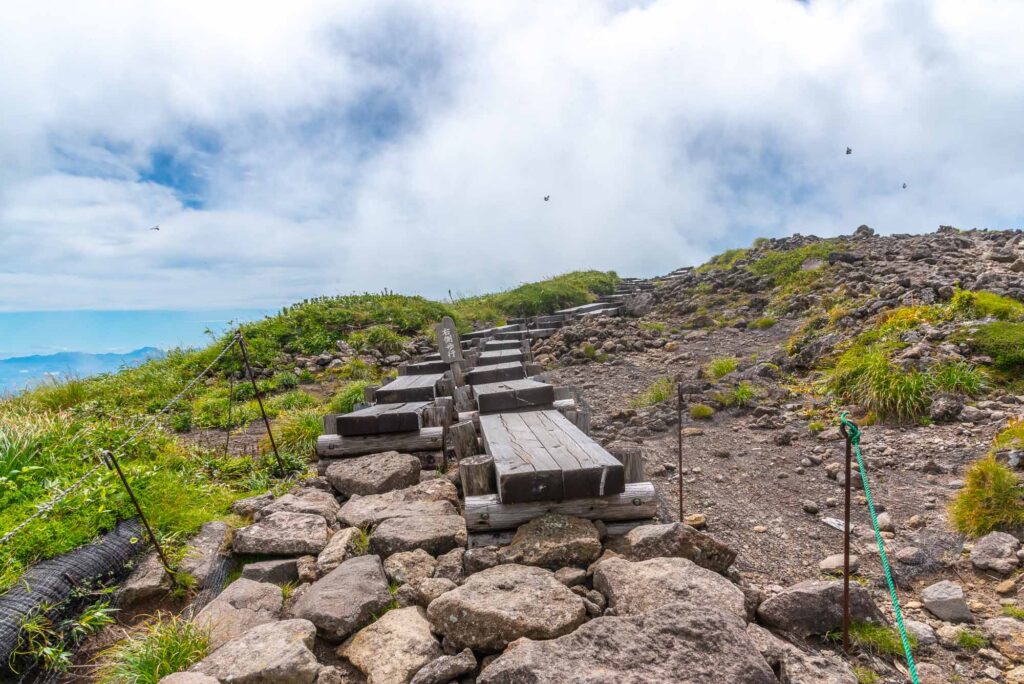
Hike to the top of Mt. Gassan
Also called “The Realm of the Dead”, or “The Mountain of the Past”, Mt. Gassan is the most important step in the Dewa Sanzan’s yamabushi training.
Distance
5.5km
Elevation
600meters
Required Time
2.5h
Danger level
Several dangers *Dangers include:Slippery slopes, Unstable rocks, Snow (risks of slipping), Low temperatures, Strong winds
Difficulty level (for beginners)
Challenging
Equipment needed
● Water ● Hiking shoes ● Rainwear ● Sun hat ● Hiking sticks ● Snow grips (especially in July)
Difficulty levels have been designed for people who have a PAI (Personal Activity Intelligence) score inferior or equal to 60. Experienced hikers or persons with a PAI above 100 can withdraw two cases to know the average difficulty for their fitness level. Example: Trails noted “Hard for beginners” correspond to “average” trails for experienced hikers or people with a PAI above 100.
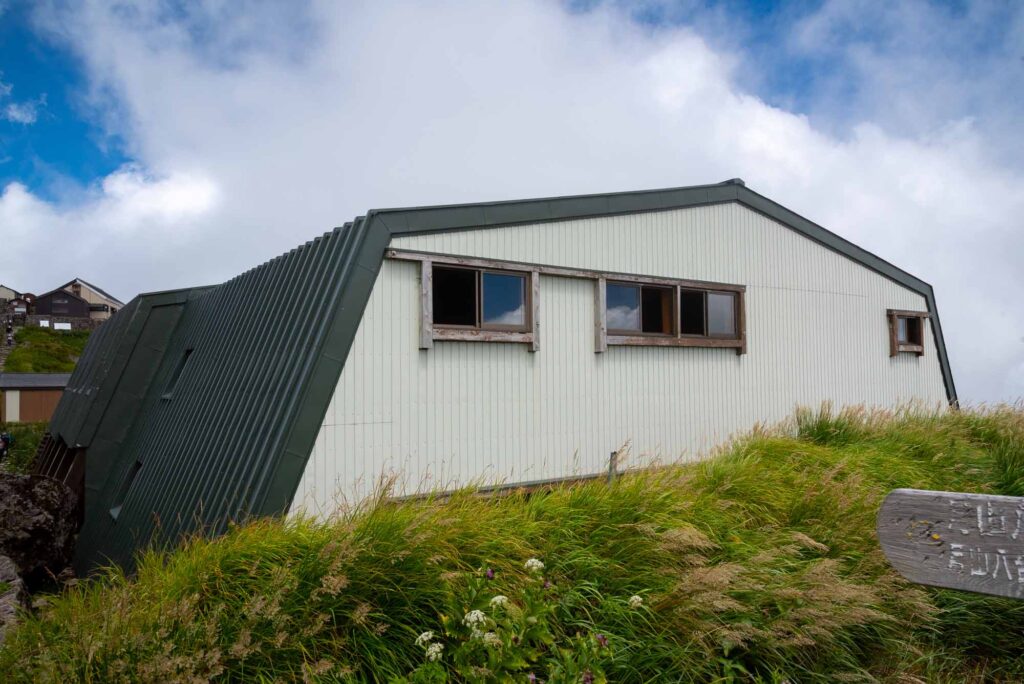
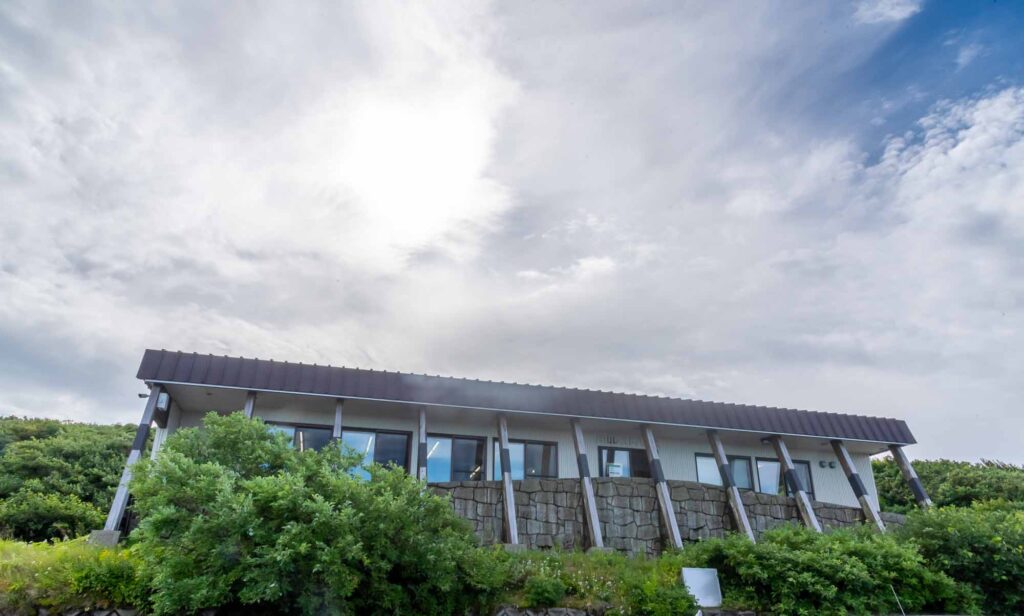
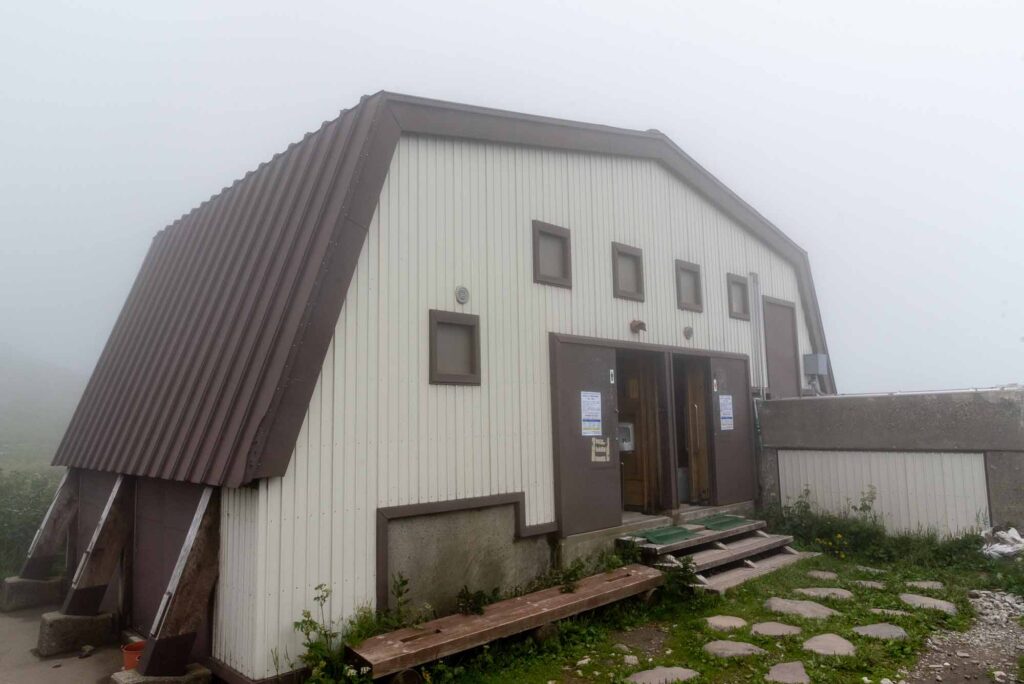
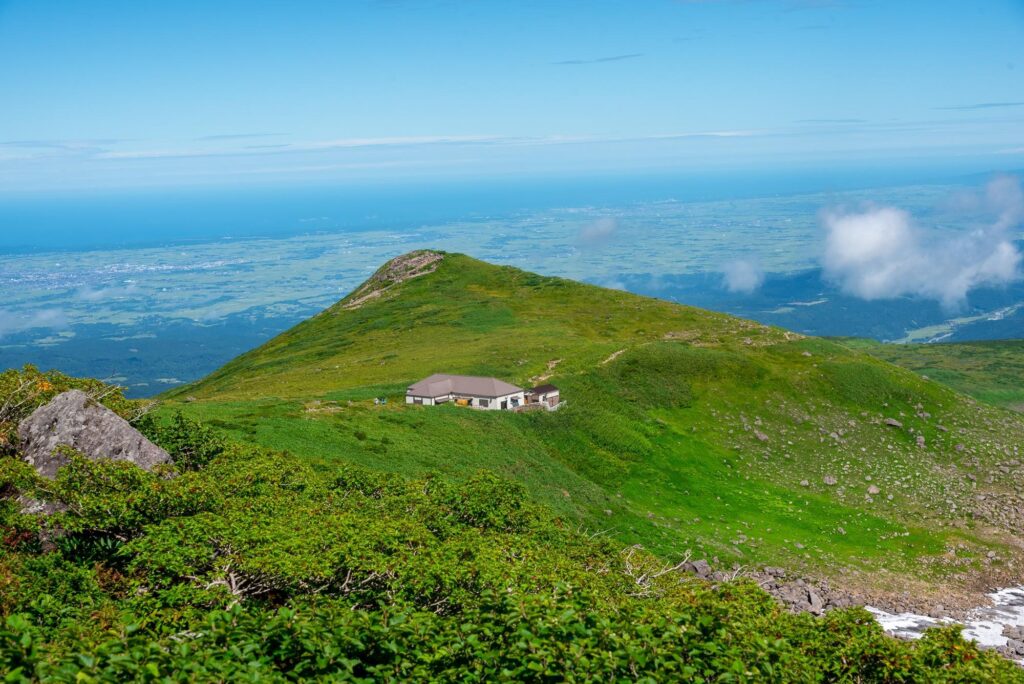
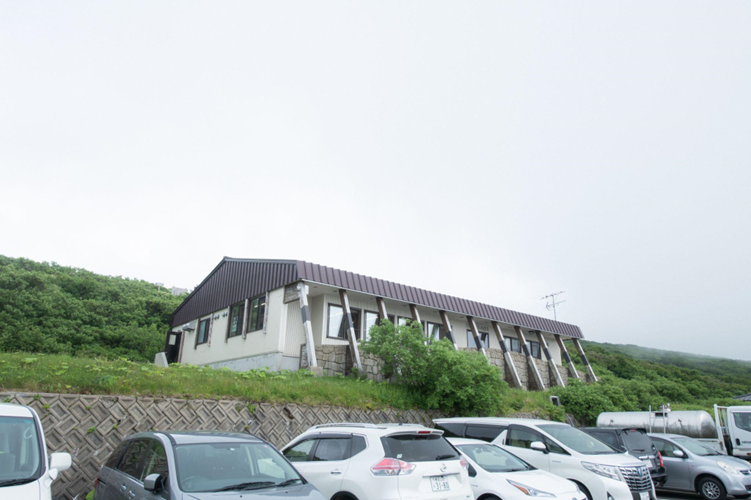
1. Get off the bus at Gassan Hachigôme
Gassan Hachigôme 月山八合目 can be translated into “Mt. Gassan’s eight station”. It is the most convenient point to start climbing the mountain. The building on the picture is Gassan Resthouse. You can buy rain gear, hats, food or drinks here.
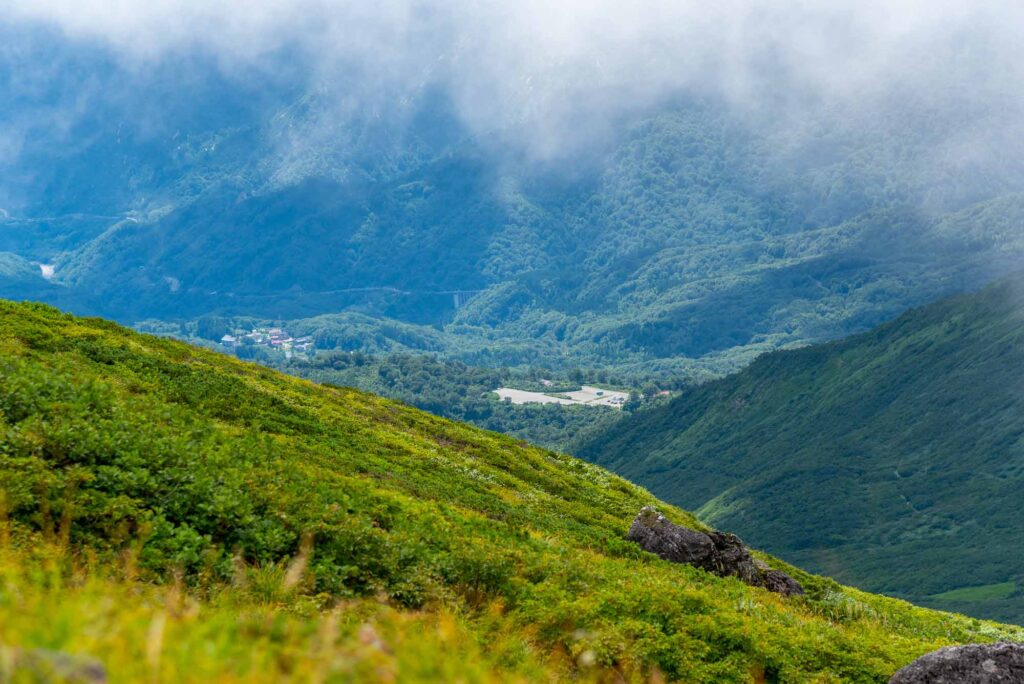
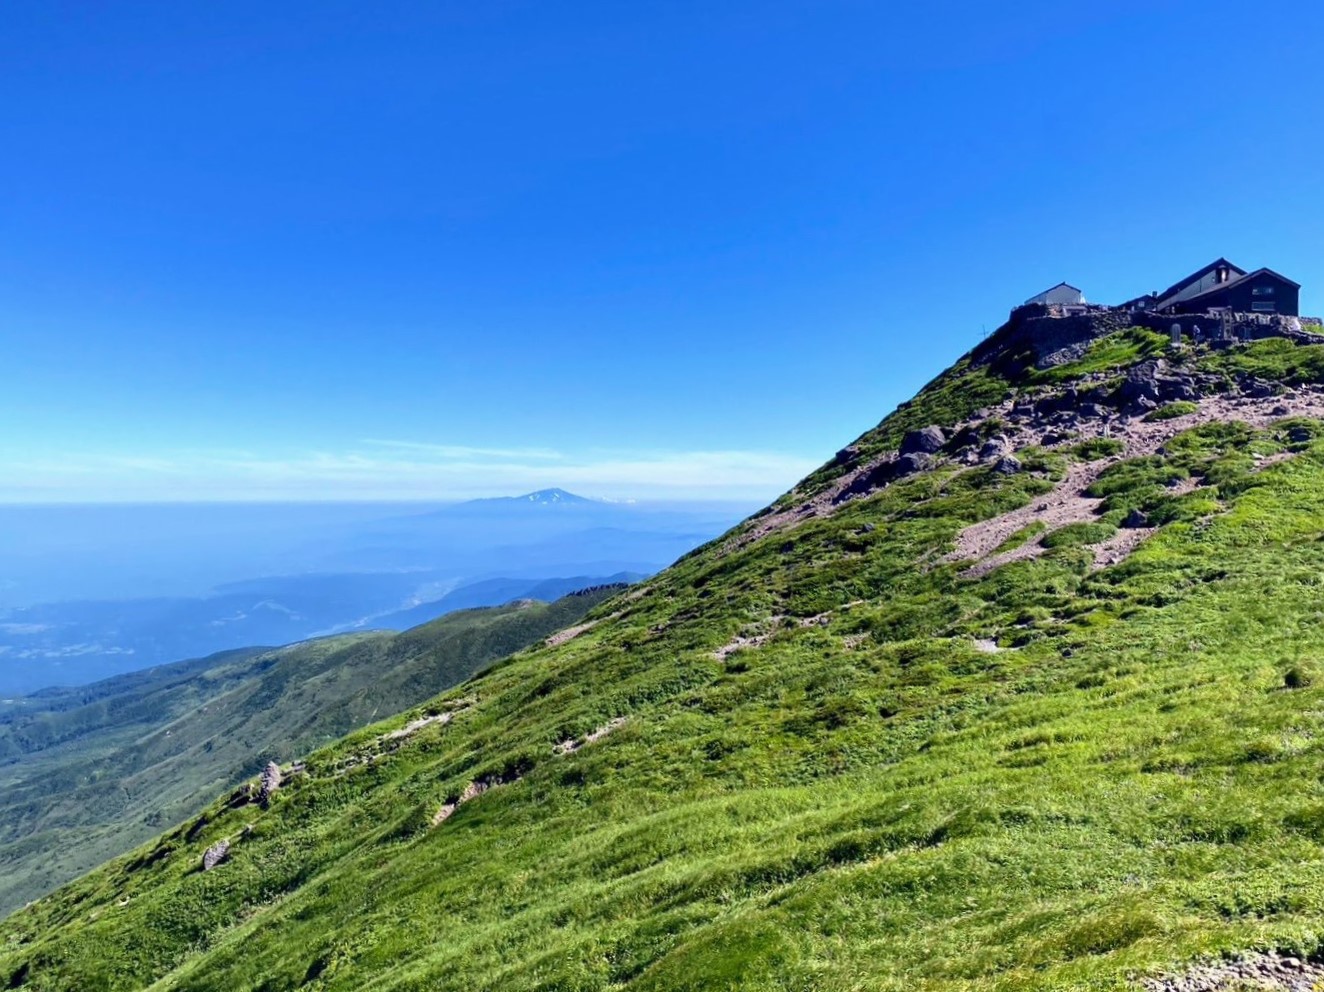
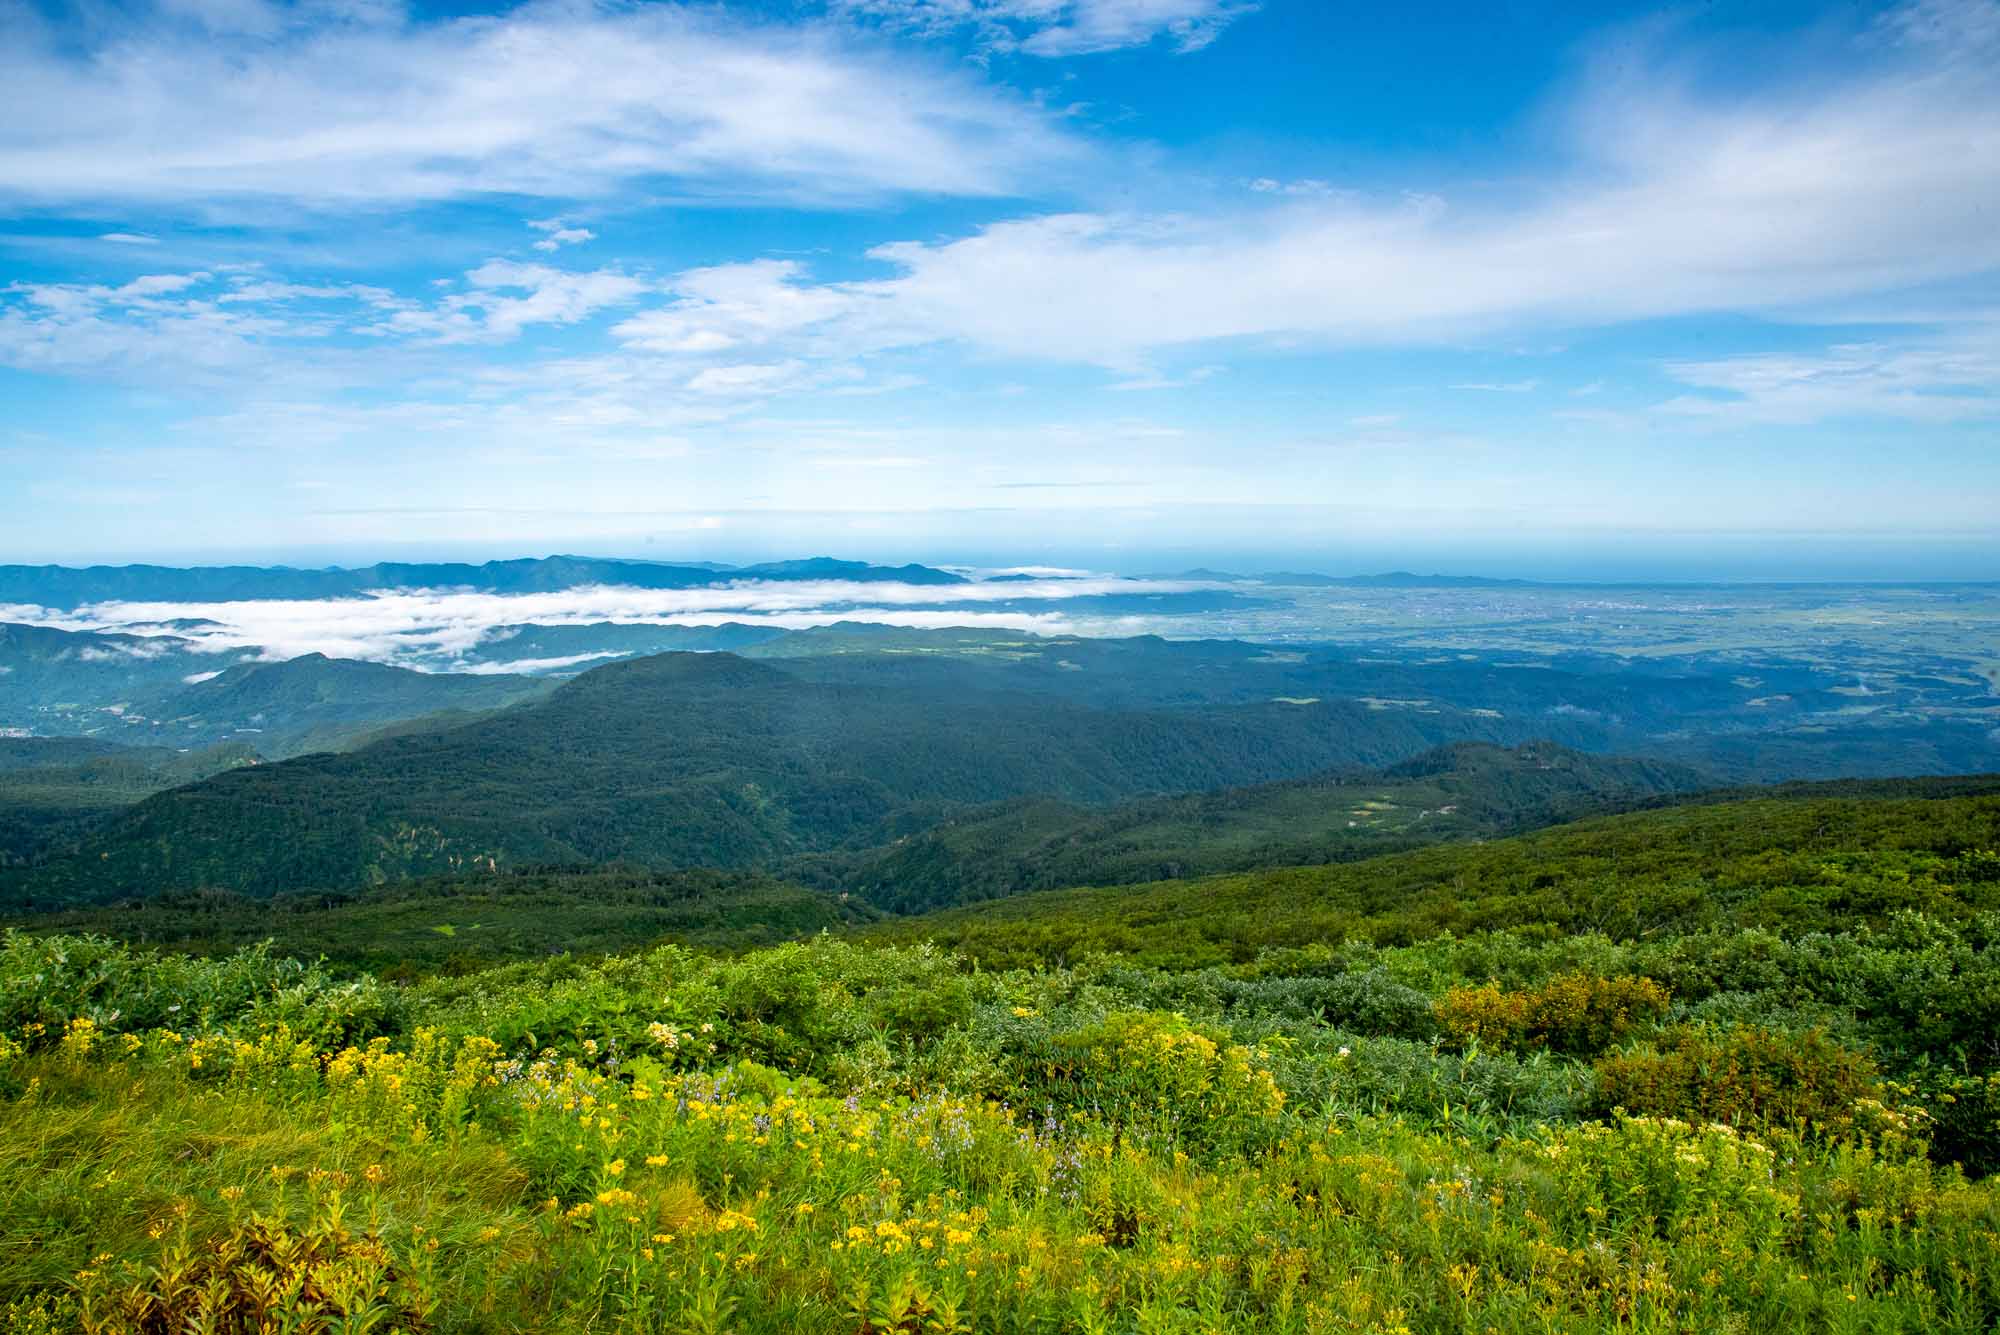
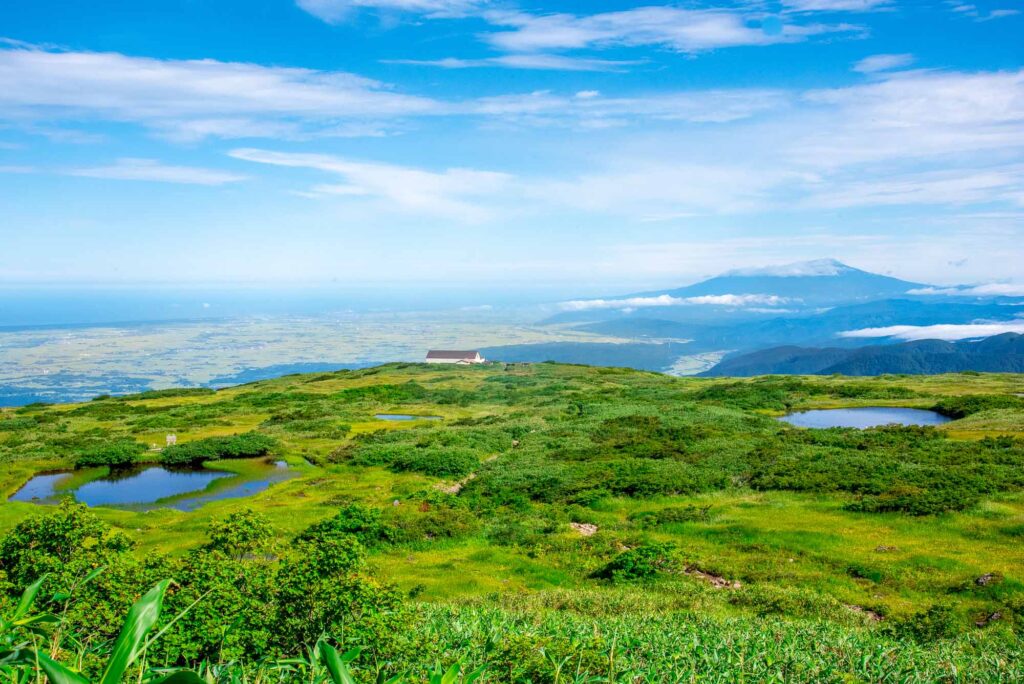
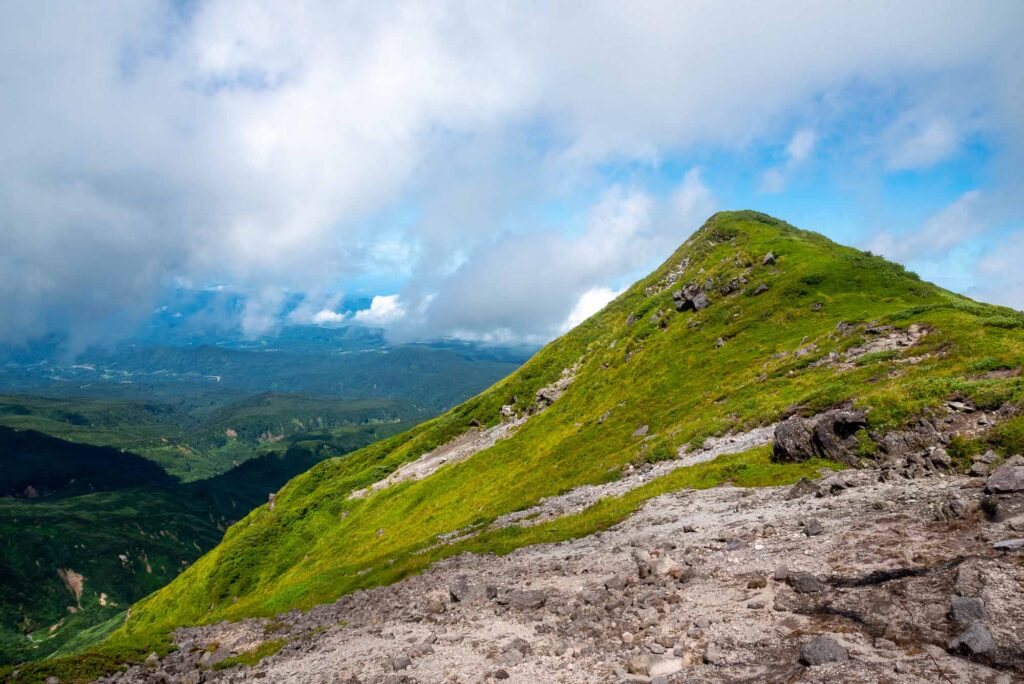
2. Have a view on the Shonai plains
If the weather is not too cloudy, you can see the extent of the Shonai region, up to Sakata city and Mt. Chôkai.
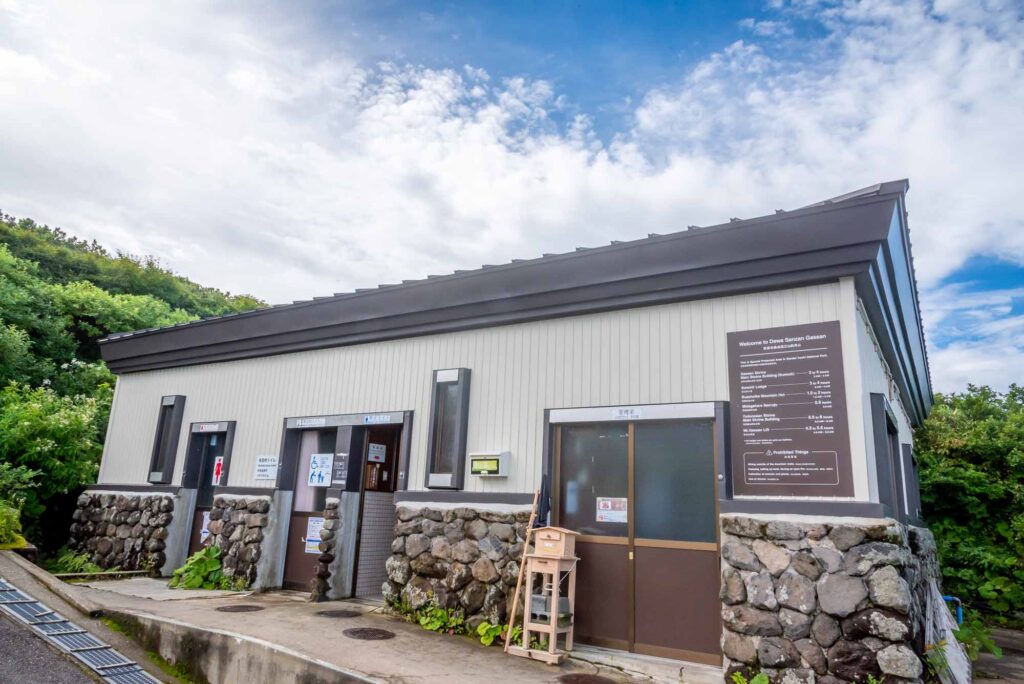
3. Toilet
These are the public toilet at the bottom of Mt. Gassan. Use them if needed, but do not forget to leave a tip to help maintain the place.
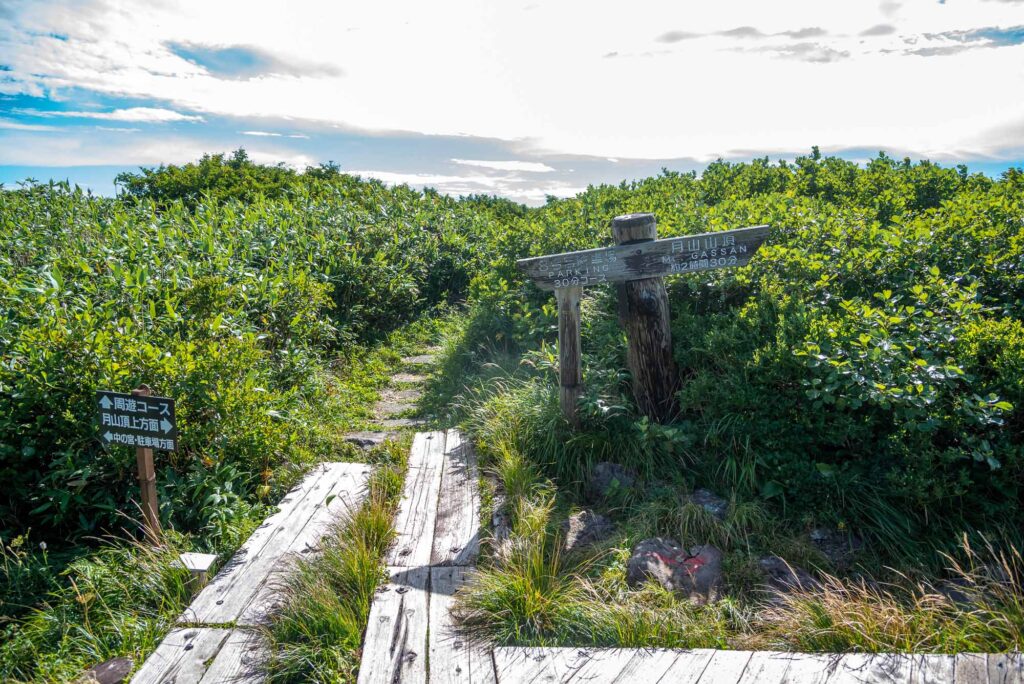
4. The first crossing
If you take left, you follow the classic Mt. Gassan climbing track. If you take right, you will cross the Midahara pilgrim lodge.
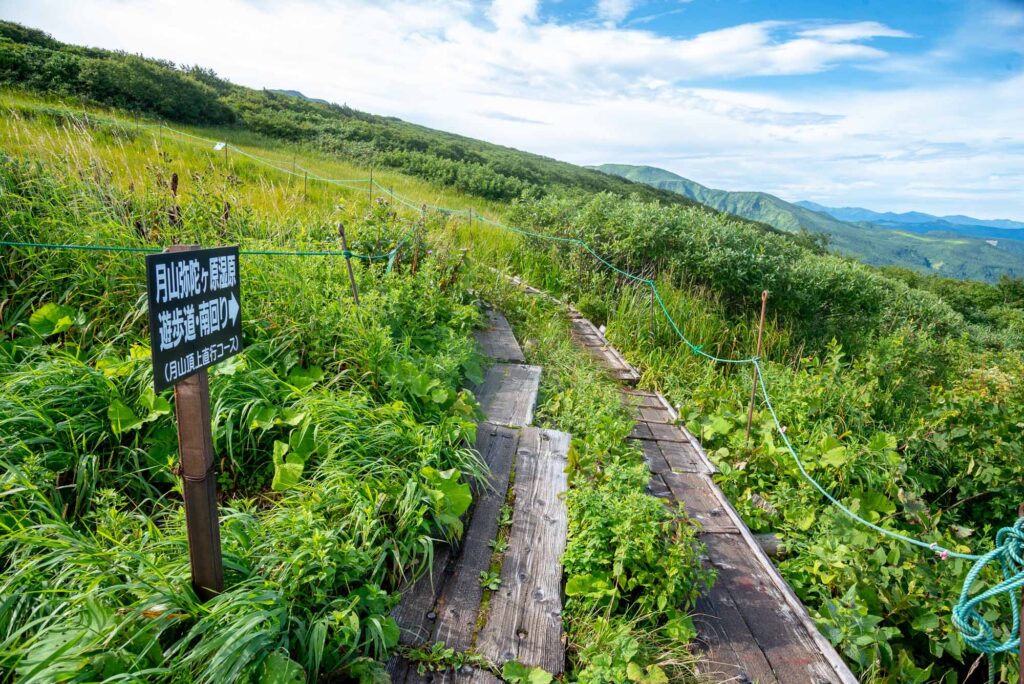
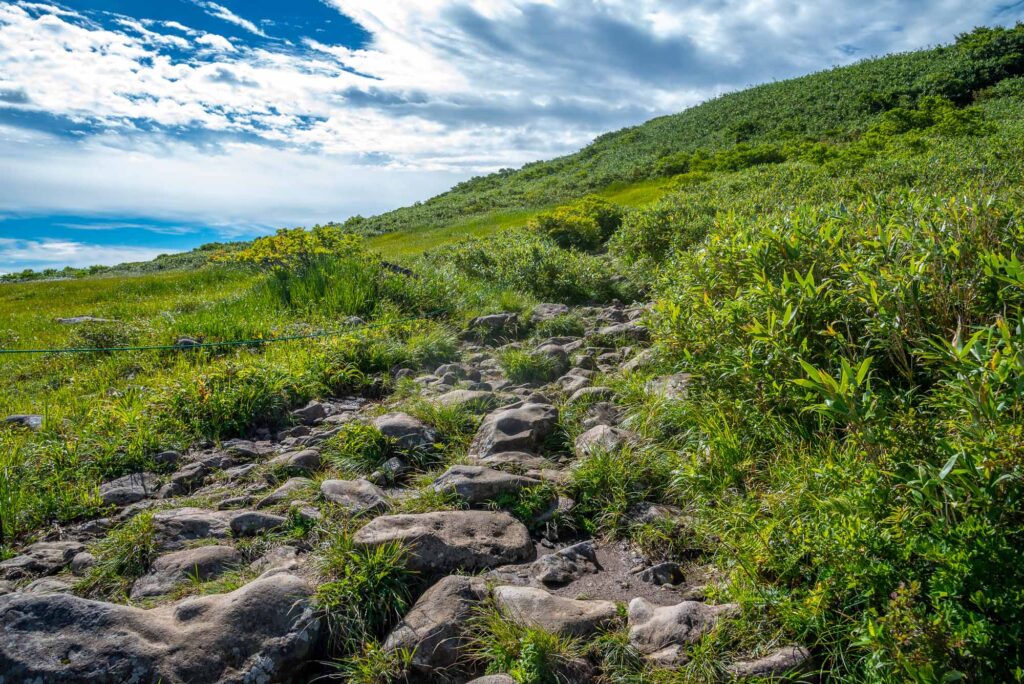
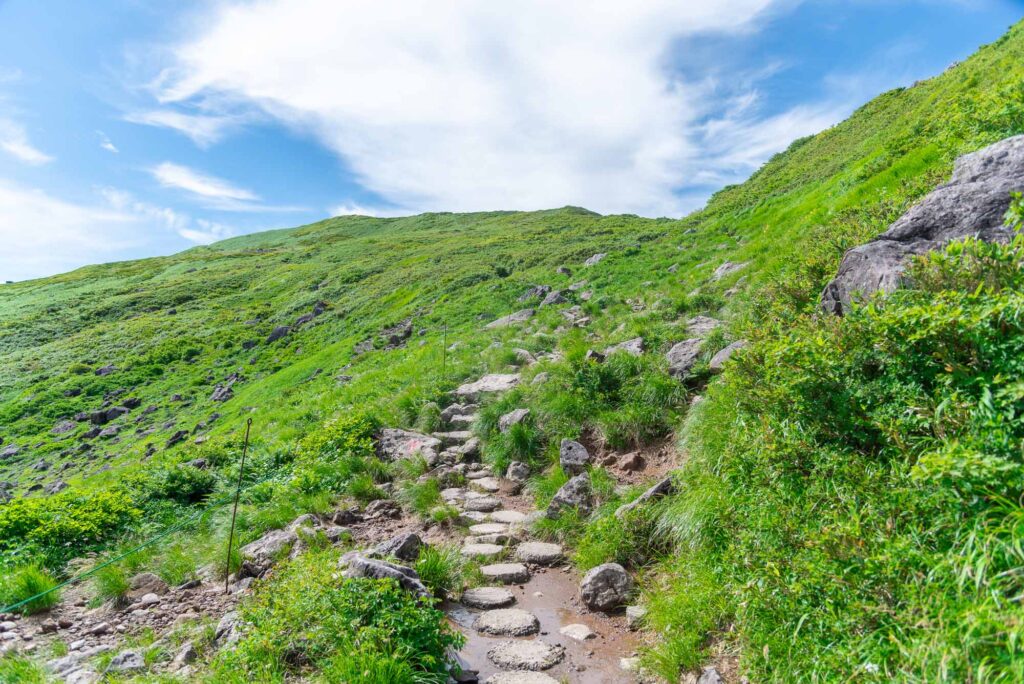
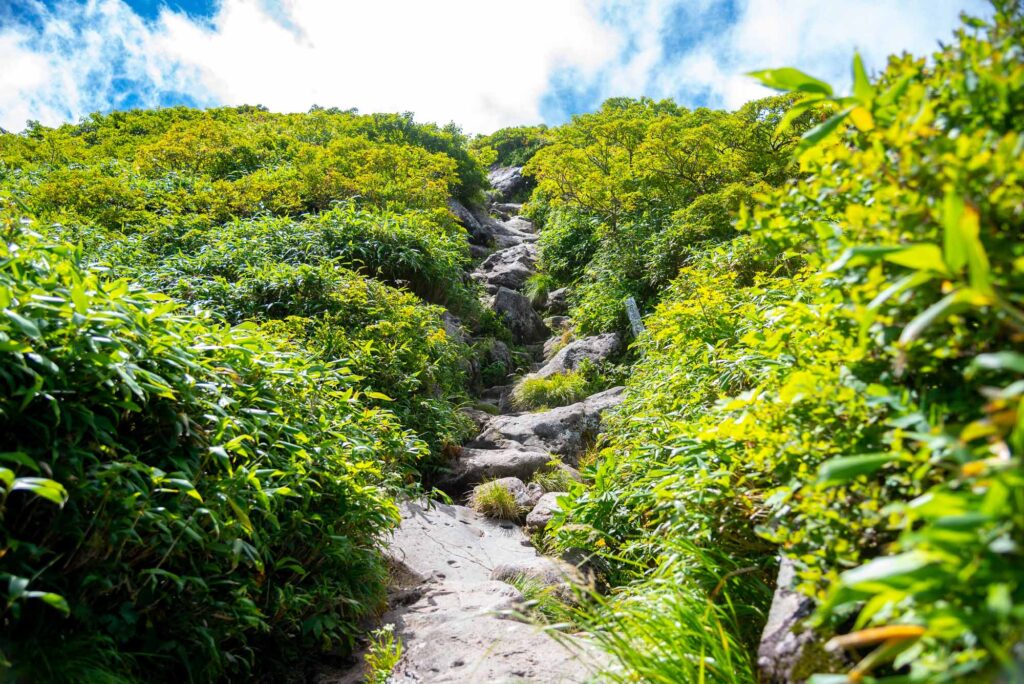
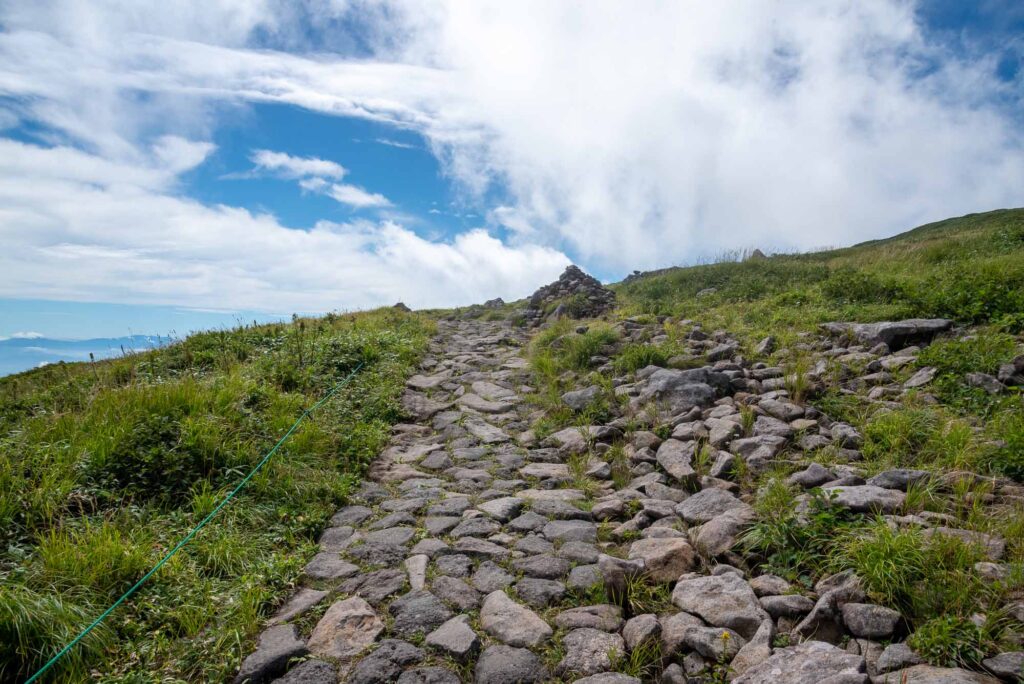
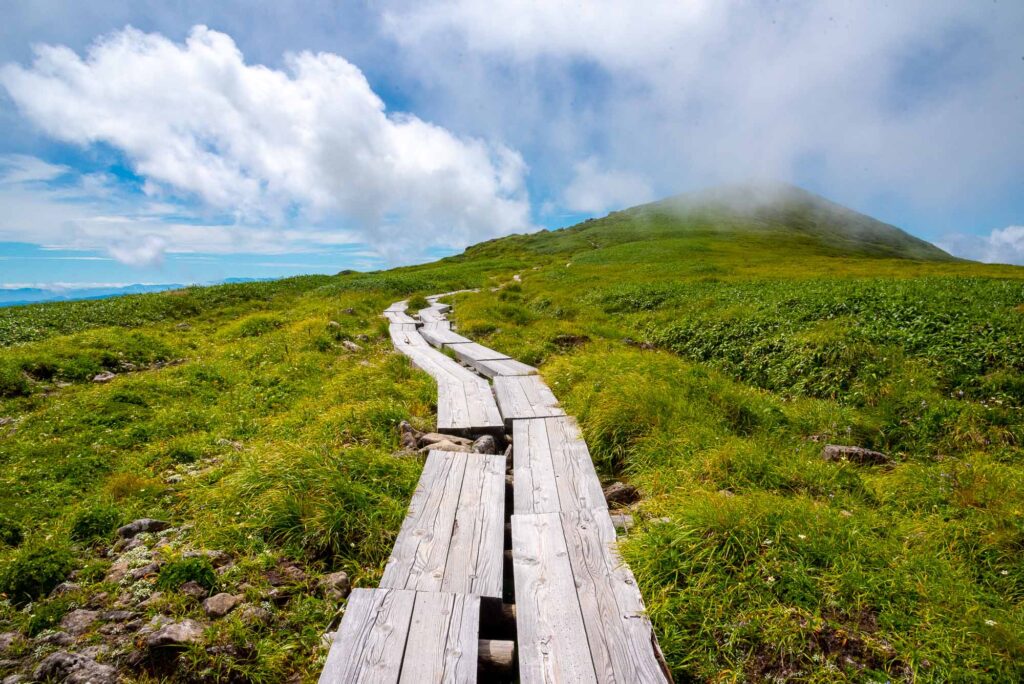
5. This is what the classic Gassan climbing track looks like
6. If you turn back, you can spot Mt. Chokai and Midahara pilgrim lodge
7. Second crossing
Take left if you want to go to Midahara’s pilgrim lodge and shrines, or take right to continue your adventure to the top of Mt. Gassan.
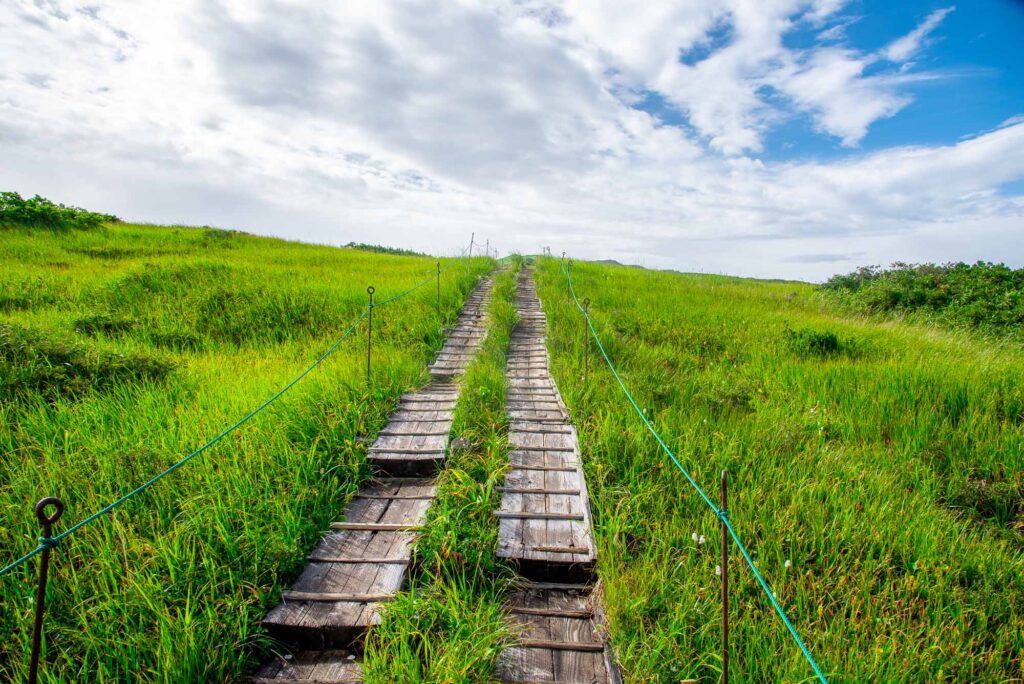
8. The wooden track ends
The track is now entirely made of rocks. Some are unstable, please watch your steps.
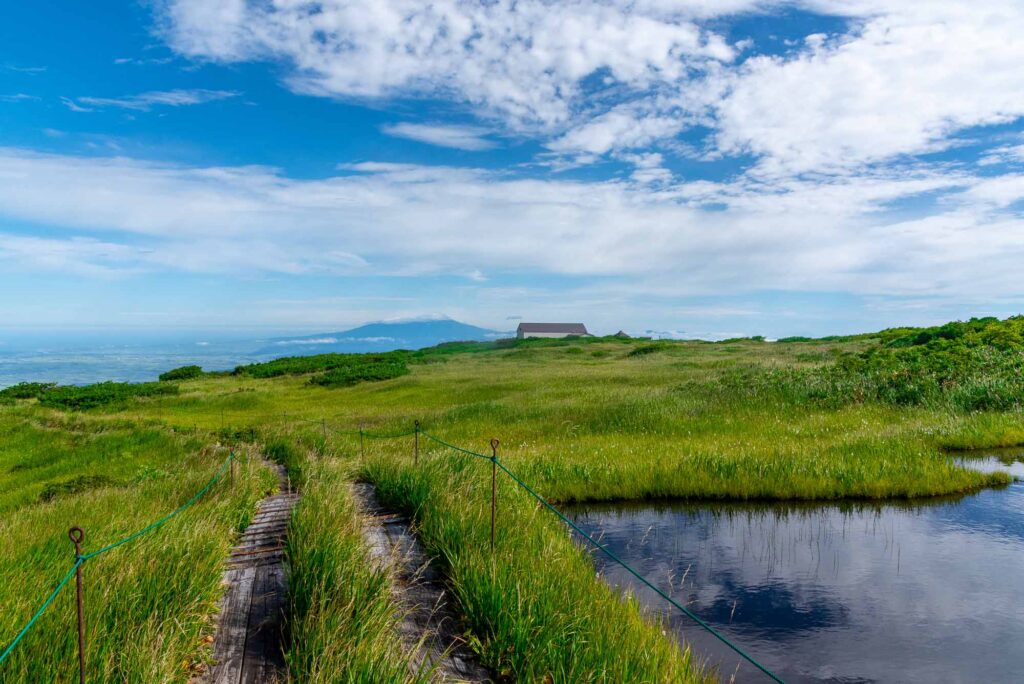
9. Midagahara marshes from afar
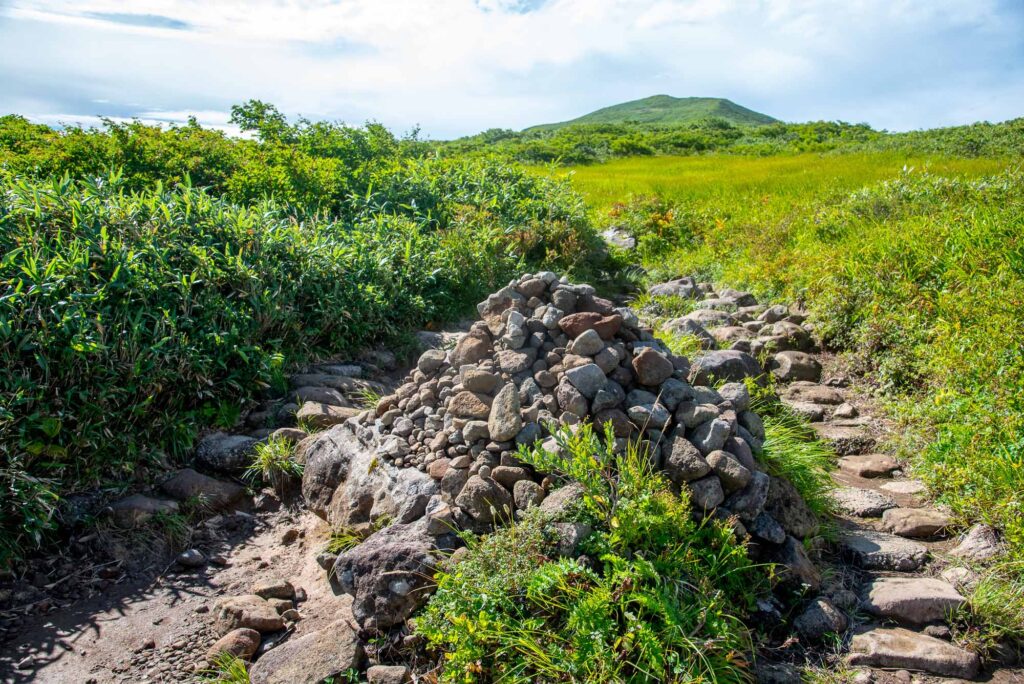
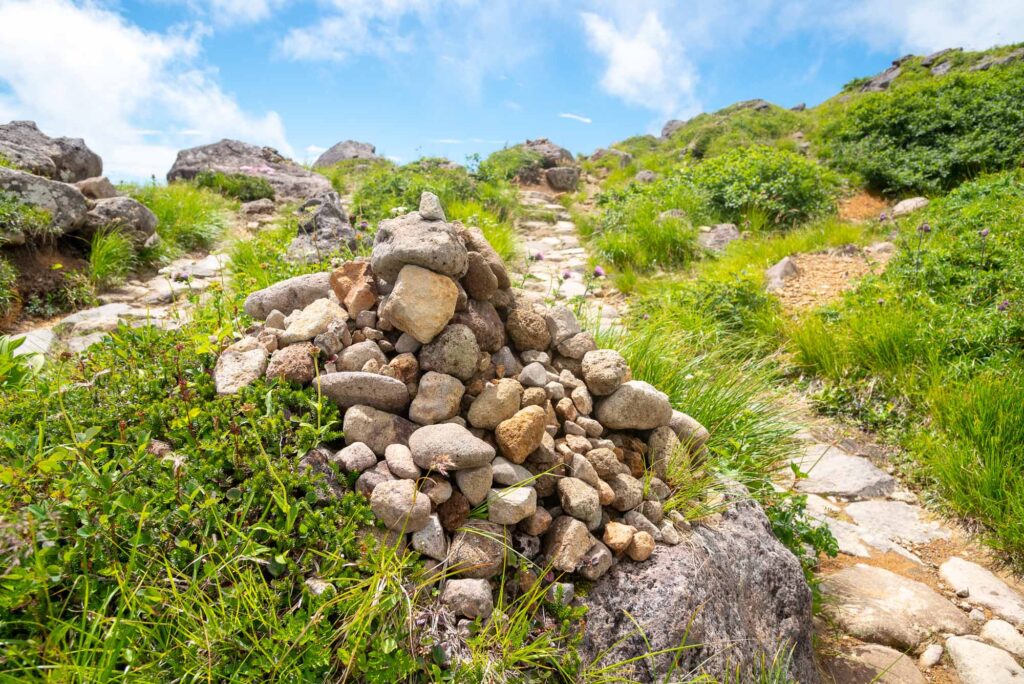
10. Balanced stones
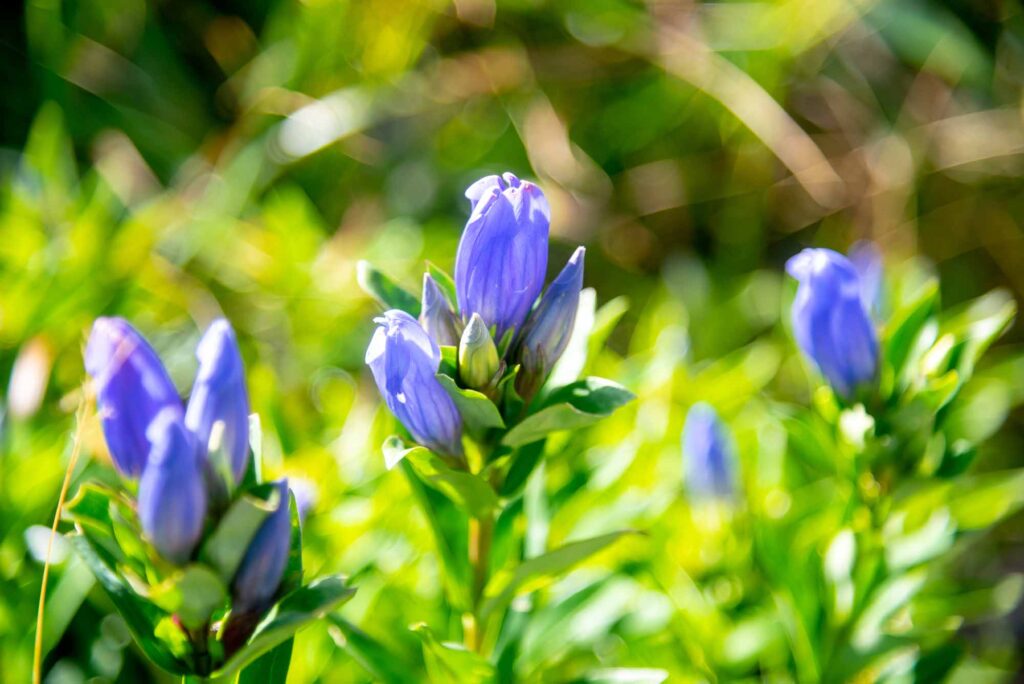
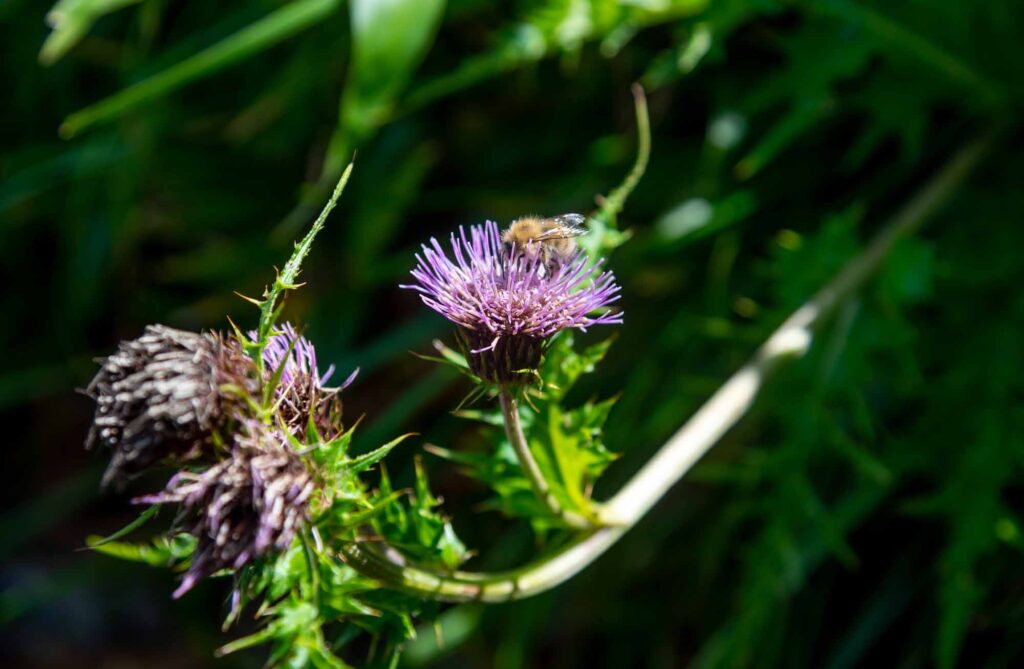
11. Native flowers
12.Native flowers
13. Continue straight
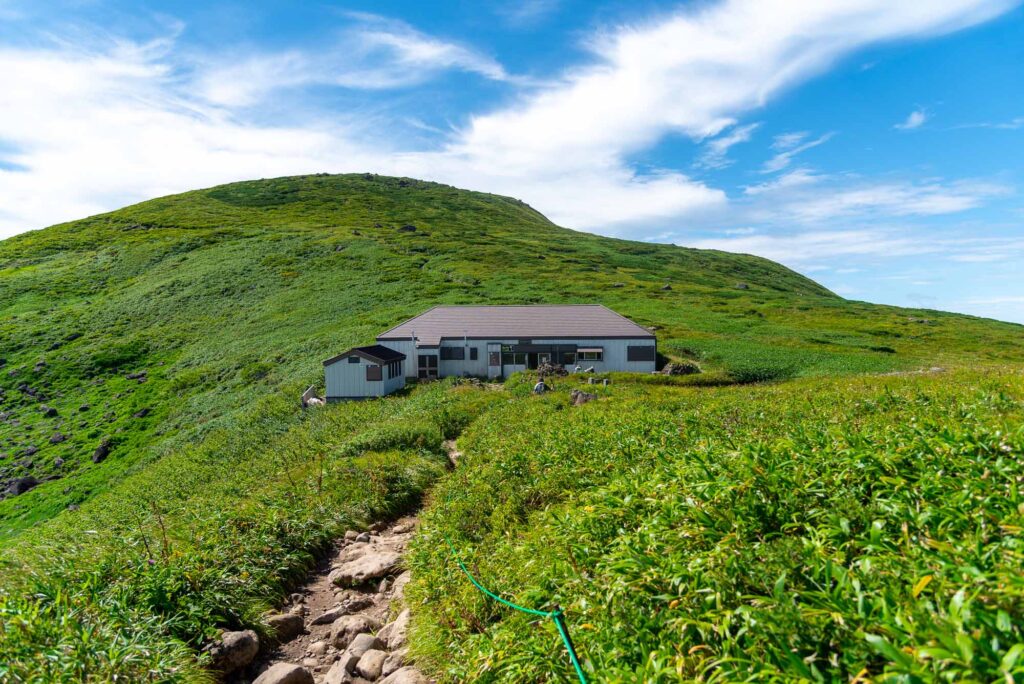
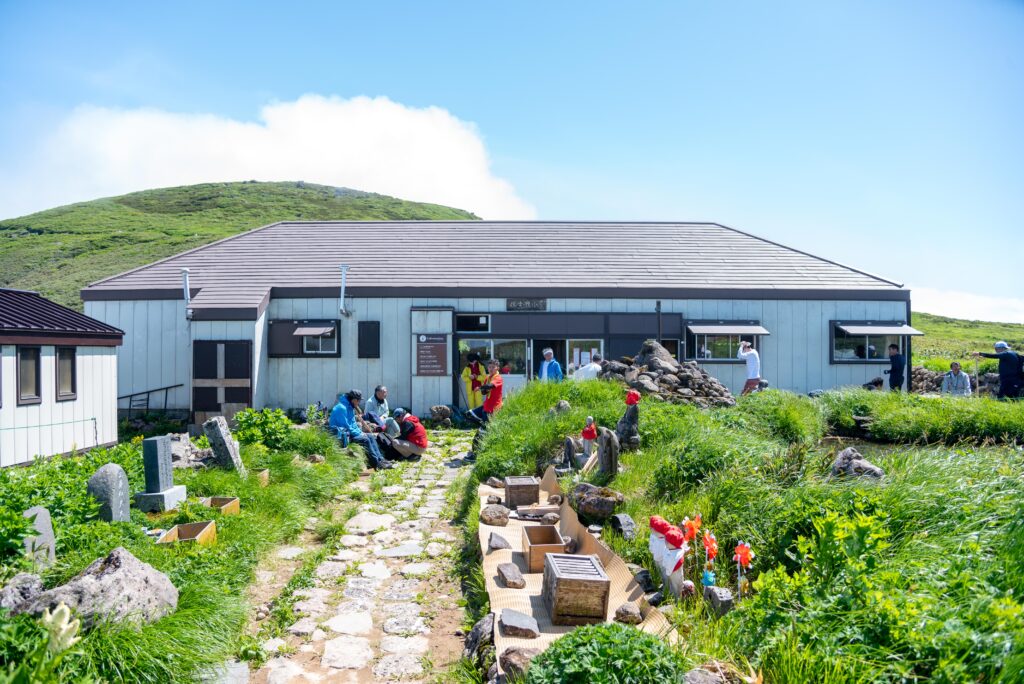
14. You arrive at Busshoike Goya
This is a pilgrim lodge & café. You need to buy a little something to use the space to rest.
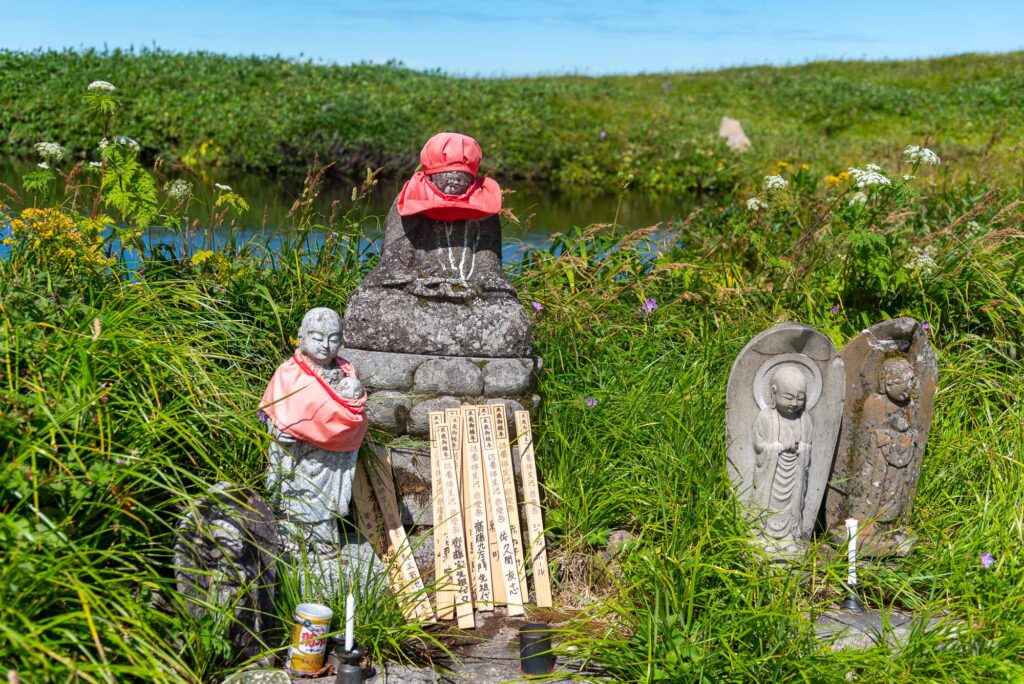
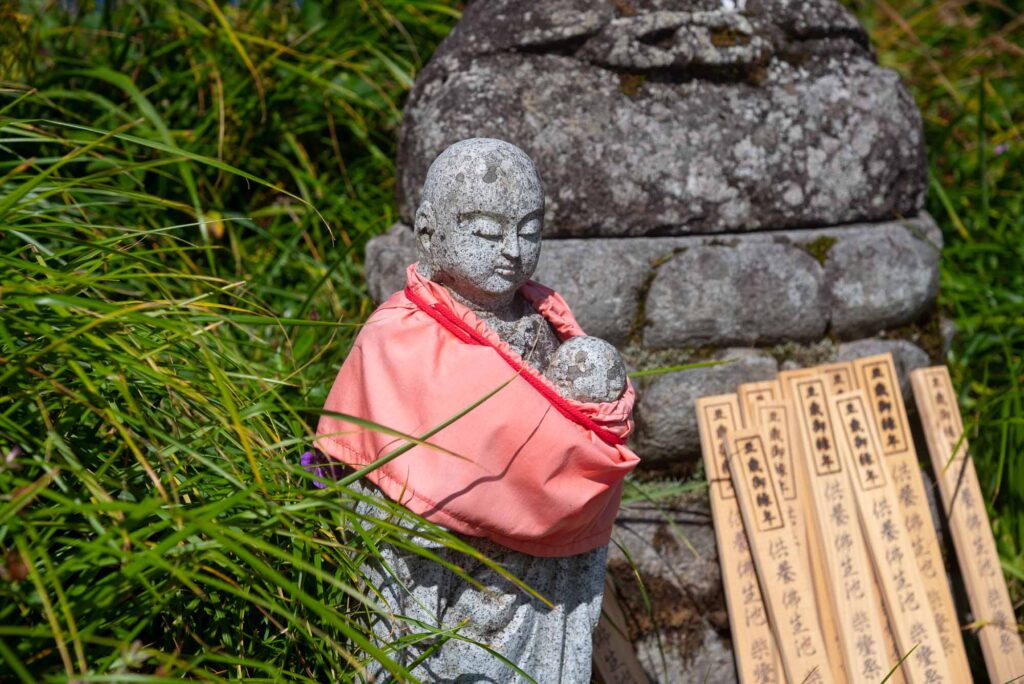
15. Busshoike pond’s statues
16.The jibokannon bodhisattva
17. Manai shrine
18. Climb the rocks
19. Gyojagaeshi slope
Continue straight or make a little detour on your right to arrive to Manai shrine
20. Manai Shrine
21. Continue straight
22. Take a rest or continue straight
23.
24. Go back on the wooden track
Those wooden tracks indicate you are near to Mt. Gassan’s summit.
25. Balanced stones near Mt. Gassan’s highest point
26. You spot Gassan’s peak
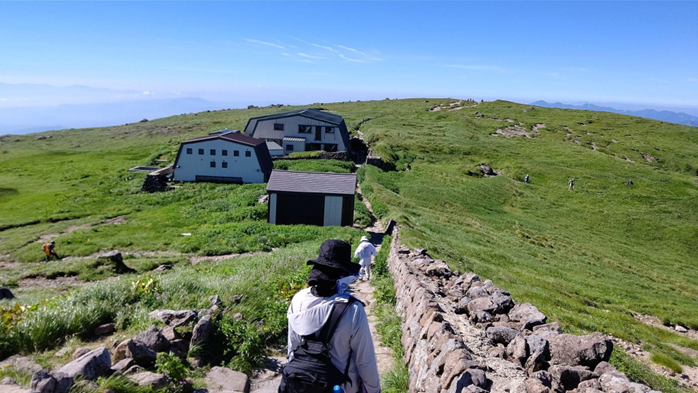
27. The building on this picture belongs to Gassan shrine
28. This is what the Gassan Shrine complex looks like
29. Here is the Gassan Chojo Goya lodge
30. Public toilet
Visit all the three mountains of the Dewa Sanzan in a single trip! (2 nights, 3 days)
Exploring the entire Dewa Sanzan mountain range can be a bit challenging due to the varying hikeability of the mountains throughout the year and limited transportation options. However, there is indeed a way to conquer all three mountains in one trip to Tsuruoka! Let us guide you on how to achieve this using the city’s available public transportation services in a 2 nights 3 days trip. Please note this whole trip can only be accomplished during the official Mt. Gassan hiking season (July 1st to September 15th)
D1 : Arriving to Tsuruoka and visiting Mt. Haguro
The Dewa Sanzan Shrine (also called “Sanjingosaiden”) at the top of Mt. Haguro
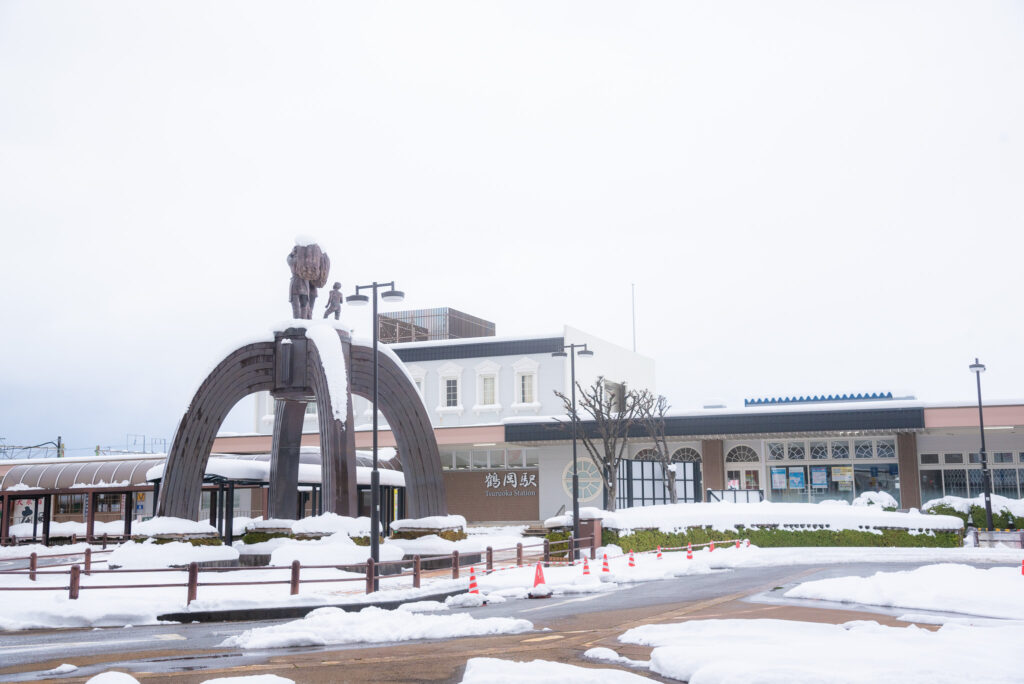
Tsuruoka Station
Tsuruoka Station is the most convenient spot to plan all your transportations to Tsuruoka City’s several places of interests (S-MALL bus center, a few minutes away from the station, is also a good place to wait for the bus as it is located near the Daiichi Hotel and inside the S-Mall shopping mall). Tsuruoka Station is part of the JR network, so you can use your JR pass to reach Tsuruoka. Here are some tips to keep in mind before embarking on your journey to the Dewa Sanzan:
Aim to arrive at Tsuruoka Station before 1:00 PM. If you’re coming from Tokyo, catch the Joetsu Shinkansen Toki 311 departing from Tokyo Station at 9:12 AM. This will get you to Niigata Station in approximately 90 minutes (arrival time: 10:41 AM), allowing for a smooth transfer to Tsuruoka Station via the Limited Inaho Express No. 7 departing at 10:48 AM. You’ll reach Tsuruoka in about 1 hour and 50 minutes (arrival time: 12:42 PM). Consider having lunch at a nearby restaurant or grabbing a bento from the convenience store next to the station.
Catch the bus to Mt. Haguro at 12:58 PM or 2:33 PM from Tsuruoka Station’s bus stop #2 (Japanese name: 鶴岡駅前バス停2番). Get off the bus at Hagurozuishinmon after a 36-minute ride.
Useful links:
Japan Railway East : The timetables of “Joetsu Shinkansen” and “Limited Inaho Express” change every month, so please search from the links below.(Japanese, please use automatic translation):
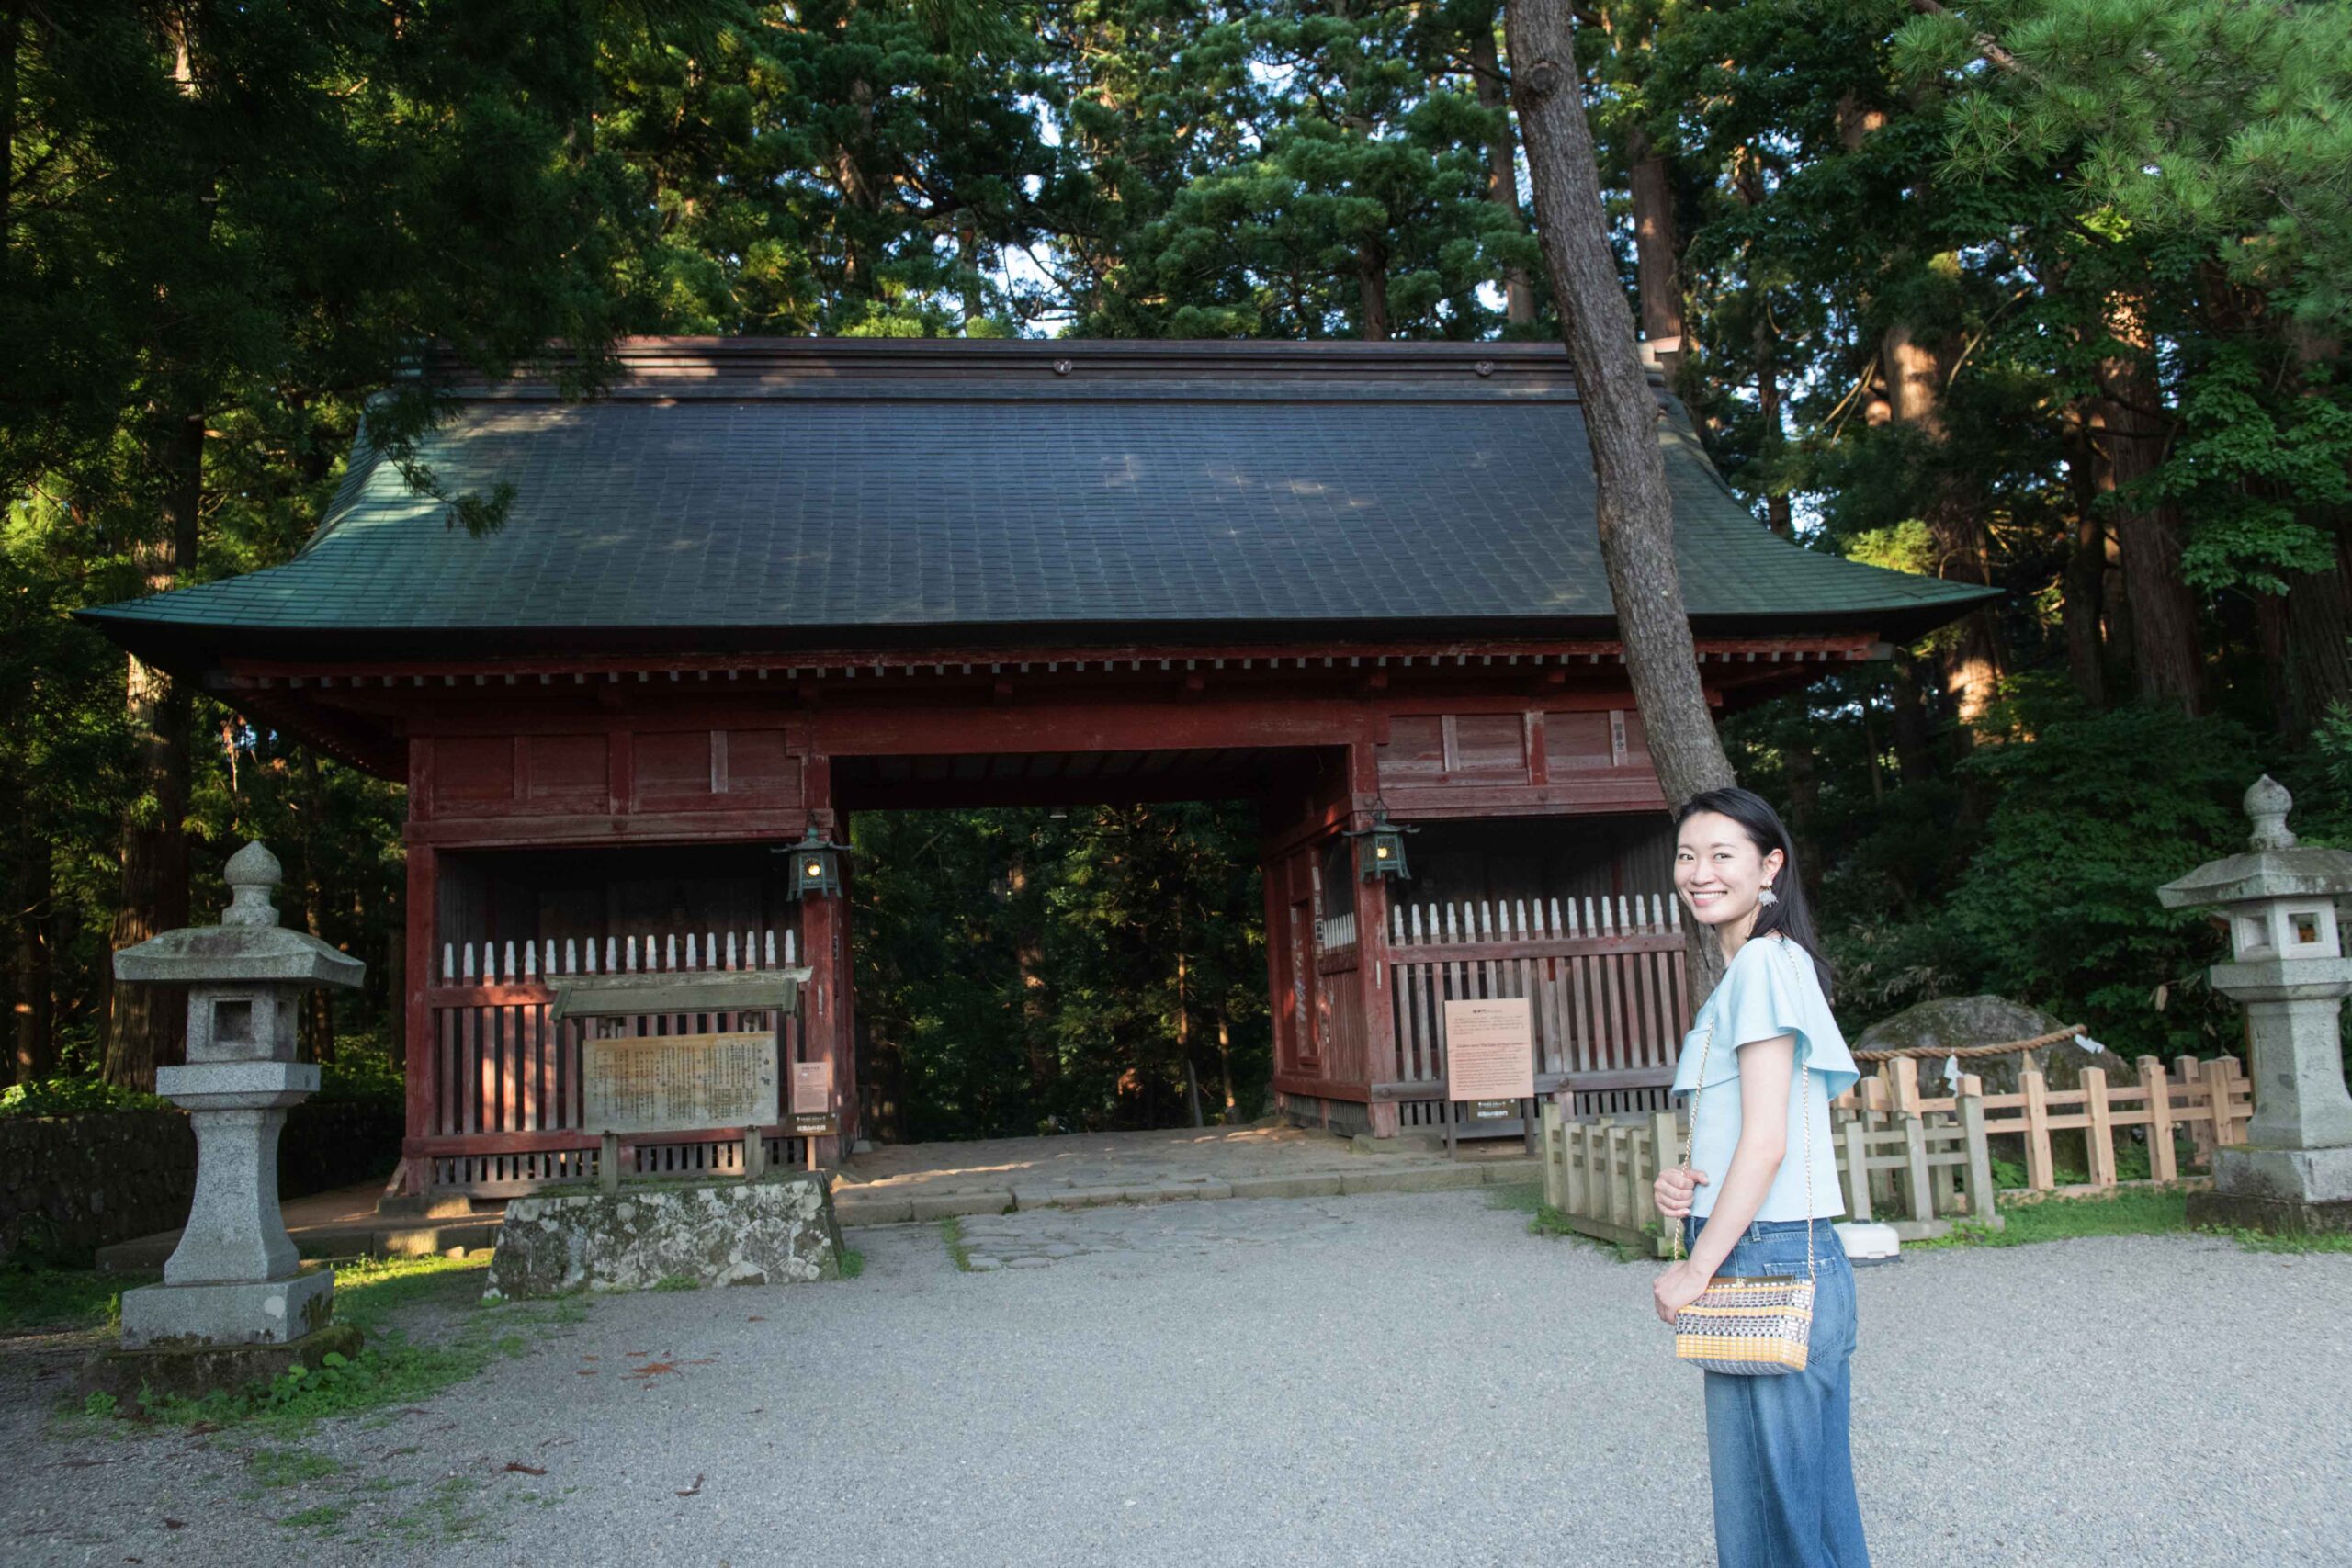
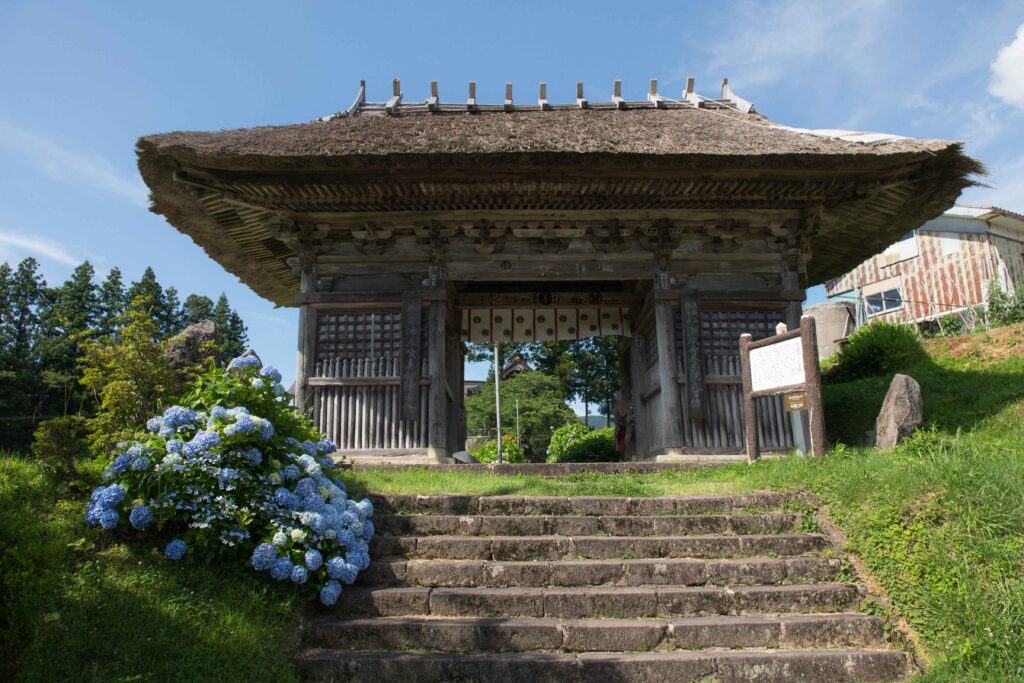
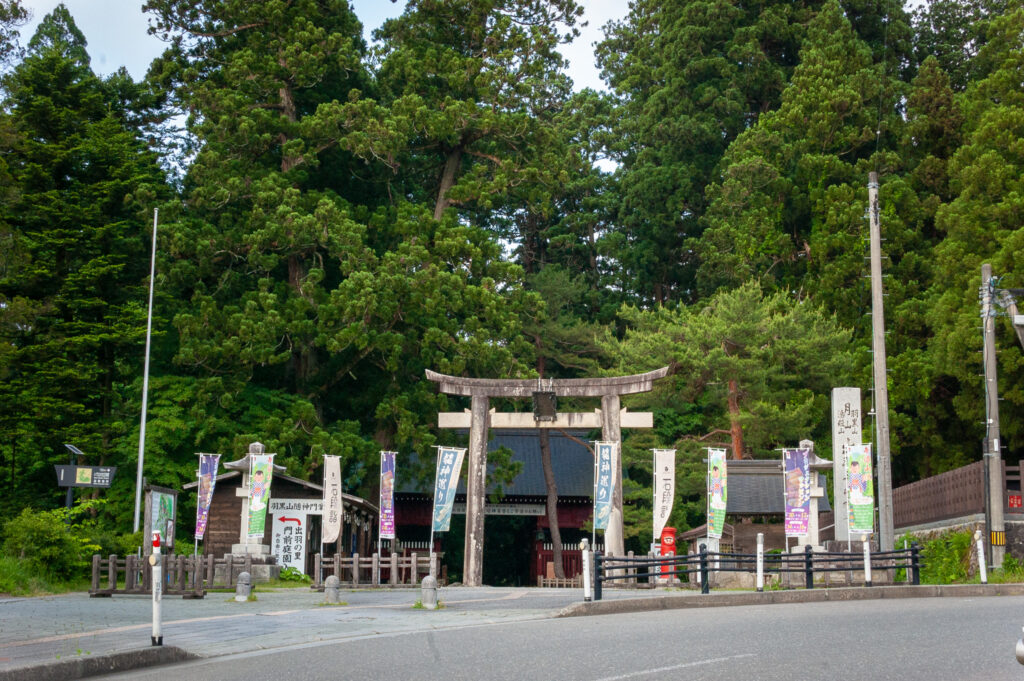
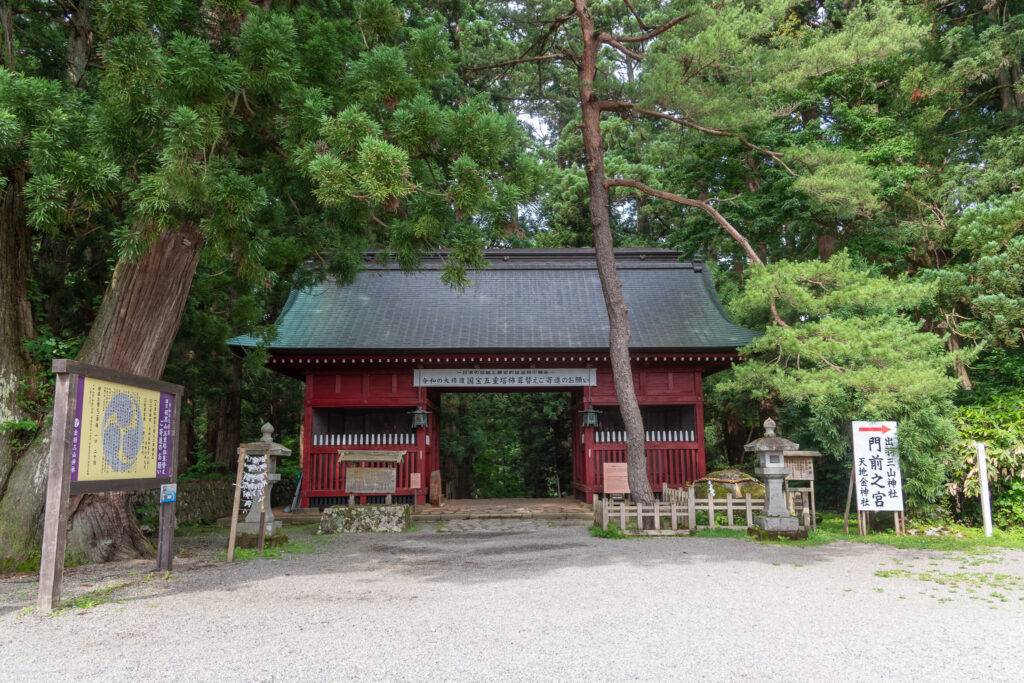
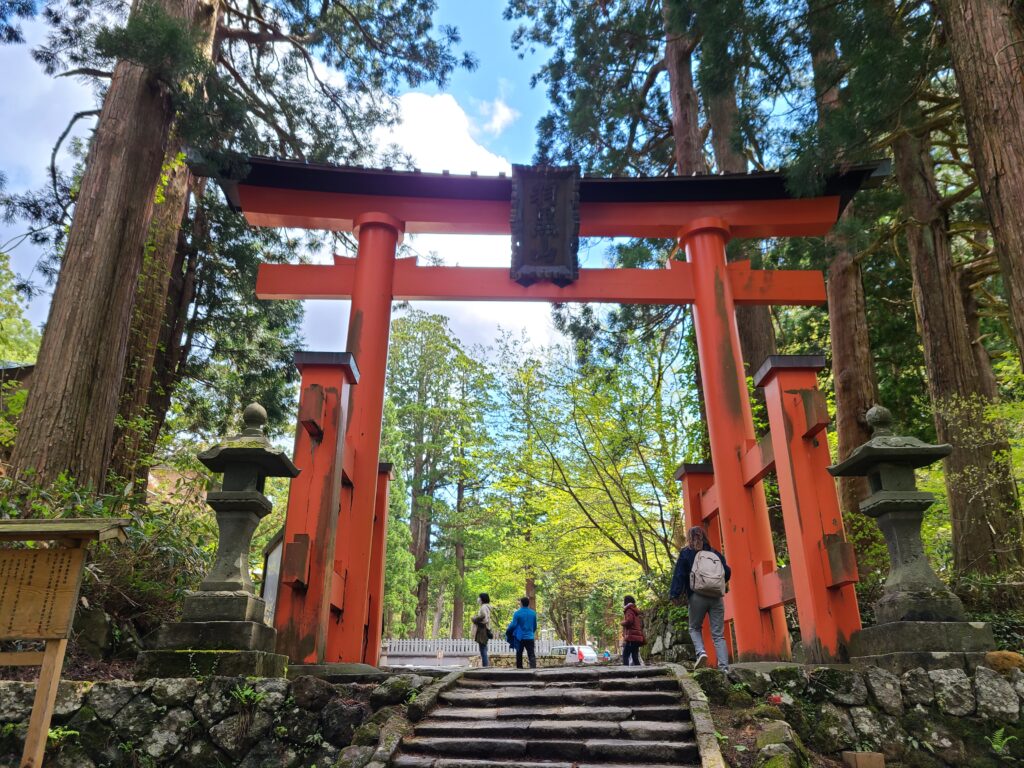
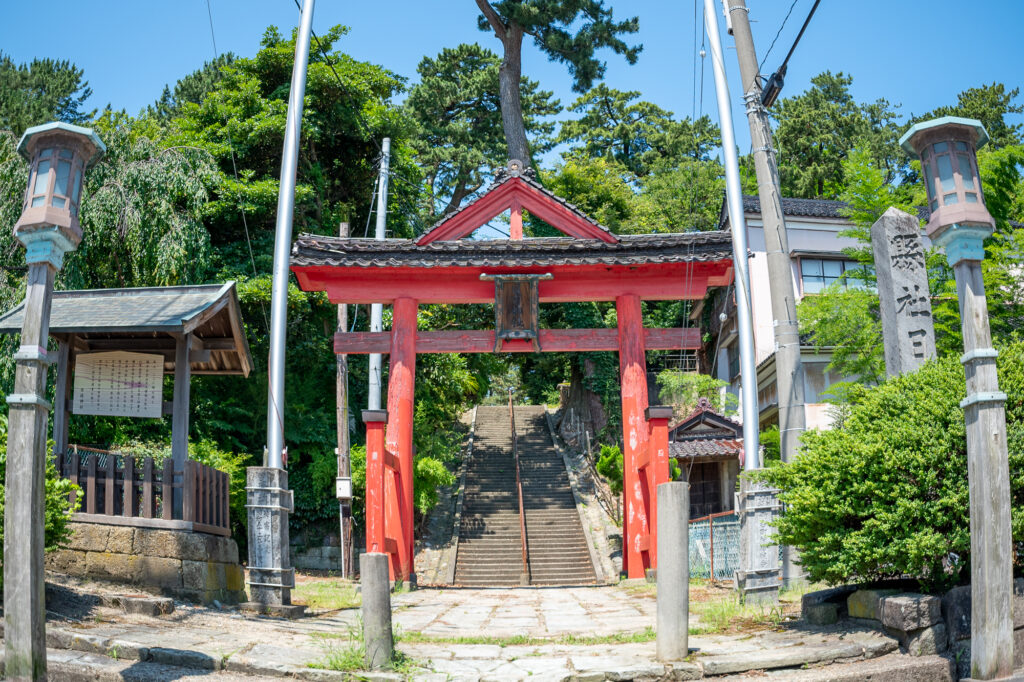
To start your journey to the Dewa Sanzan sacred mountain, the first mountain you should aim for is Mt. Haguro. In order to climb the “Mountain of Present”, you need to enter the “Zuishinmon gate”. This red gate used to be a “Niomon” (a Buddhist gate that enshrines the Buddhist gods “Nio”), but changed its name to Zuishinmon after Mt. Haguro was forcefully converted to Shintoism in the 19th century. You will find the Tenchikon-jinja shrine on its right.
“Hagurozuishinmon” Bus stop. Toilets inside the waiting area.
Here is what we recommend you to do for the afternoon:
Climb Mt. Haguro (1 hour 30 minutes to 2 hours, according to your hiking speed)
Have tea & mochi at the Ninosaka Chaya Teahouse halfway to the top.
Visit the top of the mountain, hear a prayer at the Dewa Sanzan shrine (regularly performed until 4pm)
Stay at a shukubo lodge for the night, at the top (Saikan) or by going back to the foot of the mountain. You can take the bus from the top (bus stop name: Haguro Sancho) back to the bottom (Haguro Zuishinmon or other bus stops) if you do not wish to climb the stairs down. (bus ride: 660 yen per person)
The torii gate at the top of the mountain that leads to the Haguro Sancho parking lot (& bus stop) and the Hagurosan Resthouse.
D2 : The big hike: Mt. Gassan & Mt. Yudono
The Busshoike Goya, a lodge halfway to the top of Mt. Gassan
Haguro Sancho
Haguro Sancho 羽黒山頂 will be your transfer point to take the bus to Mt. Gassan. We suggest you take the earliest bus possible to Mt. Gassan so you can do the hike to Mt. Yudono when there is still daylight.
Aim to depart from Haguro Sancho before 8am.
Catch the bus to Gassan Hachigome at 7:05am or 8:05 am. Get off the bus at Gassan Hachigome 月山八合目 after a 55 minute ride.
Gassan Hachigome 月山八合目 (“Gassan’s Eighth Station”) is the name given to the spot where most hikers start their hike to the top of Mt. Gassan. It takes 2 hours and half to reach the top for beginner hikers without a pause (please note that the time required to hike depends greatly on your hiking pace, the purpose of your hike: photography = +40 min. to +1 hour, leisure = +20 min., sports = -30min., etc.).
Equipment needed
-Good hiking shoes -Good sunproof hat & sunglasses -Sunscreen or long-sleeved top -Water -Hiking sticks -A waterproof windbreaker vest (in case of rain) -Snacks & food -Light crampons (for hikers in early-mid July; as there is some snow remaining on some parts of the trail) -(Recommended) Insect repellent -(Recommende) Bear bell
Aim to start your hike at around 9am
Visit the Midagahara marshes and the Midahara shrine
Visit the Busshoike Goya Lodge 佛生池小屋 (please buy food or a souvenir if you wish to rest inside the place)
Hike to the top, visit the Gassan shrine 月山神社 (500 yen per person)
Busshoike Goya’s lodge. It takes roughly 1 hour 10 minutes to reach for beginner hikers (no pause)
Useful links:
Shonai Kotsu – Bus to Mt. Haguro & Gassan’s timetable :
Gassan Chojo Goya (the furthest building in the background seen from the Gassan Shrine)
Have lunch at Gassan Chojo Goya 月山頂上小屋 (might be out of service according to the water-availability situation or special schedules)
Follow the hiking trail to Mt. Yudono. From there, it is a 3 hours and half+ hiking course that is awaiting you. Please count at least 4 hours of hiking if you are a novice, 5 hours if you wish to take your time/photos. The last part of the trail is dangerous (metal ladders stuck in the rock, very slippery in case of rain).
Yudonosan-jinja
Mt. Yudono’s shrine (photos & videos prohibited)
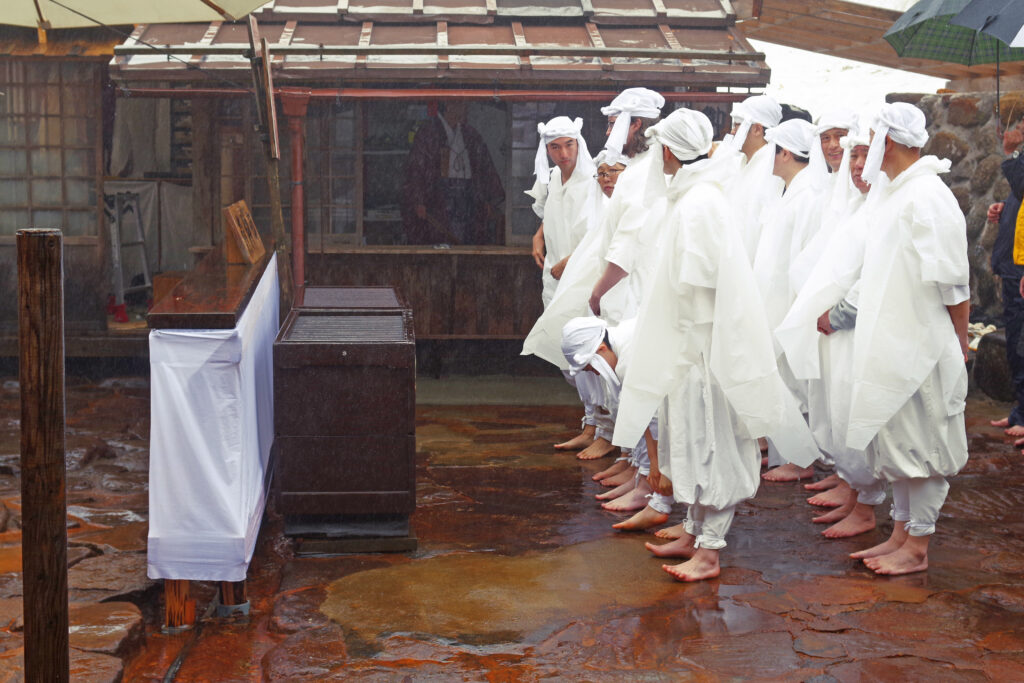
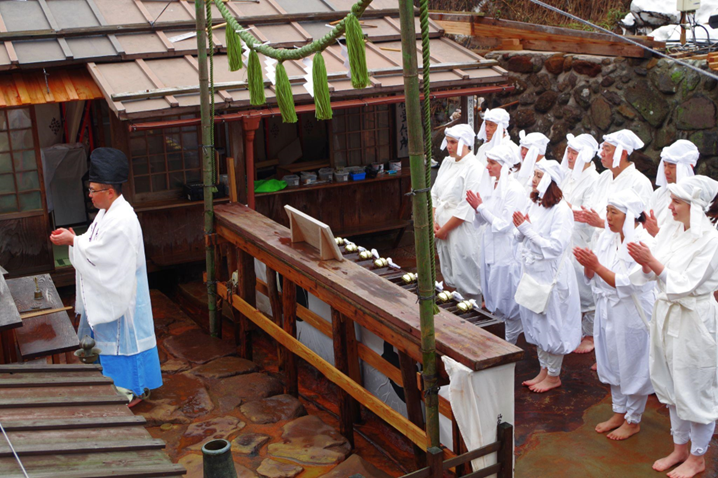
Visit the Yudonosan-jinja shrine (500 yen/person). You need to take off your shoes in the dedicated space and take part in a purification prayer as instructed by the priest (you will need to rub your body with a little white piece of paper called “hitogata”, and release it in the nearby water stream to cleanse you from your defilements; then you are expected to listen to a prayer, and climb Mt. Yudono’s holy rock in the hot water).
Go to the small parking lot behind the shrine. You will find a souvenir shop and a shuttle-bus stop that will bring you to Yudonosan Senninzawa. Wait for the bus (200 yen/person, 1-way only). The last bus departs at around 4:30pm. Please keep this in mind when planning your trip. Otherwise you will have to walk 40 min. on foot to get to the next step.
Useful links:
Shonai Kotsu – Shuttle-bus to Senninzawa (Japanese) 湯殿山神社本宮参拝バス
Yudonosan Senninzawa is the big place at the foot of the mountain with a giant red torii gate in the middle. You will find a Buddhist graveyard on the right of the torii (from the point of view of the photo above), the Yudonosan Sanrojo pilgrim lodge on the left, and the Yudonosan Resthouse at the bottom of Yudonosan Sanrojo.
Stay at Yudonosan Sanrojo (prior booking mandatory)
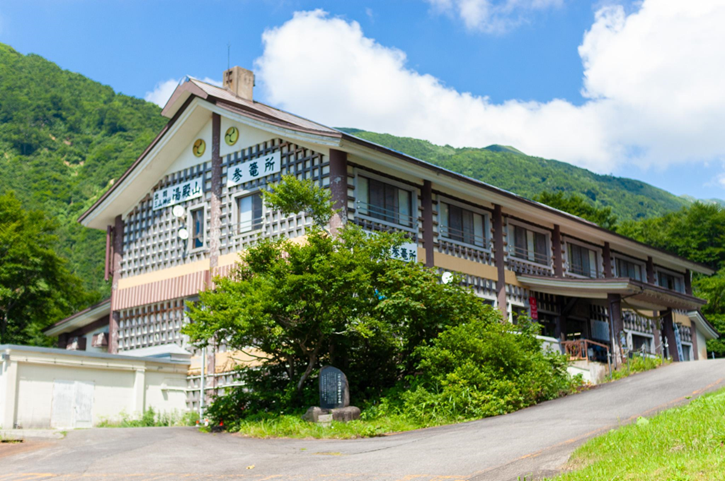
Yudonosan Sanrojo’s pilgrim lodge
Useful links:
Shoko Travel – Yudonosan Sanrojo’s English Website (reservations & info)
Japan Heritage (in Japanese: Nihon-isan 日本遺産) is a new cultural legacy designation system, apart from the already existing National Property designation system, that aims to protect the concepts and stories that are anchored into Japan’s history and traditional culture. There are in total 8 Japan Heritages registered as of February 2021 in the Tohoku Region, and Tsuruoka boasts 3 of them, which are:
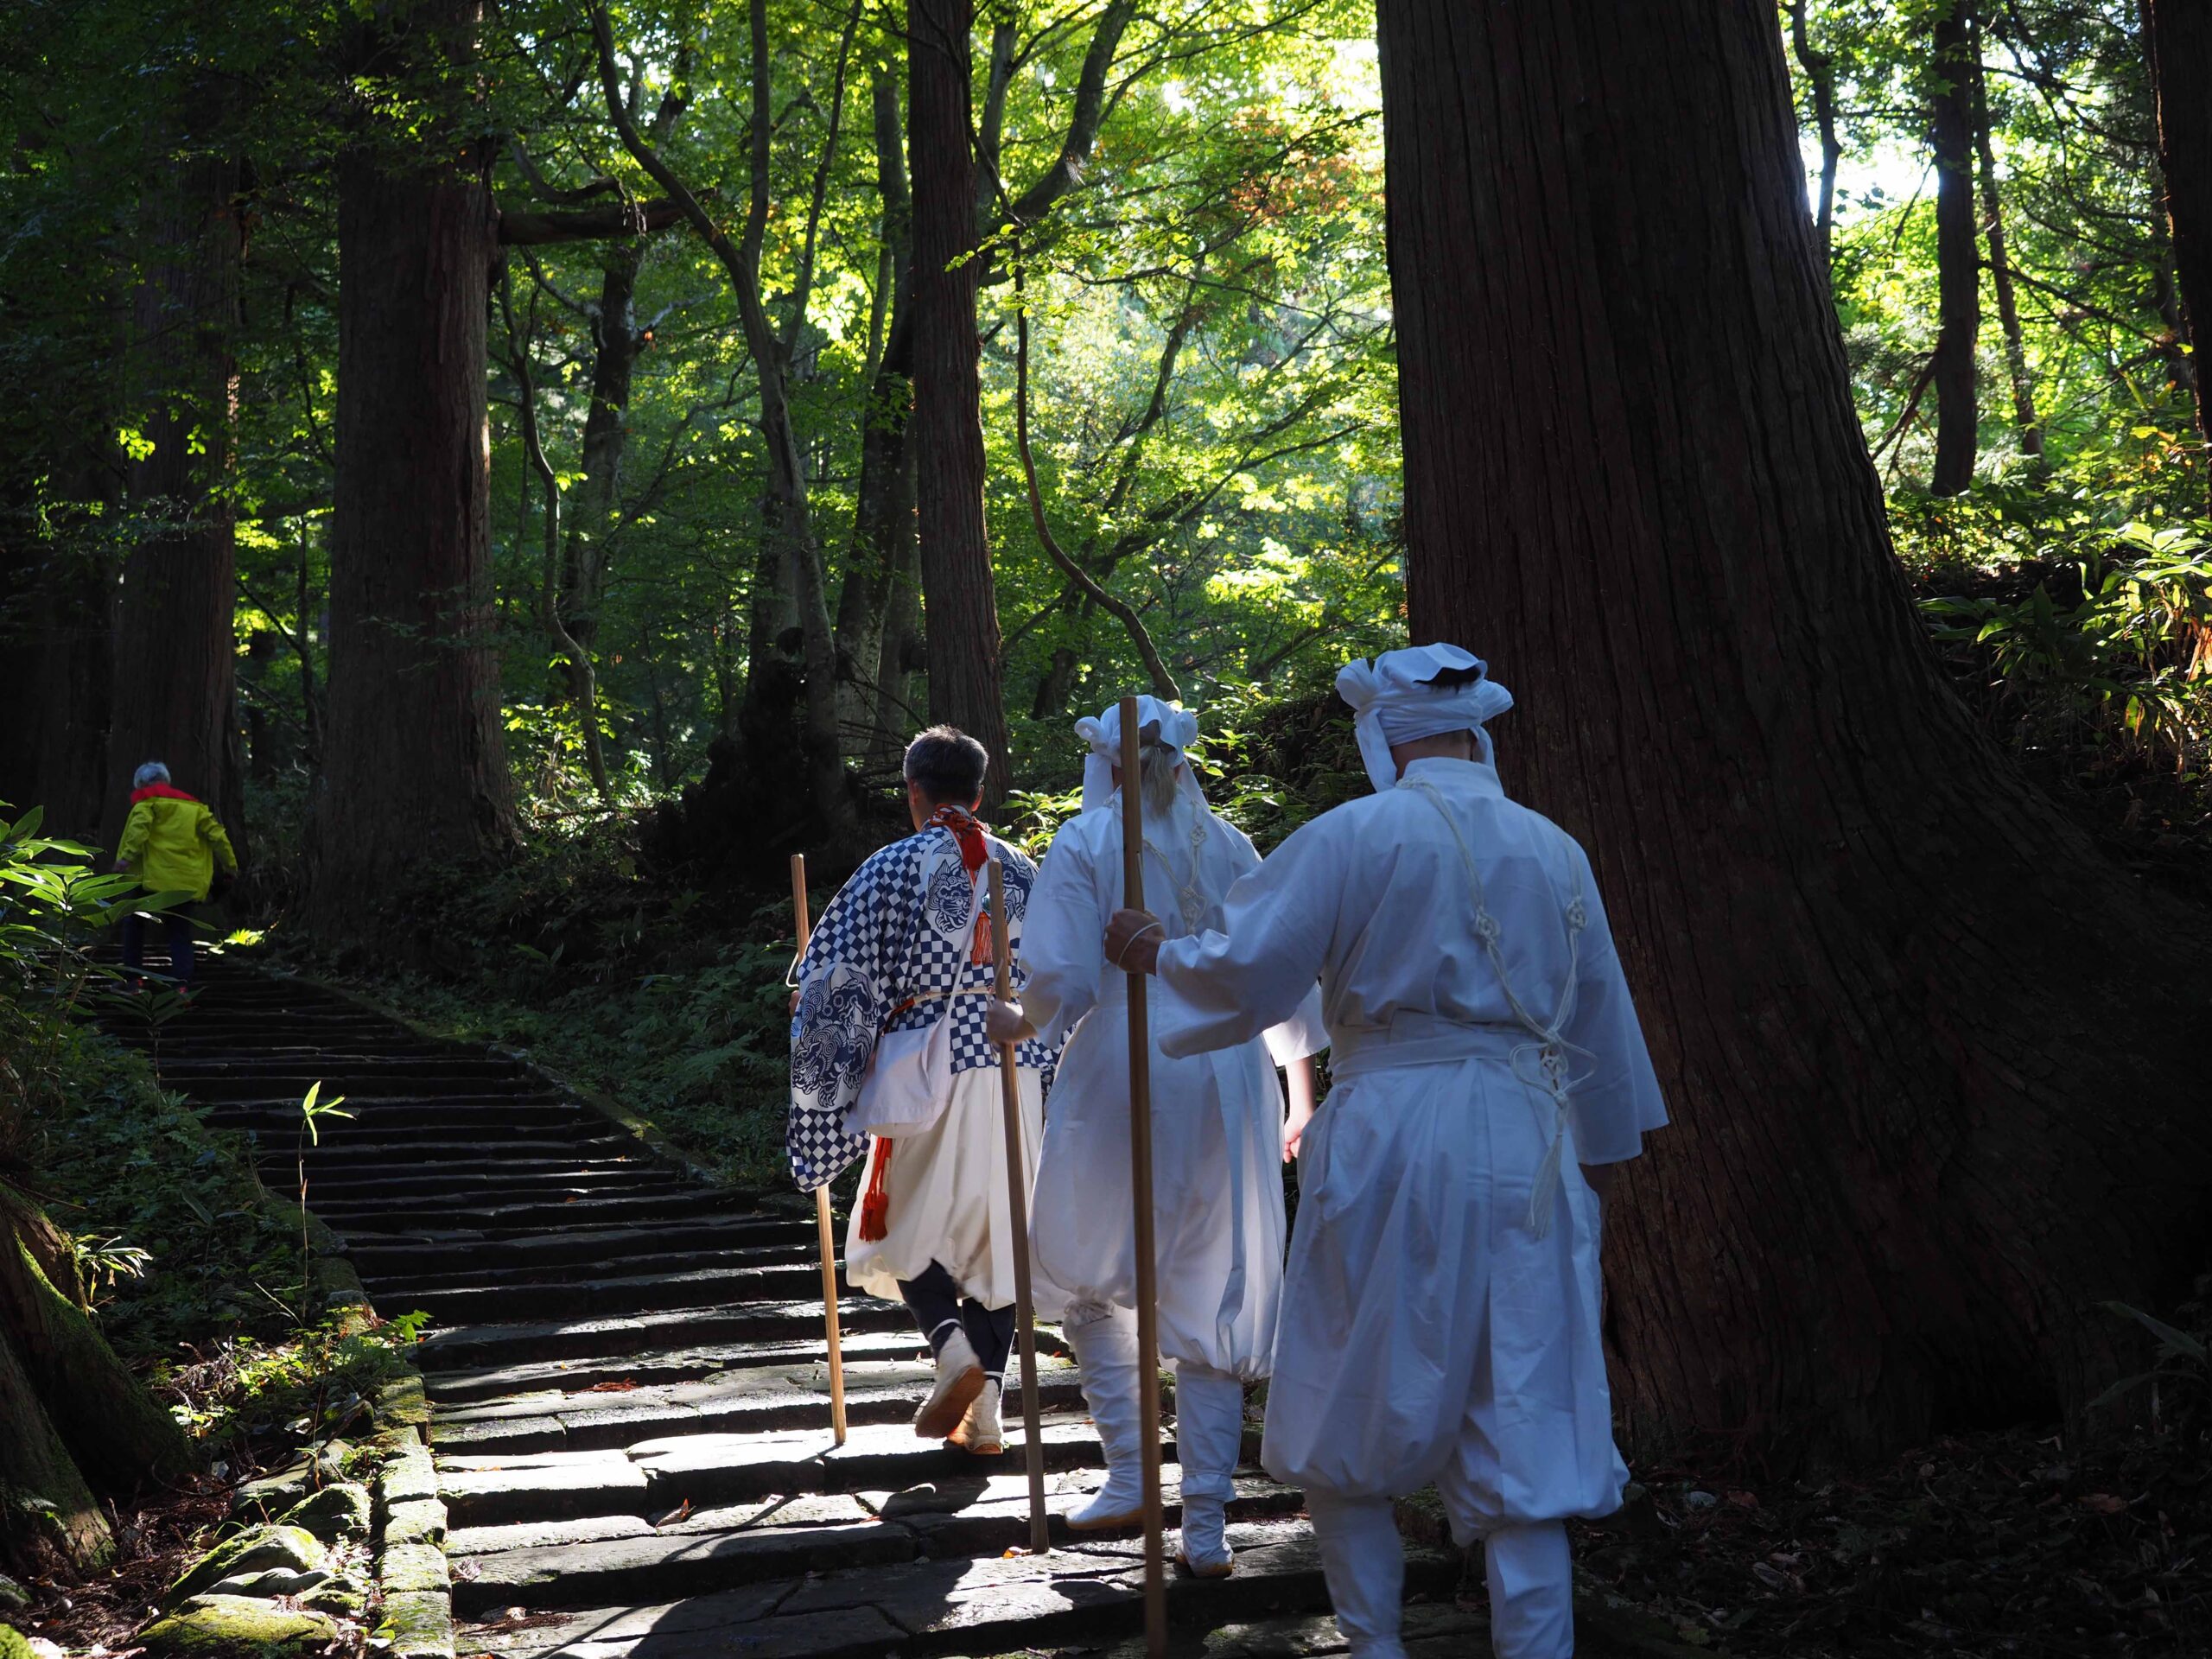
Dewa Sanzan, one of the Three Main Sacred Sites of Shugendo in Japan (日本三大修験道), has been existing for more than 1400 years. The Dewa Sanzan Yamabushi practice has been ongoing for all those centuries without discontinuing. Everybody is accepted and invited to learn about the essence of Dewa Sanzan’s Yamabushi way of thinking: the “uketamo” (ウケタモウ), literally: “I accept”. Accomplishing the pilgrimage of the Three Sacred Mountains of Dewa : Mt. Haguro, Mt. Gassan and Mt. Yudono is said to make the pilgrim access “spiritual rebirth”.
The Samurai Silk designates the silk produced in the Shonai region after the Shonai Clan’s surrender, an event that marks the end of the Boshin War in 1868 and the new government of the Meiji Period. After the Boshin War, the Shonai Clan, the last to have surrendered to the new government, was considered a renegade. To wash their former clan’s honor and prove their value, the former samurais wished to participate in developing the new government’s economics by specializing themselves in silk farming. The government allowed them to do so and let them build the Matsugaoka Silk Farms. The samurais controlled every step of the silk production: from silkworm breeding to the final products’ manufacture.
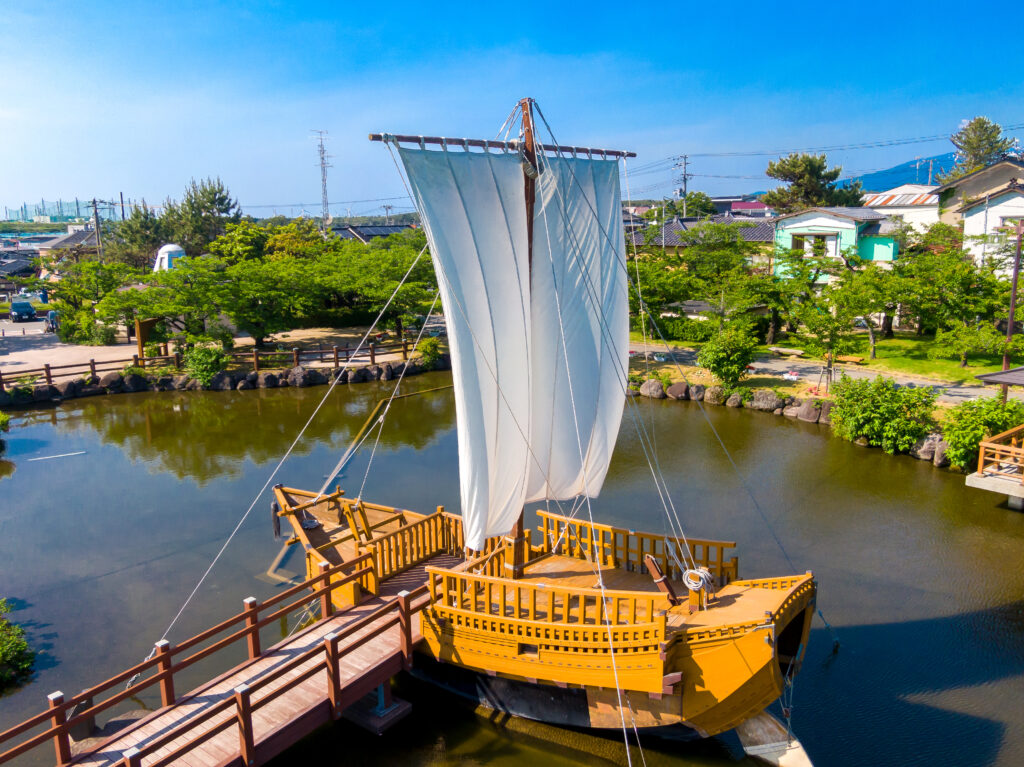
The Kitamaebune Maritime Road departed from Hokkaidô down to Osaka, running along the coast of the sea of Japan from the Early 18th Century to the Early 20th Century. The merchants of the Kitamaebune 北前船, literally: “the boats from the North” (a combination of the words kitamae 北前 that used to designate the Sea of Japan, and fune 船: the boats), followed that shipping route from ports to ports, importing rare goods from the South to the North (and vice-versa) to resell them at a higher price to the following harbor. Merchants who ventured on the dangerous Sea of Japan risked their lives, hoping for a better life. The tremendous benefits made by the Kitamaebune merchants benefitted a lot of small coastal cities. In Tsuruoka, this is particularly noticed in the castle town, with the construction of rich merchant houses and the flourishing of Zenpoji Temple thanks to the sailors’ donations. There are 45 port cities in 16 different Japanese prefectures that are registered in the Japan Heritage Kitamaebune’s Maritime Road registry.
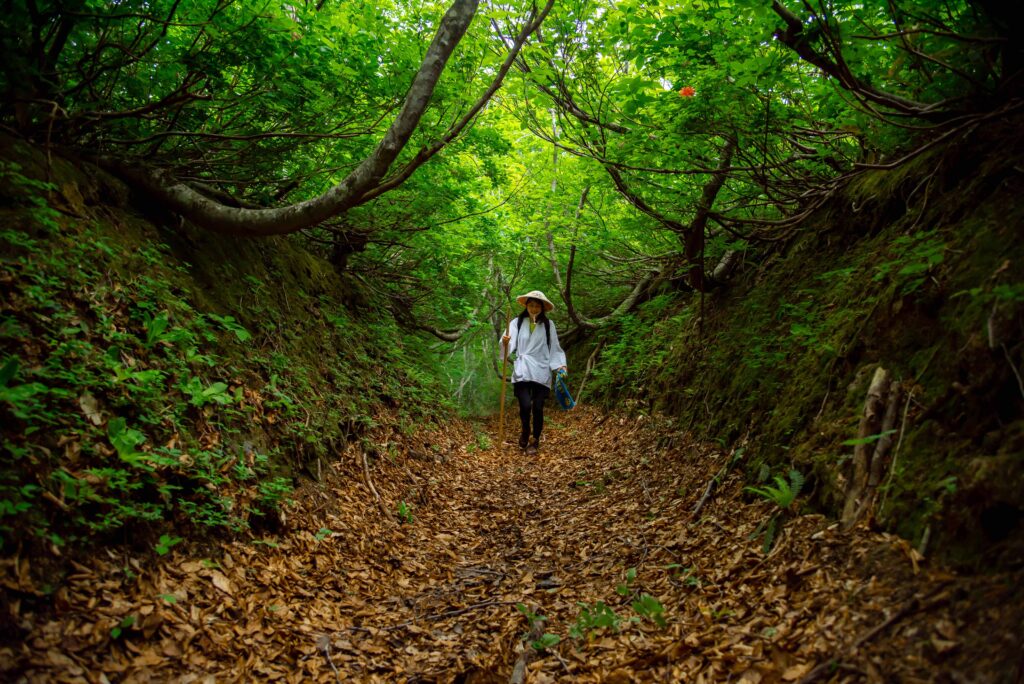
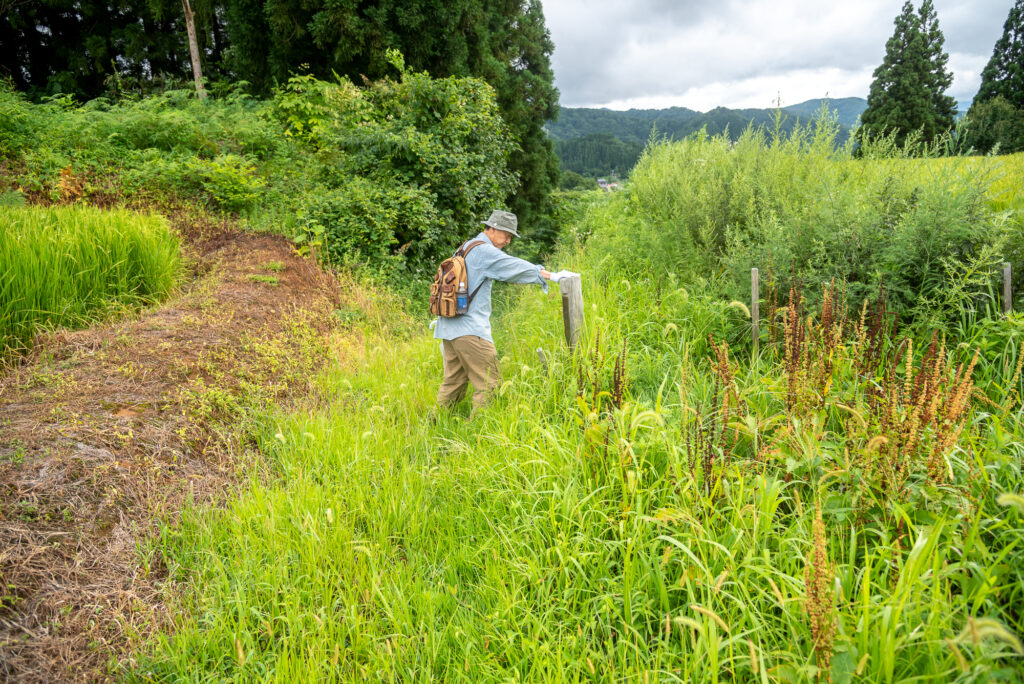
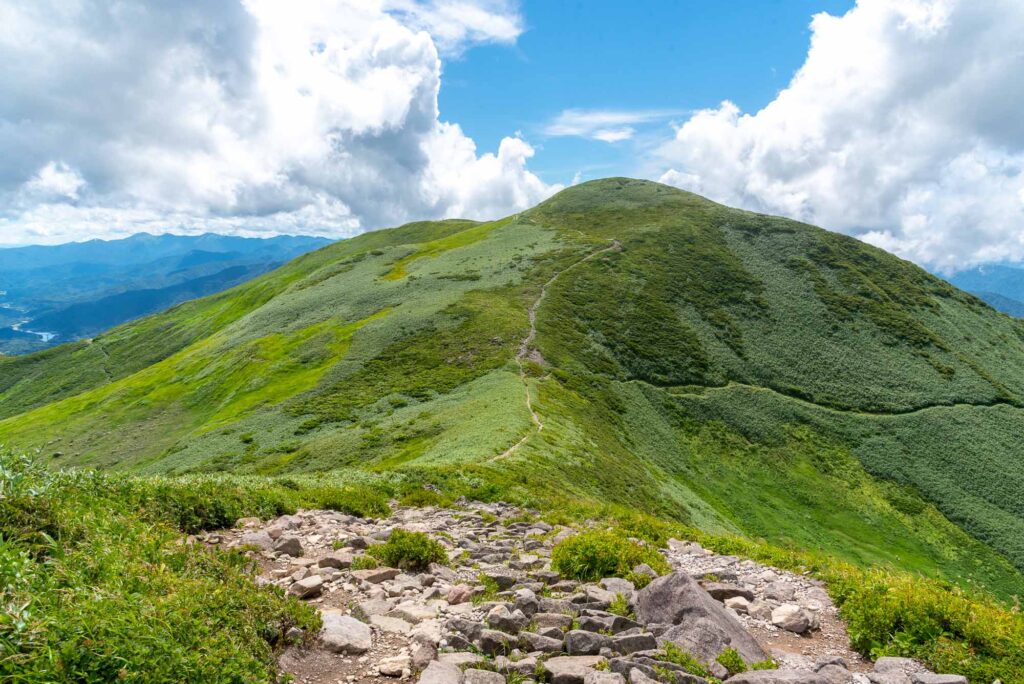
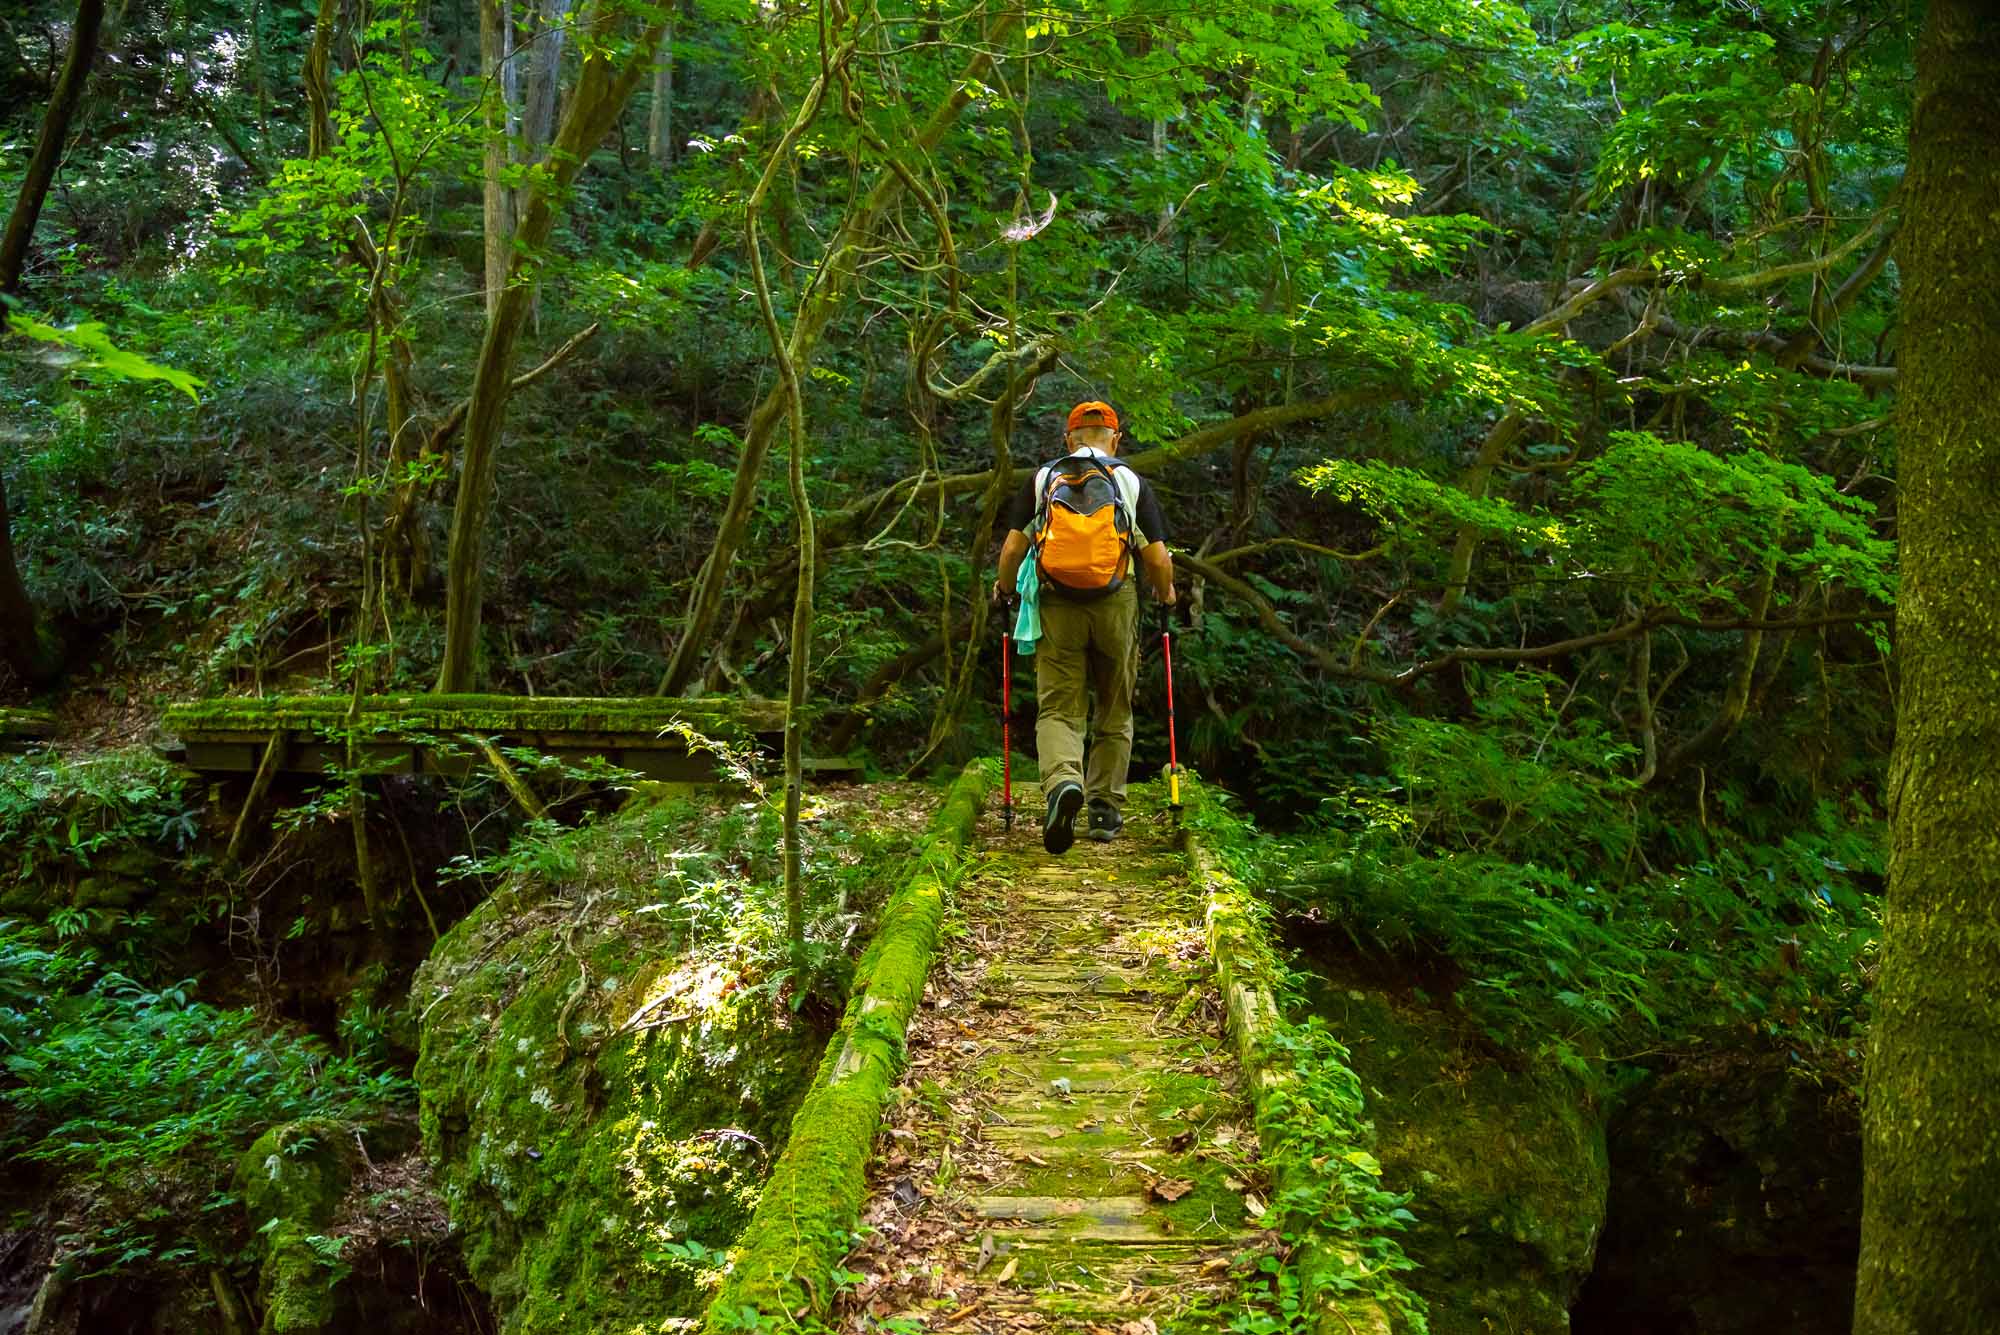
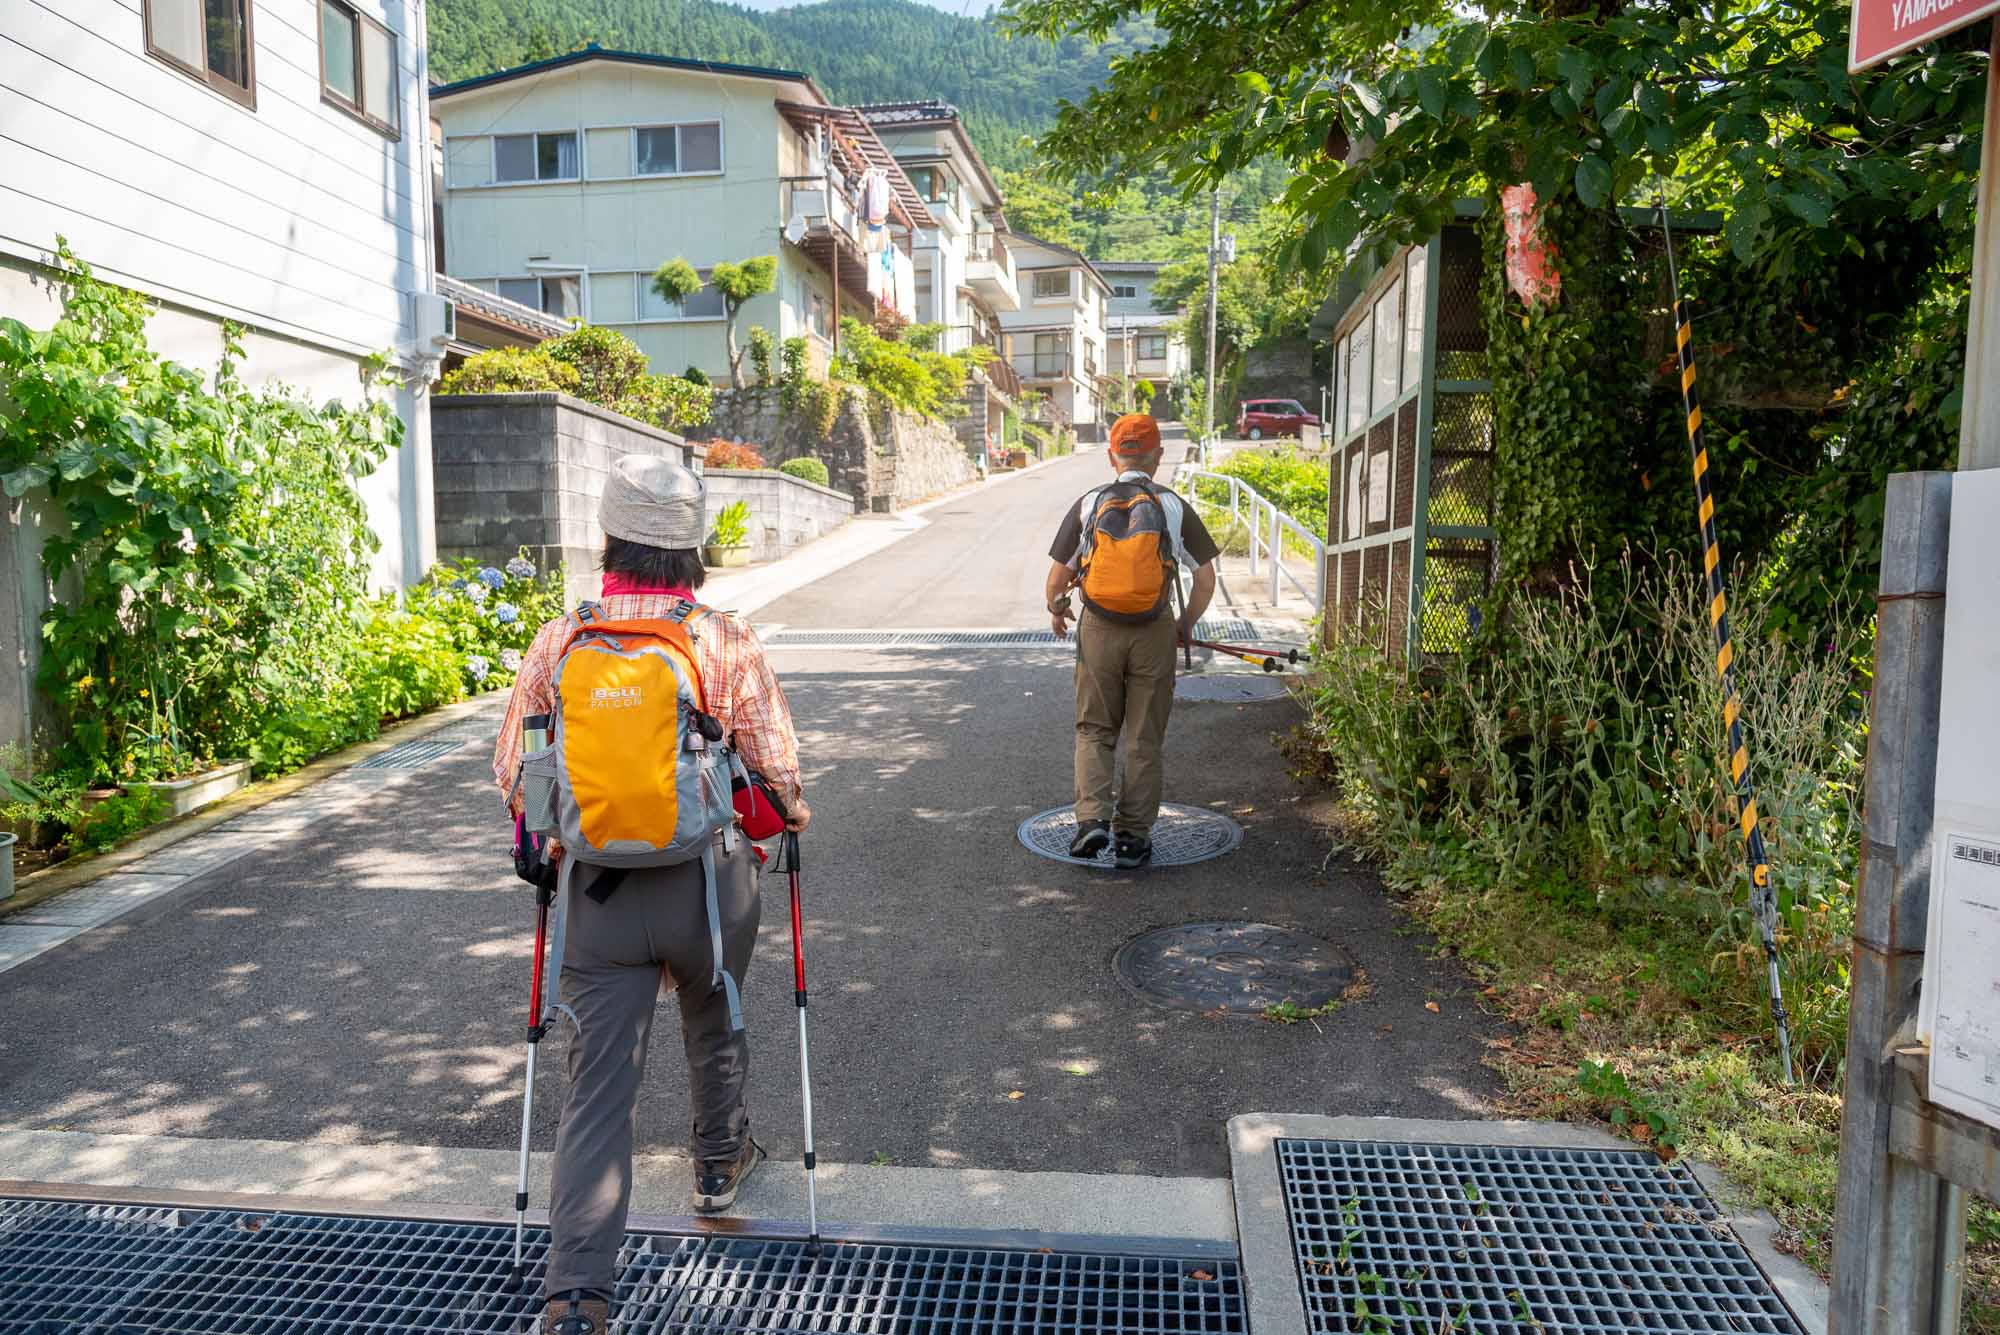
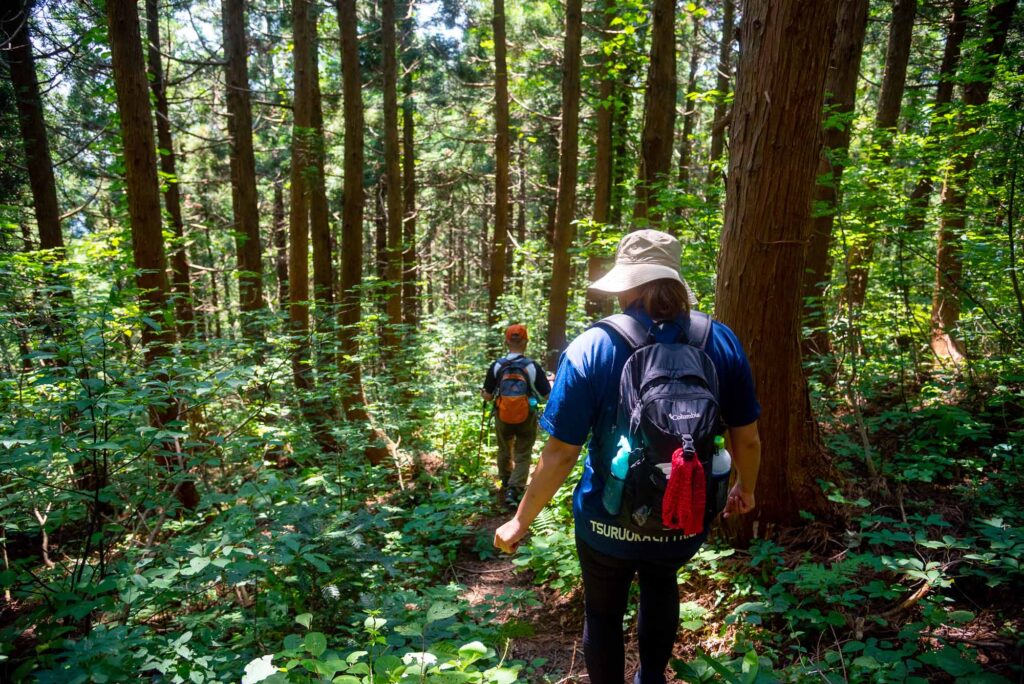
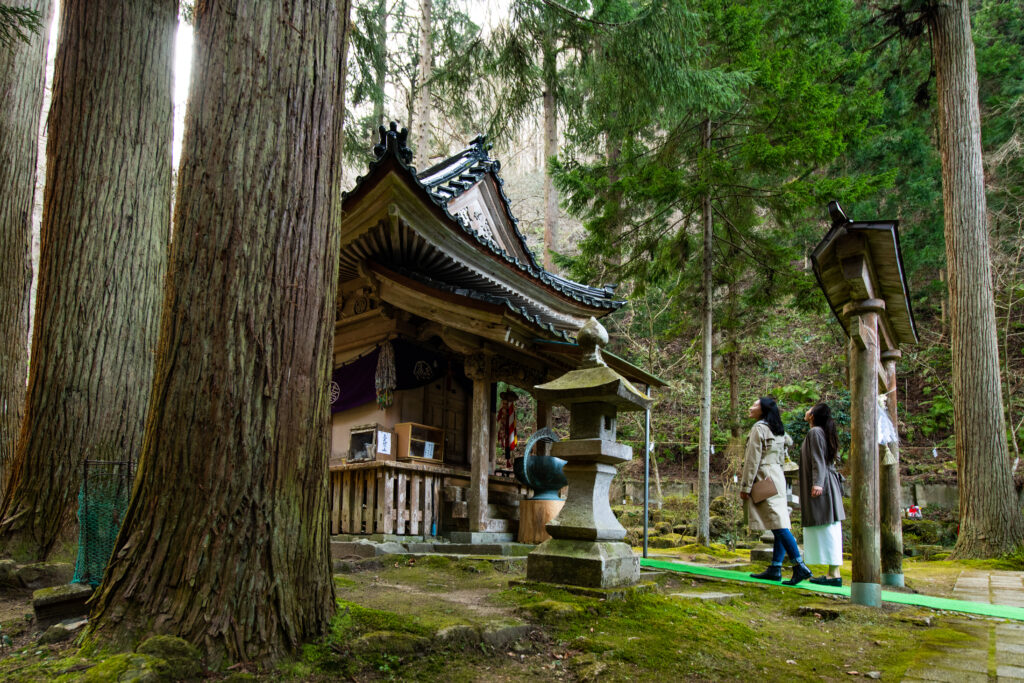
Atsumi is said to have been founded by the creator of Shugendo himself: En no Gyoja. Walk upon its sacred Shugendo paths.
Distance
10.5km
Elevation
720meters
Required Time
5h
Danger level
Caution advised *Dangers include:Bear presence, Heat strokes, Slippery slopes, Slippery when raining, Fallen trees
Difficulty level (for beginners)
Moderate
Equipment needed
● Water ● Hiking shoes ● Rainwear ● Sun hat ● Hiking sticks ● Food or snacks
Difficulty levels have been designed for people who have a PAI (Personal Activity Intelligence) score inferior or equal to 60. Experienced hikers or persons with a PAI above 100 can withdraw two cases to know the average difficulty for their fitness level. Example: Trails noted “Hard for beginners” correspond to “average” trails for experienced hikers or people with a PAI above 100.
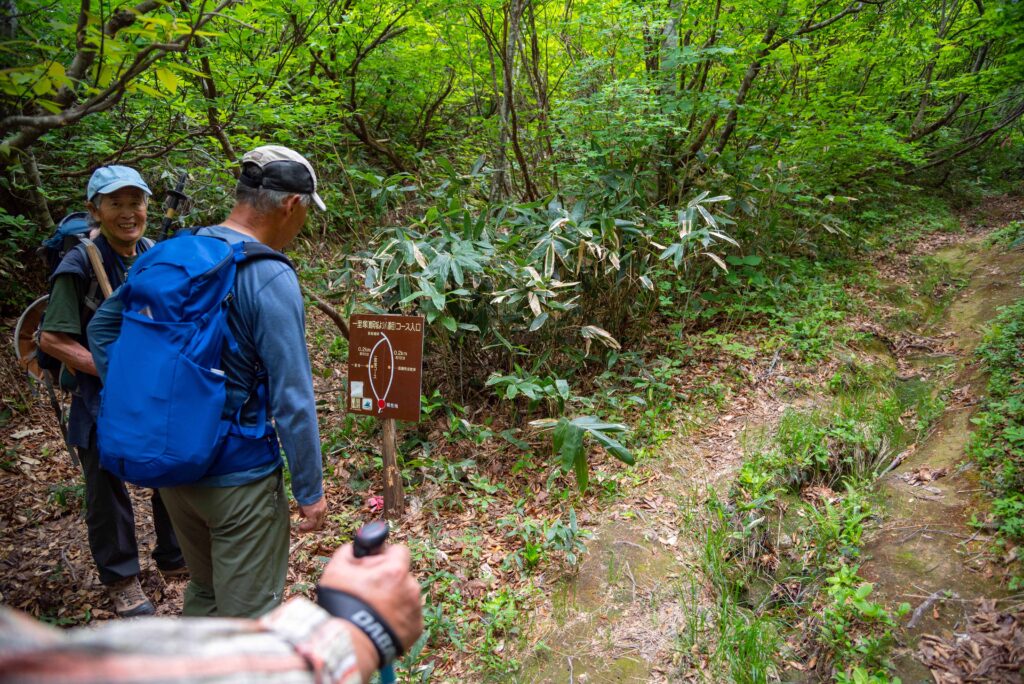
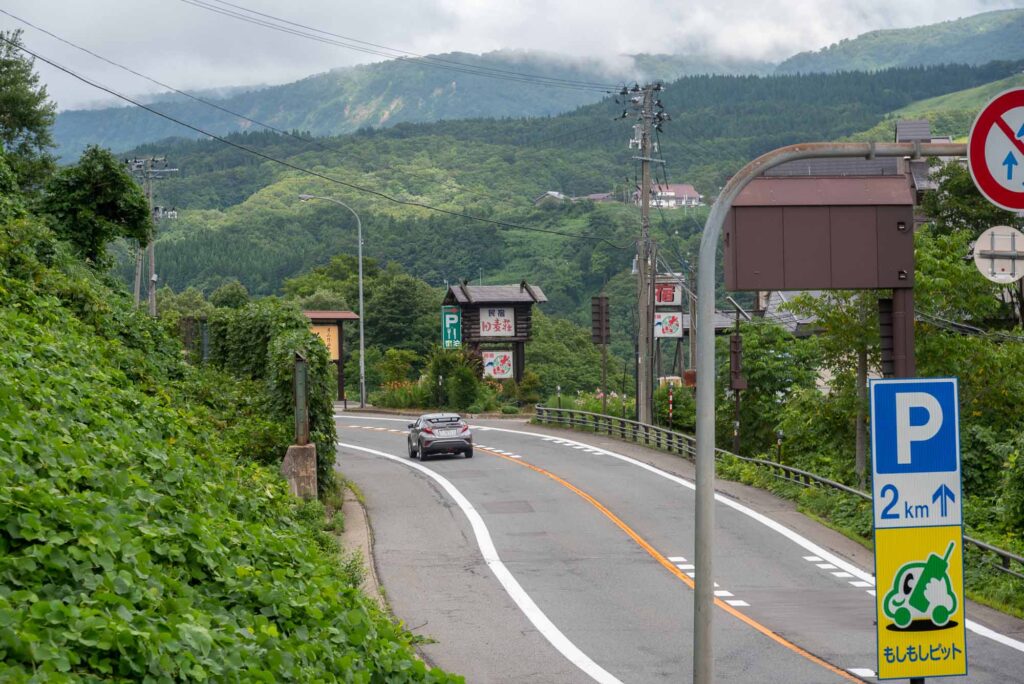
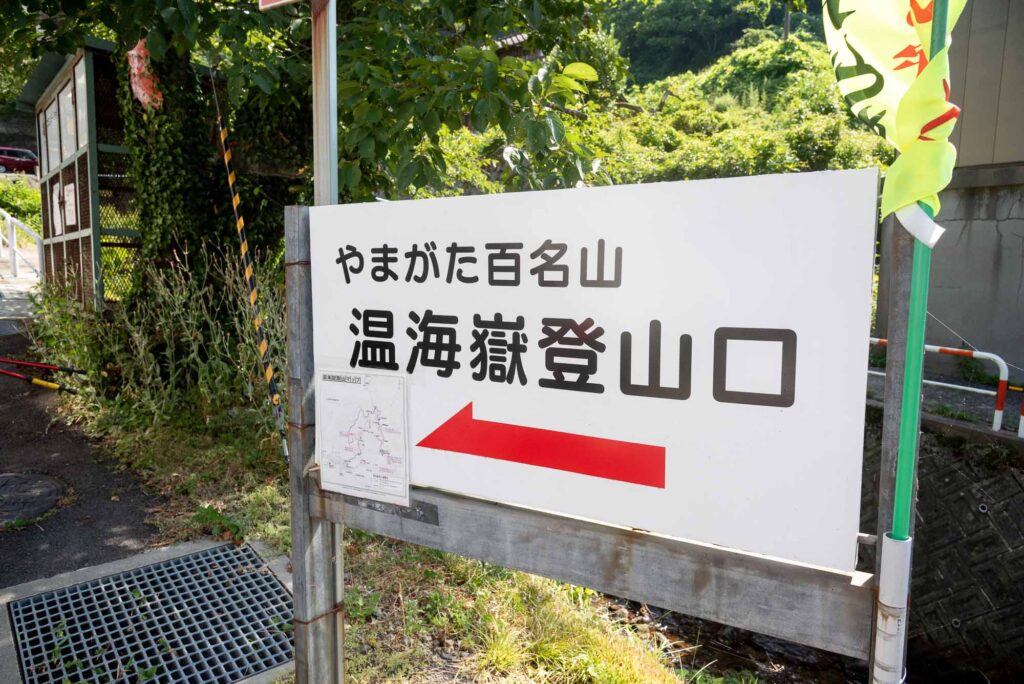
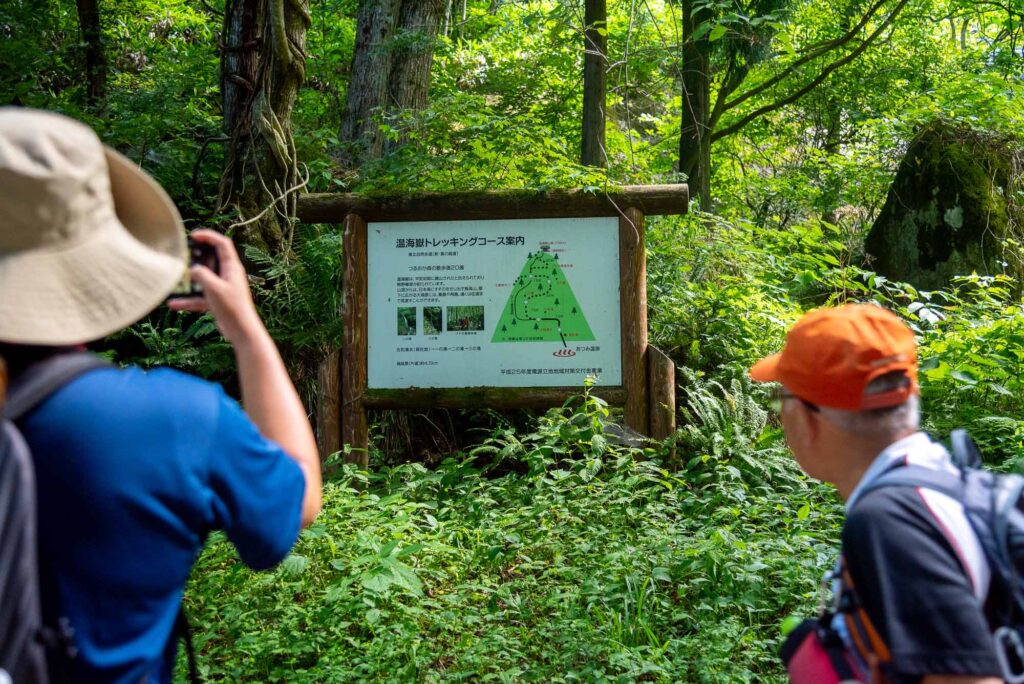
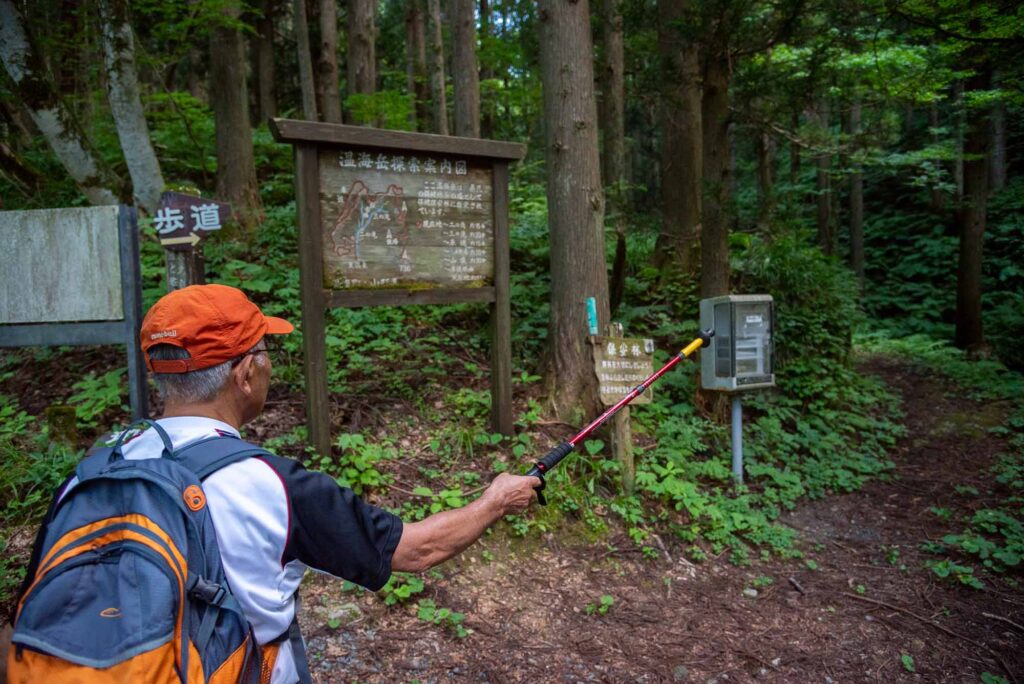
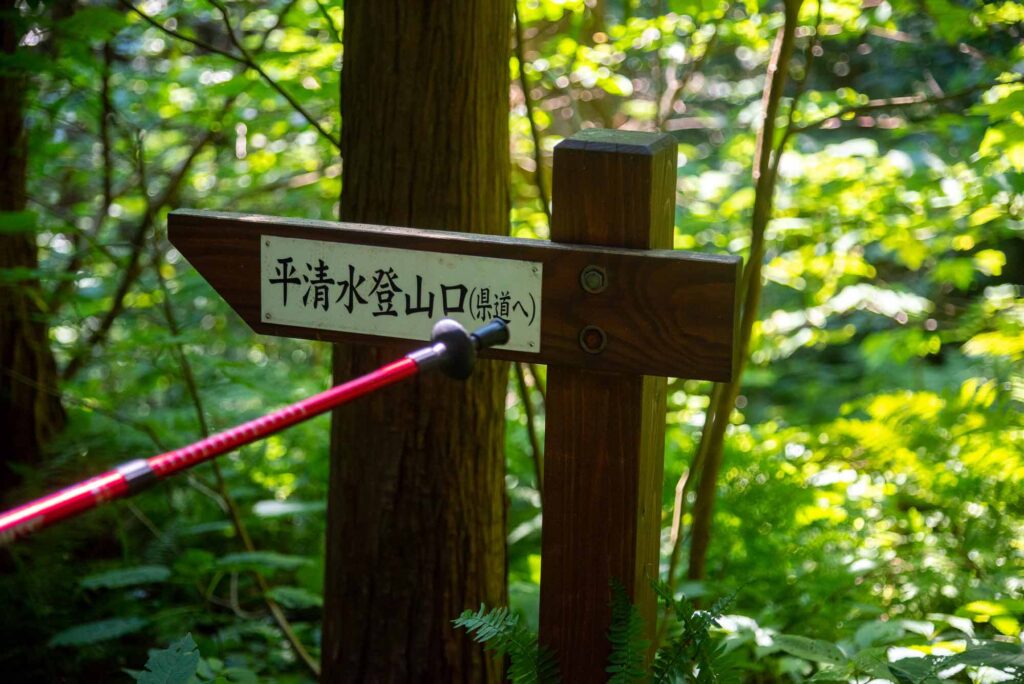
1. This sign tells you where to start your pilgrimage
2. Continue straight
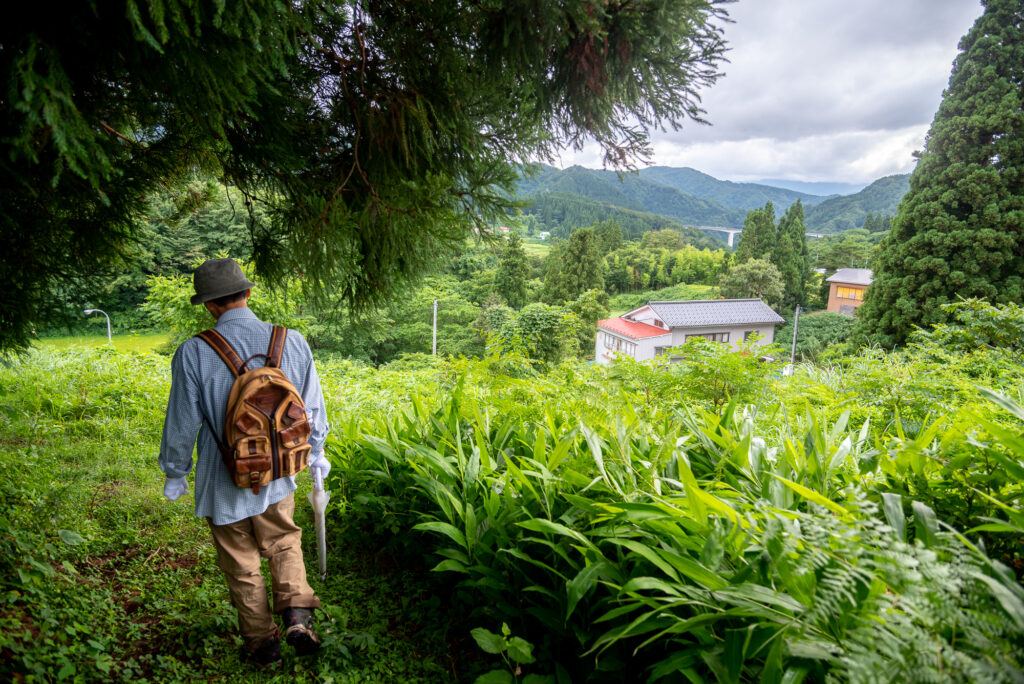
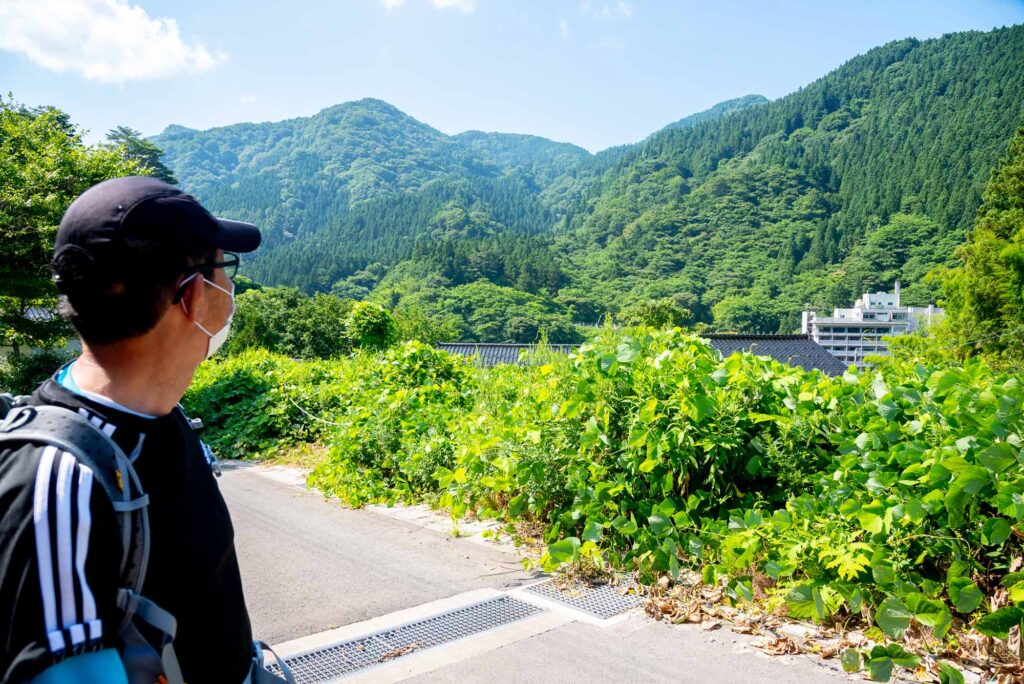
3. You get a view on Atsumi Onsen
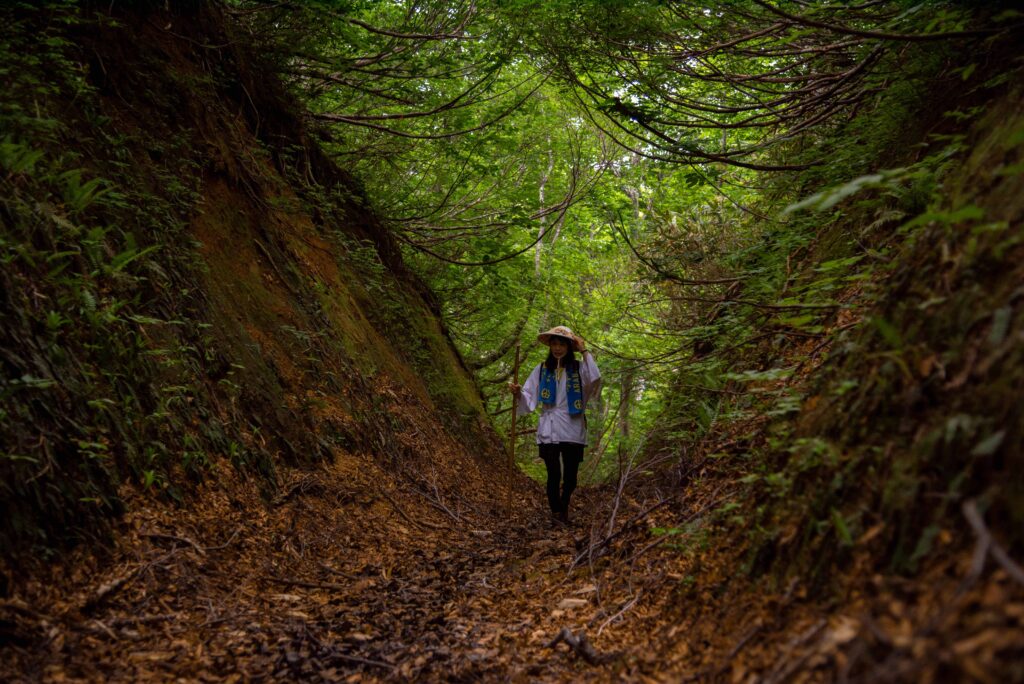
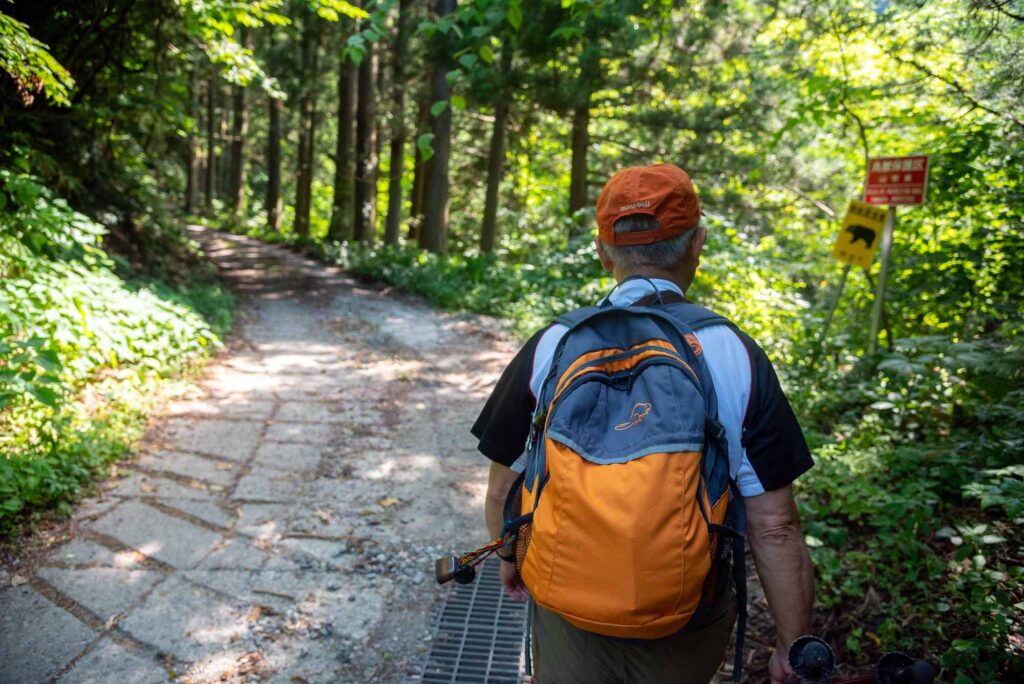
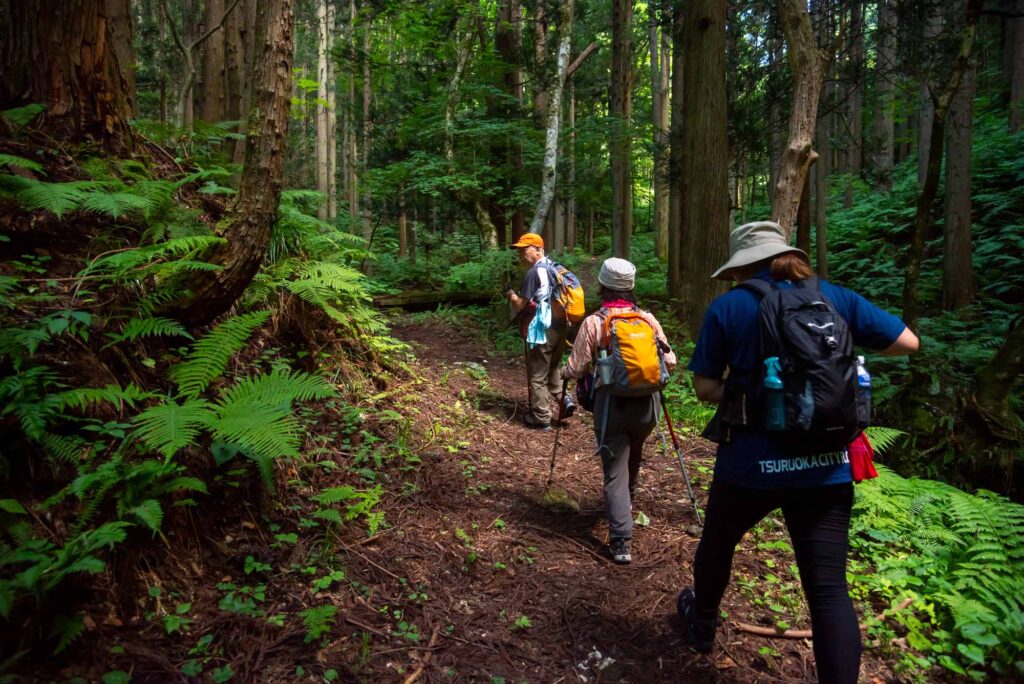
4. You step inside the forest
5. Continue straight
6. There is a map in Japanese of the surroundings
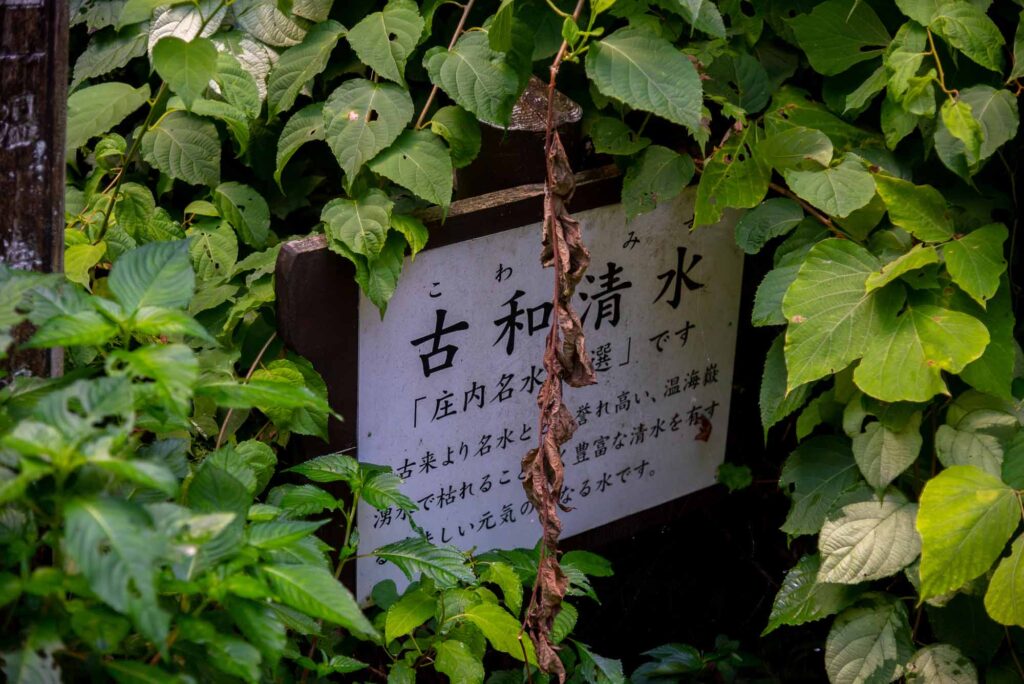
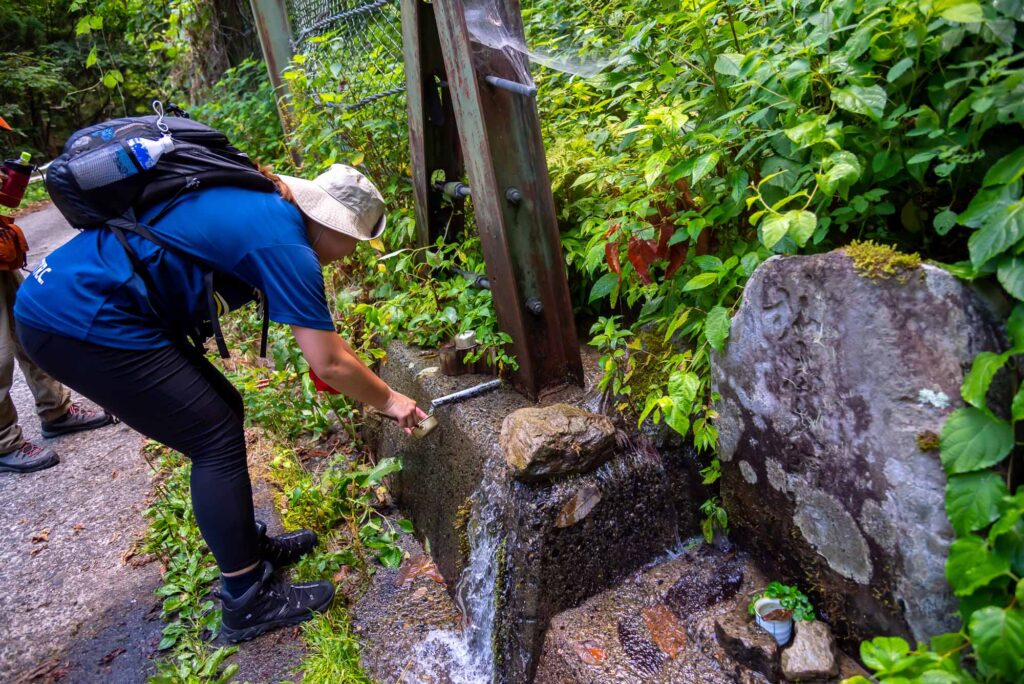
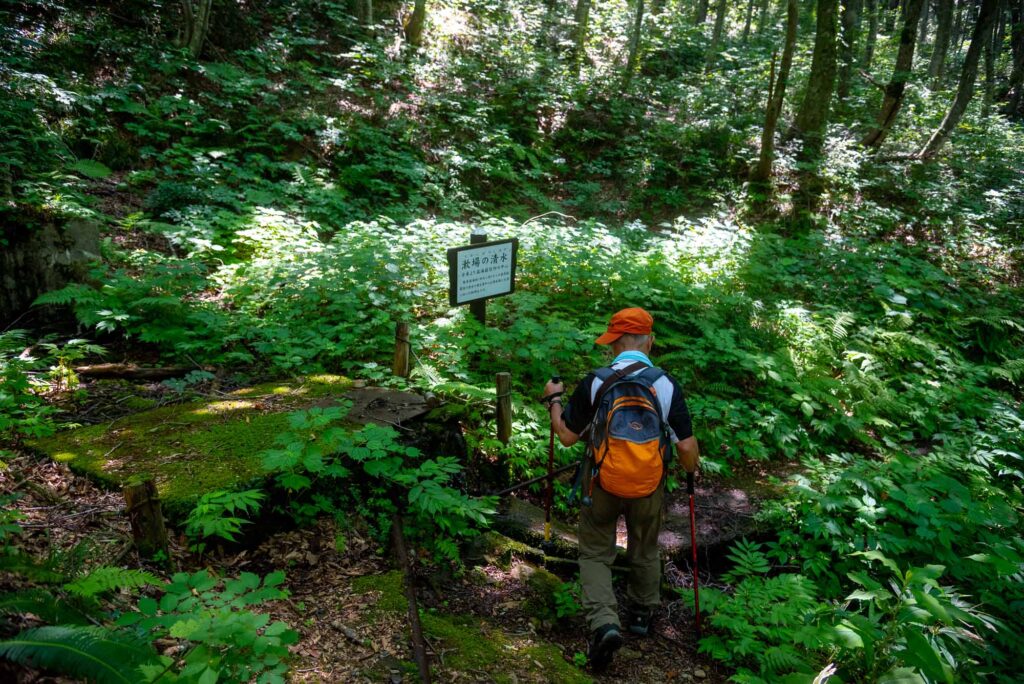
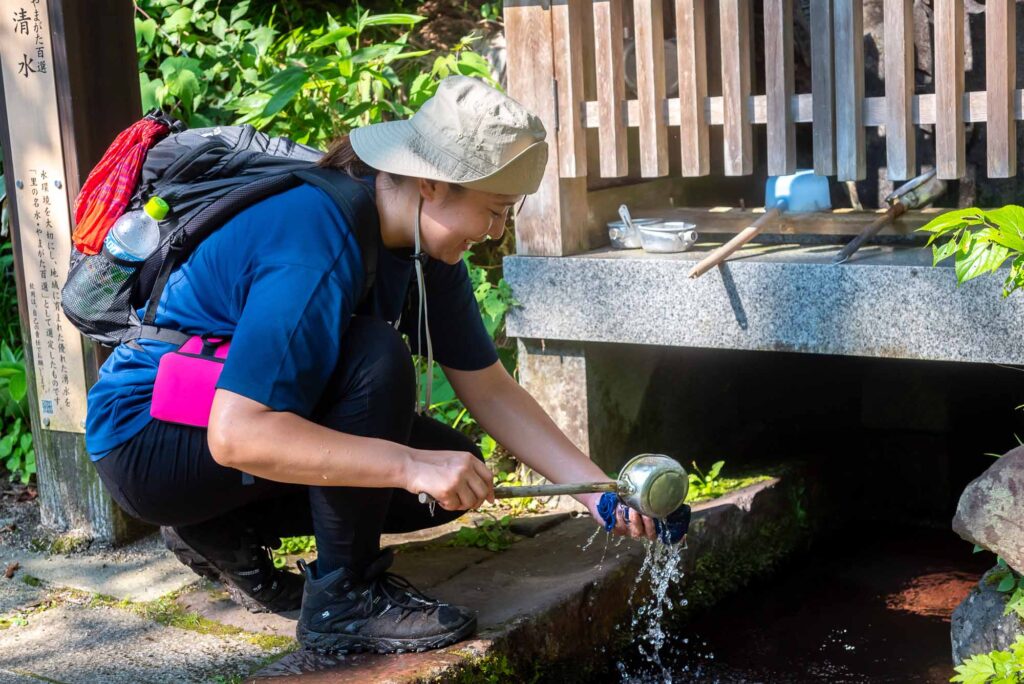
7. Fill in your water bottles at the Kowa springs
8. Kowa Shimizu (Kowa Springs)
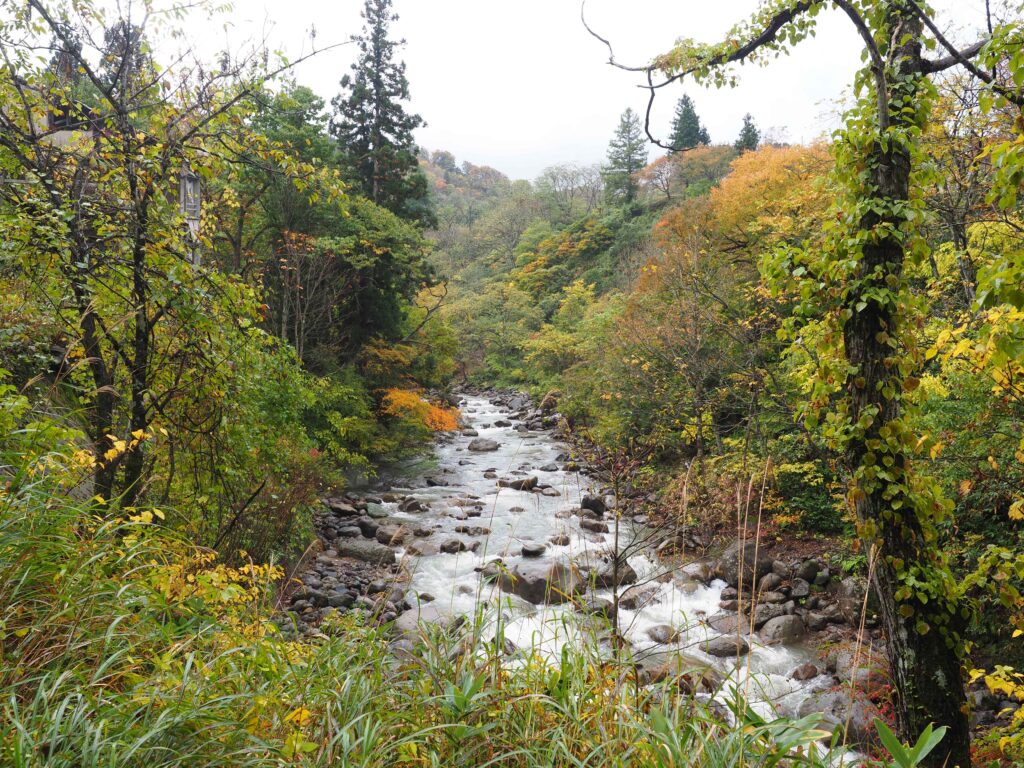
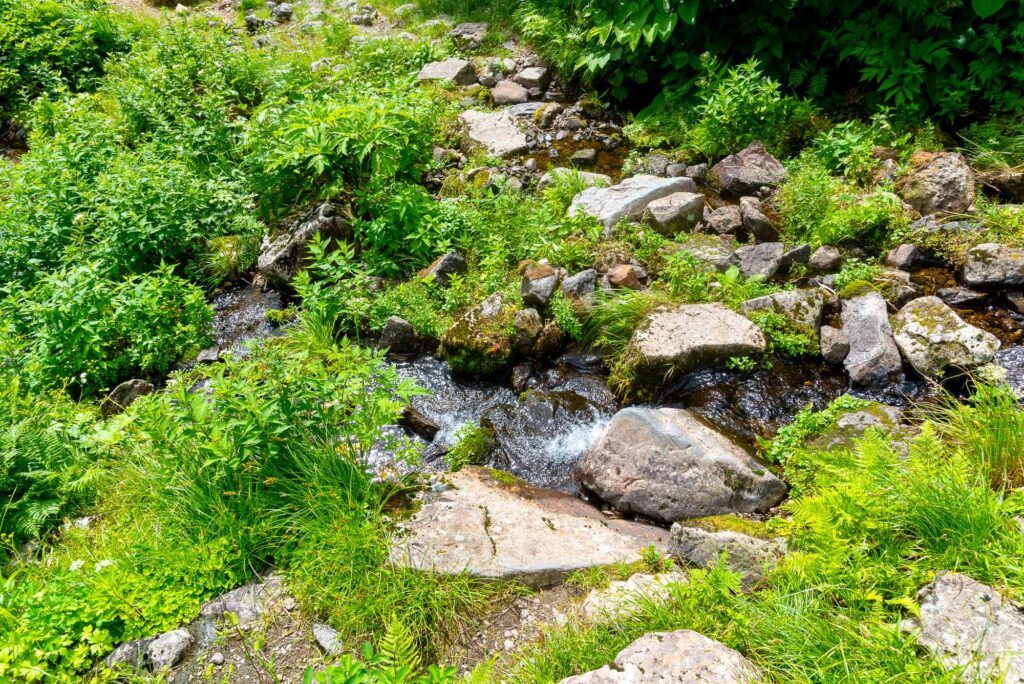
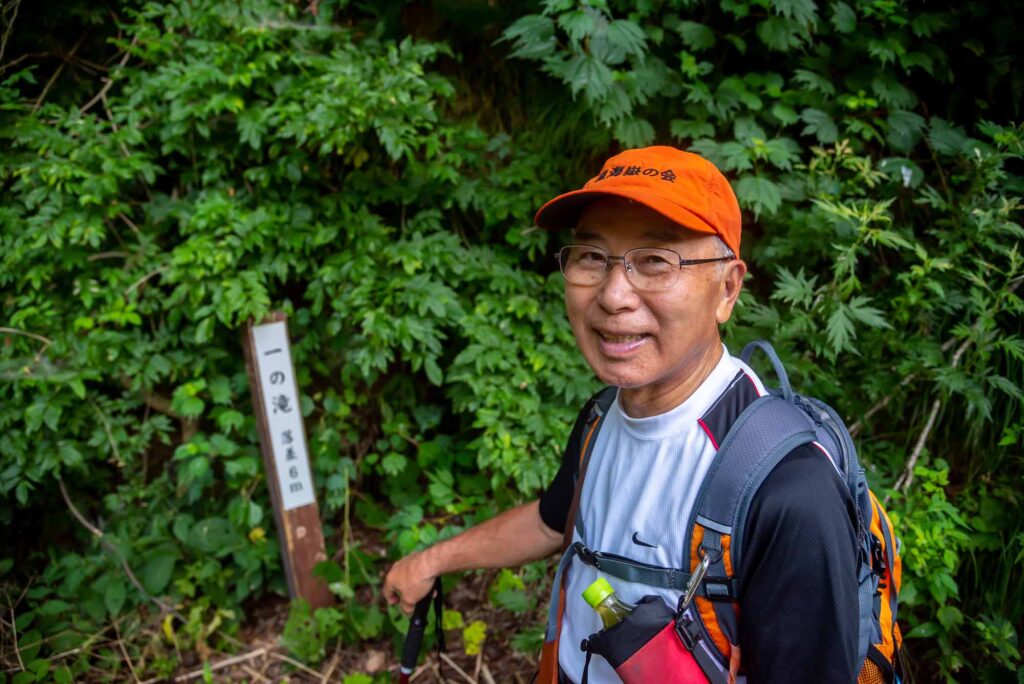
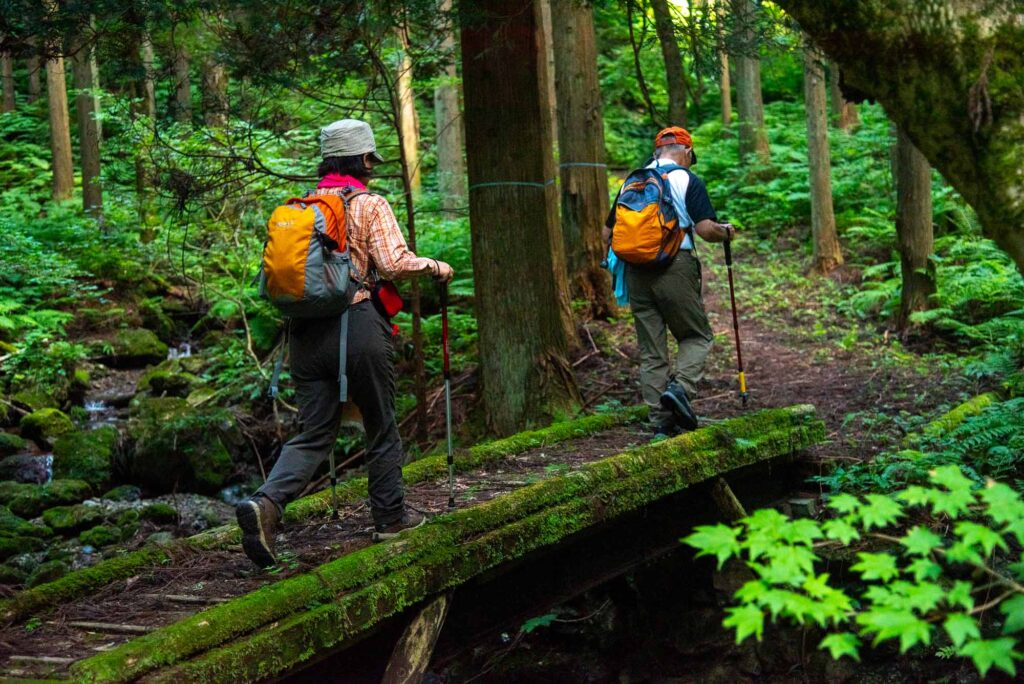
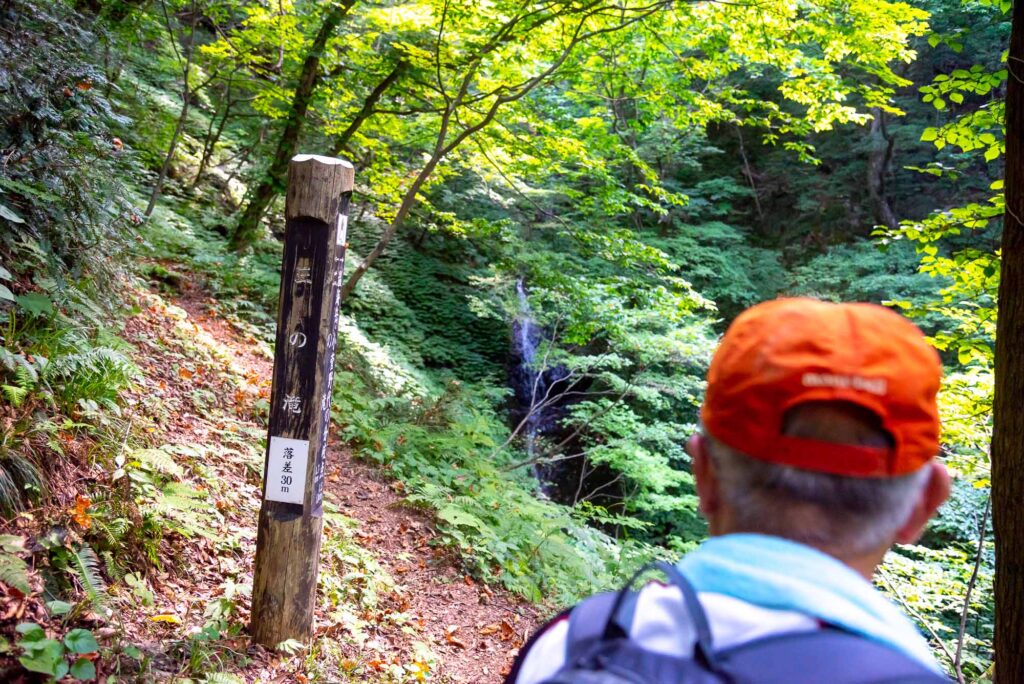
9. Cross the bridge at the Ichinotaki falls
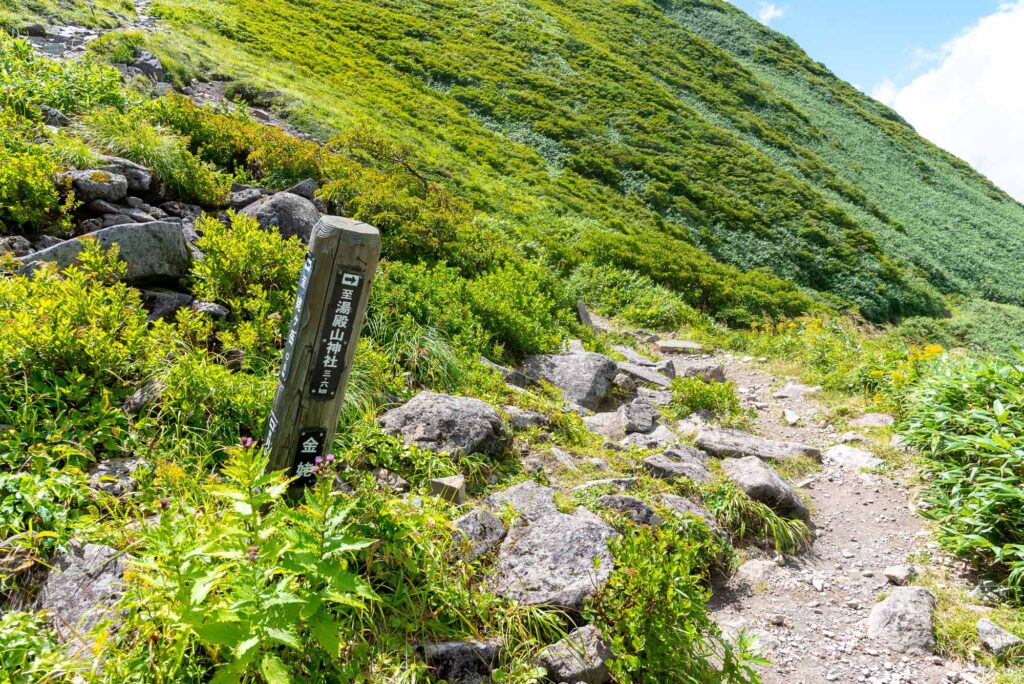
10. Turn right at this sign
11. Don’t forget to write down your name
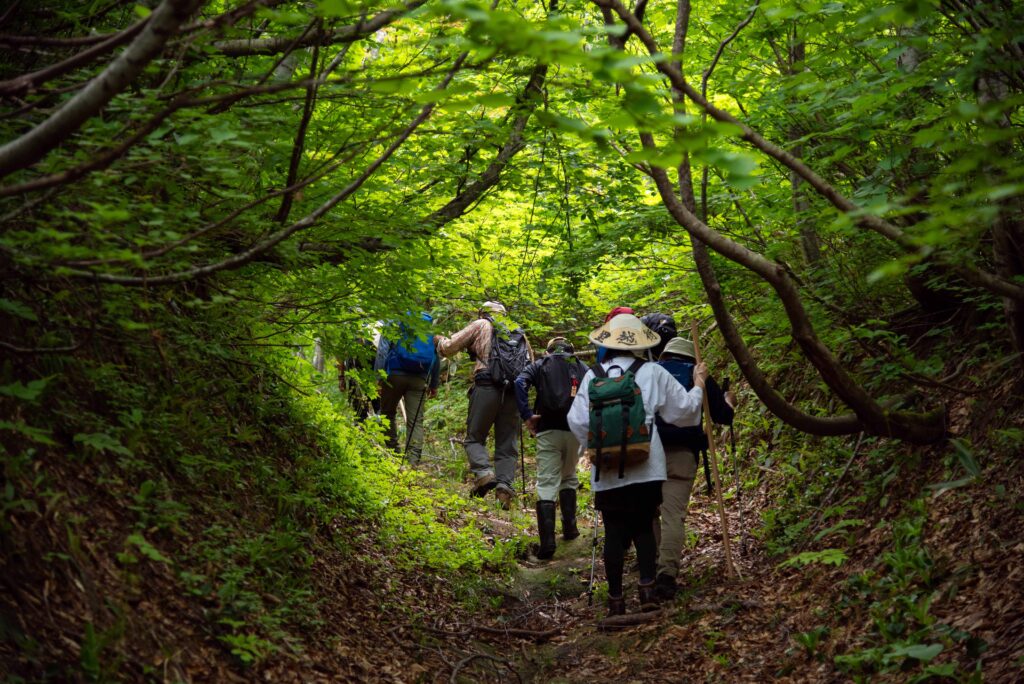
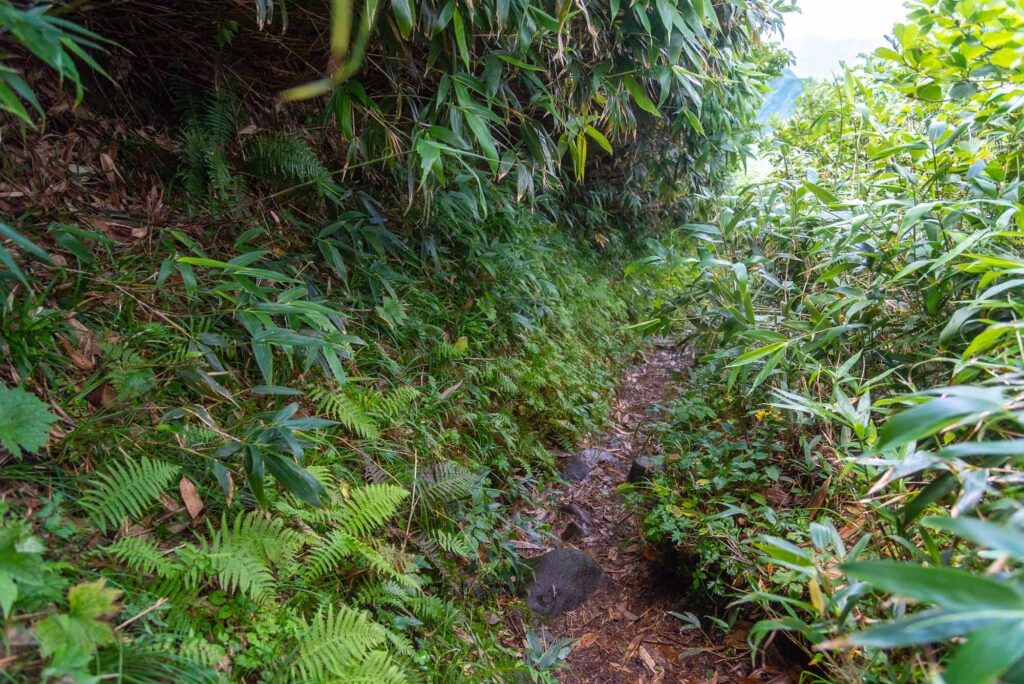
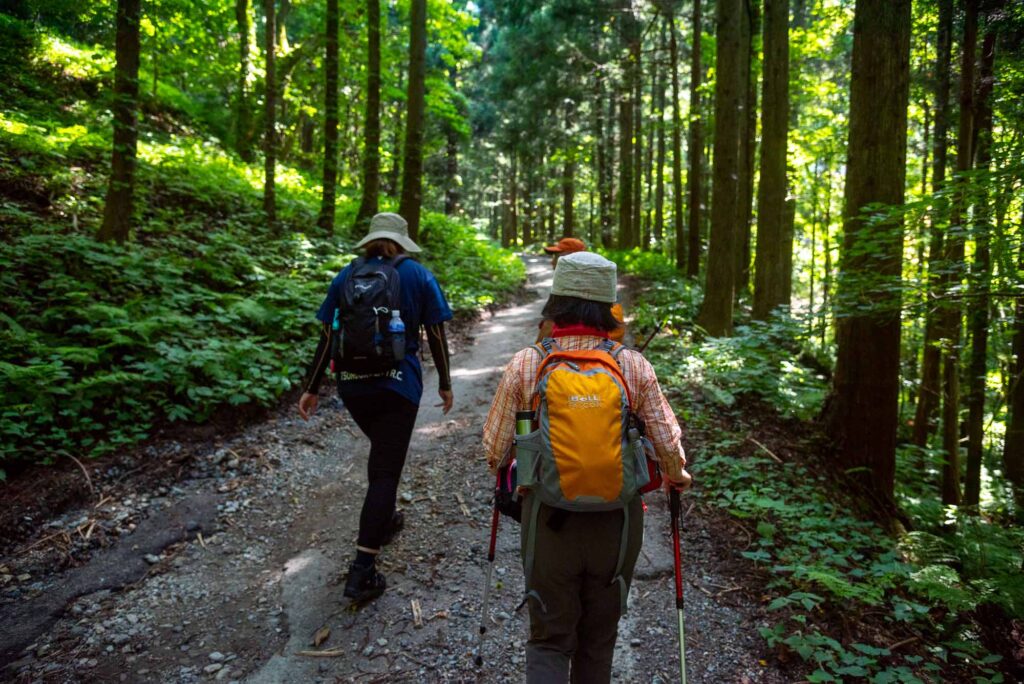
12. Get inside the forest
13. Cross the bridge
14. Continue straight
15. Cross another bridge
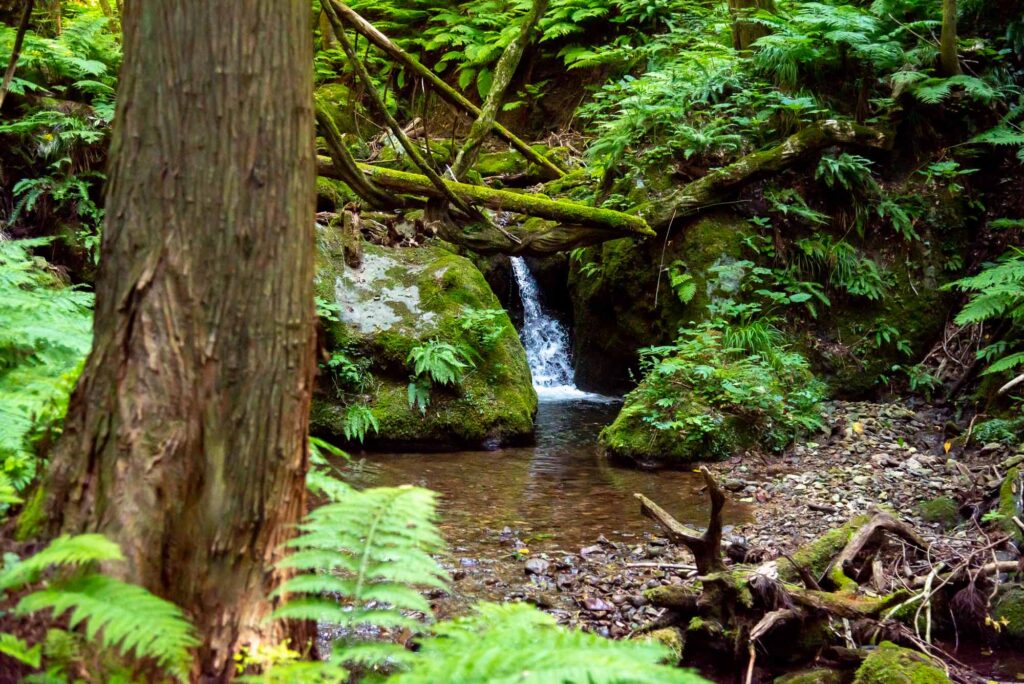
16. Spot the “Encounter falls”
The Deai no taki 出会いの滝 designates two falls that join in the same stream, making them look like lovers.
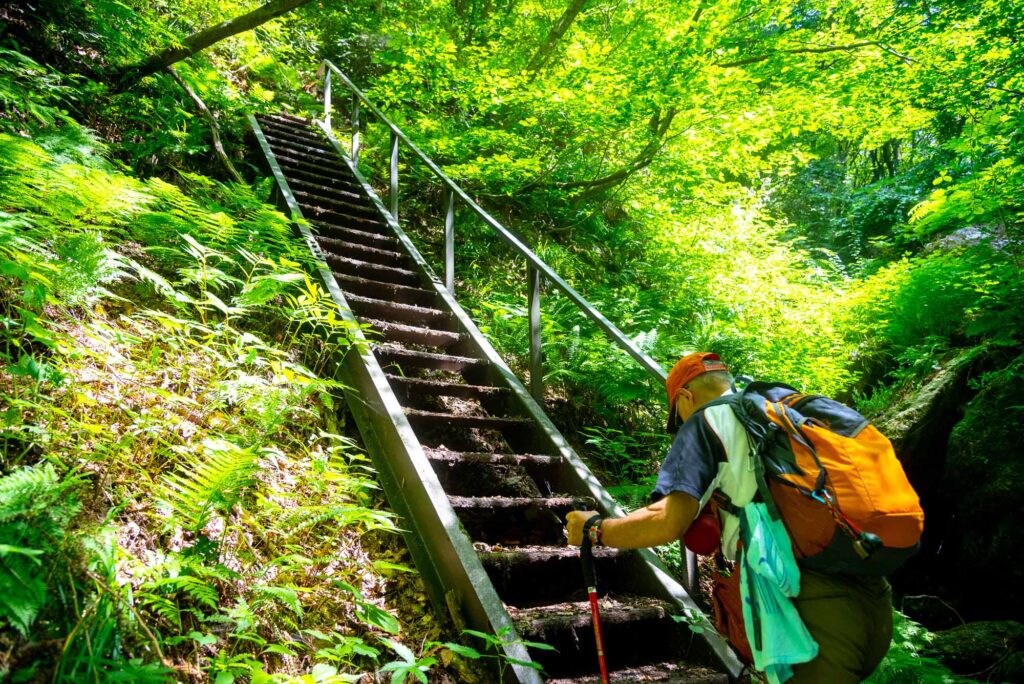
17. Climb the ladder
18. Cross another bridge
19. Climb the stairs
20. Spot the Sanno Falls
21. Use this spring to fill in your bottles
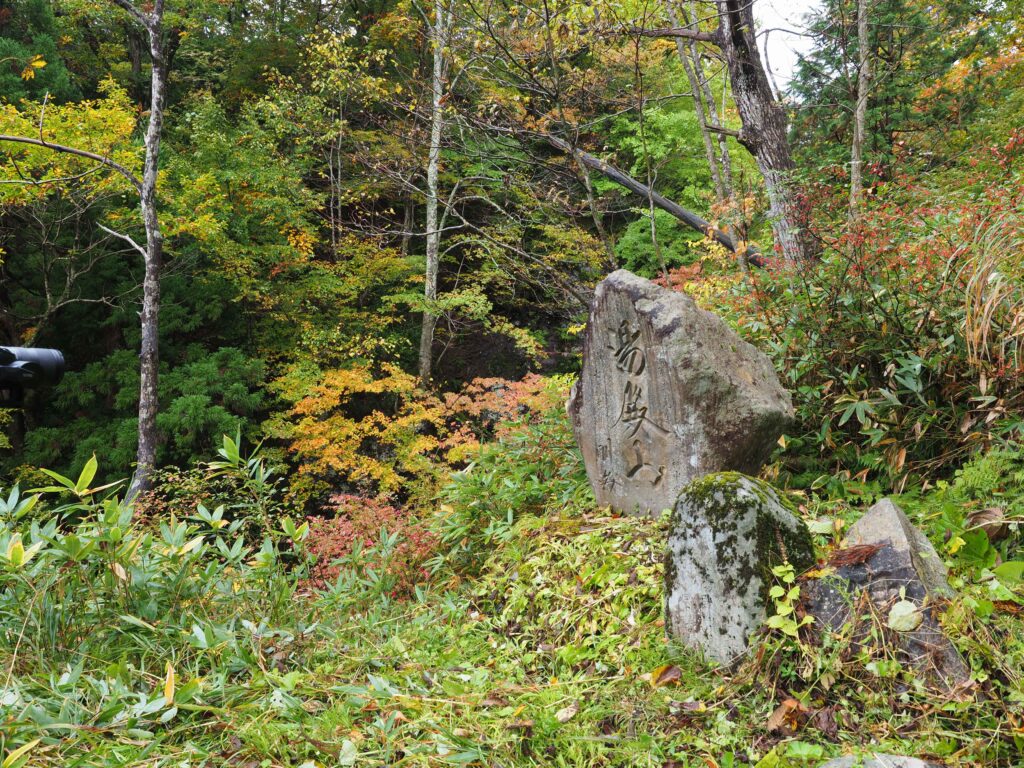
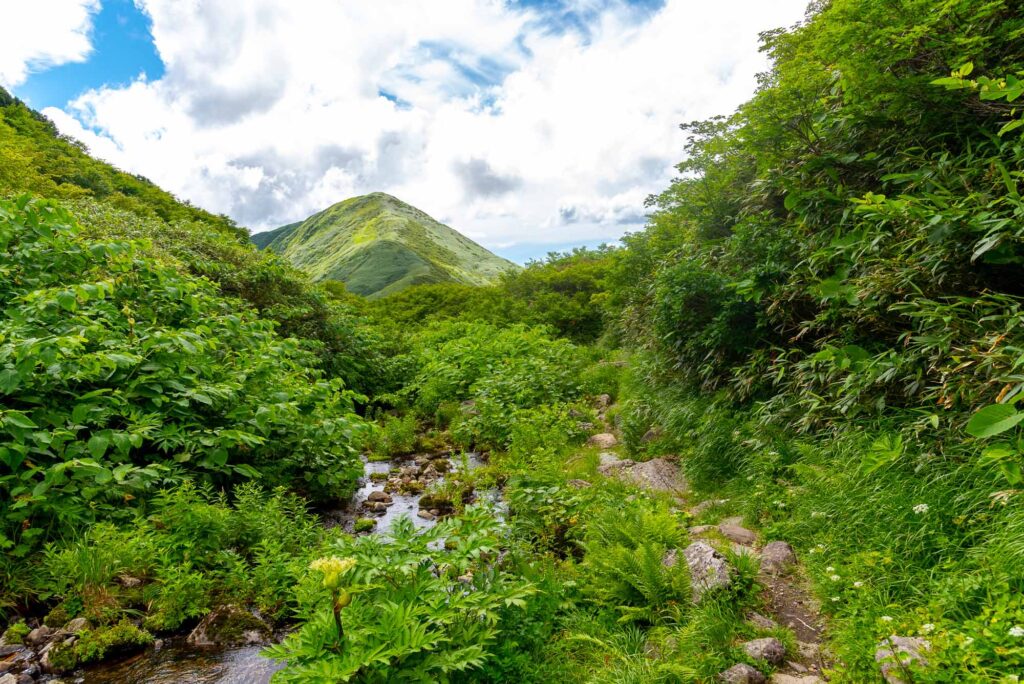
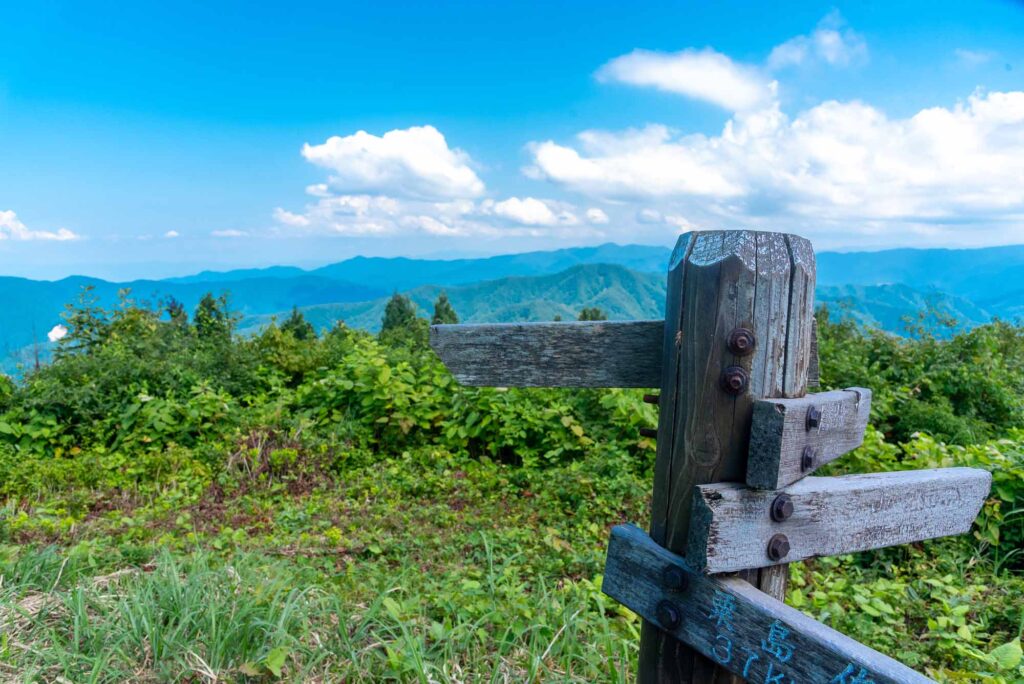
22. After a while, you arrive at the Kumano Shrine
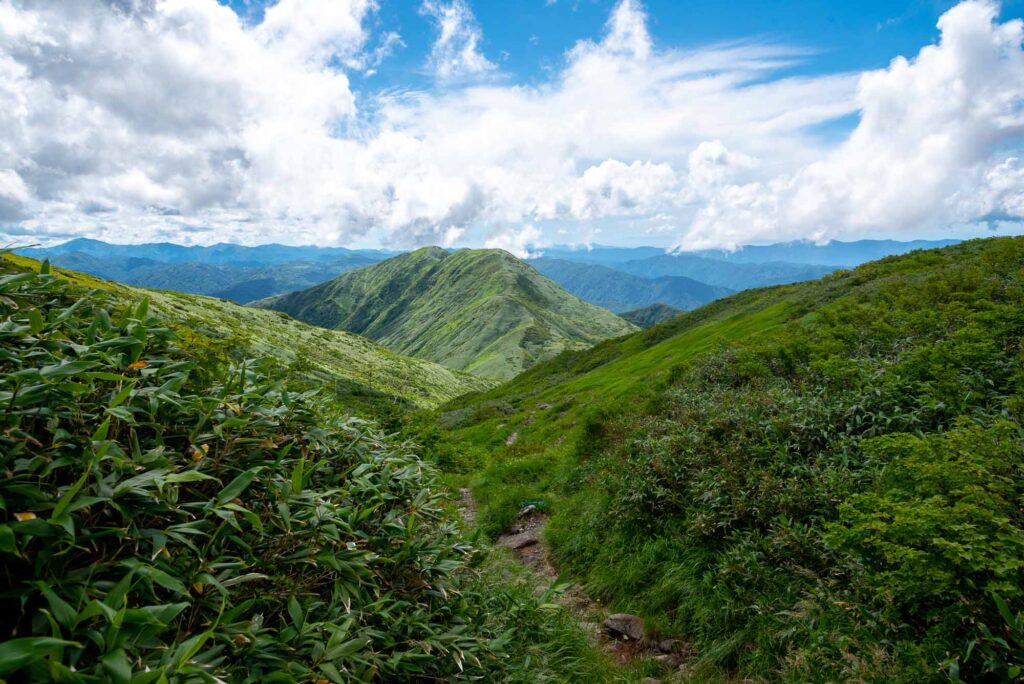
23. A little further, Mt. Atsumi’s viewpoint
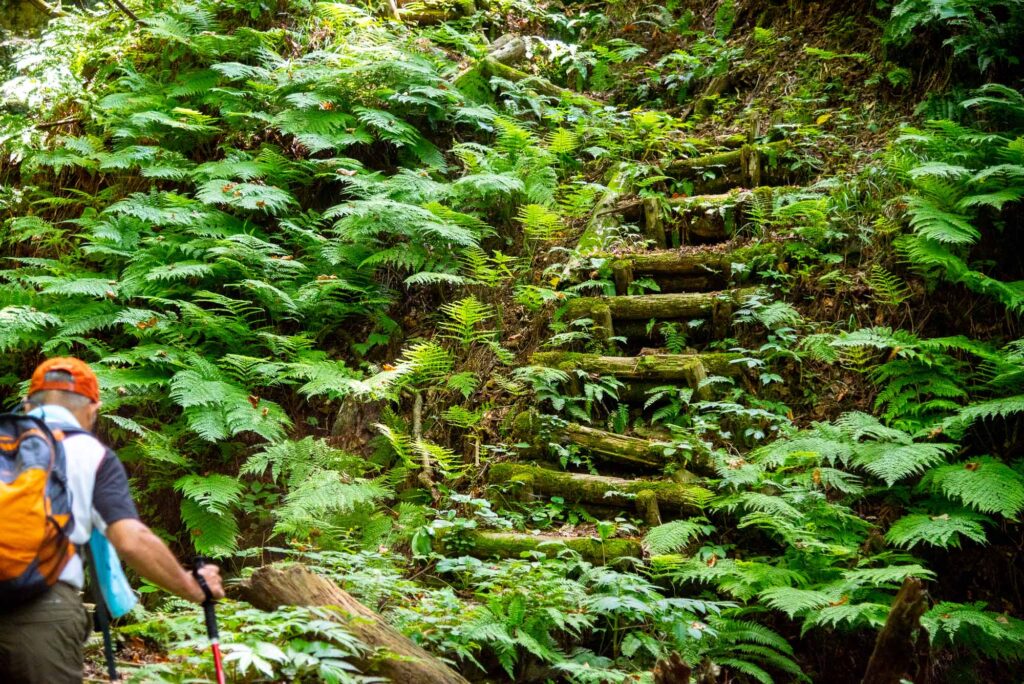
24. Go down
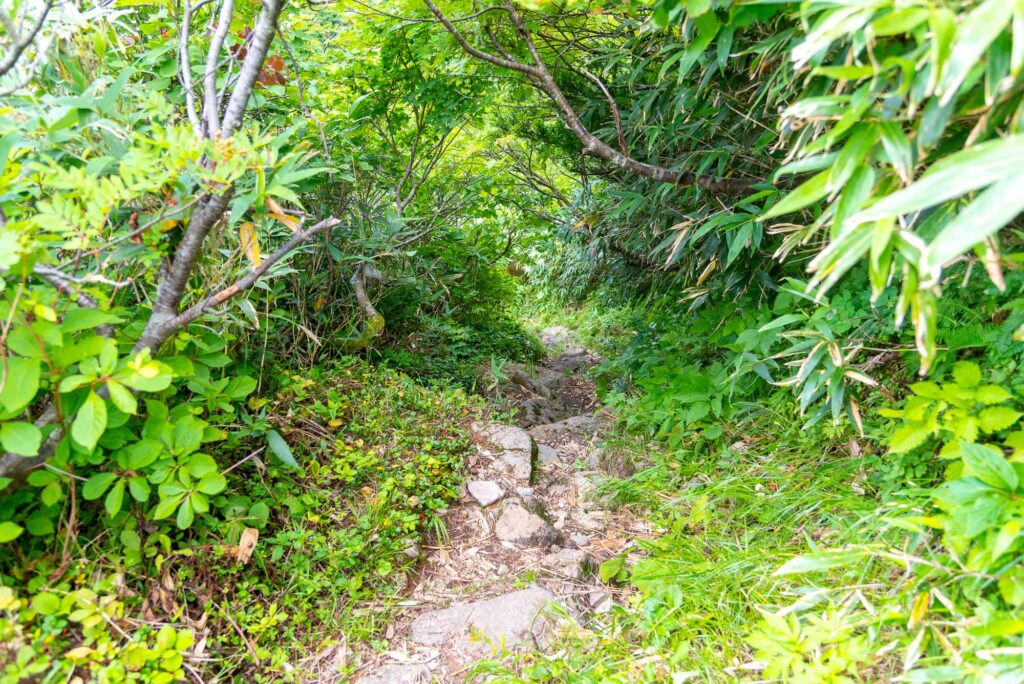
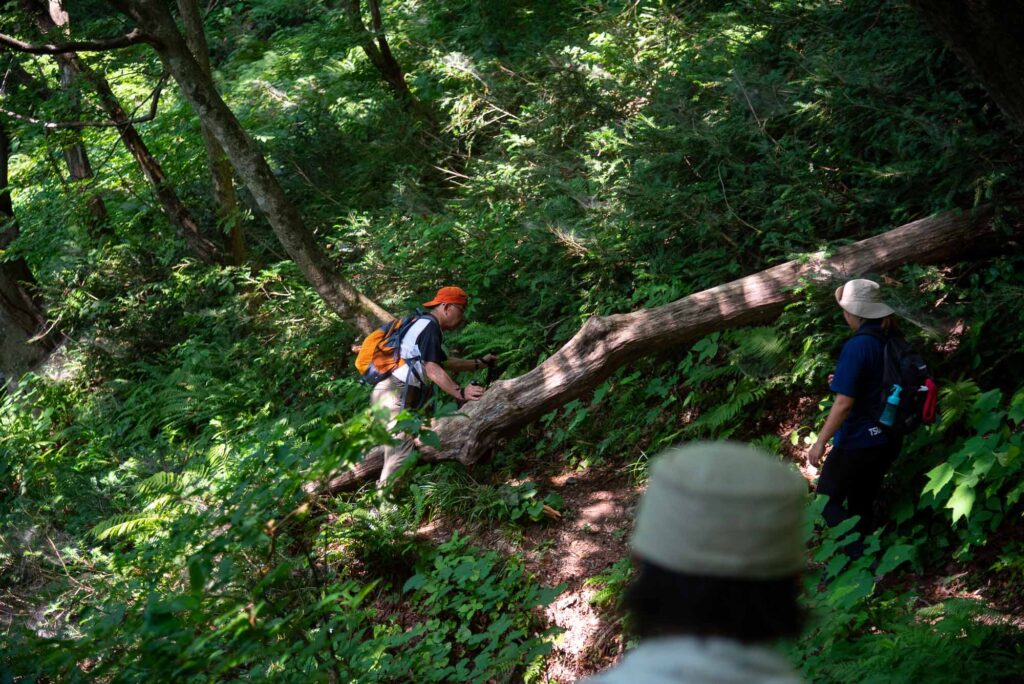
25. The tracks are narrow and some trees have fallen
Please be very careful when doing down the route.
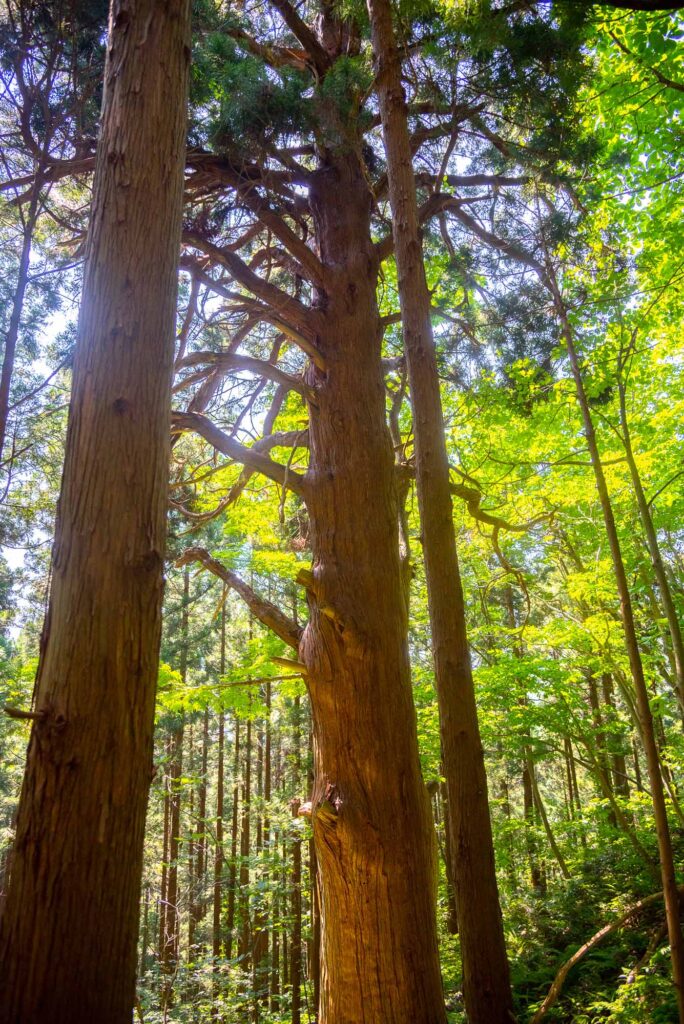
26. Come across the Babasugi
“Grandma cedar”
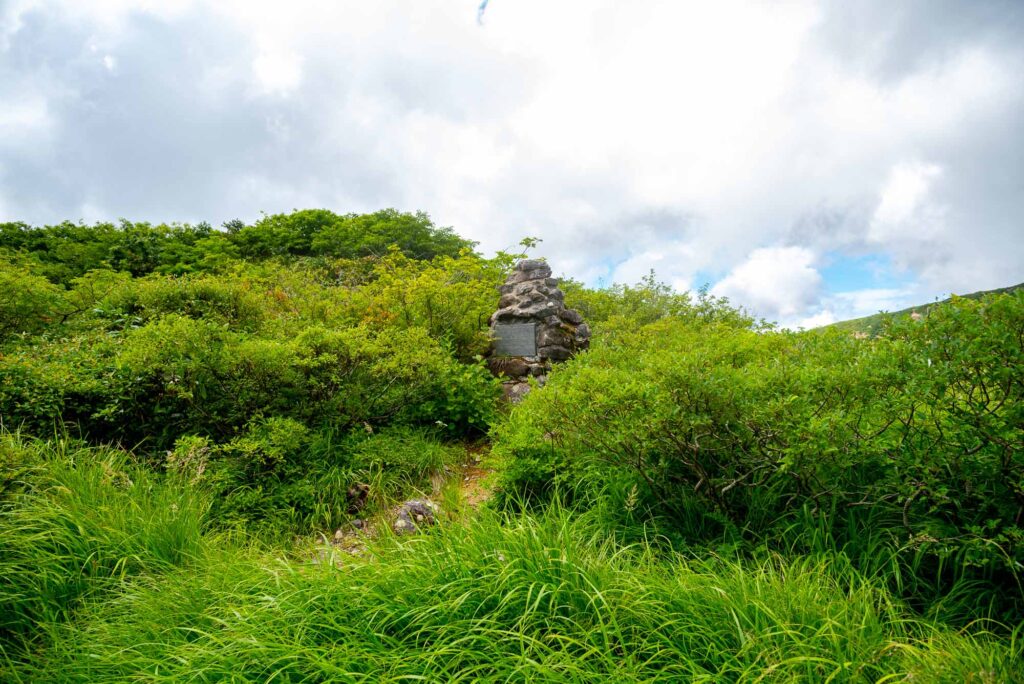
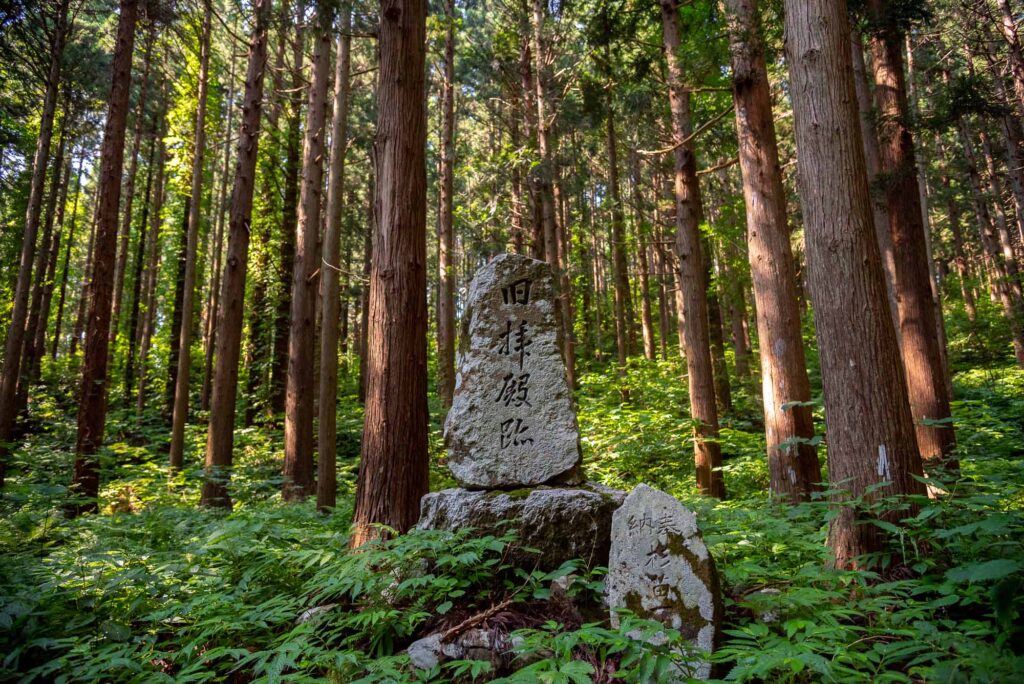
27. Buddhist stele
28. This sign indicates you are near the end
29. This spring is the last spot of this hiking trail
Otsukaresama deshita! お疲れ様でした!”Congratulations for your efforts!”
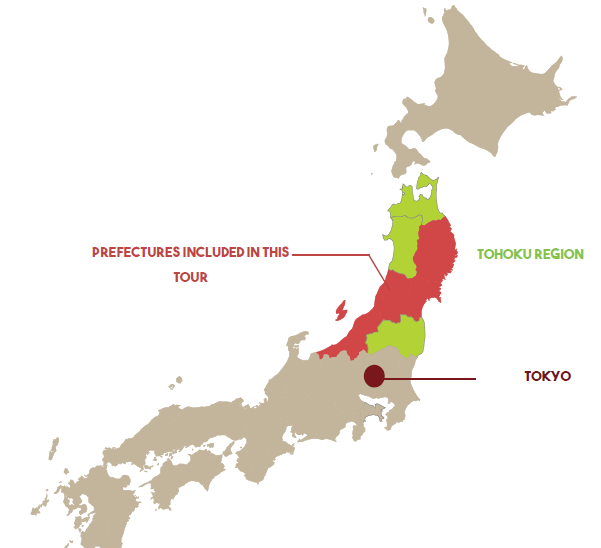
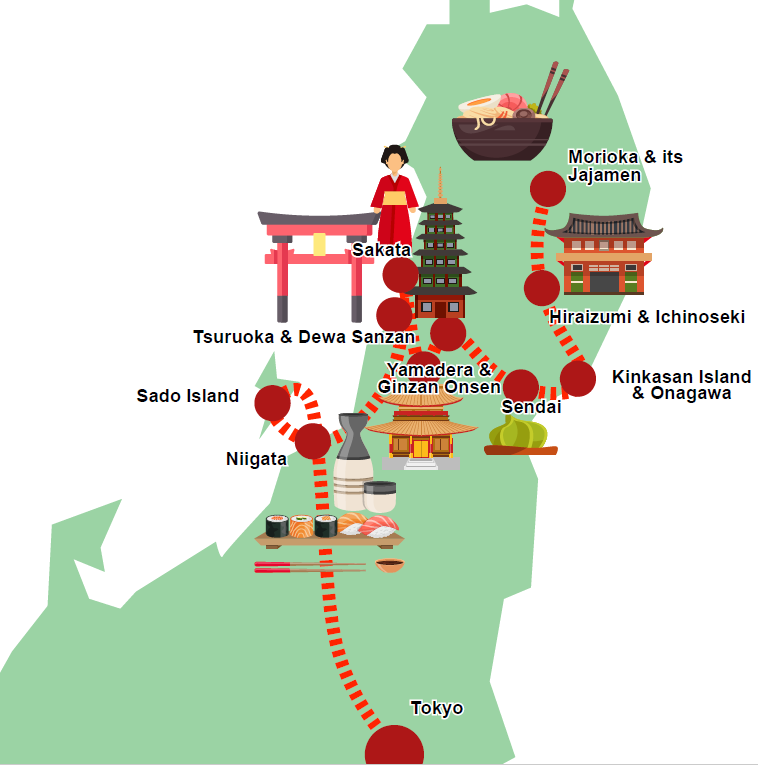
(Recommended itinerary) 11 days to see (and taste!) the best of the Tohoku region! 🚆A JR-pass compatible tour
Ready to venture outside Japan’s beaten tracks? Eager to discover the beauty and the spiritual essence of the Northeastern part of Japan, known as “Tohoku” in Japanese? Do you consider travel incomplete without indulging in delicious food? Look no further. We have the perfect 10-nights itinerary for you to explore the Tohoku region, experiencing each prefecture’s iconic dishes and drinks while visiting the most historic, fascinating, and beautiful landmarks! This tour is also JR-pass friendly (but feel free to use the means of transportation of your choice!).
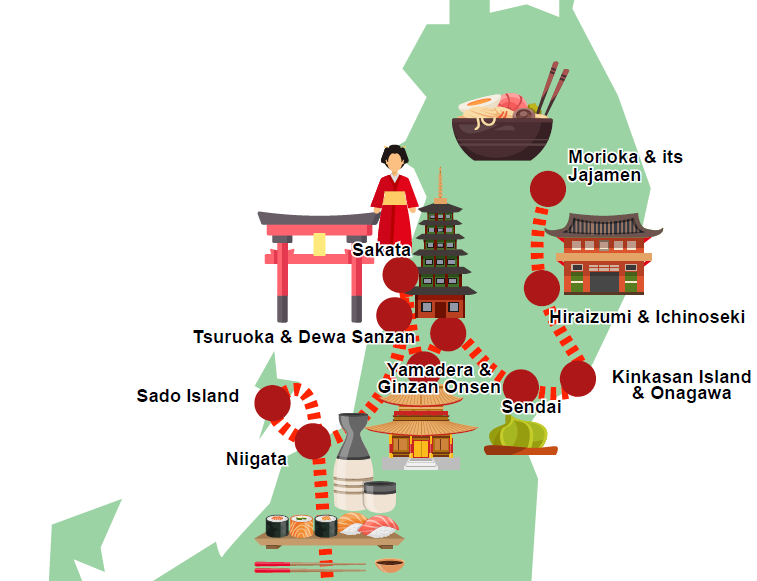
Places visited: (Niigata prefecture) Niigata city, Sado island, (Yamagata prefecture) Tsuruoka and the Dewa Sanzan, Yamadera, Ginzan Onsen, (Miyagi Prefecture) Sendai, Onagawa, Kinkasan, (Iwate prefecture) Hiraizumi, and Morioka.
This trip idea can be completed all-year-round but we recommend to avoid the snowy season if you wish to walk the hiking parts entirely.
Physical activity level: Easy
Budget: 200$ a day on average
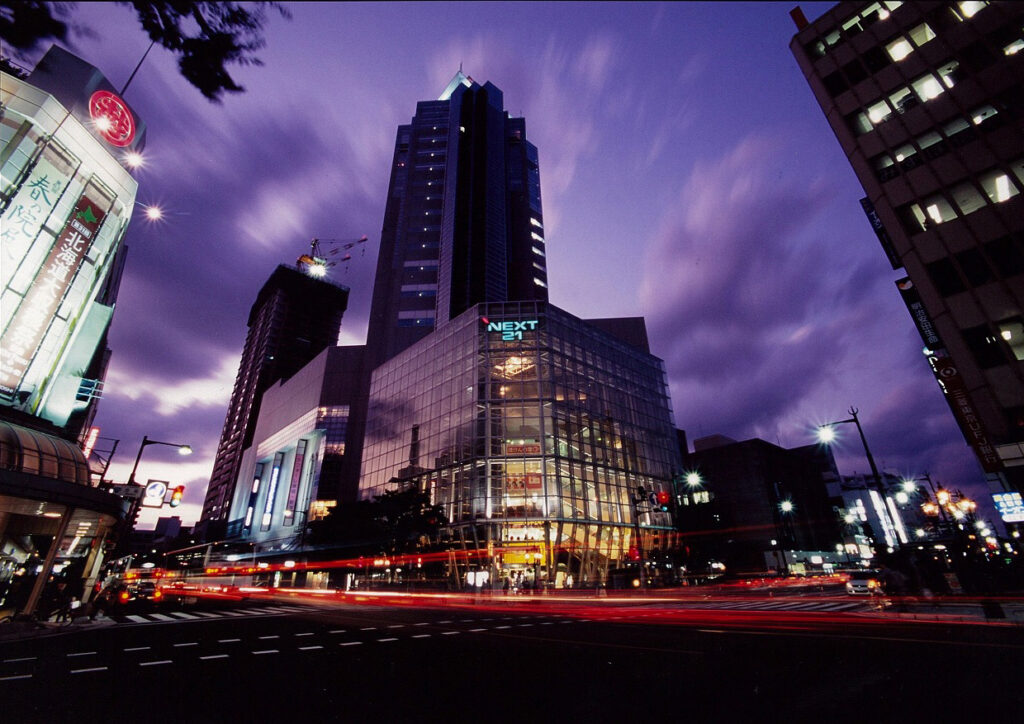
(D1) Niigata: the gateway to the Tohoku region
(From Tokyo station) By Shinkansen: Take the JR Joetsu Shinkansen bound for Niigata station (between 1 hour and 30 minutes and 2 hours)
→ Did you know? The shinkansen that leaves at 9:12 from Tokyo station (Toki 311) is the fastest to reach Niigata station! (89 minutes)
While it is true that technically, the Niigata region doesn’t belong to the Tohoku region (it is actually part of the Hokuriku region), its convenient location, right between Tokyo and Yamagata Prefecture, makes it the perfect gateway for those wishing to visit the Tohoku region from Tokyo. Additionally, Niigata’s position along the Sea of Japan, its heavy winter snowfalls, and its cultural similarities with northern Japan often lead to its association with Tohoku. Furthermore, travelers looking to visit the beautiful Sado Island must stop at Niigata’s port to take the ferry to this famous island.
Below are our recommended places to visit while in Niigata City:
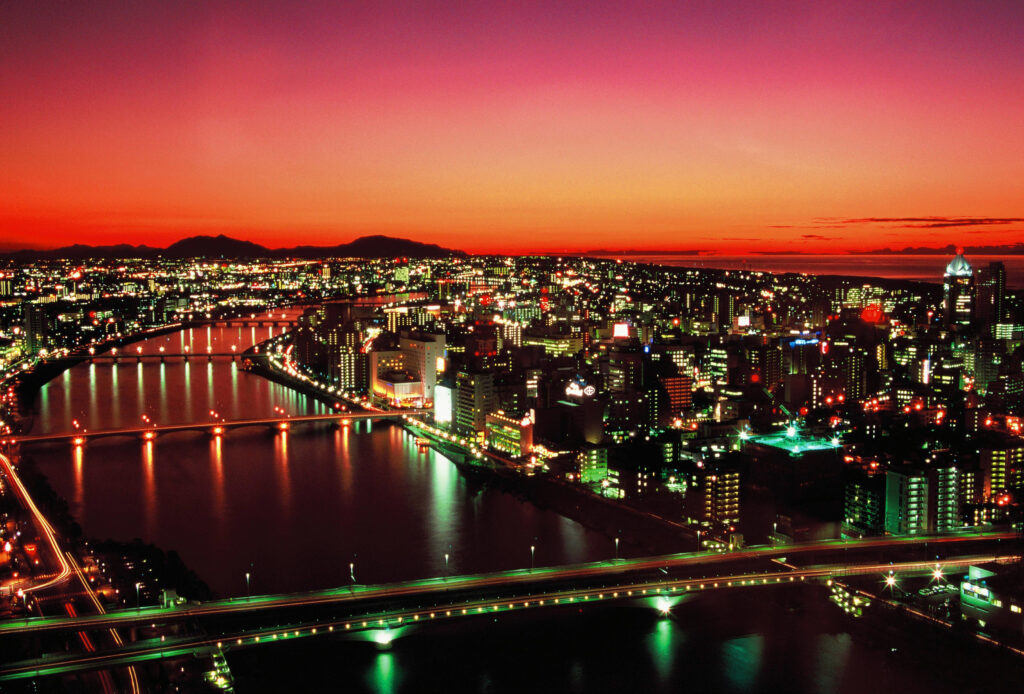
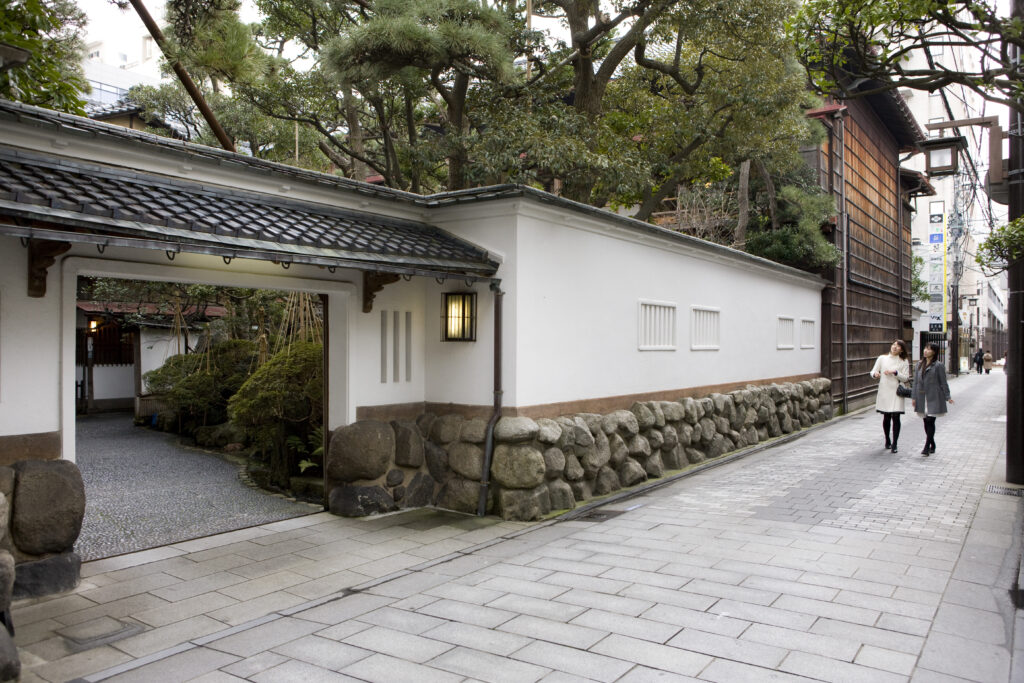
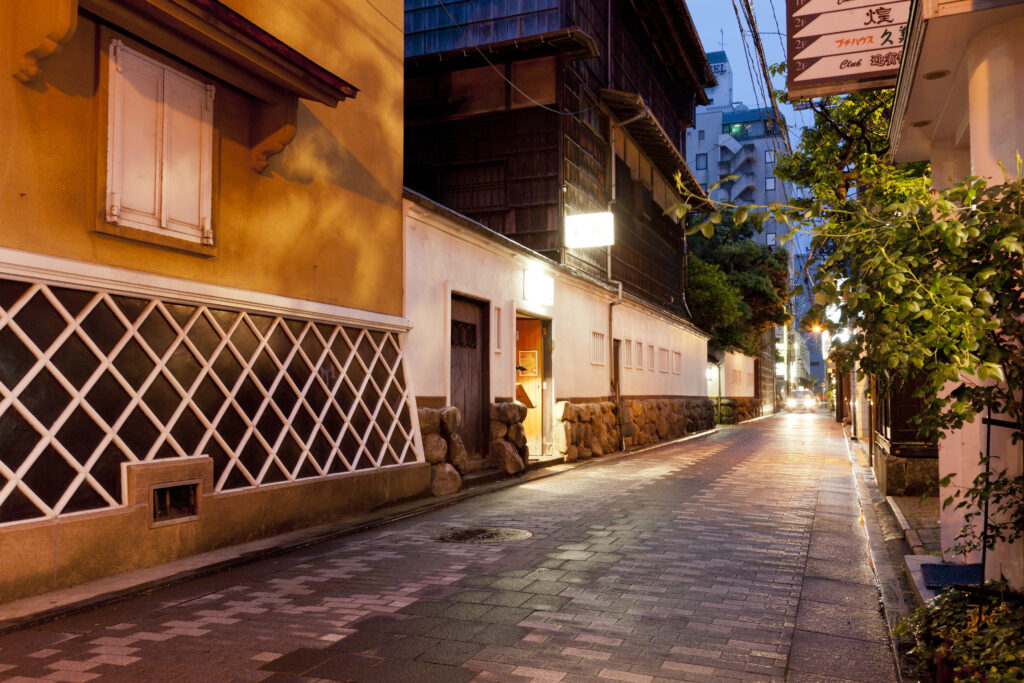
The “Old-Town” (Furumachi)
Distance from Niigata station: 9 min. by bus (Bandai-bashi line or 40 min. on foot). Bus stop name: Furumachi.
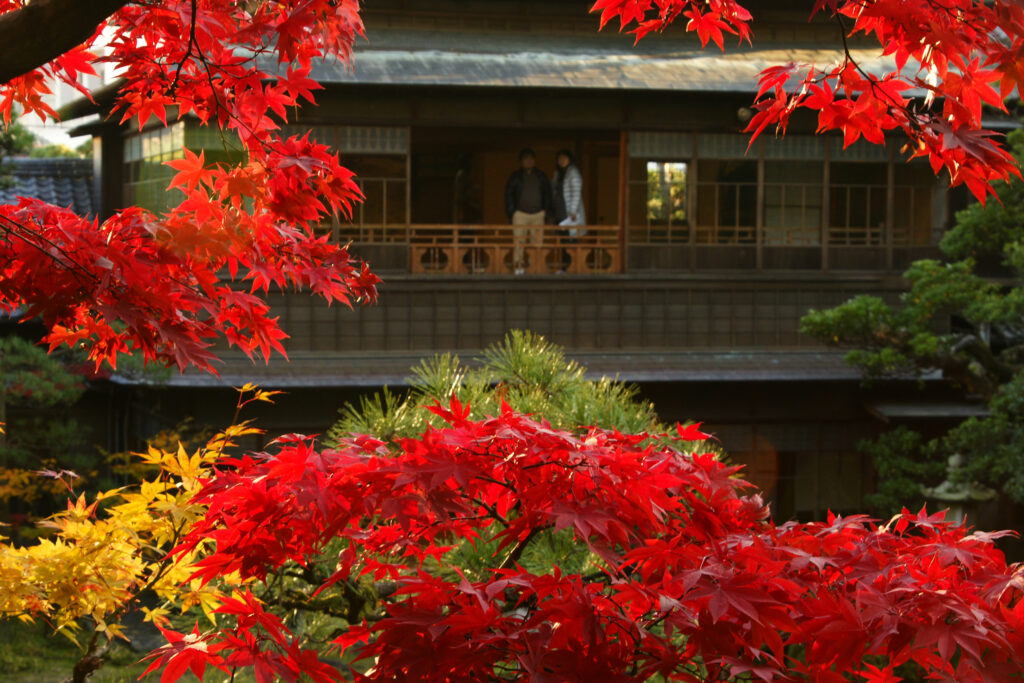
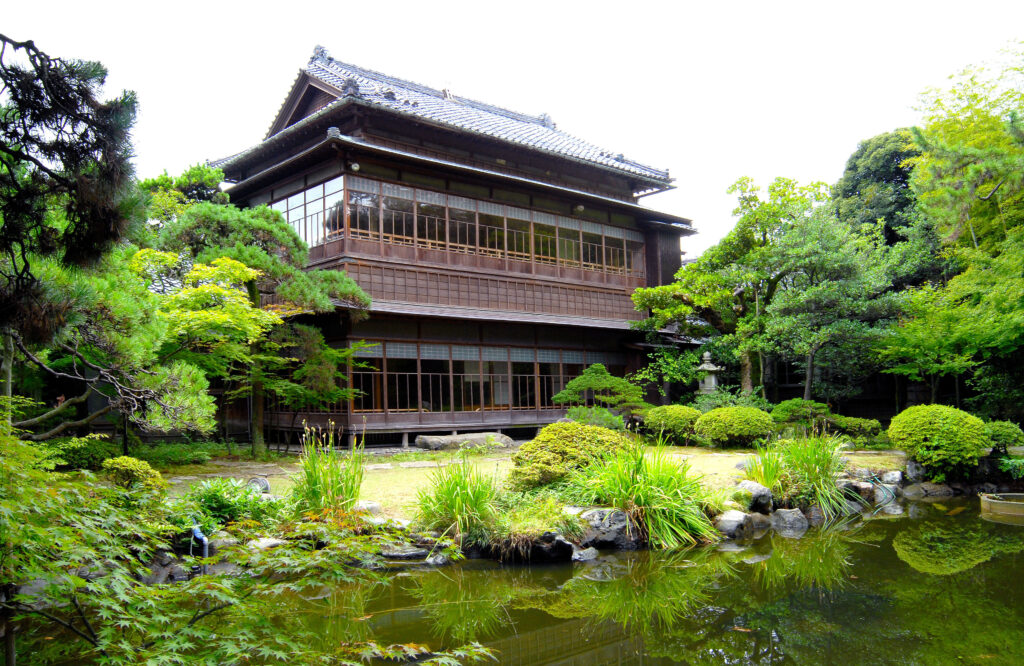
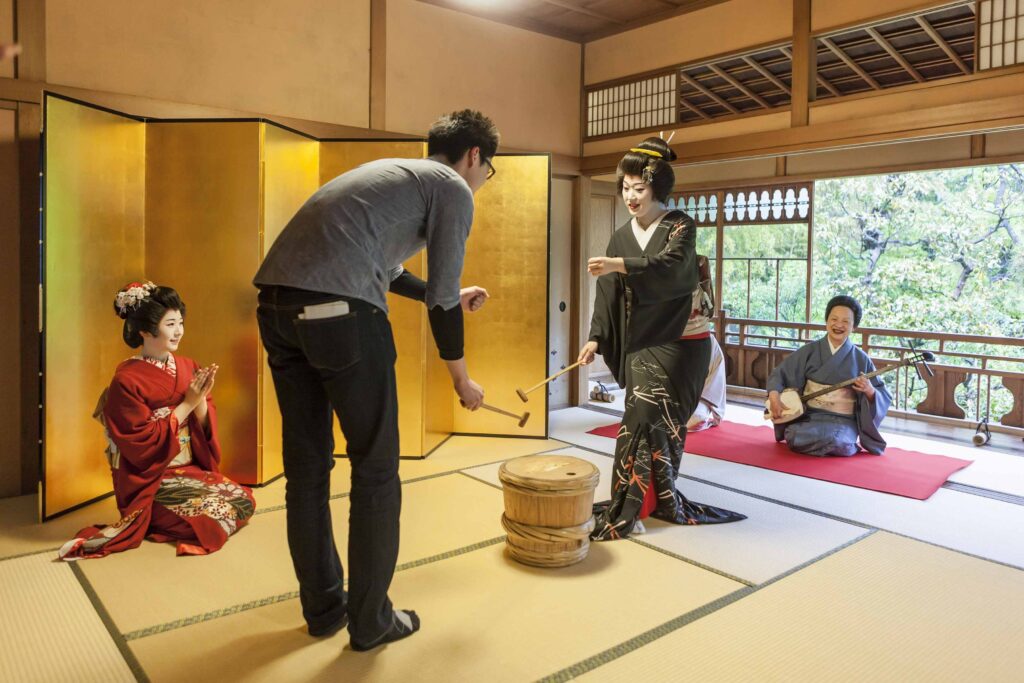
The Old Town is full of charming cafés, restaurants, and, most importantly, historical sites such as the Saito Family Residence (Saito-ke bettei 斎藤家別邸). This traditional Japanese house once belonged to one of the most influential families in the region and is also a venue for “Geigi” (Niigata’s geisha and maiko) performances.
Niigata’s Furumachi at nightNiigata’s Furumachi at nightThe Saito Family ResidenceThe Saito Family ResidenceGeigi performance upon requestGeigi games upon request
Did you know?
Niigata’s Geigi (芸妓, “girls of arts”) first appeared 200 years ago, catering to the needs of wealthy merchants who sailed from Hokkaido to Kyoto along the Sea of Japan. These merchants traveled on boats called “Kitamaebune” 北前船 (a Japan Heritage site since 2017) to buy and sell goods from harbor to harbor. This new maritime trade route facilitated cultural, culinary, architectural, and artisanal exchanges in these harbors. Niigata’s Geigi are a manifestation of these cultural exchanges, as the tradition of geishas, a form of entertainment that originated in Kyoto, was brought to Niigata during this time.
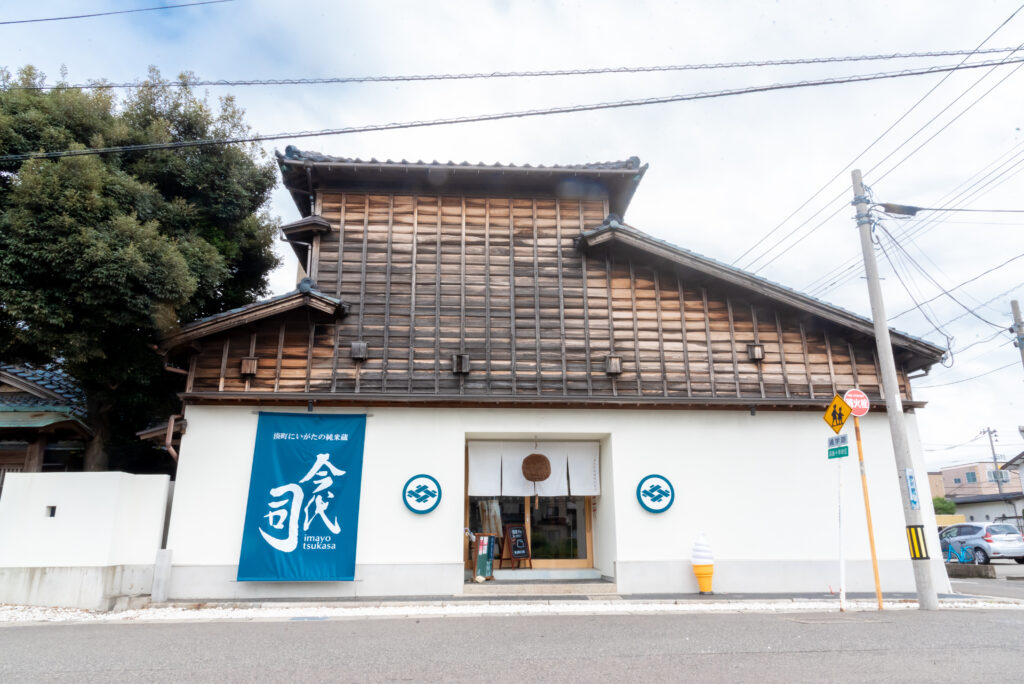
The Imayo Tsukasa sake brewery and other sake tasting activities
Distance from Niigata station: 15 min. on foot.
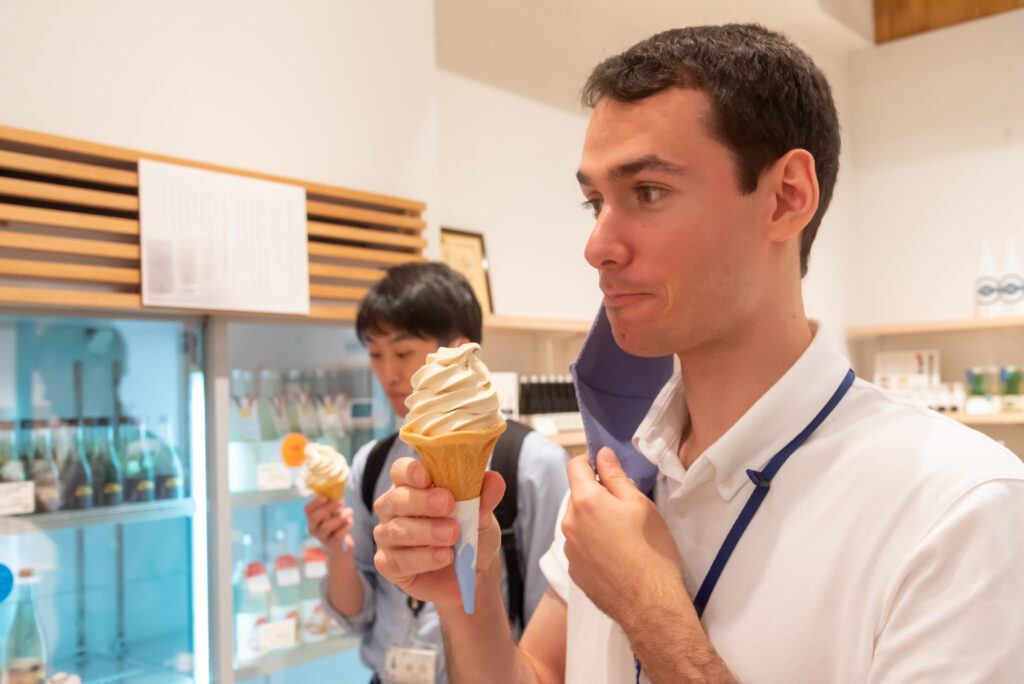
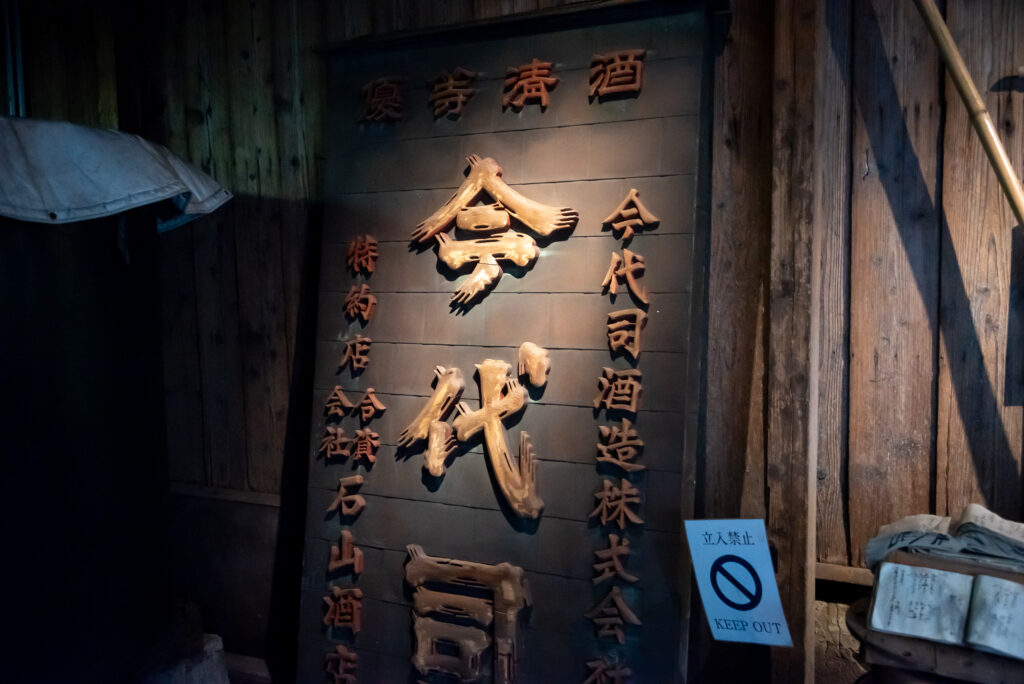
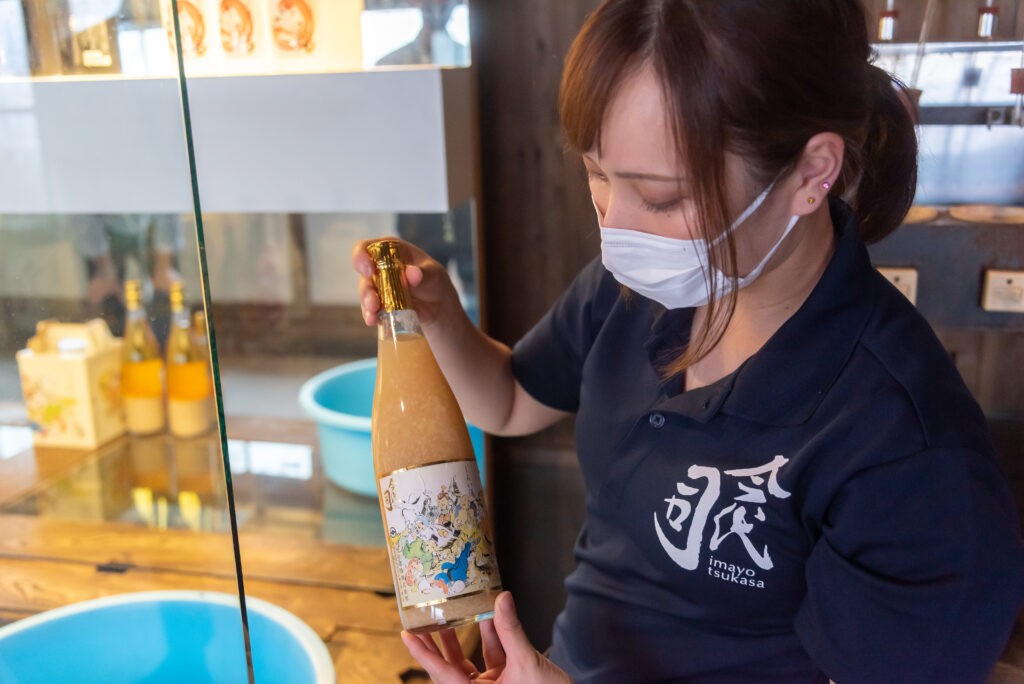
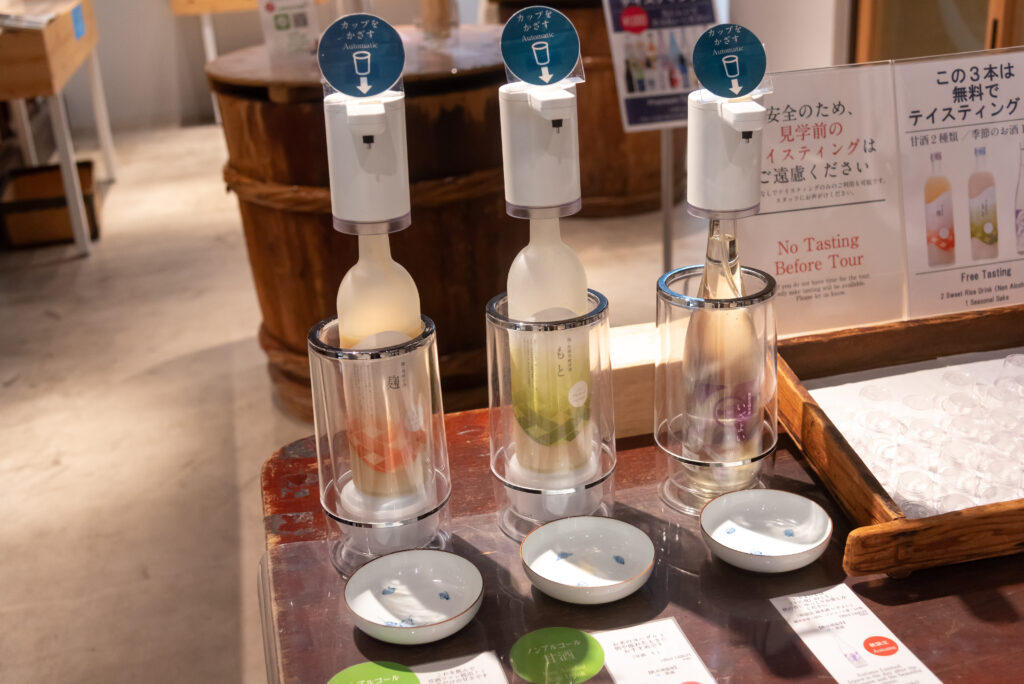
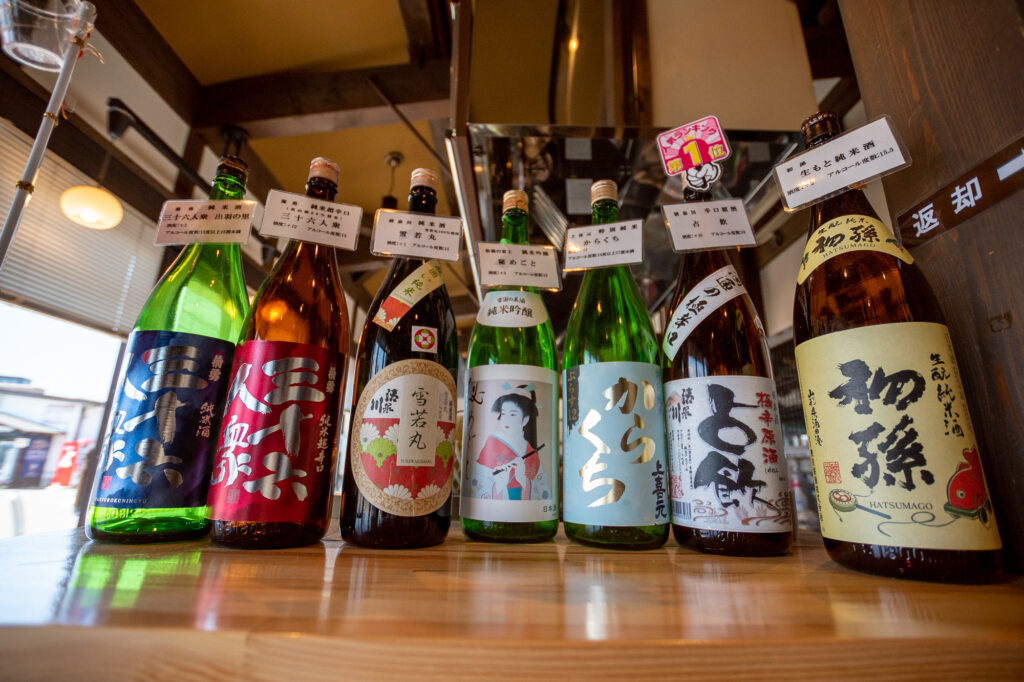
The Imayo Tsukasa brewery, established in 1767, boasts nearly three centuries of expertise in sake brewing. Renowned for its exceptional sake, the brewery consistently earns awards for taste, packaging, and innovation. The brewery offers free tours (with English tours costing 400 yen per person), but reservations are required via their website. Some sake samples are available for free tasting, but we recommend trying the premium sake tasting (1000 yen per person) to experience a wider selection of Niigata’s diverse and unique sake.
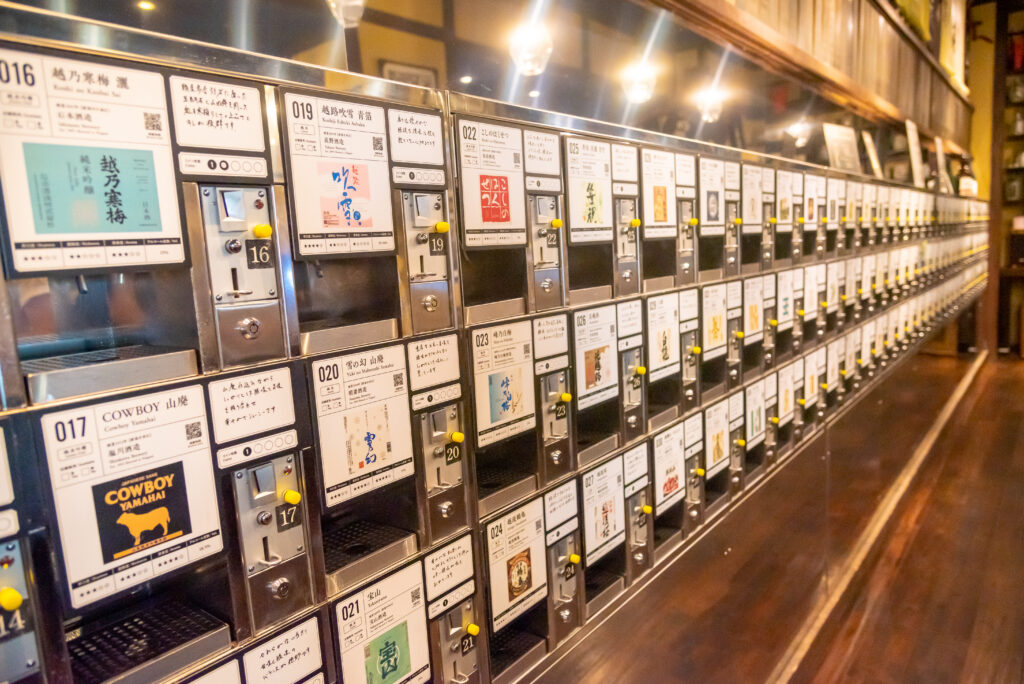
For those short on time, Ponshukan, a sake-tasting space inside Niigata Station, offers a glimpse of Niigata’s sake. Here, you can sample around 90 varieties of local sake; 500 yen gets you five coins to use in the different sake dispensers.
Sake-flavored ice creamExhibition of Imayo Tsukasa’s creationsThe guide explains the difference in all the sakesFree sake and non-alcoholic beverages (amazake) tastingBottle that was awarded “best-packaged sake”Ponshukan, a sake-tasting area inside Niigata station
Did you know?
Niigata Prefecture is Japan’s number one sake producer in terms of the number of “sakagura” (酒蔵, “sake brewery”), boasting the largest number of sake breweries in the country. This is due to Niigata’s ideal environment for cultivating rice: abundant snowfall in the winter, warm and humid summers, and extensive fields with high-quality water. The perfect year-round temperature and rich soil nutrients result in plentiful crops and delicious rice, which is essential for producing top-quality sake.
What to eat in Niigata
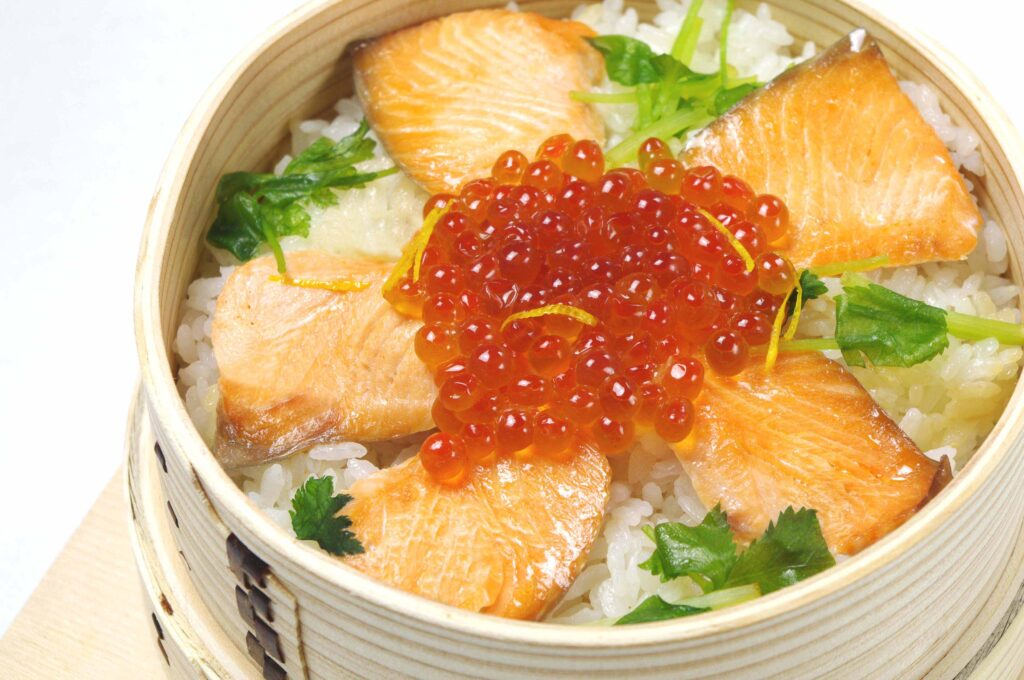
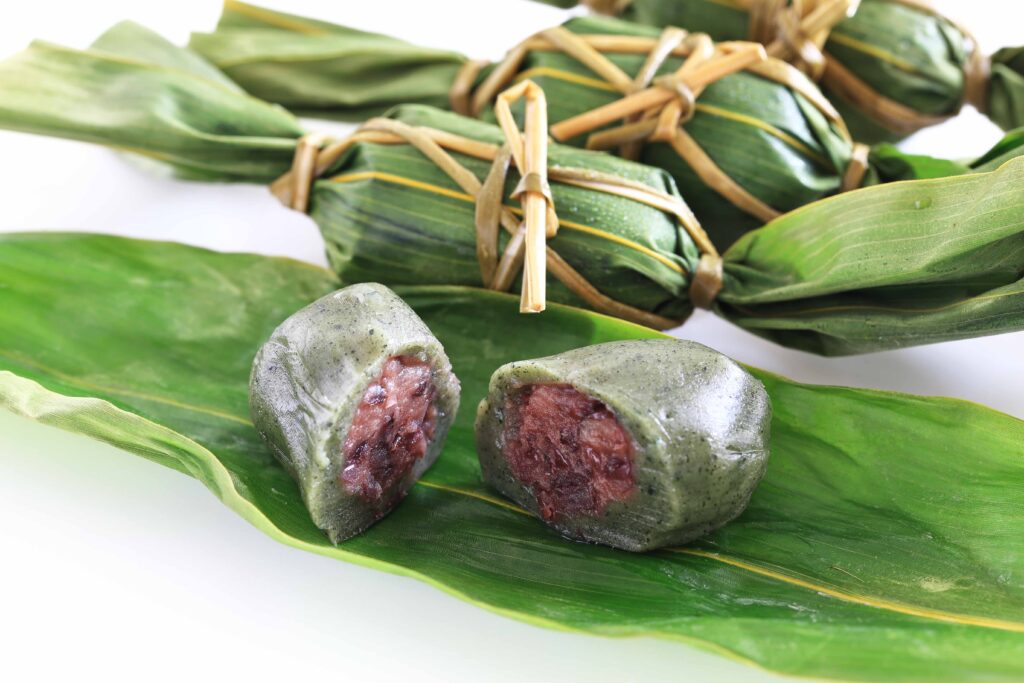
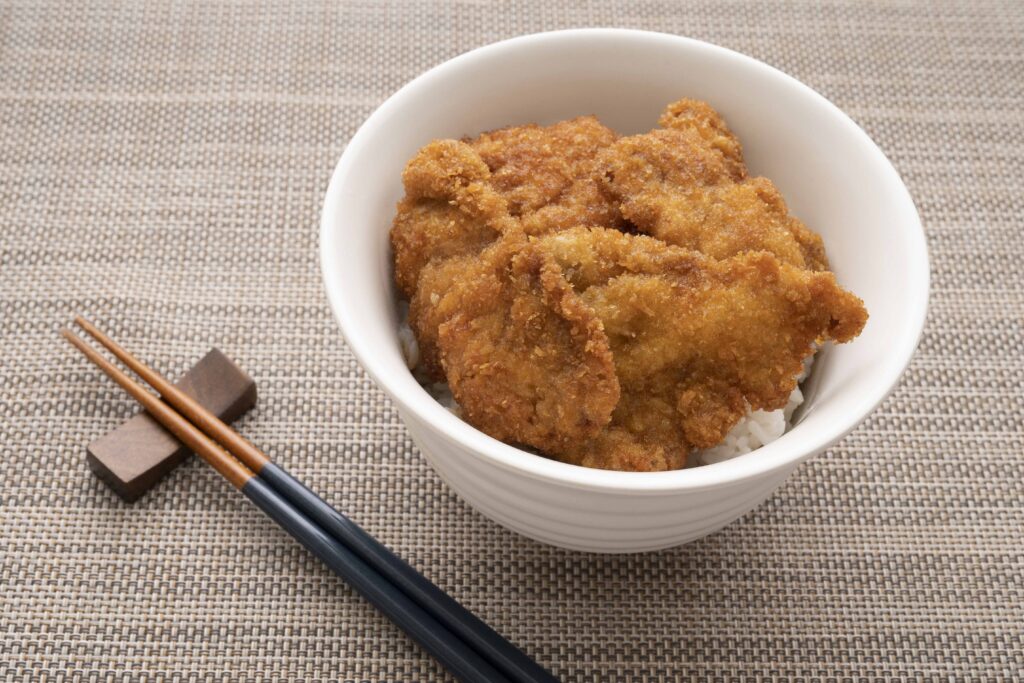
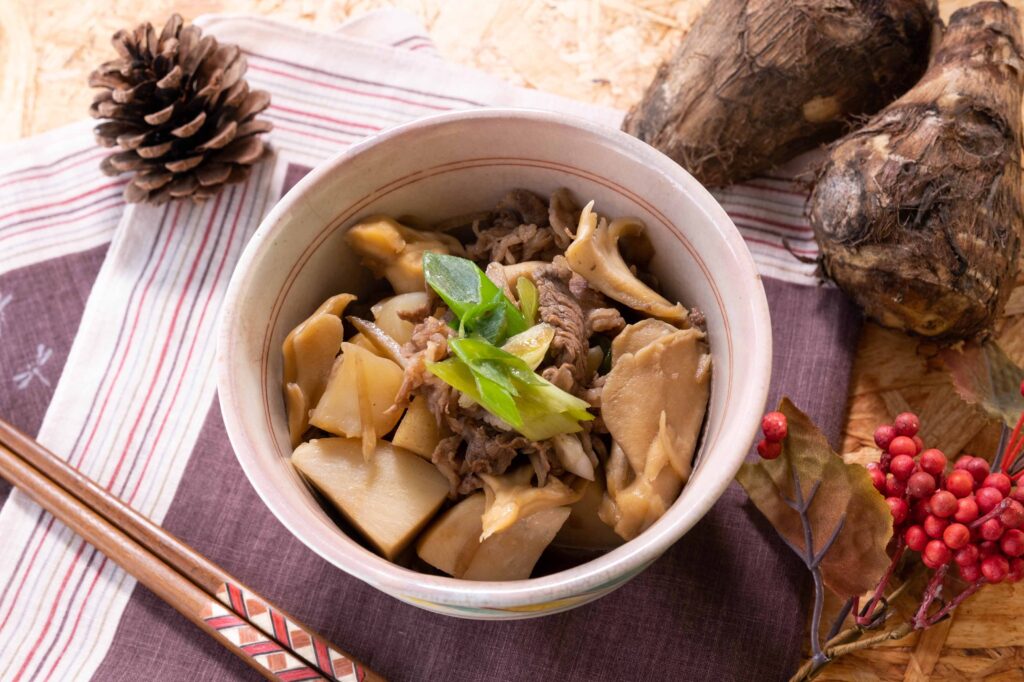
Wappa-meshi, a bowl of steamed rice and fishNoppe-jiru, the local stew that consists of yams, vegetables, peas and mushroomsSasa-dango, red beans-filled mugwort mochi wrapped in sasa bamboo leavesTare-katsu don, Niigata’s “comfort food” that consists of deep-fried pork dipped in sweet soy sauce-based seasoning
Plenty of stay options around Niigata station! Use your favorite booking website to choose the one that fits your needs.
-Jetfoil (the fastest way to reach Sado Island, around 65 min.) : From Niigata port to Ryotsu port 7,050 yen/adult (one way) – 13,490 yen/adult (two-ways)
-Car ferry (the cheapest way to reach Sado Island, around 2 hours 30 min.) : From Niigata port to Ryotsu port starting from 2960 yen/adult (one way)
Sado Island, a little paradise on the sea just one hour away from Niigata by jetfoil boat, is beloved by hikers and enthusiasts of traditional Japanese arts. The island is famous for the Sado Taiko drums and offers excellent opportunities for wildlife photography. In 2024, Sado’s Gold Mines were listed as UNESCO World Heritage sites, highlighting the island’s cultural significance in Japan’s history. Sado Island is renowned for its seafood and its historical connection to maritime activities. Visitors can enjoy “taraibune” tub boat tours, diving sessions, and sea kayaking.
Here is a list of recommended activities and sights on Sado Island:
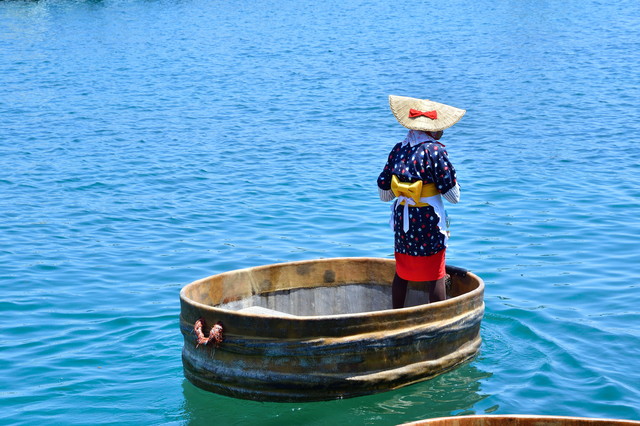
Taraibune tub boat tour on the sea at Rikiya Kanko Kisen
The tub-boats were devised around the beginning of the Meiji era. They were repeatedly improved from laundry tubs into the current design of the tub-boats.
The idea originated on the Ogi Coast, where the many hidden rocks made the tub-boats more stable and easier to maneuver than small boats.
Tub-boats were used to catch turban shells, abalone, and seaweed.
The tub-boats used for sightseeing are made slightly larger than those used for actual fishing.
With fares ranging from 500 yen for 2 hours to 2000 yen for 2 hours, the island proposes in the Tourism Information Center electrical bicycle-rental plans called “Eco-da-chari”. The best way in our opinion to discover the island’s little shrines and temples that are full of wonders. Did you know there was a “Rabbit Temple” (Chokokuji Temple), where one can find the giant statue of a Rabbit Bodhisattva and many baby rabbits wandering around? The monk-in-charge of the temple fondly takes care of them.
Take the local train (JR Limited Express Inaho) to Sakata (1 hour 49 minutes). Get off at Tsuruoka Station (or Atsumi Onsen if you’re staying there).
→ For the quickest ride, be sure to take the Limited Express Inaho, as other local trains can take twice as long!
Tsuruoka City (hi! that’s us!), once the castle town of the Shonai Clan, who governed the historic Dewa Province (Dewa no kuni 出羽の国, other phonetic version: Ideha no kuni いではの国) a now obsolete term that designated an area that used to cover Yamagata and Akita Prefectures), was and still is renowned as one of Japan’s top rice-producing regions. The Shonai Clan was famous for its military prowess, including their undefeated record during the Boshin War (1868) and the strict teachings based in Ogyu Sorai’s doctrine (deriving from Confucianism) of the Sakai family, their leaders. Besides its rich feudal past, Tsuruoka is a spiritual center for pilgrims and practitioners of ancient mountain-worshipping traditions like Shugendo, as well as esoteric Buddhist schools such as Tendai and Shingon. The sacred Dewa Sanzan, a pilgrimage route with over 1,400 years of history, includes three mountains: Mt. Haguro (414m), Mt. Gassan (1,984m), and Mt. Yudono (1,500m). In addition to its exciting hiking trails, and historical and spiritual significance, Tsuruoka is home to the world’s largest jellyfish collection at Kamo Aquarium, located near the Yunohama Onsen hot spring village, and is Japan’s first UNESCO Creative City of Gastronomy.
Here’s a plan to experience all of the above in a 2-day trip to Tsuruoka:
Arrive at Tsuruoka station (in Japanese: Tsuruoka ekimae 鶴岡駅前)
If you came with the Limited Express Inaho bound for Sakata from Niigata at 8:22, you’ll arrive at Tsuruoka station at 10:12
From there, take the bus bound for Haguro-Gassan at the bus stop n°1. If you arrived at Tsuruoka with the first train, you’ll be able to pick the 10:43 bus.
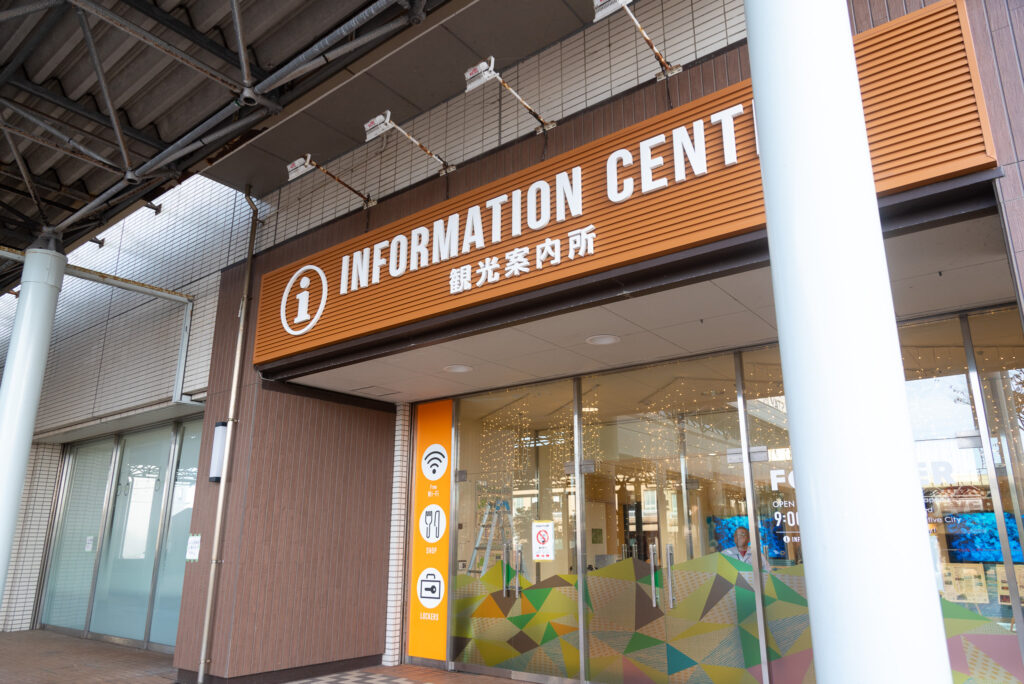
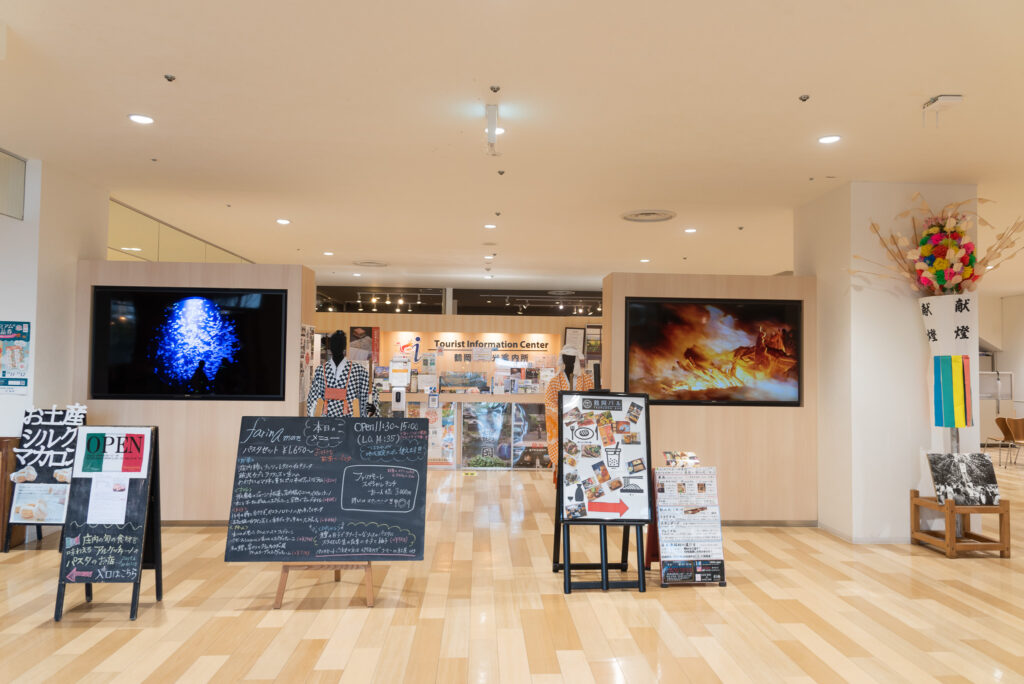
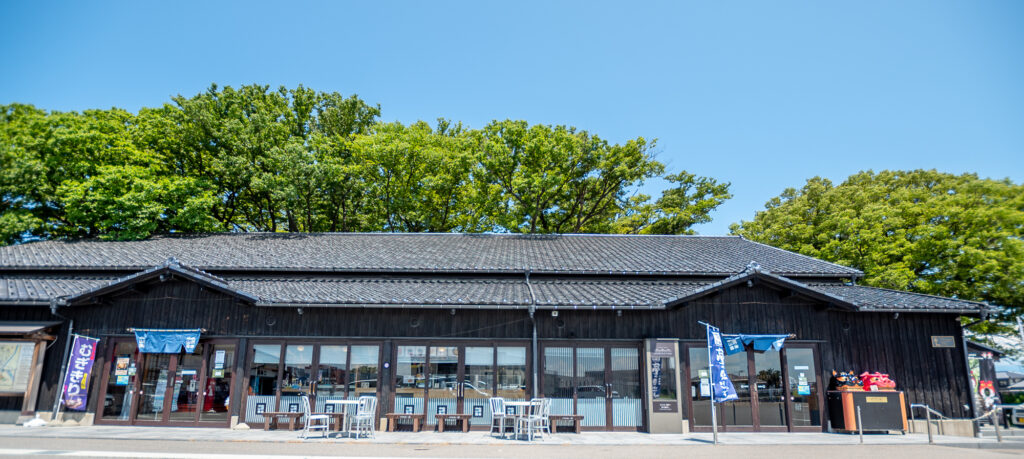
In front of the station and the bus stations, there is a building called “FOODEVER”. Inside, you will find the Tsuruoka Tourist Information Center, where English-speaking staff will answer your questions and help you sort out any problem you have from 9am to 5:30pm. There are also coin lockers, toilets, a restaurant, seats, Wi-Fi, and tourist brochures at your disposal (the building is open from 9am to 10pm).
This is Tsuruoka station viewed from FOODEVERFOODEVER entranceInside FOODEVERThe tourist information center (opens from 9 am to 5:30pm, everyday)
Get off the bus at Haguro Zuishinmon
Get off the bus at the bus stop called “Hagurozuishinmon”. If you took the 10:43 bus from Tsuruoka ekimae, you will arrive at Haguro Zuishinmon at 11:19. (reminder: Bus timetable)
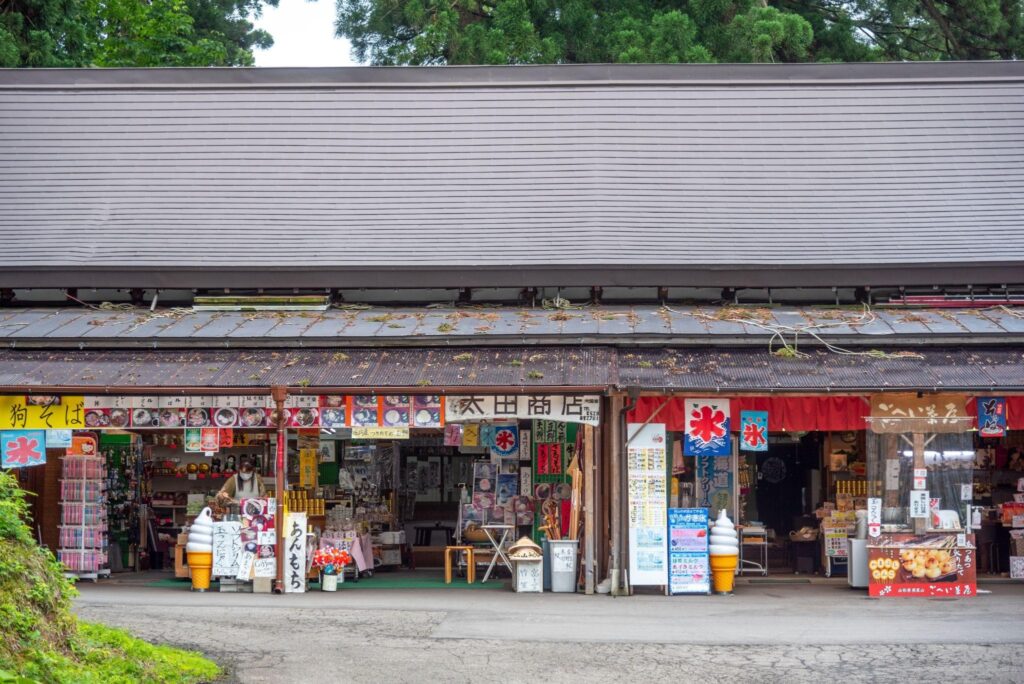
Haguro Zuishinmon is the entrance gate to Mt. Haguro’s hiking path and its 2446 stones. You need to start here if you wish to see the Five-Storied Pagoda, the Suga Falls, Grandpa Cedar, Minamidani, and many little shrines and Buddhist remains. There is no toilet on the way so please use the toilets located inside the rest area near the bus stop. You can also have lunch at the soba restaurant “Okawa Shoten” 大川商店 (no reservation needed). If you place a reservation prior to your visit, you can have shojin-ryori for lunch at Saikan, the lodge/restaurant at the top of Mt. Haguro.
Now, time to start your hike (approx. 1 hour 30 minutes).
Please acknowledge that the duration of the hike depends on your hiking pace and the number of times you make pauses.
The Zuishinmon gateThe Tenchikon shrineThe Shinkyo bridgeThe Suga FallsGrandpa CedarThe Five-Storied Pagoda (a National Treasure)The 2446 stone stairs (part of it)The Ninosaka chaya TeahouseThe path to the Minamidani ruinsThe Haniyamahime shrineSaikan’s pilgrim lodge and restaurantThe end of the hiking trailThe Dewa Sanzan Shrine (also known as Sanjingosaiden)
Where to stay in Haguro
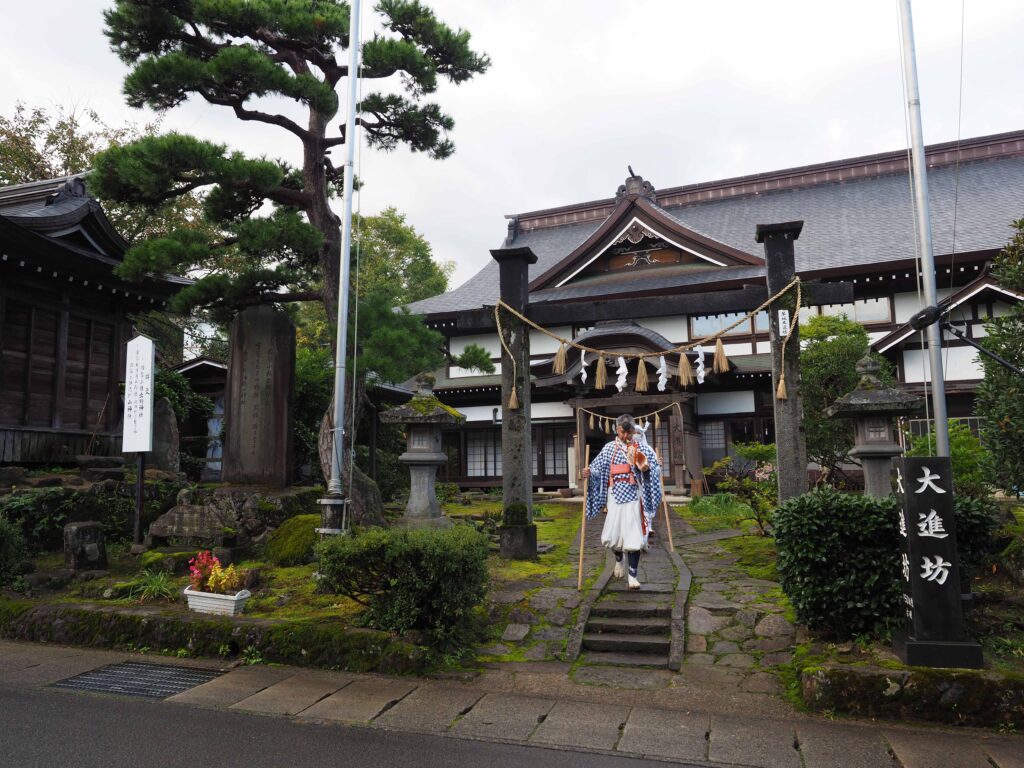
Stay at a shukubo lodge on Mt. Haguro
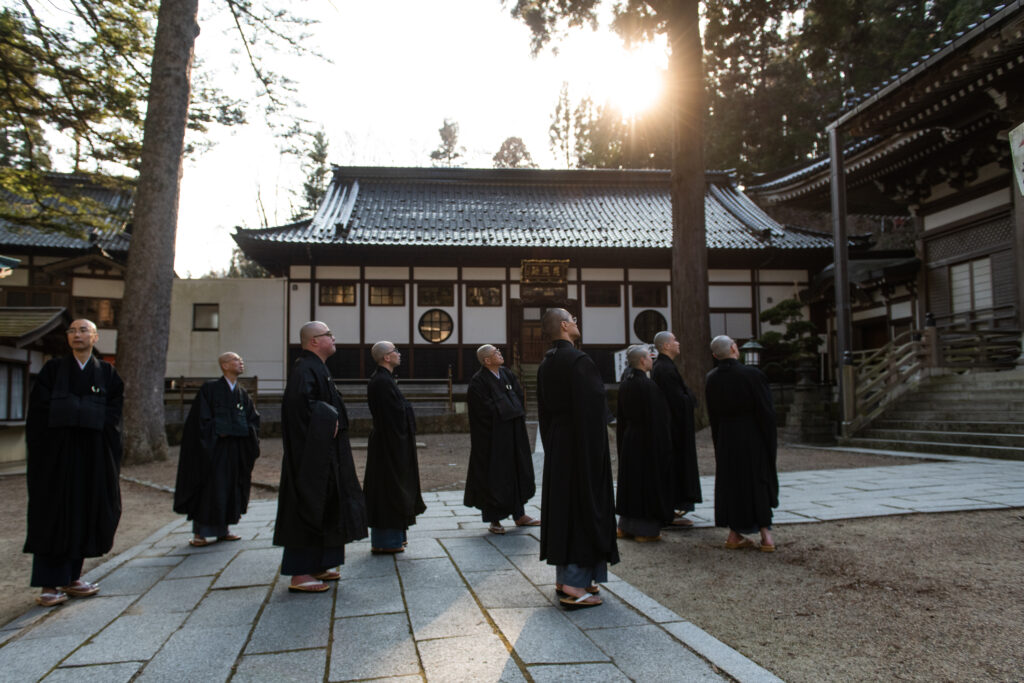
The original way to start the Dewa Sanzan pilgrimage/spiritual training is to stay at a Yamabushi shukubo lodge. Yamabushi are the practitioners of the Shugendo religion (a blend of Buddhist and Shinto practices, with many other beliefs intertwined together). In Mt. Haguro, most of the lodges belong to the Shinto religion, which is different from the shukubo in Koya-san for example (Buddhist). Hence, food at Haguro’s shukubo lodges is NOT vegetarian (Buddhist lodges often offer vegan dishes). They can be made vegetarian upon requests most of the time.
The Yamabushi families that run the shukubo can offer morning prayers, Haguro guided tours, rides to Mt. Gassan (paying) and other special services.
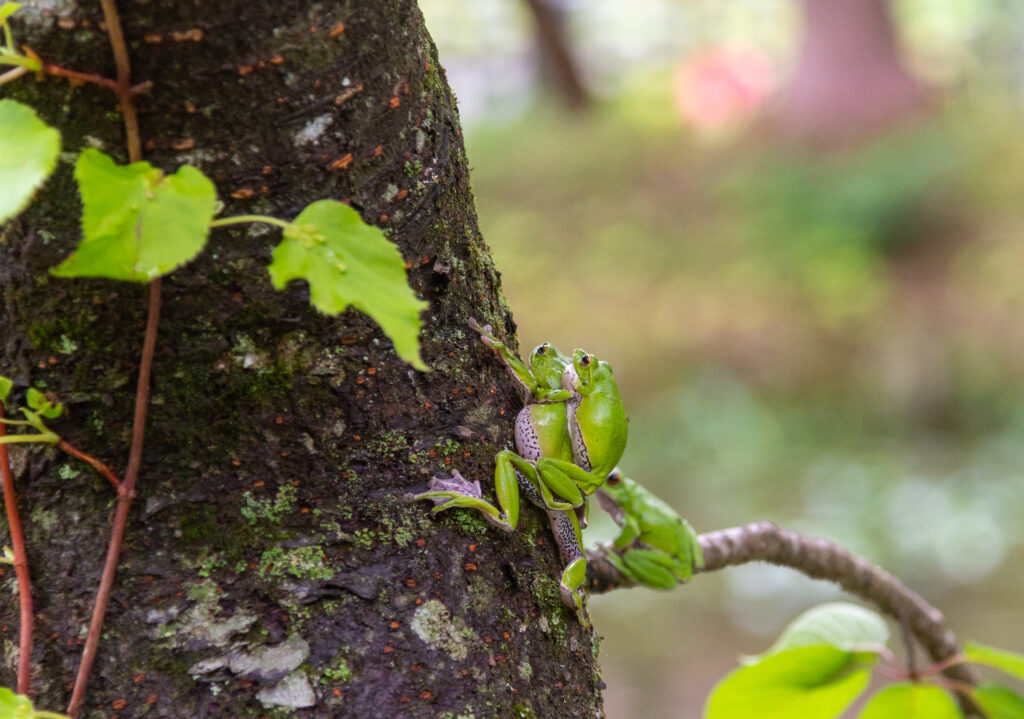
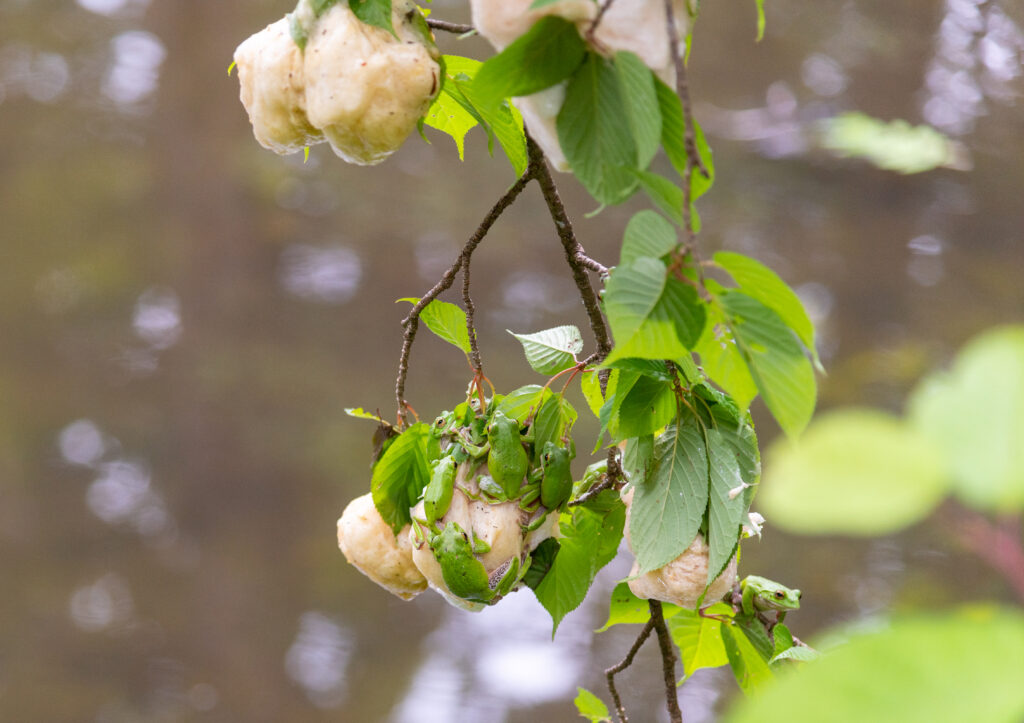
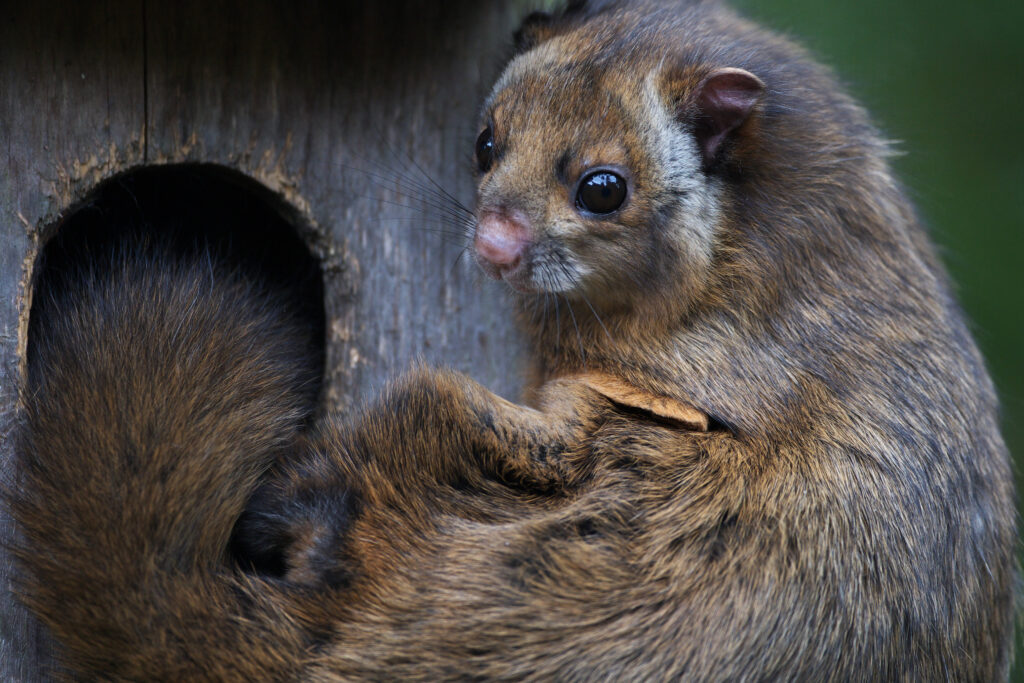
Mt. Haguro belongs to the National Park of Bandai-Asahi, along with the two other mountains of the Dewa Sanzan (Mt. Gassan & Mt. Yudono). The Bandai-Asahi National Park includes many natural sites over the prefectures of Yamagata, Niigata and Fukushima. This national park hosts a great variety of endemic animal and vegetal species. In Mt. Haguro, lucky visitors can spot the Japanese flying squirrel (musasabi in Japanese) or the moriaogaeru モリアオガエル frog who likes to lay eggs above Mt. Haguro’s Kagamiike pond in July. Website for the Bandai-Asahi National Park
(D4) Kamo Aquarium, Zenpoji Temple and Yunohama Onsen
Wake up from your shukubo lodge, have the morning prayer, breakfast, and head back to Tsuruoka station (reminder: the bus stop is called “Tsuruoka ekimae”, bus timetable). If you are staying in a lodge at the foot of Mt. Haguro (a place called “shukubo-gai”, the “shukubo town”), there are many bus stops. The most recognizable is located near the Koganedo/Shozen’in temple (bus stop name: Koganedomae). Take the 9:21 bus. Arrive at Tsuruoka station at 9:55.
Go to Kamo Aquarium
Take the bus that goes to Yunohama Onsen via Kamo Aquarium at 10:38 from Tsuruoka ekimae’s bus stop n°2. (bus timetable) Arrive at the aquarium at 11:19.
The entrance costs 1500 yen per adult.
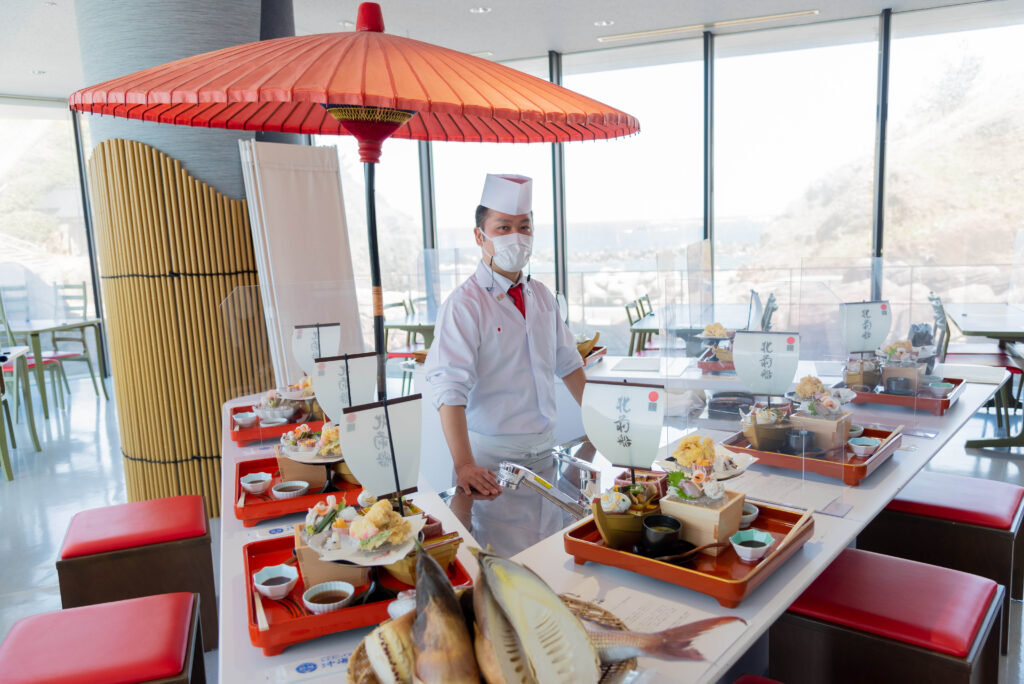
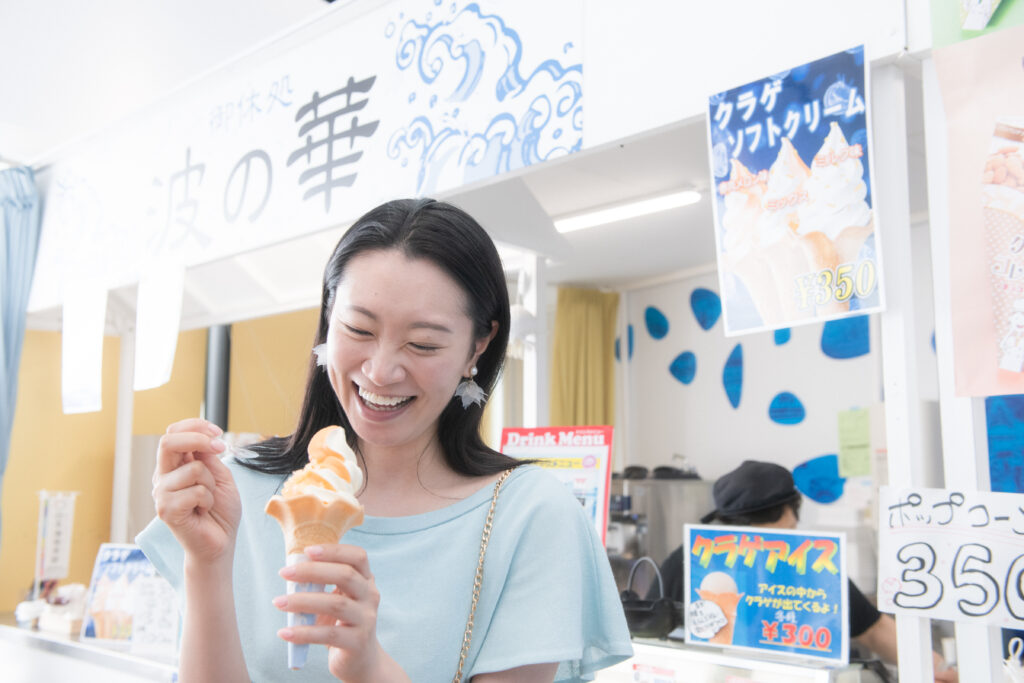
You can have lunch at Okimizuki, the restaurant inside the aquarium. Orders need to be placed through the ticket dispenser machine at the entrance of the restaurant. You have a plethora of choice: seafood menu, fish tempura, or even jellyfish ramen! Will you feel adventurous that day to try the jellyfish dishes? Estimated visit time at the aquarium : 1 hour (more if you wish to take pictures or see the performances)
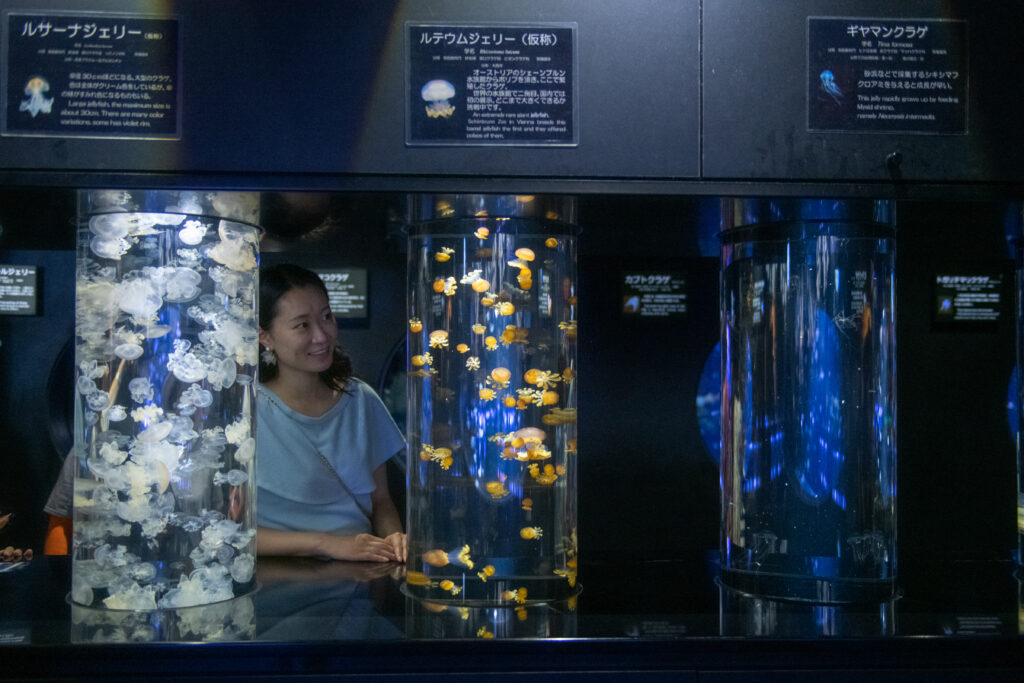
Okimizuki restaurant (inside the Kamo Aquarium)There’s more than jellyfish at Kamo Aquarium! Local fish and mammals species are also exhibited!Discover the many shapes and colors of the jellies!Jellyfish ice cream
Did you know?
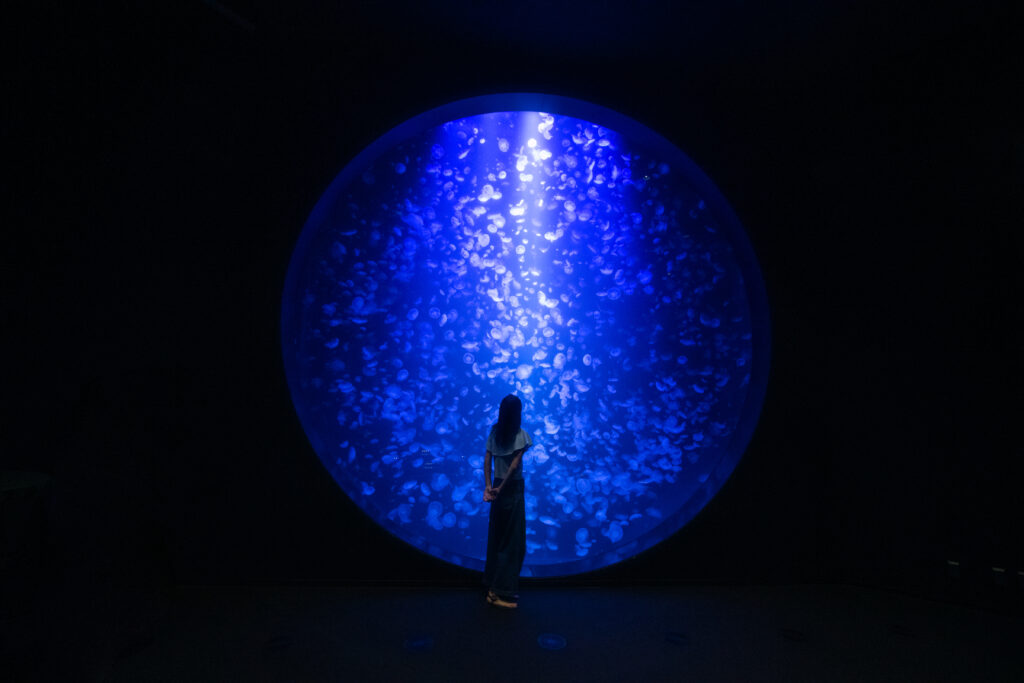
Kamo Aquarium is renowned for having the largest collection of jellyfish in the world, with over 60 successfully reproduced species. It features the world’s only “jellyfish-only fish tank,” a five-meter-diameter tank filled with Aurelia Aurita (moon jellies). The aquarium shares its expertise globally through partnerships with aquariums and universities, including Paris Aquarium, Monterey Bay Aquarium, and La Rochelle Aquarium. Before its transformation into a jellyfish-specialized aquarium, Kamo Aquarium faced bankruptcy as a generalist aquarium. The current director, Mr. Okuizumi Kazuya, who was then a keeper, proposed the idea of specializing in jellyfish. Despite their simple anatomy, jellyfish are extremely difficult to keep in captivity due to their need for stable environmental conditions. Mr. Okuizumi mastered the complexities of jellyfish care, significantly expanding the aquarium’s jellyfish collection with the help of his skilled team of keepers and researchers. Mr. Okuizumi also assisted Dr. Osamu Shimomura, the 2008 Nobel Prize winner in Chemistry, by providing specimens of Aequorea victoria. This jellyfish produces a bioluminescent protein called GFP, which was central to Dr. Shimomura’s Nobel-winning research. Since then, Kamo Aquarium has continued to thrive and innovate.
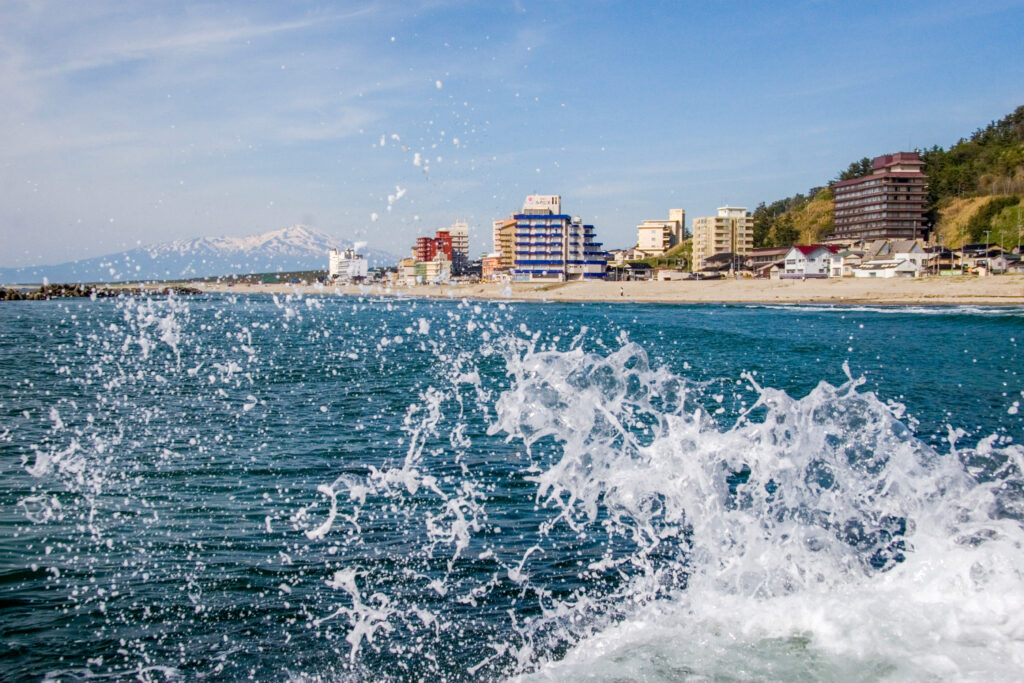
Go to Yunohama Onsen (bus transfer & ryokan check-in)
You can aim for the 13:45 bus to Yunohama Onsen from the aquarium’s bus stop (reminder: the bus stop name is Kamo Suizokukan, bus timetable).
Get off at Yunohama Onsen at 13:55. Check-in at the ryokan you have chosen for the night.
Then, take the bus from Yunohama Onsen’s bus stop to Tsuruoka city through Zenpoji temple (bus timetable) at 14:45.
Visit Zenpoji Temple
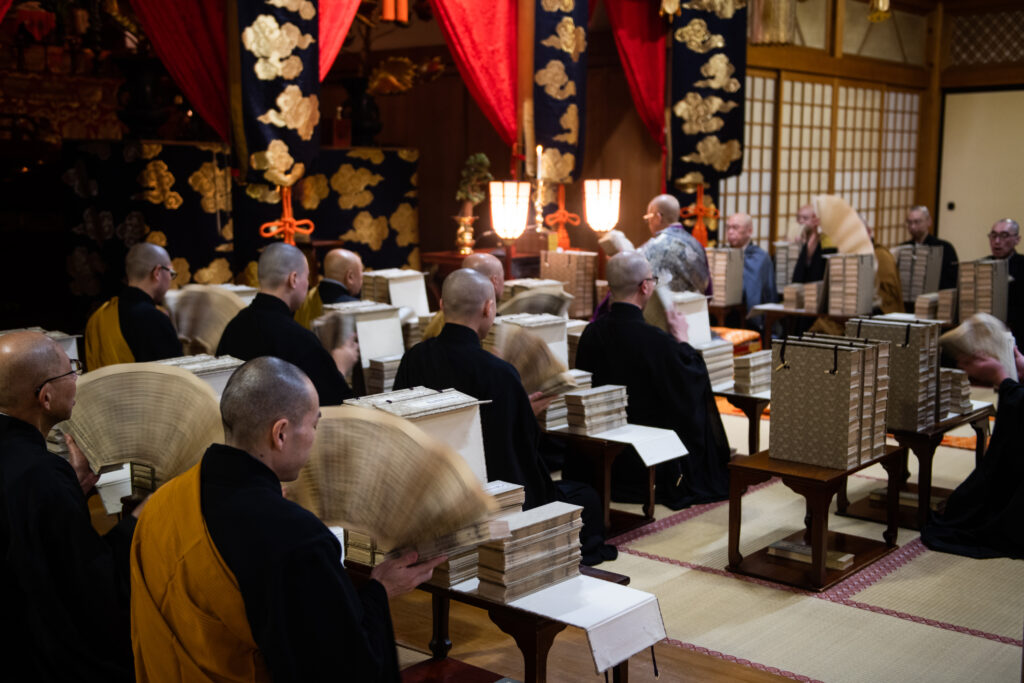
Get off the bus at Zenpoji at 14:53 and explore the temple’s precincts for about 45 minutes. To visit the inside of the temple, there is a 500 yen entrance fee. Don’t miss the last prayer of the day at 16:00, where the monks perform the Heart Sutra Prayer for around 20-30 minutes. You can ask to be blessed during the prayer by paying a blessing fee (starting from 3000 yen) up to 10 minutes before the prayer begins. Otherwise, you can attend the prayer with just the 500 yen entrance fee.
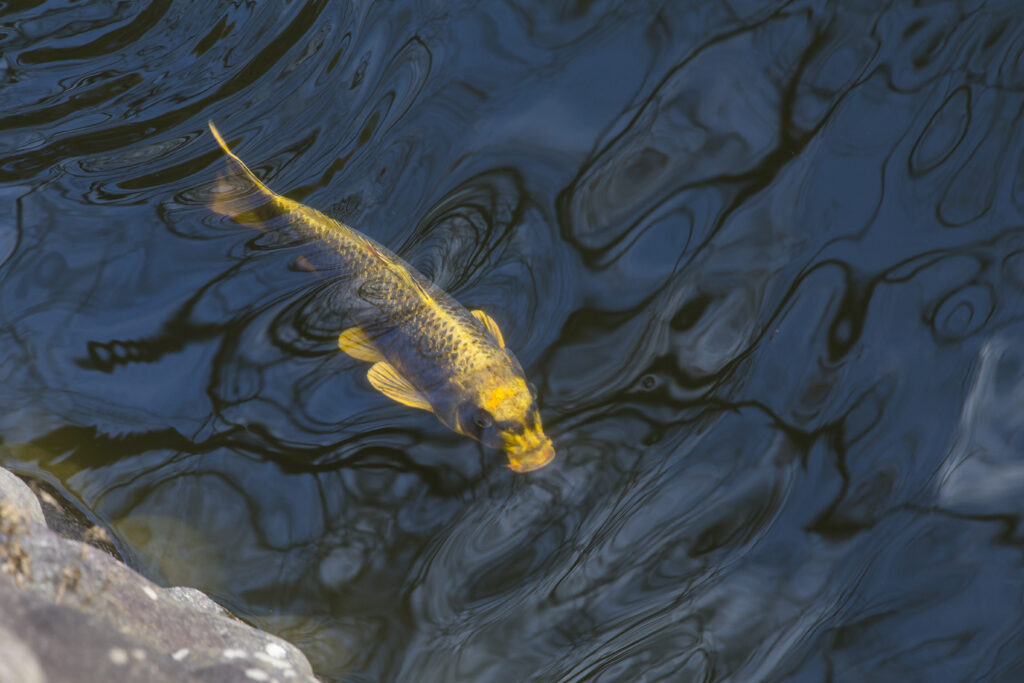
The bus back to Yunohama Onsen leaves Zenpoji temple at 17:20. Until then, feel free to visit Kaibami-ike pond with its human-faced fish and explore the many buildings of the temple. Go back to Yunohama Onsen to have a relaxing soak and some well-deserved sleep.
The Heart Sutra Prayer performed following the “Tendoku way”Zenpoji’s monksAround the Kaibami-ike pondKaibami-ike pond’s human-faced koi carpsZenpoji Temple’s Five-Storied Pagoda
Did you know?
Zenpoji Temple is one of the Three Main Soto Buddhist Temples in Japan, with a history spanning over a millennium. The temple’s main deity is the Dragon God, revered for protecting all things related to water, including fishermen, farmers, and sailors, and for its powers to heal diseases and pain. Zenpoji is so respected throughout the Tohoku region that fishermen from other prefectures proudly display Zenpoji’s flag on their boats, seeking protection and blessings. Zenpoji gained significant attention in the 90s due to its “human-faced carps” (人面魚 jinmengyo in Japanese) after a Japanese TV program featured these uniquely human-like fish. The jinmengyo are believed to be manifestations of the Dragon God worshipped in the temple’s waters. Visitors often make donations or pray at the shrine near Kaibami-ike pond at the temple’s base, hoping for cures for their illnesses. During the golden age of the Kitamaebune maritime road (see Niigata’s paragraph for more details) in the 18-19th century, Zenpoji became a prominent site of devotion for merchants seeking protection from sea storms and shipwrecks. This increased popularity and the donations it brought allowed the temple to invest in the creation of beautiful structures, such as the Five-Storied Pagoda and the 500 Rakan Hall. The temple’s monks perform the prayer 6 times a day. They also offer zazen sessions, shojin-ryori lunches or Buddhist stays at their lodge on the second floor.
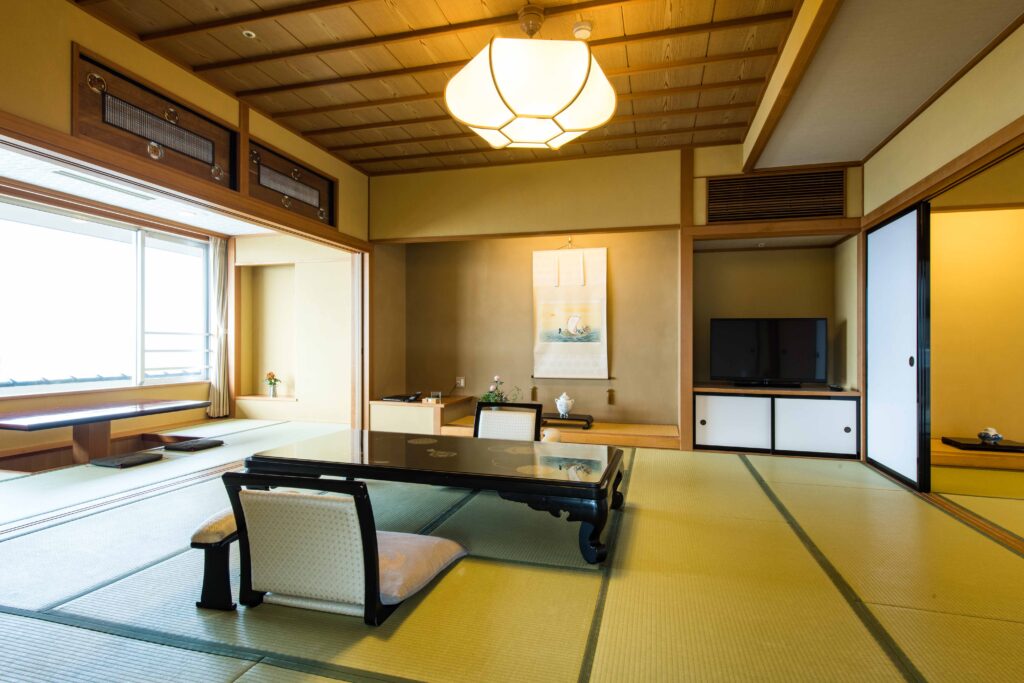
We personally recommend trying “Kameya”, a three-centuries old ryokan that has welcomed two Imperial Couples as its guests in its history, proof of the high-quality of its services and its comfort.
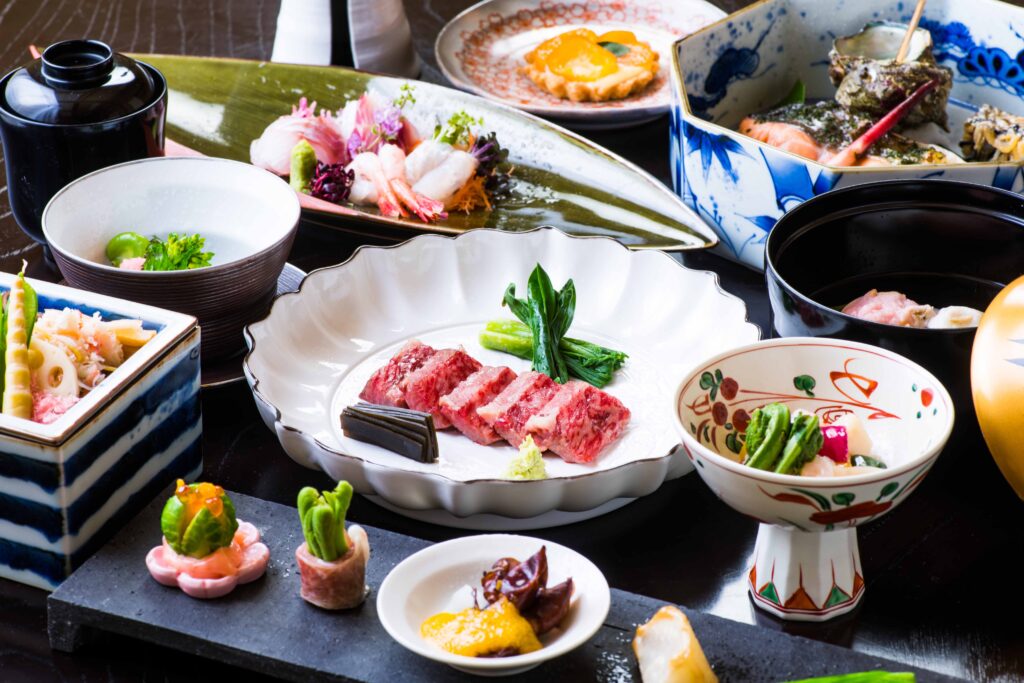
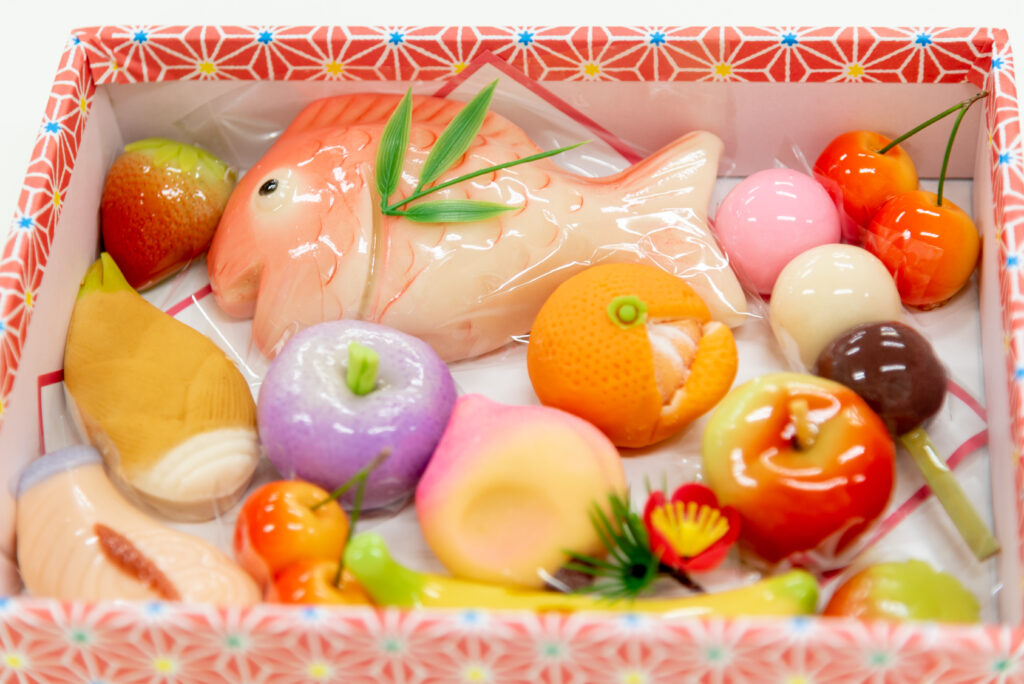
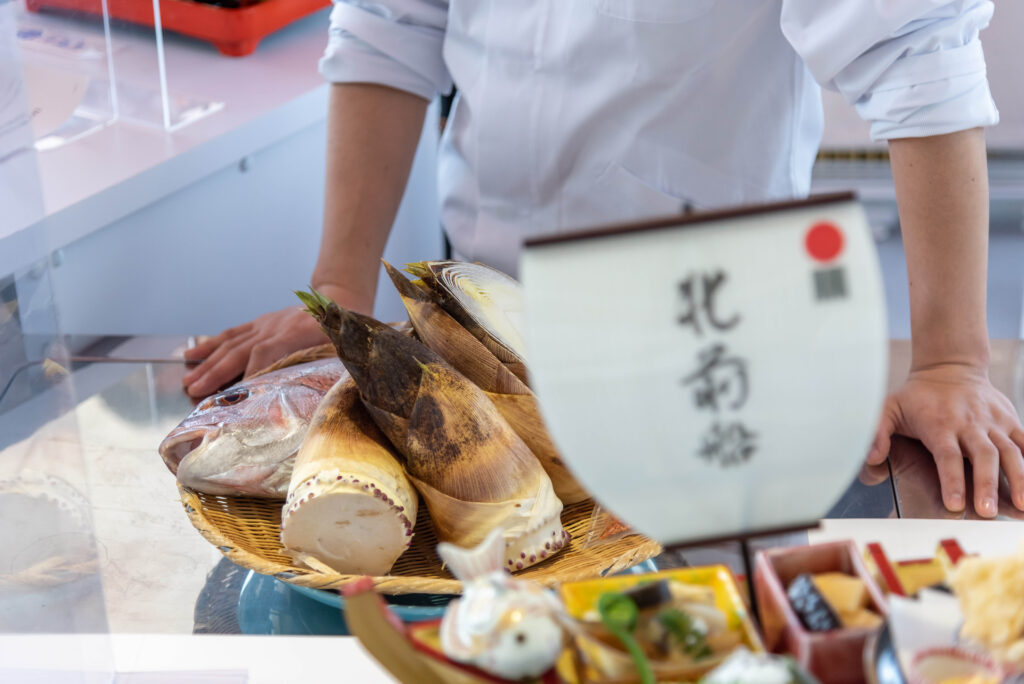
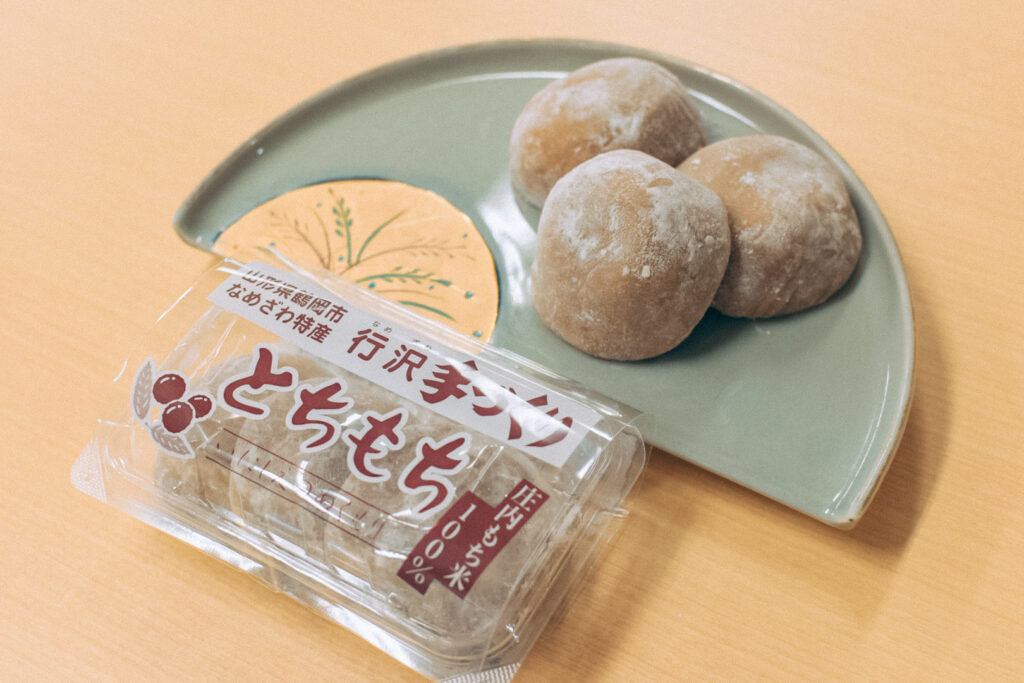
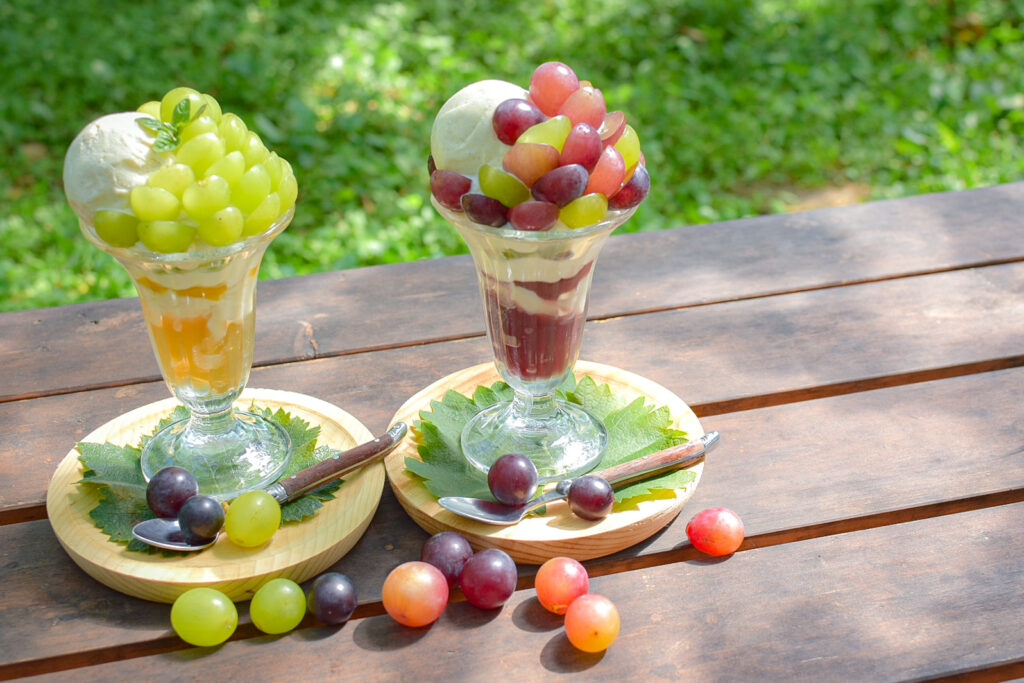
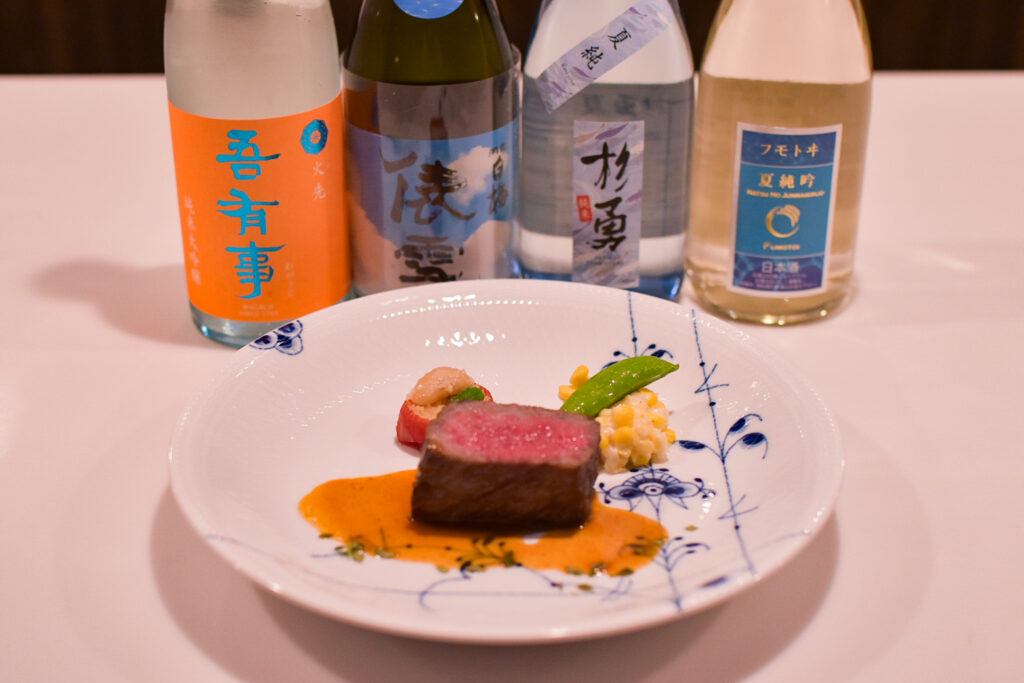
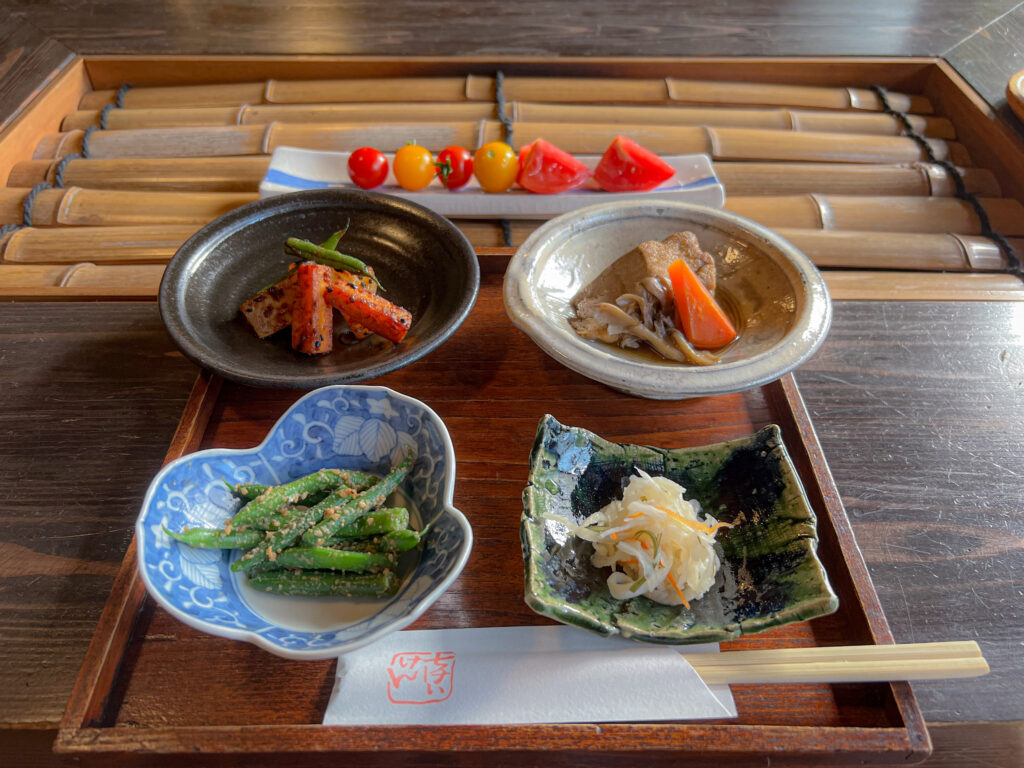
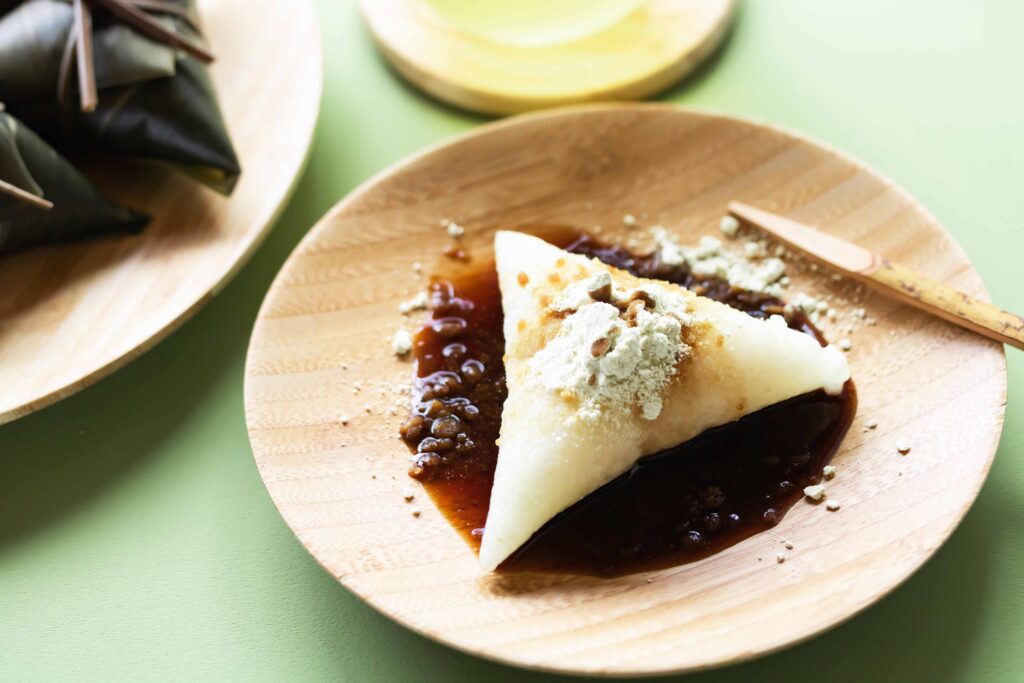
Dewa Sanzan’s Shojin-Ryori spiritual menuTsuruoka’s hinagashi cakes (in March/April)Moso bamboo soup (in Spring)Tochimochi (horse-chestnut mochi)Grapes sweets!Japanese/French (or Italian) fusion food paired with sake!Farmer cuisine
(D5) Sakata city, its maiko & oiran culture and its delicious pork
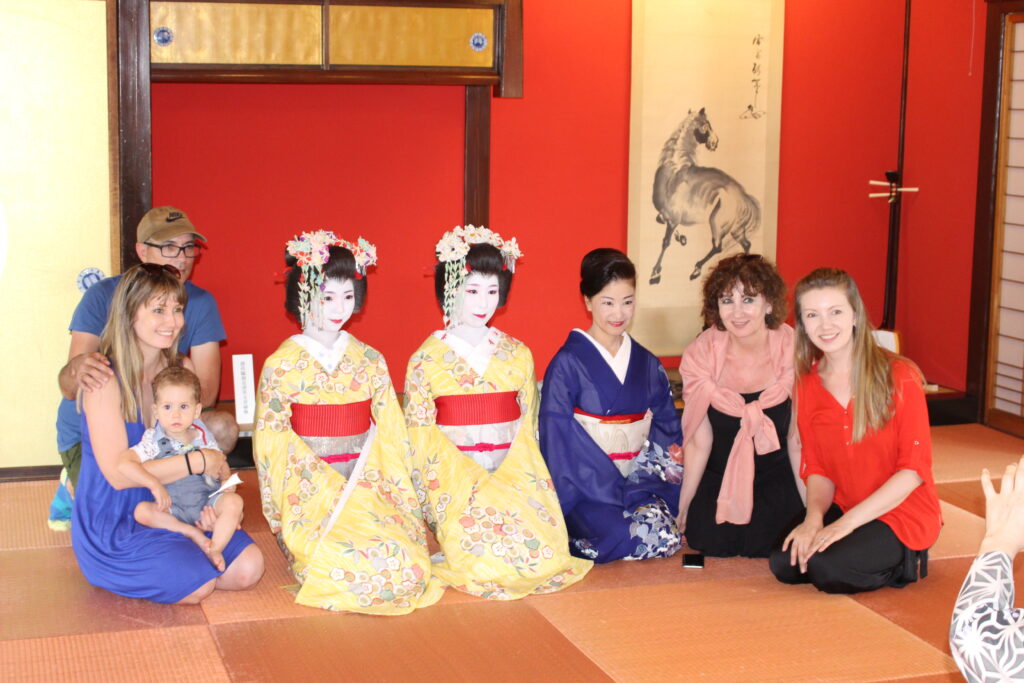
Sakata City, another key hub port of the Kitamaebune trade route until the 19th century, was home to Japan’s wealthiest family, the Honma family, who amassed their fortune through vast rice fields (and harvests). In Sakata, you can immerse yourself in the history of Kitamaebune merchants by exploring the old town, where the Somaro teahouse is located. Somaro’s maiko still perform in the local dialect, offering unique dances and chants for lunch or special occasions. The experienced eye can appreciate the differences from Kyoto geisha and enjoy the distinctive performances of Sakata’s maiko.
Nearby, you can visit the Sanno Kurabu, a former restaurant with a 120-year history. This site showcases the history of Sakata’s oiran (highest-ranked courtesans) through comical and erotic drawings displayed in a small tearoom, as well as doll displays depicting the various workers of a pleasure house.
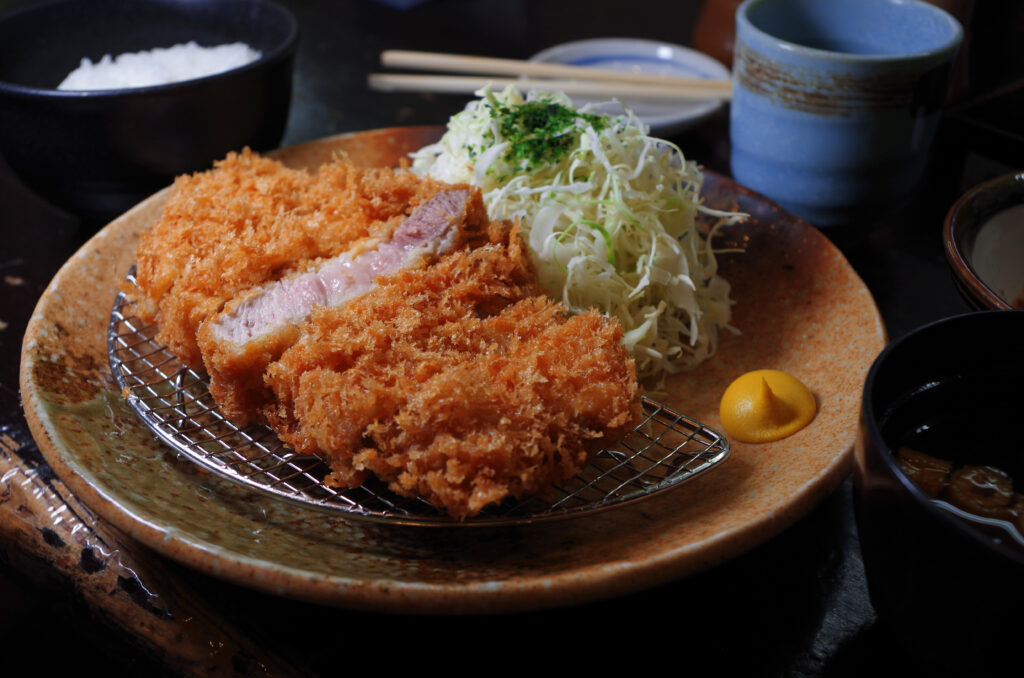
Surrounded by the Shonai Plain and bordered by the Sea of Japan, Sakata offers exquisite sake and seafood. However, we recommend trying one of Japan’s finest pork meats: Shonai Pork, at Hirata Bokujo’s restaurant. This culinary delight is not to be missed.
Go to Sakata city, have tonkatsu for lunch
For that, take the bus bound for Tsuruoka station from Yunohama Onsen via Kamo Aquarium, preferrably at 9:00. Arrive at Tsuruoka station (Tsuruoka ekimae) at 9:46 (bus timetable). Take the train bound for Sakata station (Inaho 1) at 10:12. Get off the train at 10:32. Take the city bus B to Mizuho Icchôme (1chome), have tonkatsu for lunch at Tonya (Hirata Bokujo’s restaurant). Once finished, take the same bus to Sankyo Soko’s rice warehouses. Visit the warehouse and the exhibitions inside.
Sankyo Soko’s warehousesDifferent icecream flavors insideSake lovers might find their happiness there
Somaro’s maiko dance and Sanno Kurabu’s history of the Sakata oiran
Once finished, walk to Sanno Kurabu, enjoy the different exhibitions and try to spots every hint at the oiran culture in Sakata city. If you have a little more free time, visit the Honma Museum and its Japanese garden (one of Japan’s Most Scenic Places 国指定名勝). Stay nearby for the night.
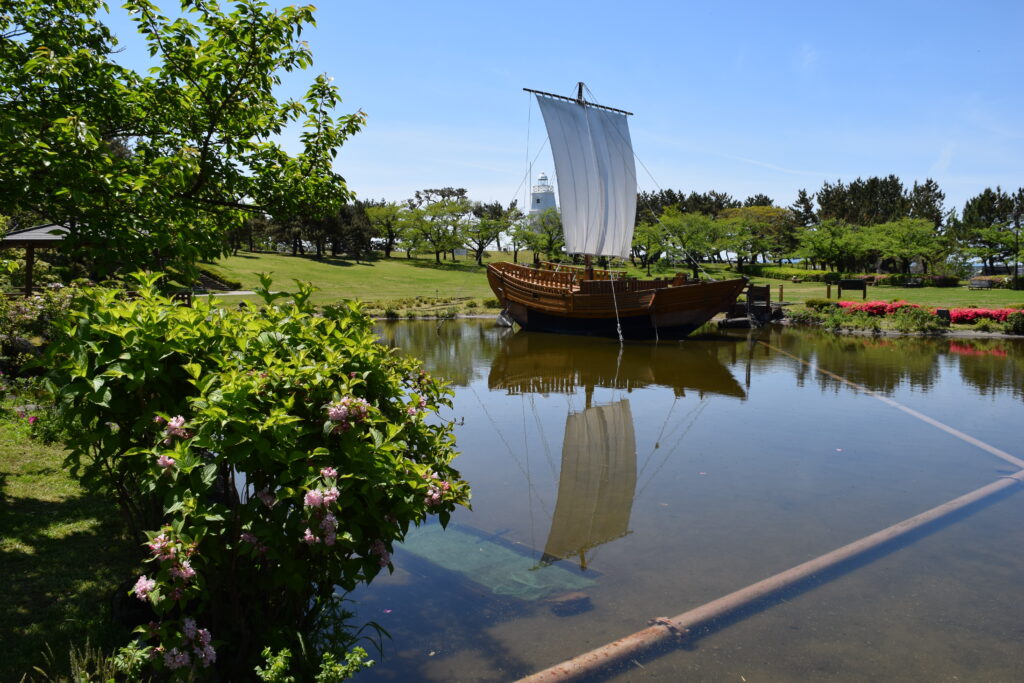
The Hiyoriyama ParkSomaro’s outsideThe entrance torii gate to Hiyoriyama Park
Where to stay in Sakata?
There are many places to stay in Sakata, but our recommendation goes to Wakaba Ryokan, a cozy, traditional ryokan near Somaro, Sanno Kurabu and the Hiyoriyama Park that serves traditional Japanese food and has cozy futon bedrooms.
Many people confuse geisha 芸者 (literally : “person of arts”) and oiran 花魁, since they have relative similar appearances (white makeup, luxurious kimono and hair decorations to name a few). However, those two roles are completely different. Geisha are trained entertainers, who enter a teahouse and train for many years to perfect their instrument-playing, singing, and dancing. Customers buy their services to animate a business meeting or spend a luxurious moment filled in the company of refined ladies. Back in the days, geishas used to be a “transition” for customers who were waiting to see the courtesans, dancing and singing meanwhile. Oiran were considered elite courtesans within the pleasure quarters (yūkaku), such as the Yoshiwara district in Edo (now Tokyo). They were known for their beauty, elaborate hairstyles, and richly decorated kimonos. Oiran were distinguished by their elaborate and ornate kimonos, tall wooden clogs (koma-geta), and complex, multi-layered hairstyles adorned with numerous hairpins. Their appearance was much more flamboyant compared to geisha. Oiran culture declined with the end of the Edo period and the eventual outlawing of licensed prostitution, while geisha culture has continued to the present day, though in a modernized form.
What to eat in Sakata city?
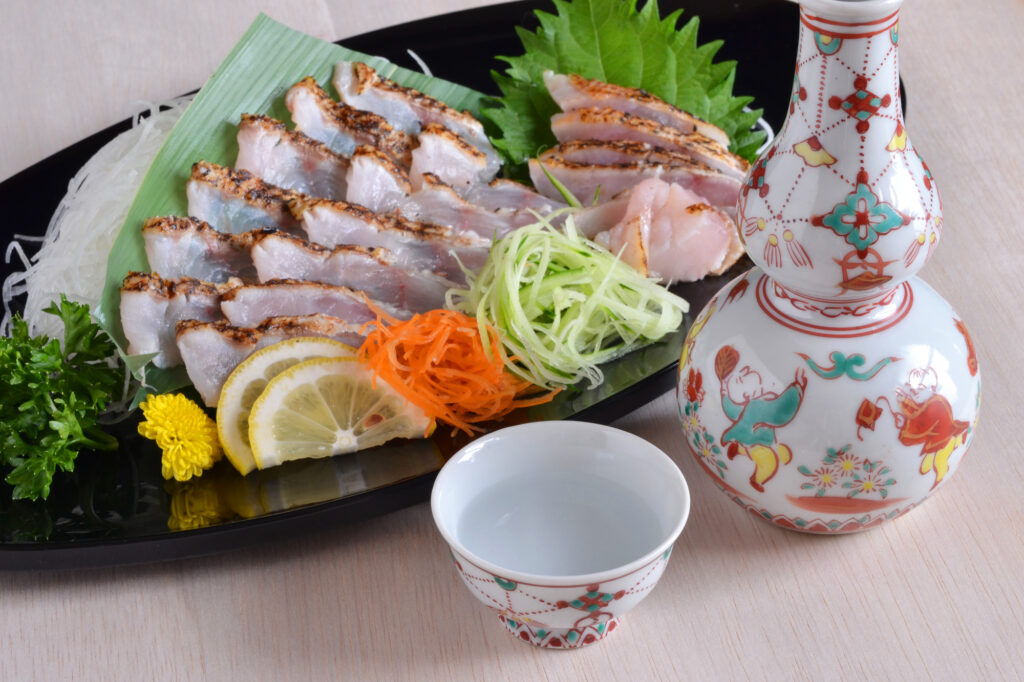
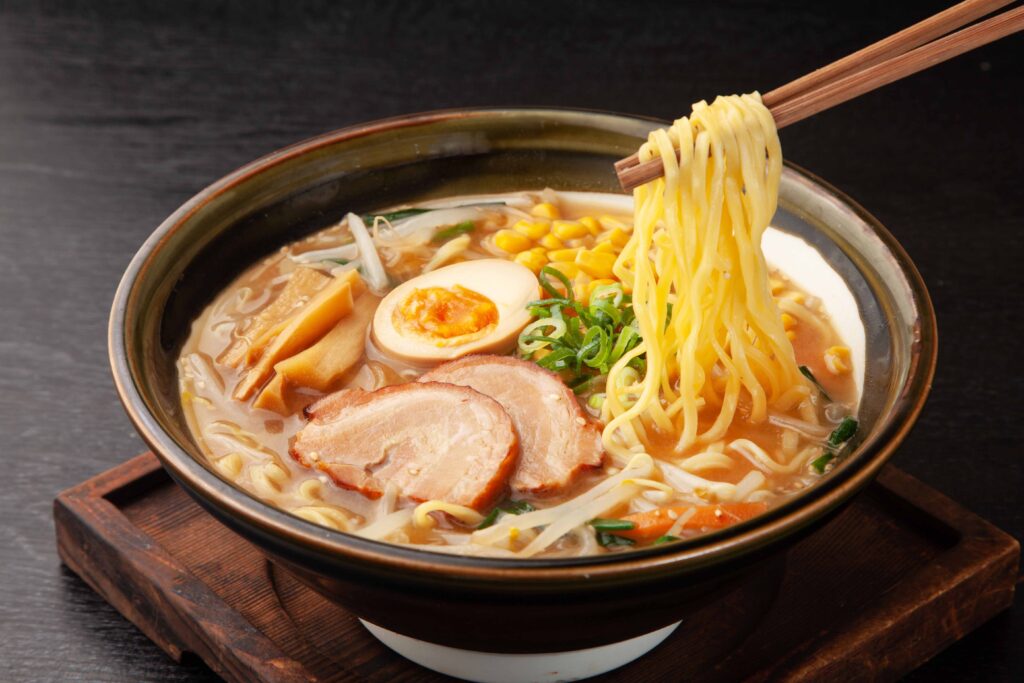
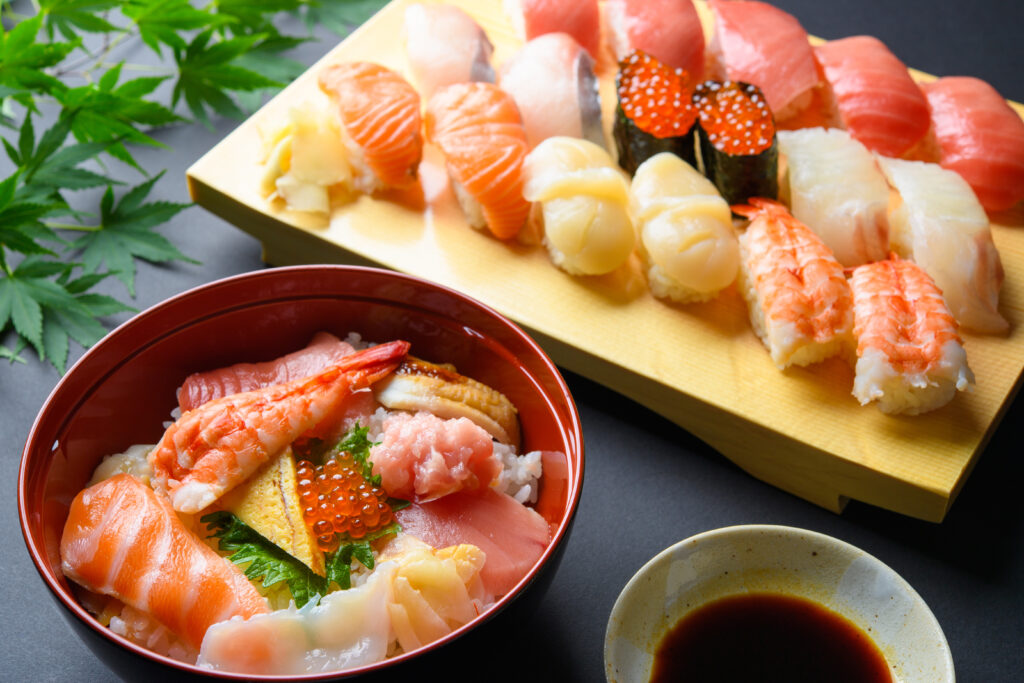
Sakata ramen : a rich seafood-broth and thick, firm noodlesSakata’s seafood and more especially: Sakata’s kaisendon (raw seafood-topped rice bowls)Sakata’s version of French Cuisine
Did you know?
Sakata’s ramen were voted “Japan’s N°1 ramen” in 2023 at the “Japanese local ramen contest” that was held in Shinjuku/Okubo Park.
You’re going to have a busy morning this day!
1. Take the the Inaho 6 bound for Niigata at 9:11
2. Get off at Amarume station at 9:19
3. Take the Rikusai Line bound for Shinjo at 9:25
4. Get off the train at Shinjo Station at 10:54
5. Take the Yamagata line bound for Yamagata at 11:35
6. Get off the train at Oishida at 11:54. Have a quick lunch in front of the station
7. Take the JR bus to Ginzan Onsen at 12:35
8. Arrive at 13:11
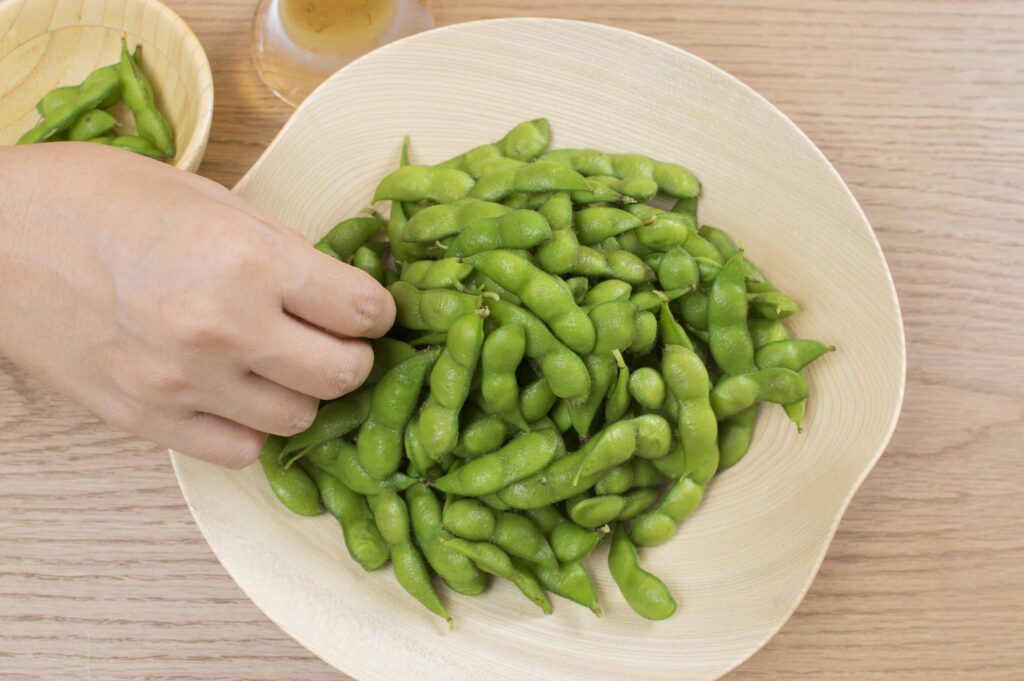
Don’t miss Yamagata City, a key destination in the Tohoku region. Not only is it a transportation hub connecting you to stunning spots like Yamadera and Ginzan Onsen, but it’s also a “culinary hub,” offering the finest dishes from across the prefecture. Enjoy the famous dadachamame from Tsuruoka (known as the “king of edamame”), savor the rich flavors of Yonezawa beef (one of Japan’s top three wagyu varieties), and taste the renowned Shonai pork. Yamagata is also famous for its ramen and is Japan’s top producer of cherries.
During your one-night, two-day stay in Yamagata, you’ll have plenty of time to fully appreciate the delights this prefecture has to offer!
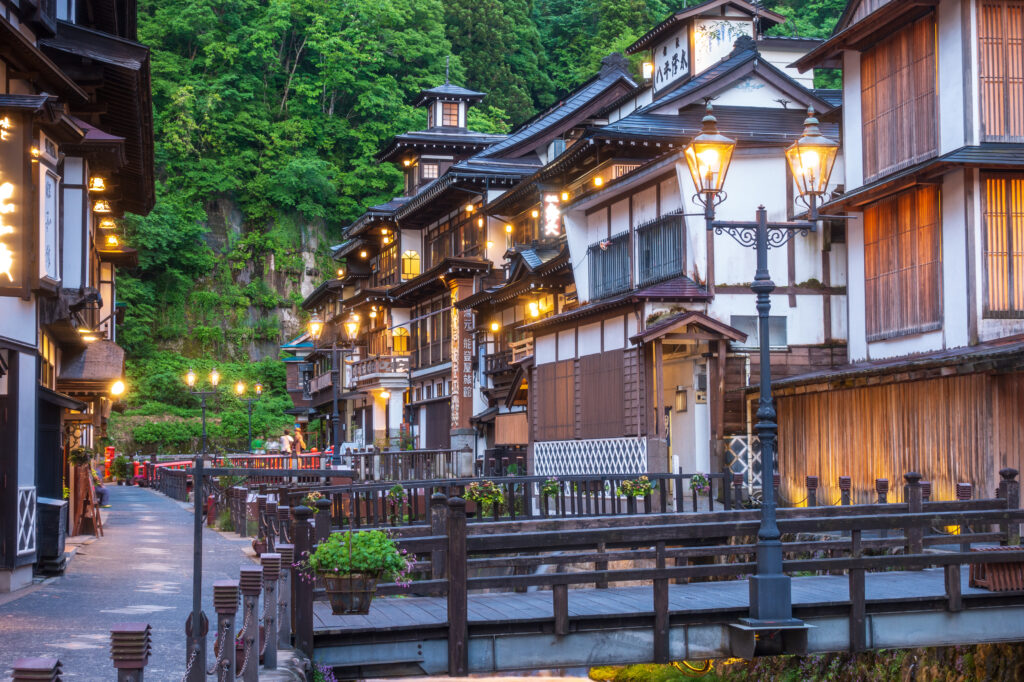
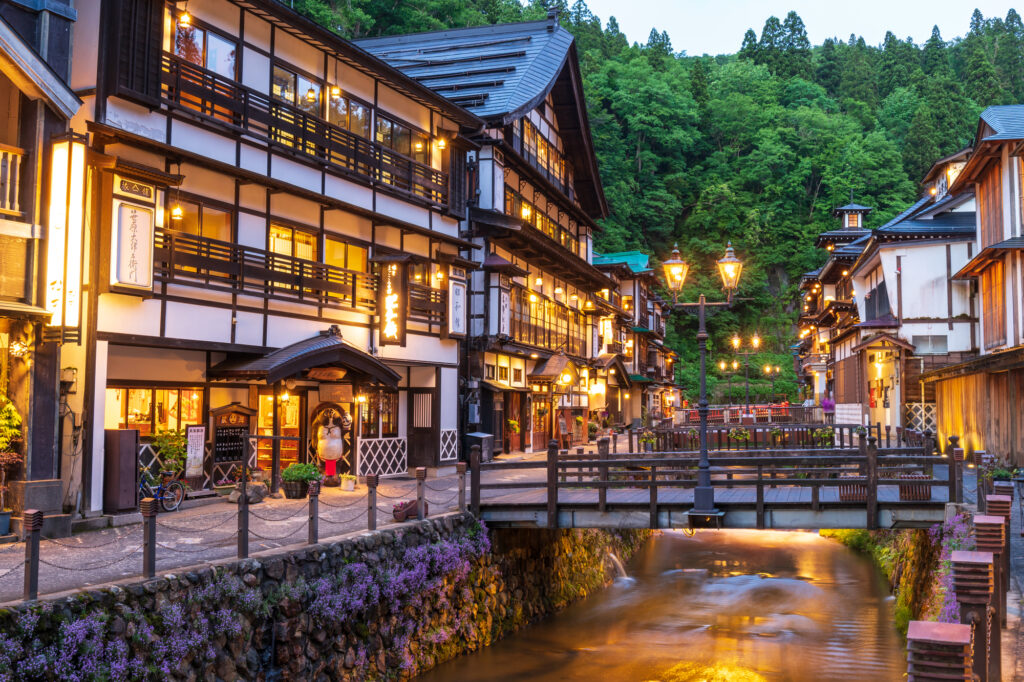
Go to Ginzan Onsen
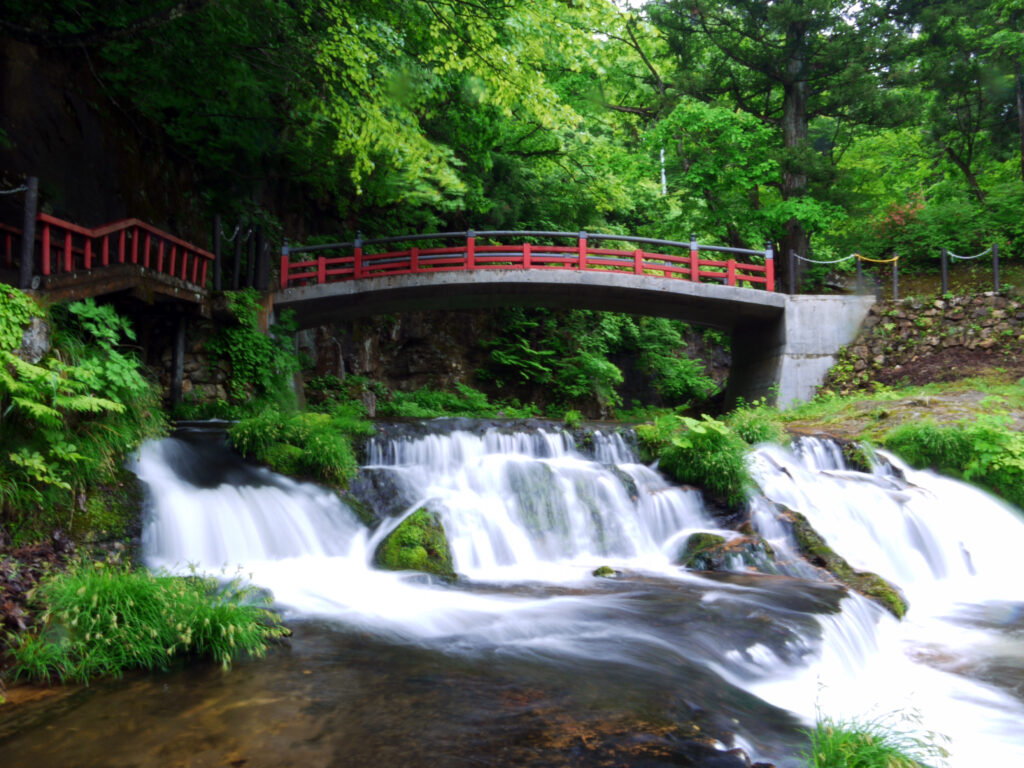
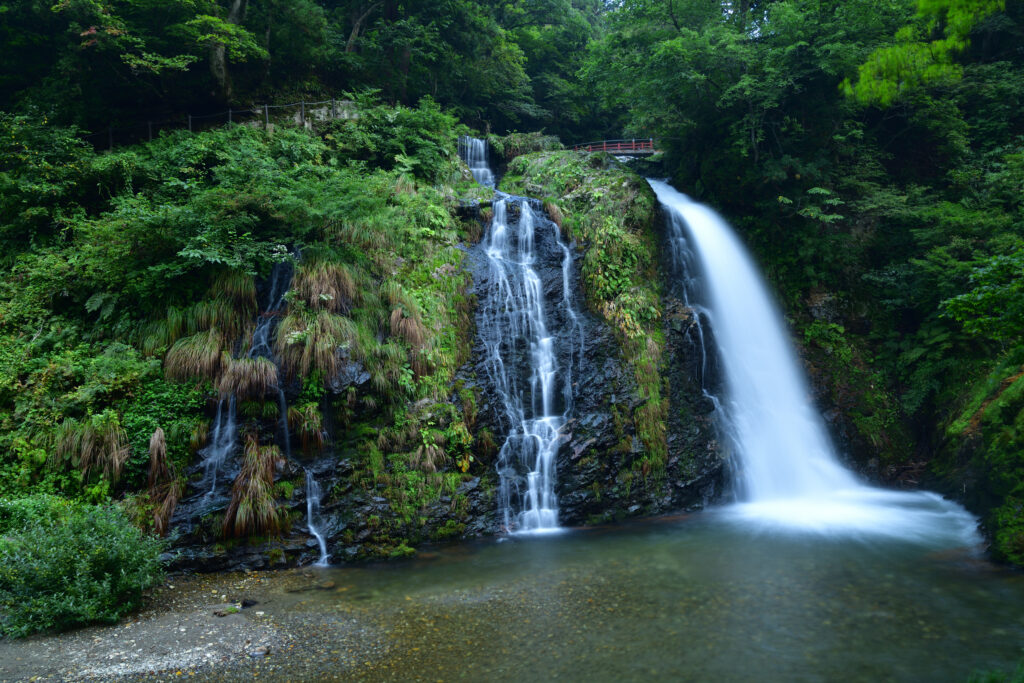
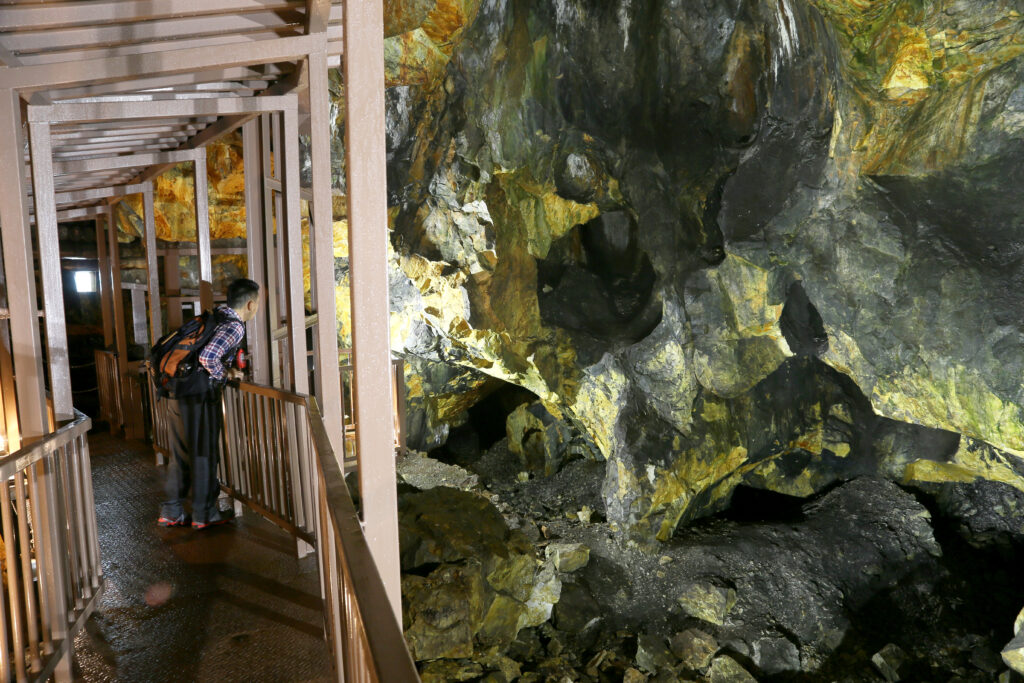
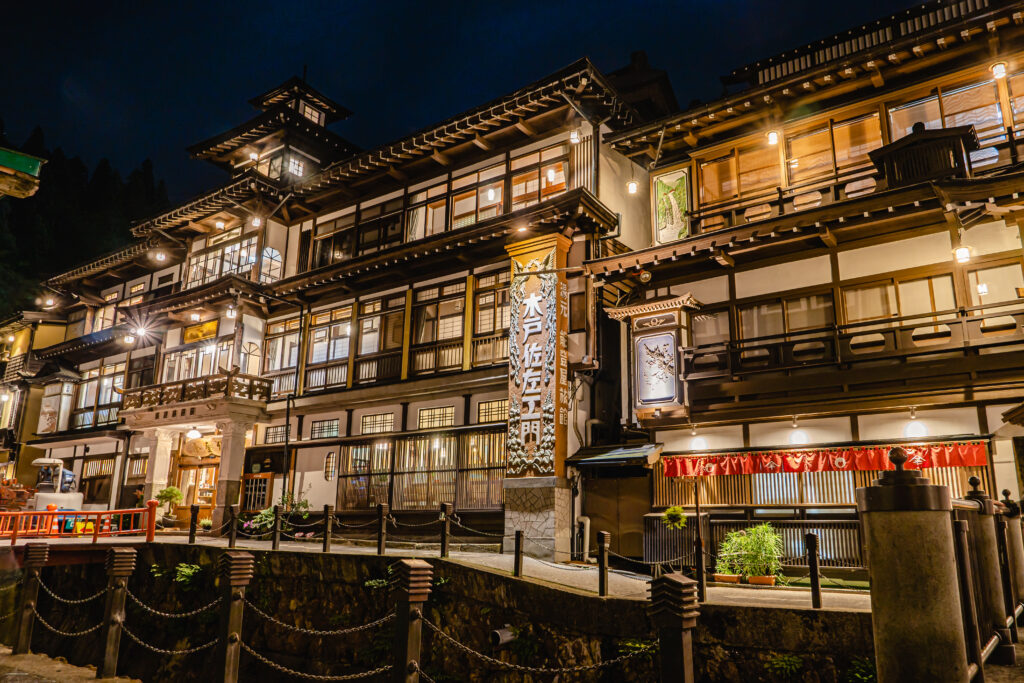
Nobody needs to introduce this stunning onsen village anymore. Ginzan Onsen is renowned for its beautifully preserved traditional ryokan (Japanese inns) with wooden facades lining the Ginzan River. Many of these buildings date back to the Taisho era (1912-1926) and early Showa era (1926-1989), creating a nostalgic and romantic ambiance, especially when illuminated at night. Explore Ginzan Onsen, visit its historic silver mine and picturesque waterfall, and go down to Yamagata city to stay for the night.
Where to stay near Ginzan Onsen?
It is actually very hard to stay at Ginzan Onsen. Most establishments are full many months in advance, and most rooms’ price is on the upper side of the scale. We recommend you to stay near Yamagata station if you couldn’t make a booking for a ryokan inside Ginzan Onsen.
(D7) Yamagata city, Yamadera’s Buddhist grounds and off to Sendai!
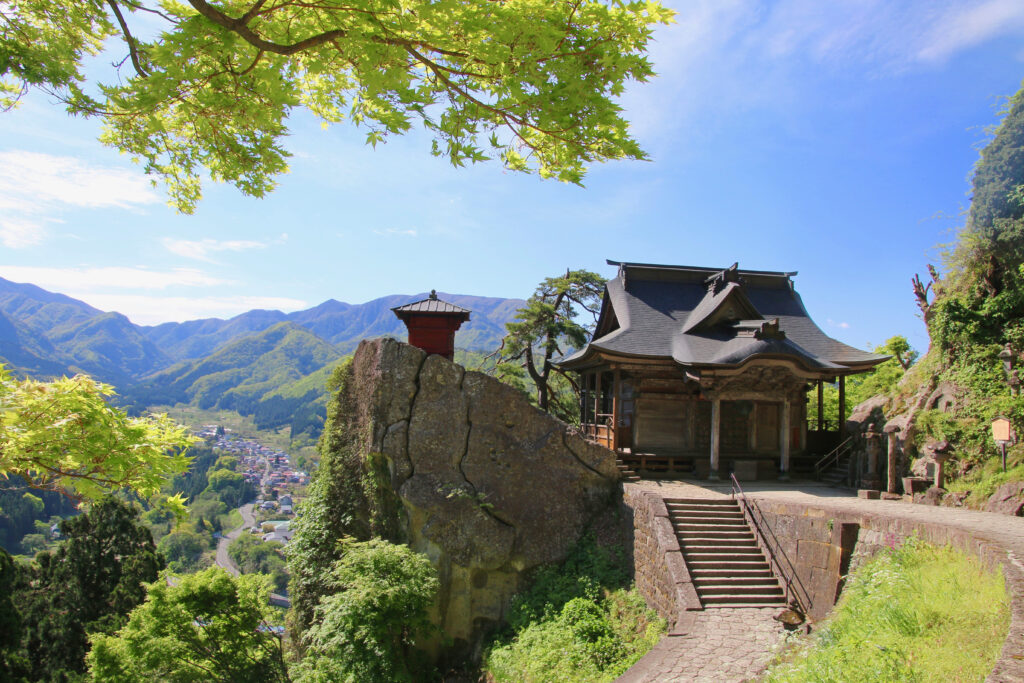
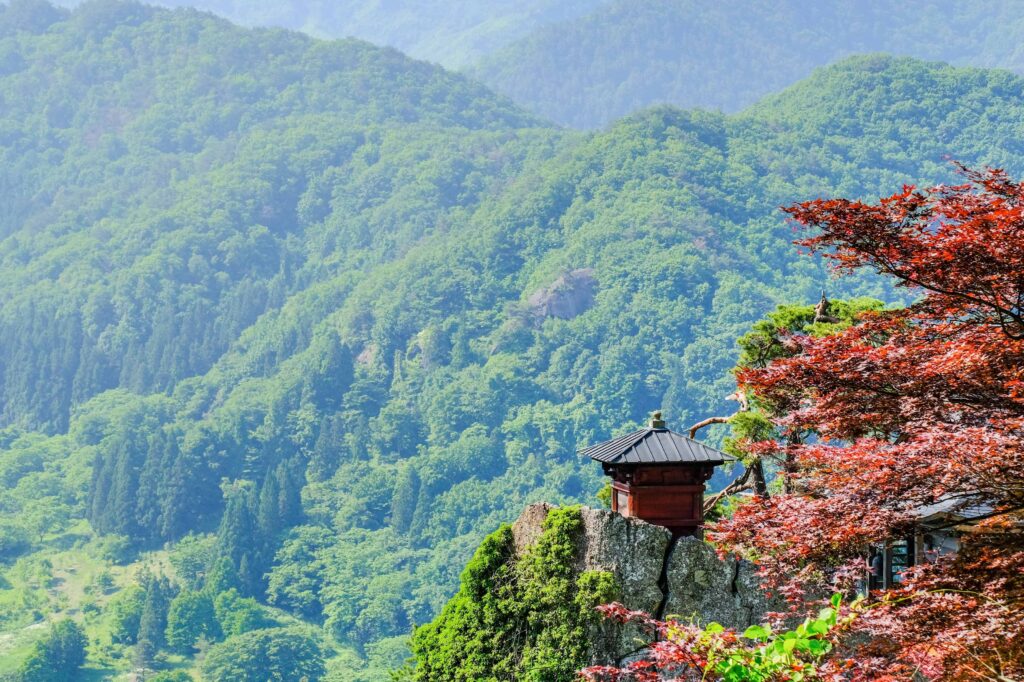
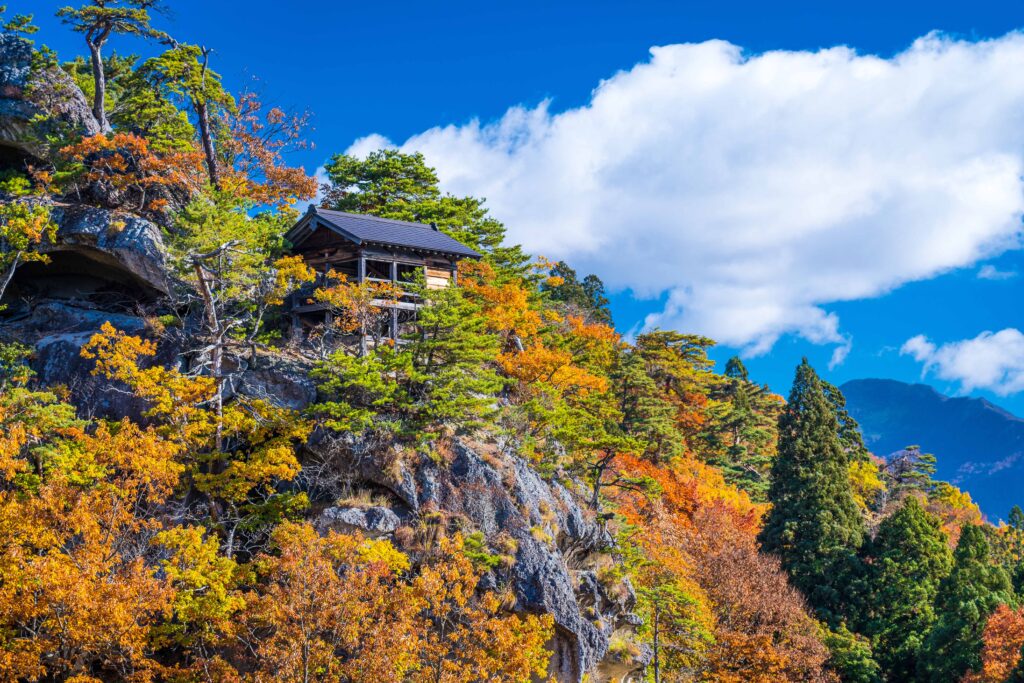
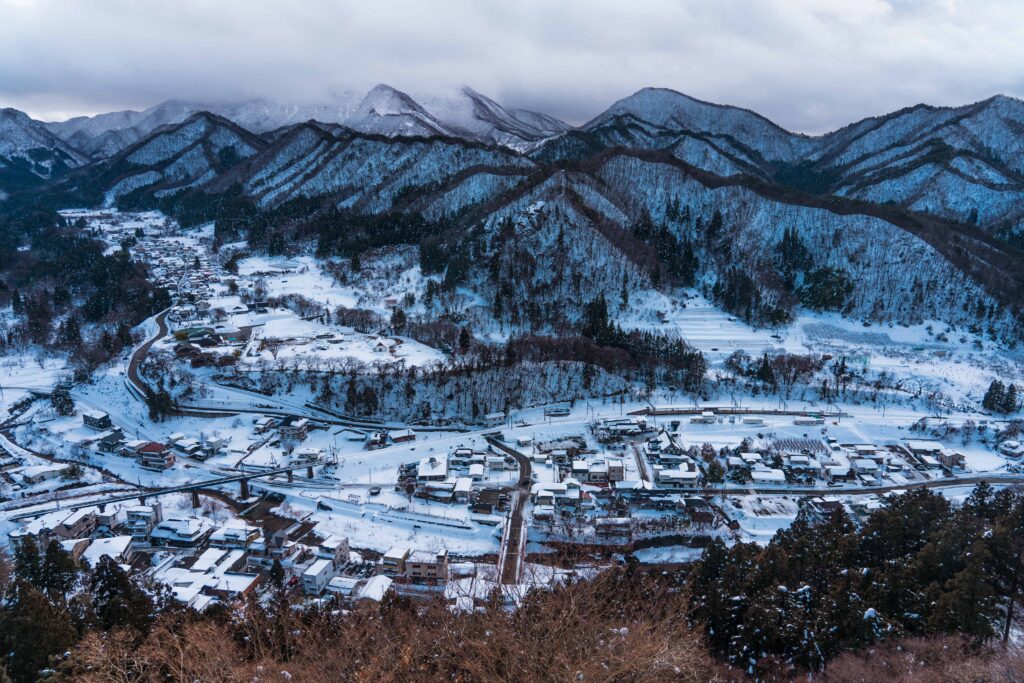
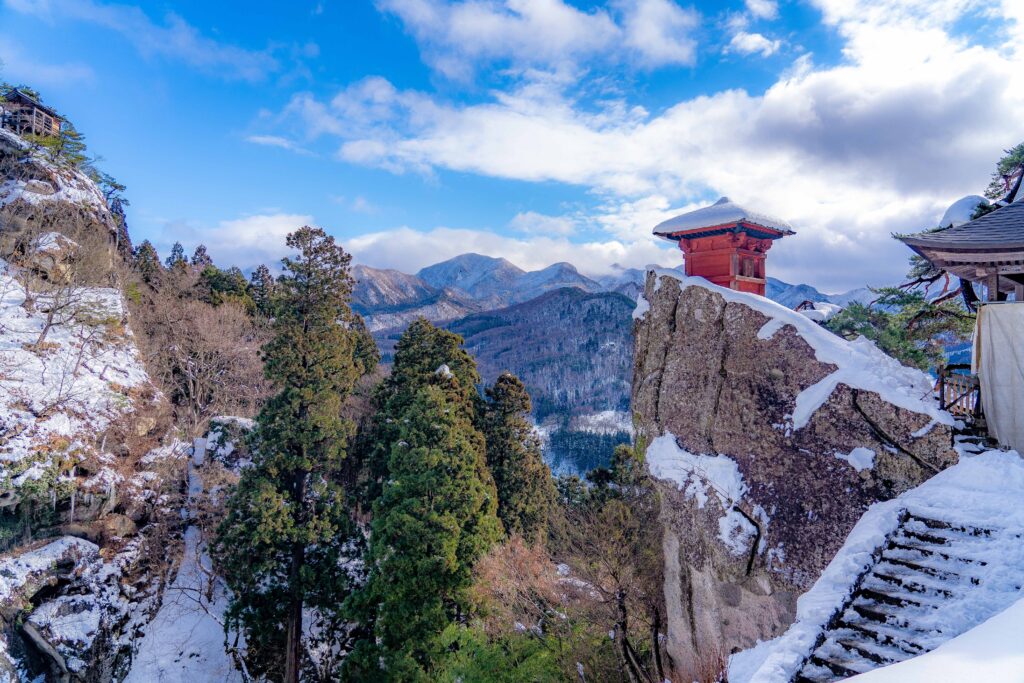
Go to Yamadera
To go to Yamadera from Yamagata Station, take the Sendai Line bound for Sendai, and get off the train at Yamadera station (approx. 20 min.). Have lunch in front of the station. You have plenty of choice: ramen, soba, udon.. Choose the noodles dish you prefer!
Visit Yamadera. You have the possibility to book for a guide/interpreter to accompany you on-site (their website: Yamaderan’s Association).
What to eat in Yamagata city
Dadachamame (Tsuruoka’s edamame soybeans)Sasa-maki (steamed bamboo-wrapped mochi)Imoni (yam stew), with fried tofu, beef (or pork), mushrooms, leek…Yonezawa-gyu, one of Japan’s 3 best wagyuFor more ideas of things to do in Yamagata city
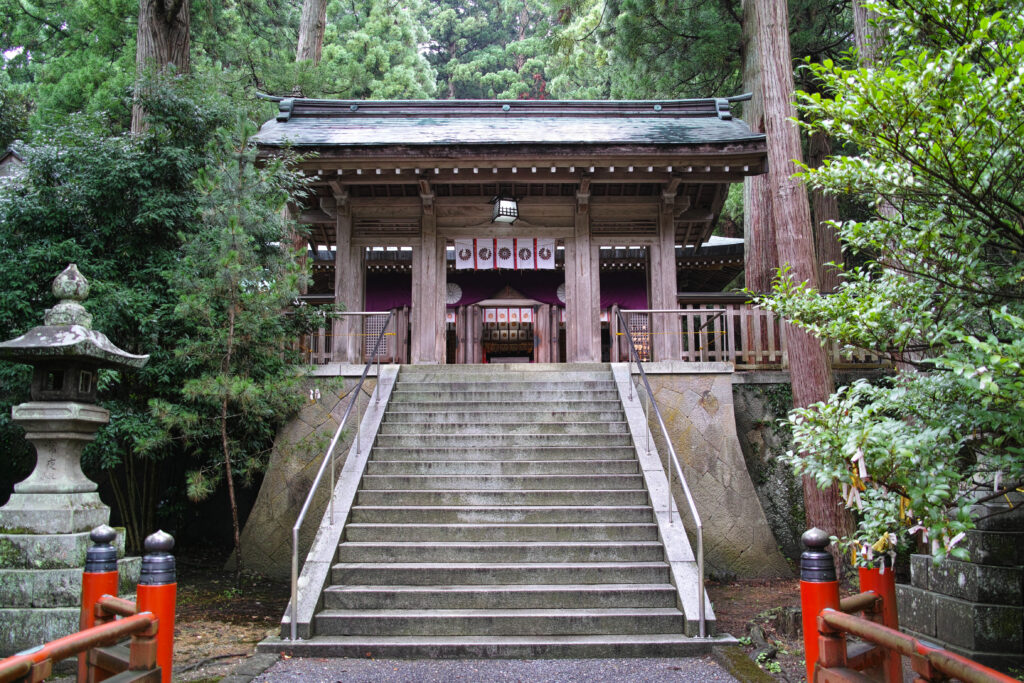
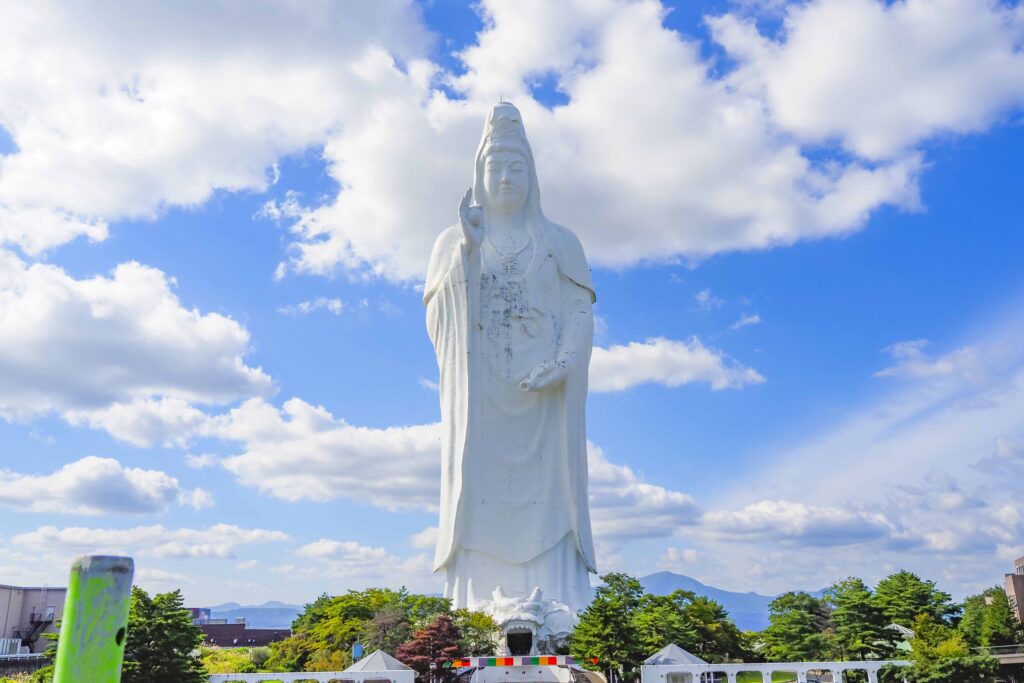
Go to Sendai from Yamagata station with the JR Sendai Line (1h20min.). Visit the Ozaki Hachiman Shrine (National Treasure) by taking the train to Ayashi and getting off the train at Tohoku Fukushi Daizen. From there, you can reach the giant Bodhisattva statue with the bus that stops at Kunimigaoka Icchome. Go back to Sendai station to stay at the hotel of your choice
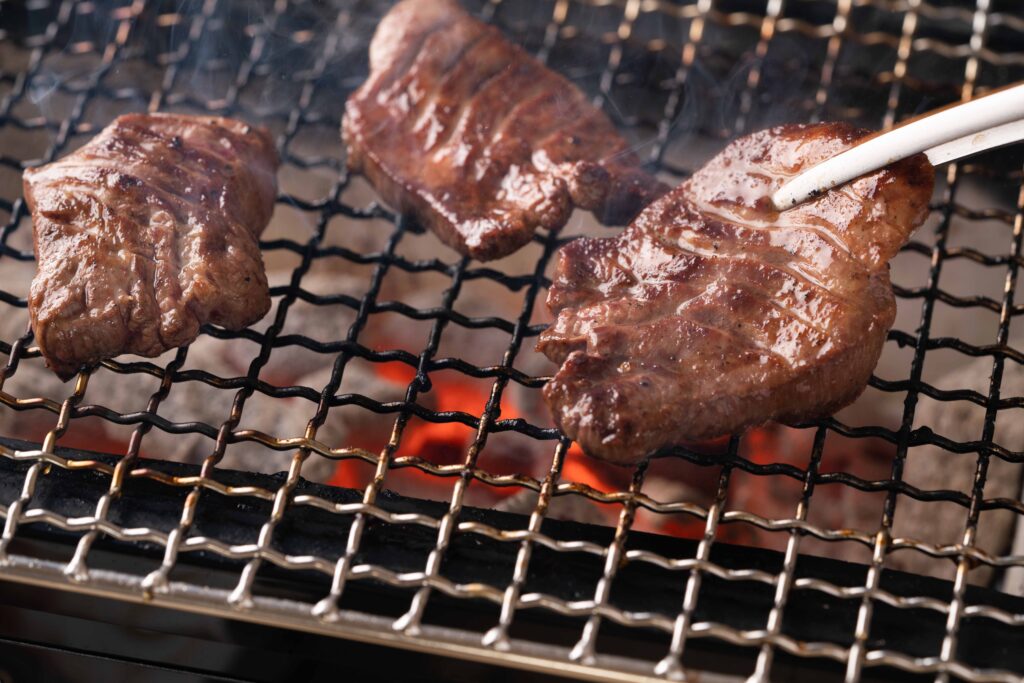
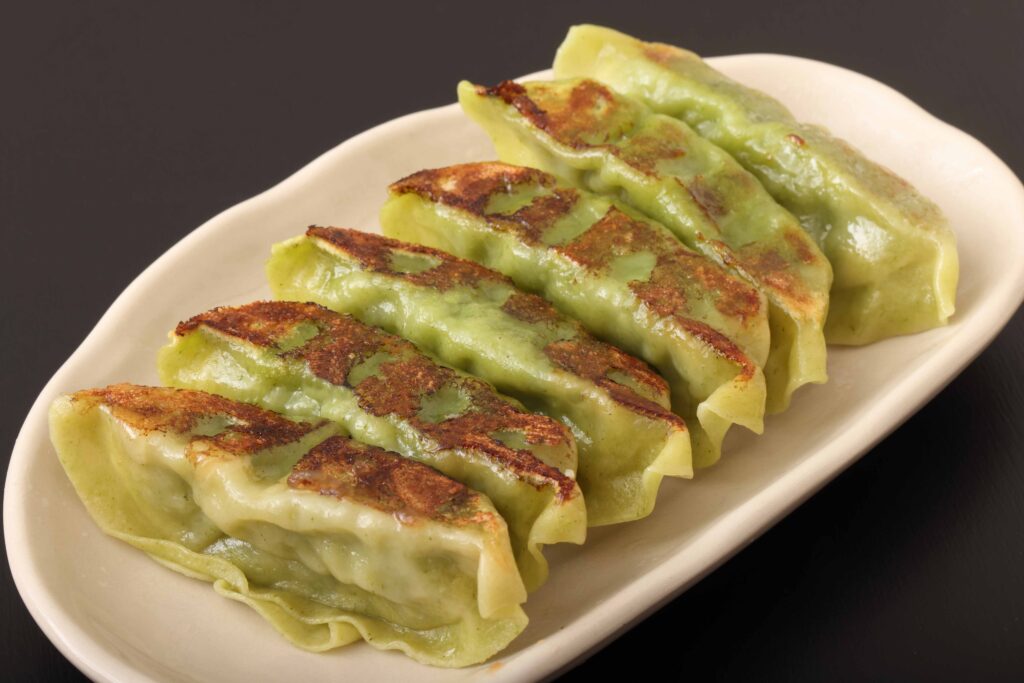
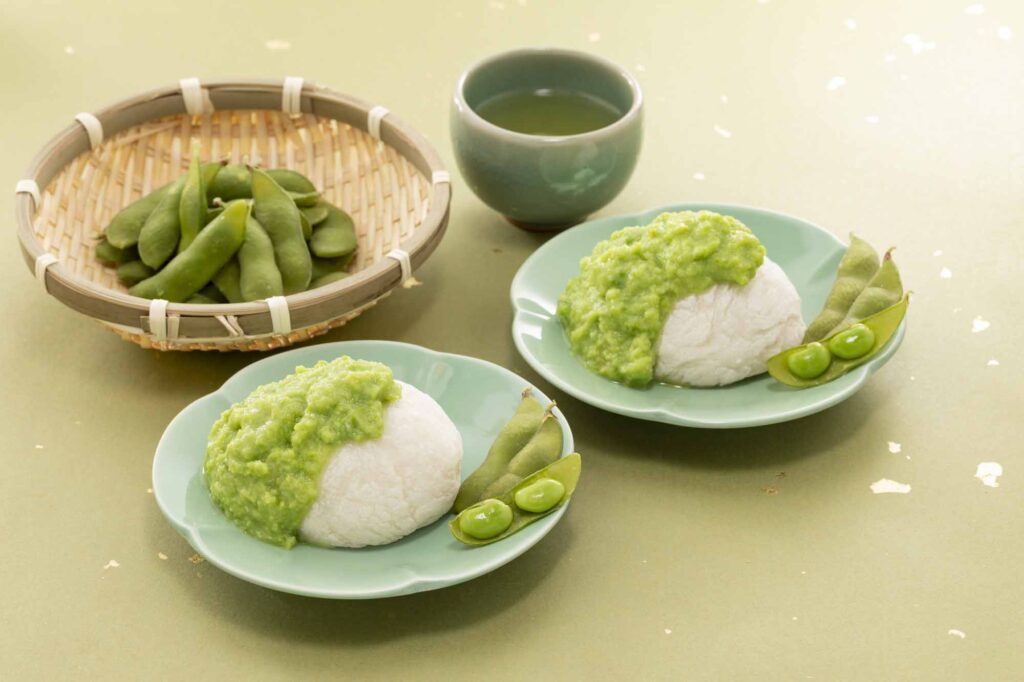
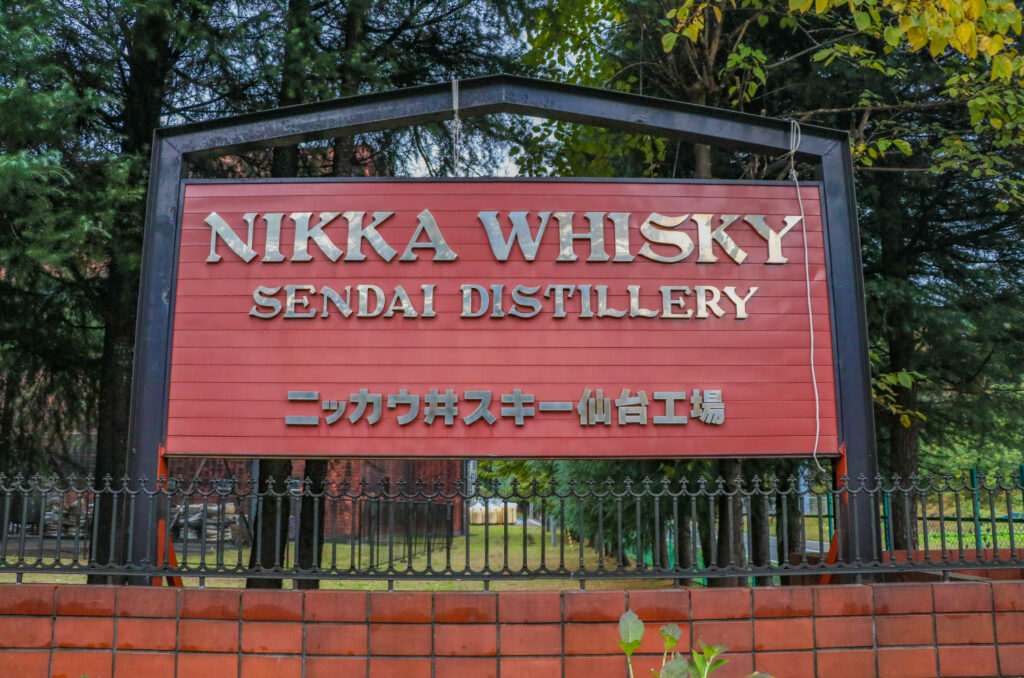
What to eat (and drink) in Sendai?
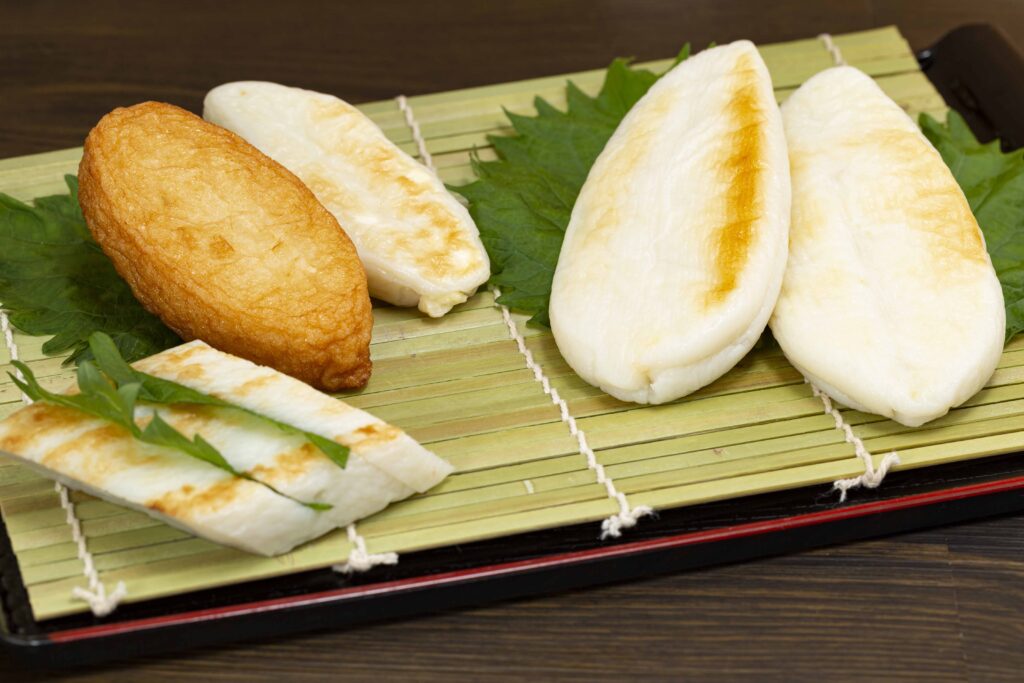
Sendai’s kamaboko (grilled fish cake)Sendai’s Beef TongueGreen gyozaZunda-mochi (zunda is a sweet edamame-paste that is often used in Sendai’s pastries)Nikka Whisky! Nikka’s whisky was voted the “best blended malt whisky in the world” by the WWA in 2023
1. Take the Express Senseki Tohoku line to Ishinomaki at 8:20 (1 hour)
2. Make a transfer at Ishinomaki station for the Ishinomaki Line bound for Onagawa at 9:33
3. Get off the train at 9:59 at Onagawa Station
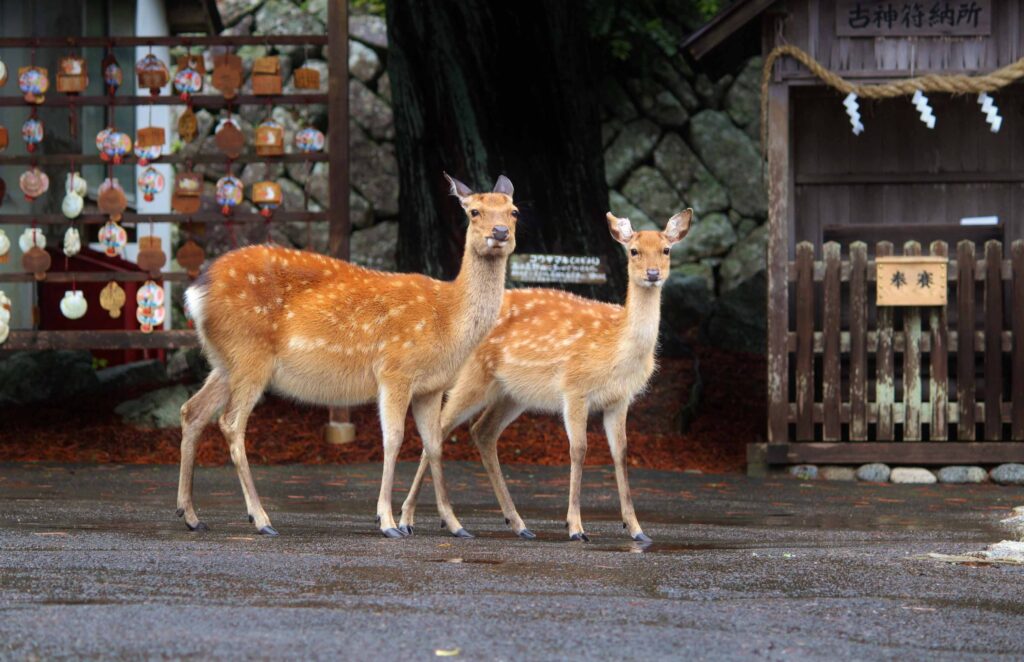
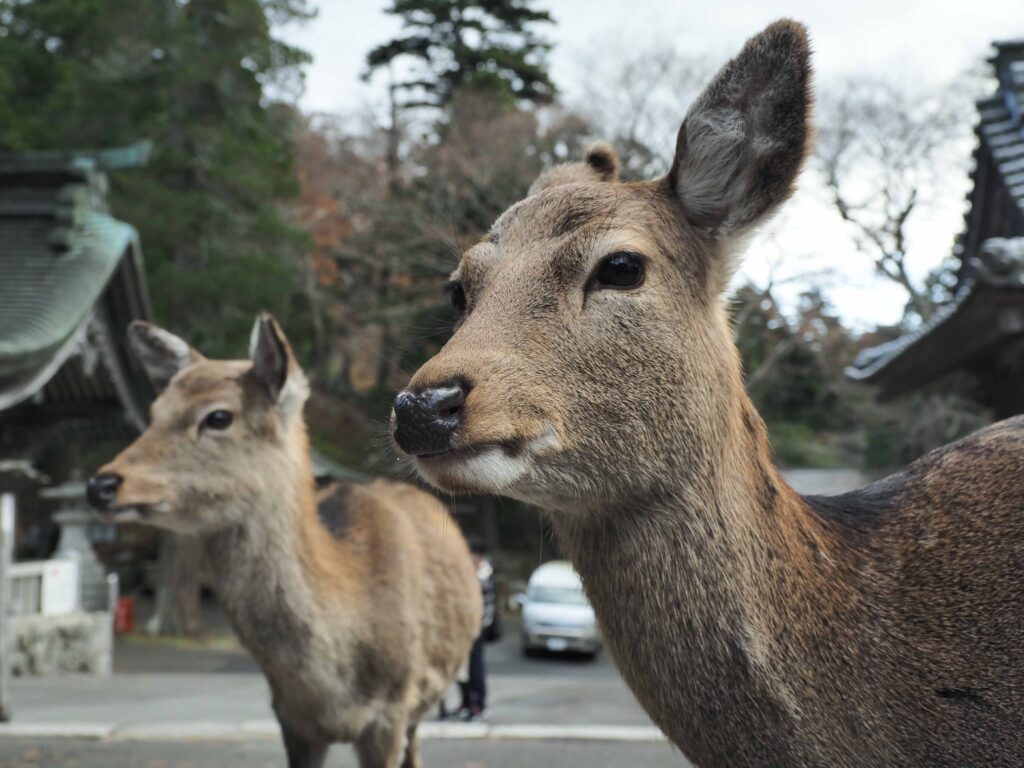
Kinkasan’s Island is designated as a Natural Monument of Japan, recognized for its rich biodiversity and its role as a sanctuary for various wildlife species. The island is home to a thriving population of deer, along with monkeys and numerous bird species, including eagles and other raptors, making it a paradise for wildlife enthusiasts and birdwatchers.
In addition to its vibrant wildlife, Kinkasan boasts a well-maintained pilgrimage route that guides visitors through the island’s lush forests, past ancient shrines and temples.
The island’s atmosphere is often compared to Nara, with its sacred deer and historic sites, but with the added charm of being set in the middle of the ocean. To go there, you will need to take the ferry from Onagawa port, a harbor city that still today hosts the terrible vestiges of the 2011’s Tohoku earthquake and tsunami.
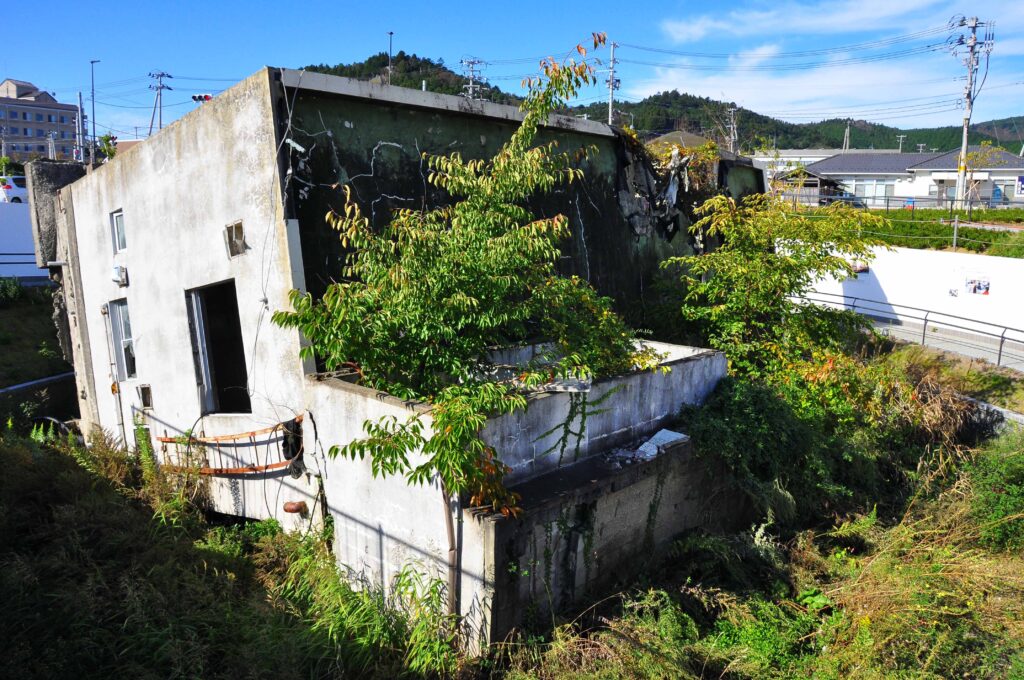
Visit Onagawa’s harbor and its monuments dedicated to the 2011 Tohoku Earthquake
The monument on the picture was the former Onagawa police station, a two-story concrete building that, as you can still see today, was completely swept away by the waves during the 2011 tsunami. Its location, inside what resembles a “pit”, shows how much effort was made by the authorities to rebuild the city on higher grounds as to not relive the same tragedy, should a similar tragedy happen in the future. This poignant site serves as a reminder of the resilience of the Onagawa community and the lessons learned from the devastating event.
Have a quick morning treat at Onagawa’s fish market
When someone says “harbor city,” seafood naturally comes to mind! Not far from the ferry boarding point, there is a bustling fish market and souvenir shop, as well as numerous nearby restaurants where you can savor the freshest fish, seashells, sea urchins, and the local specialty, “sea squirts.” Even for those who aren’t big fans of seafood, there are plenty of other dining options, including pizza, yakiniku, Chinese food, and Italian restaurants.
Take the ferry to Kinkasan
It costs 1750 yen for a one-way ferry ticket to Kinkasan Island. The boat is operated by Shio Planning (Japanese website). The time schedule varies according to the season, but most of the time you can expect the boat to leave the port at around 10:30/11:00 am (please verify beforehand)
Visit Kinkasan
This is the “little Nara in the North”! Look for the deers, the monkeys, the Japanese serow, or the other native animals that live on the island. There is a lodge/restaurant on the island, where you will have your lunch and spend the night. Take your time to explore this fascinating pilgrimage site on the sea.
(D9) Heading to Iwate’s World Heritage : Hiraizumi
1. Take the ferry to Ishinomaki at 12:30 (verify the timetable as time might change frequently. Be careful! It’s not the same ferry that you came with)
2. Take the 13:54 train from Ishinomaki station to Kogota station (Ishinomaki line)
3. Make a transfer from Kogota station to Hiraizmu (Tohoku Main Line, train bound for Morioka) at 14:45
4. Arrive at Hiraizumi at 15:51
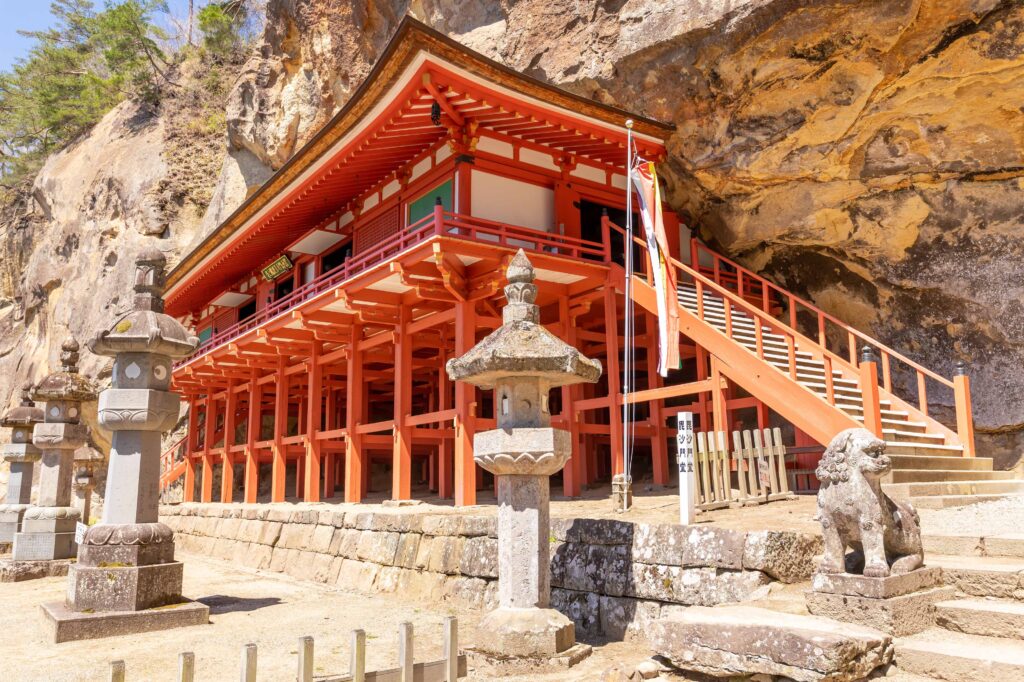
Hiraizumi is a cultural gem in Japan, boasting several UNESCO World Heritage Sites linked to Buddhism. Among these, Chuson-ji Temple and Motsu-ji Temple stand out for their exquisite gardens, ancient architecture, and invaluable historical artifacts. Chuson-ji, founded in the early 12th century, is particularly famous for its Konjikido Hall, a golden pavilion lavishly adorned with gold leaf, making it a stunning example of Heian-period Buddhist art. Motsu-ji, known for its serene Pure Land gardens, offers a glimpse into the spiritual landscape design of the era.
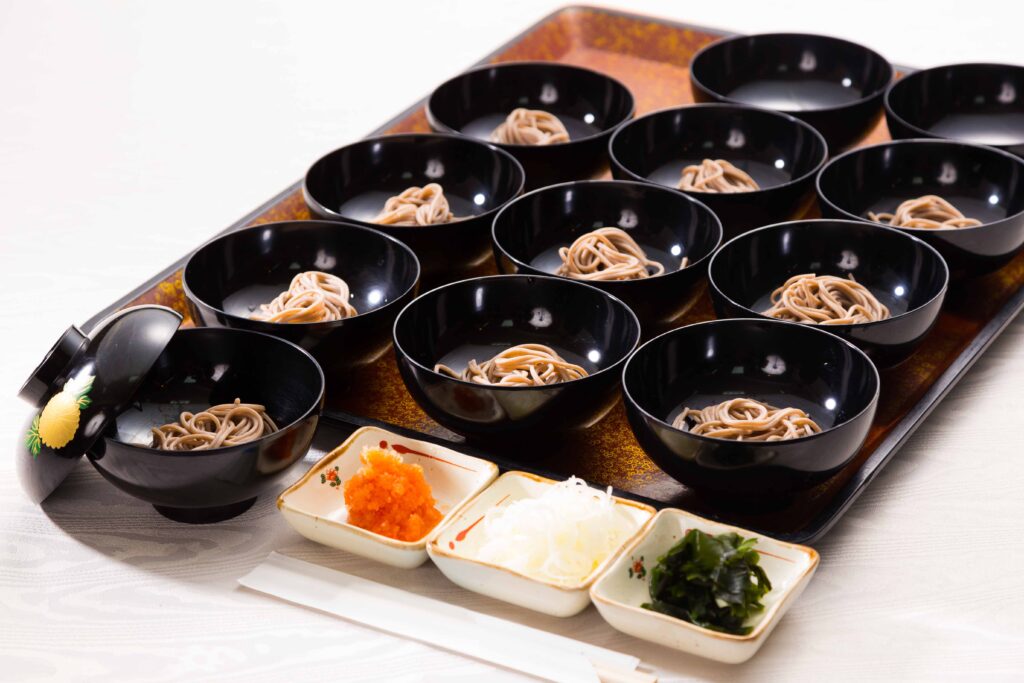
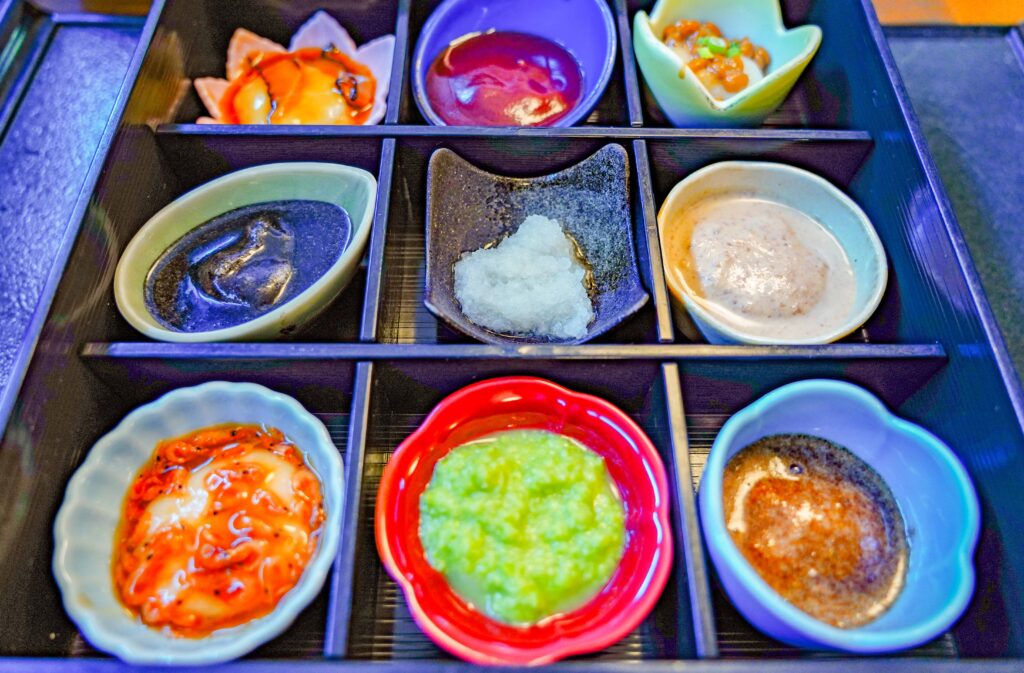
Explore the area on electric bicycles to travel more freely. For lunch, you’ll stop at a local “wanko soba” restaurant. This unique dining experience is a specialty of Iwate Prefecture, where small bowls of soba (buckwheat noodles) are served one after another in rapid succession. The challenge—and the fun—lies in signaling when you’ve had enough by covering your bowl, as servers continuously refill it until you do.
To cap off the day, you’ll enjoy a refreshing Japanese beer. Interestingly, Iwate Prefecture is one of the main producers of hops in Japan, contributing to the country’s excellent beer-making tradition.
Check-in to your lodging facility and visit (if time allows it) Motsuji temple
Motsu-ji Temple in Hiraizumi is renowned for its serene Pure Land Garden, designed to reflect the Buddhist paradise with its central pond, carefully arranged rocks, and seasonal beauty. Although many original structures were lost, the stone foundations and scattered stupas offer a glimpse into the temple’s historical grandeur. The temple also houses Ennin Hall, dedicated to the influential monk Ennin, and features a small museum displaying artifacts that deepen understanding of its cultural significance.
Where to stay in Hiraizumi?
The cheapest option would be to stay around Ichinoseki station (8 min. away from Hiraizumi station by train). But the most convenient choice would go for a ryokan or minpaku nearby Hiraizumi station. Our recommendation goes to Maizuru’s ryokan, an affordable and comfortable option for a 2 nights stay in Hiraizumi.
You’ll stay at the same place than the day before. So don’t worry about the next train, bus or check-outs, you can take your time to visit all the temples and main spots of Hiraizumi. We recommend you rent a bicycle next to Hiraizumi’s station (see more) to move more efficiently and effortlessly.
Wanko-soba (many little bowls of soba noodles)Mochi lunch (Ichinoseki & Hiraizumi are THE place to be for mochi!)Maesawa-gyu, one of Japan’s best waguy beefs
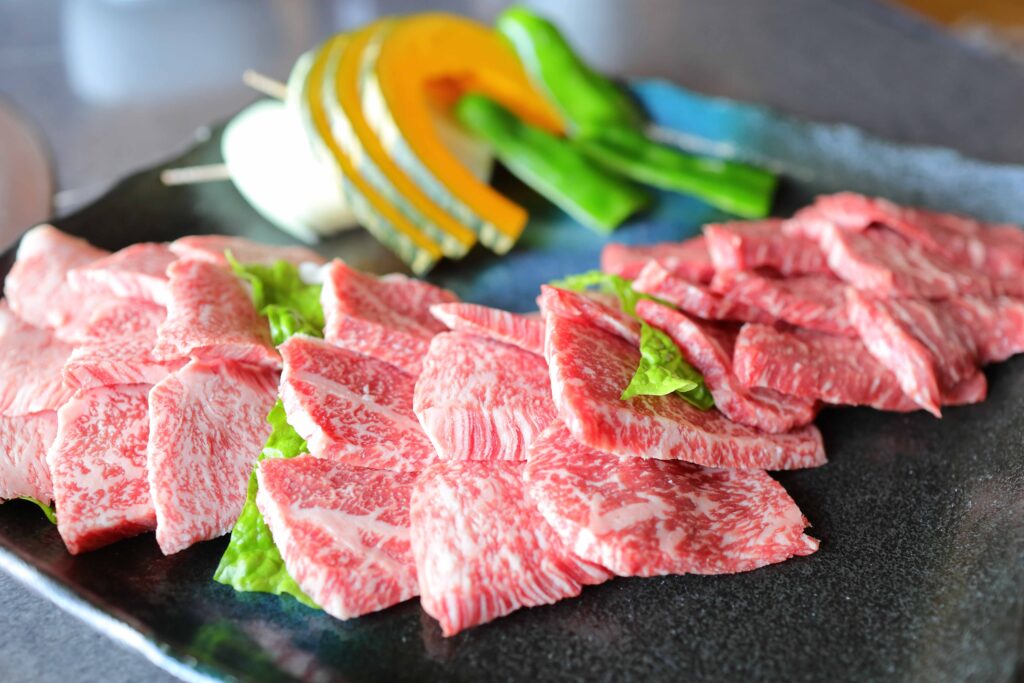
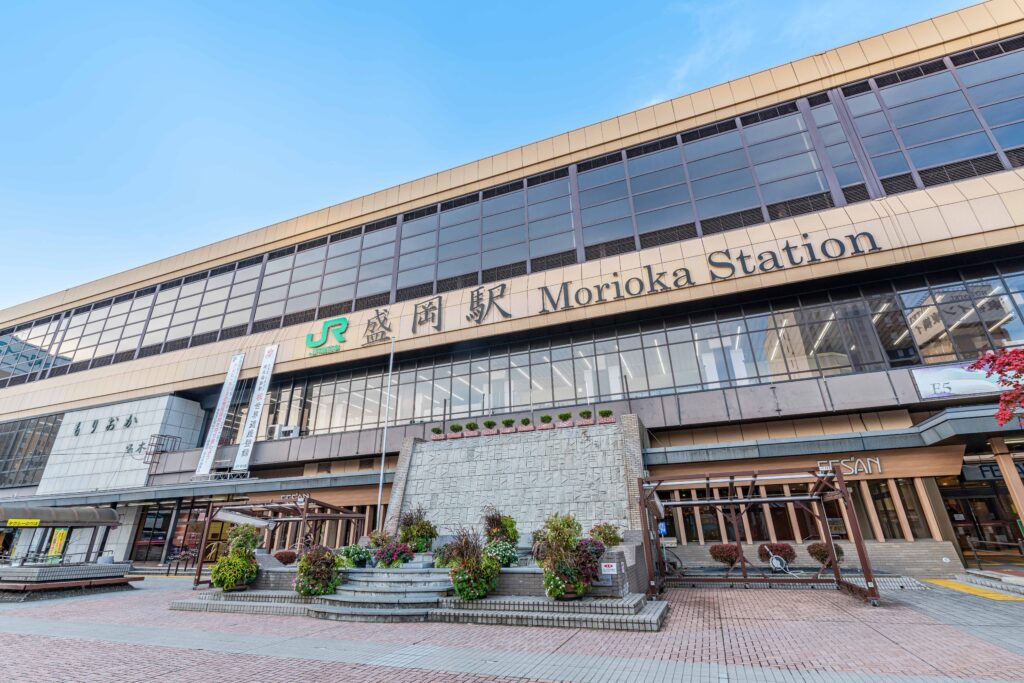
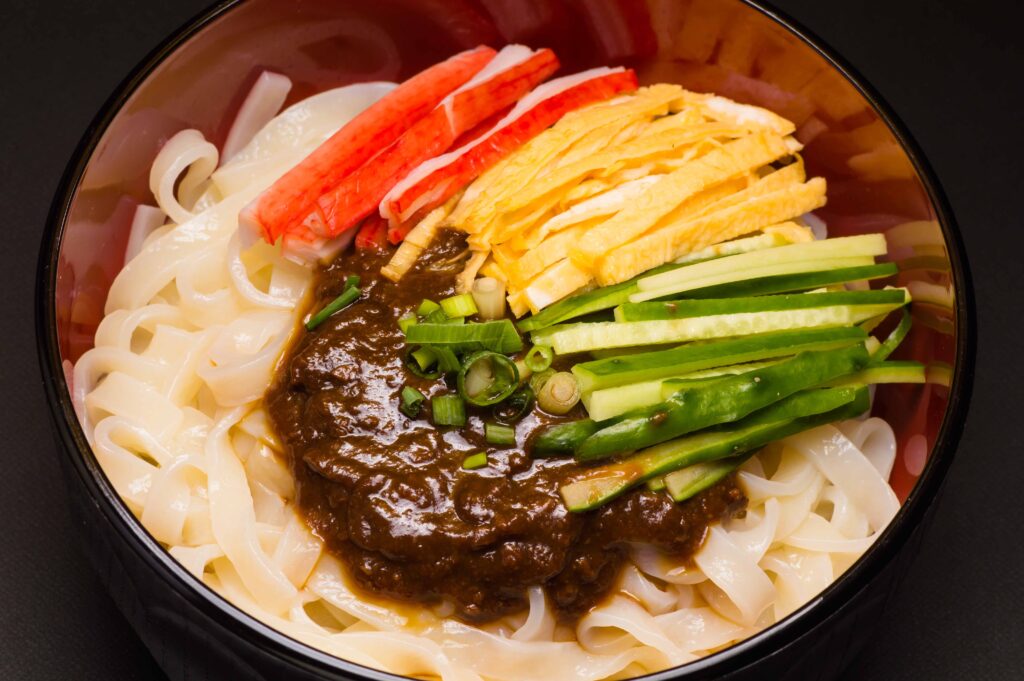
(D11) End your trip on a delicious note: Morioka and its jajamen
1. Take the Tohoku Main Line at 9:03 to Morioka
2. Arrive at Morioka station at 10:25
On the final day of our Tohoku trip, we’ll ease the bittersweet feeling of departure with a taste of Morioka’s famous “Jajamen” after visiting the striking Morioka Hachimangu Shrine, a vibrant red shrine dating back to the 17th century. Morioka Jajamen is a comforting dish featuring thick, handmade wheat noodles that are satisfyingly chewy. It’s traditionally topped with a flavorful mix of minced meat, usually a blend of pork and beef, along with finely chopped green onions, cucumber, and other fresh vegetables, creating a delightful balance of textures and flavors. Before we head home, we’ll explore local souvenir shops where you can pick up a “Chagchag Umako” doll—an intricately decorated horse figure that makes for a unique memento of Morioka.
Visit Morioka’s shrines on foot from the station
Start your discovery of Morioka’s shrines with the Sakurayama-jinja inside the park that contains the former Morioka castle’s vestiges. Once done, head for the Morioka Hachiman Shrine but make a stop at the Iwate Bank’s Red Bricks Building, symbol of the Meiji era (early 20th century) architecture. After this building, there are some restaurants serving “Jajamen” along the streets, you can choose to have lunch now or after having seen the Morioka Hachiman shrine.
You can choose to go back to Tokyo from here, or continue your trip further in the North.
You can take the Tohoku Shinkansen back to Tokyo until 20:50 (takes 2 hours 10 min.)
How did you like it?
Thank you for reading our recommended trip to the Tohoku region. Please remind that this is just a recommended itinerary and not a complete travel guide. All the timetables of the several buildings and services noted in this article are subject to change through time and/or according to emergencies or special occasions. Feel free to change the plan, extend some stays or shorten/skip others. Please verify the itinerary, time tables, buildings’ opening hours, hotels’ availabilities, and such by yourself or subscribe to one of our arranged packages (book with us).
This site uses cookies to help us understand better the usage patterns of visitors on the website. By clicking "Agree," you consent to the use of cookies on this site. Click here to see our Cookie Policy.